8: Perspective
( \newcommand{\kernel}{\mathrm{null}\,}\)
Perspective
Perspective is an art technique for creating an illusion of three-dimensions (depth and space) on a two-dimensional (flat) surface. Perspective is what makes a drawing seem to have form, distance, and look "real." The same rules of perspective apply to all subjects, whether it's a landscape, seascape, still life, interior scene, portrait, or figure drawing. The use of the technique and application of perspective to two-dimensional art has not always been apparent in the artwork created prior to the Italian Renaissance and the end of the Gothic Art Period in Northern Europe. We will first examine the art of earlier time periods and see whether use of perspective is evident. For the most part, storytelling was more important and the illusion of depth is not present. The development and understanding of this concept in art, and the interest to include the illusion of depth in drawings and paintings will come later.
Historical Overview
Prehistoric Art


• Cave painting dates back 50,000 years
• Symbols are drawn or painted
• Perspective is not evident
Ancient and Medieval Art

• Egyptian 3250 - 1280 BCE: the artwork is flat and formulaic
• Sumerian 2600 BCE: used registers similar to the Egyptian hieroglyphs
• Assyrian 883 - 889 BCE: flat depictions of war-like leaders
• Persian 490 BCE: similar to Assyrian art, for power and influence

• Minoan 1550 - 1450 BCE: beautiful, but rather flat, artwork of an advanced, peaceful people
• Greek 540 - 530 BCE: focus is mainly on the surviving architecture and sculpture; art of Athens moved western art forward
• Normandy & England 1066 - 1183: tapestries and illuminated manuscripts most significant art of the period; perspective not completely understood
• Italian 1305 – 1311: strides in modeling the forms; awkward renderings of spaces and buildings
Early Christian Art
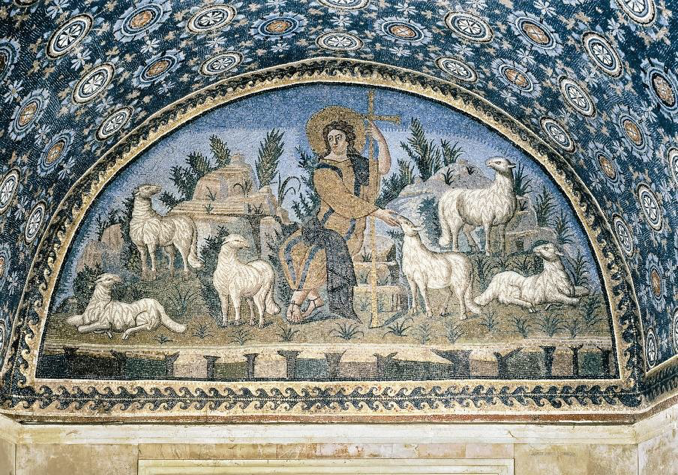

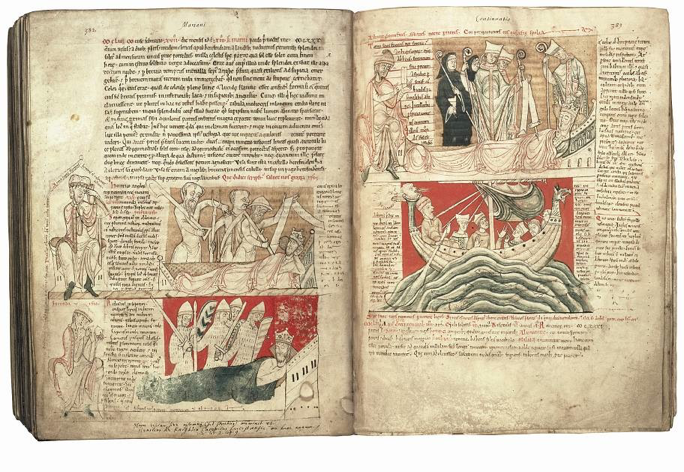

• Spirituality, not space, is the concern
• Creating “royal images” in a new vocabulary - mosaics with glittering gold and bright colors
• Perspective not natural
Islamic Art


• Narrative important - the art of storytelling
• Most art is quite decorative without emphasis on human form
• Perspective not natural
Late Medieval & Gothic


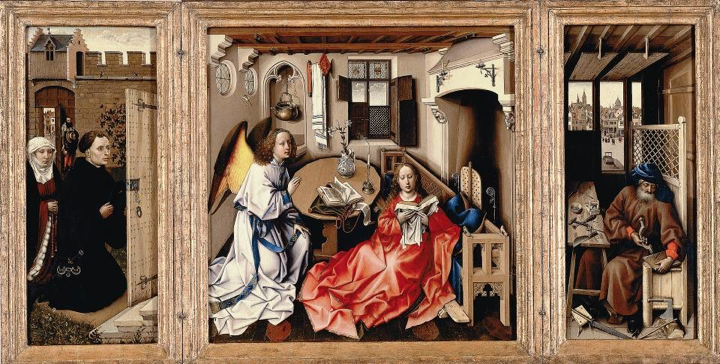
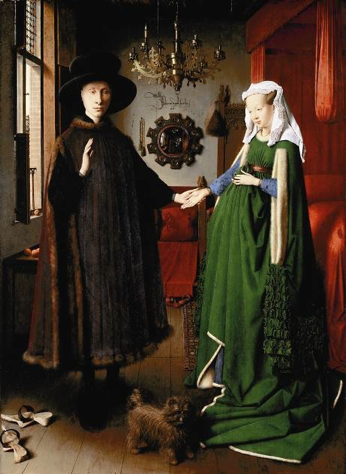
• Strides are made in creating natural forms in painting
• Perspective not natural with the exception of the paintings by Jan van Eyck
Italian Renaissance

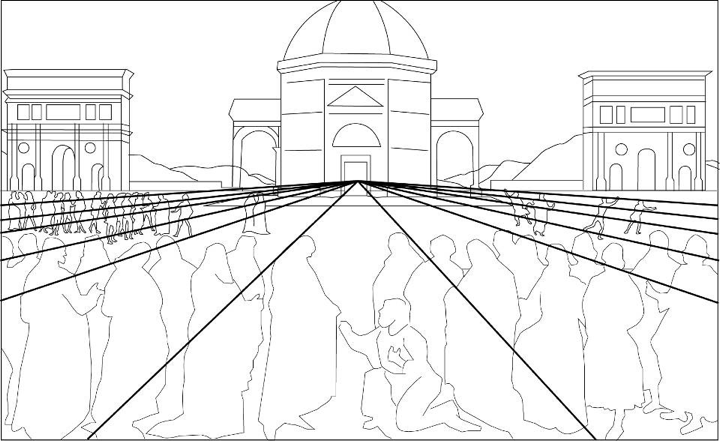
• A rebirth in science and art takes place in 15th century Florence
• Brunelleschi is credited with linear mathematical perspective
• Natural perspective is achieved in two-dimensional art for the first time
There are three approaches to Perspective when drawing, each with their own rules:
- Linear Perspective (also called vanishing point perspective)
- Aerial Perspective
- Isometric Perspective
Linear Perspective
Linear perspective, a system of creating an illusion of depth on a flat surface. All parallel lines (orthogonals) in a painting or drawing using this system converge in a single vanishing point on the composition’s horizon line.
HORIZON LINE
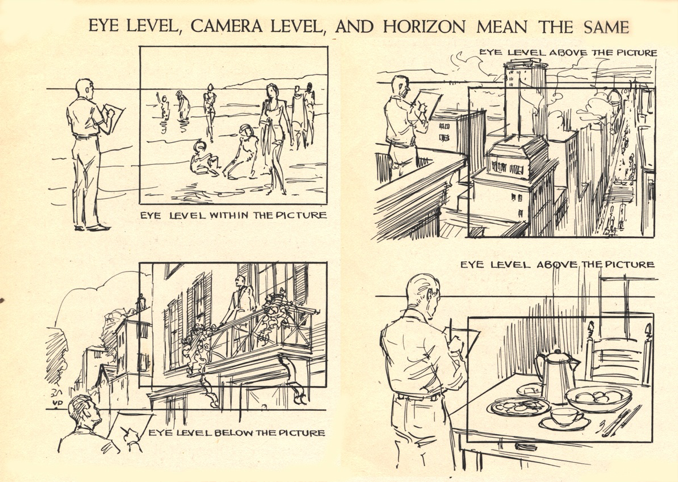
The horizon line is where the curvature of the earth and the sky meet when looking into the distance. It is also equal to your eye level.
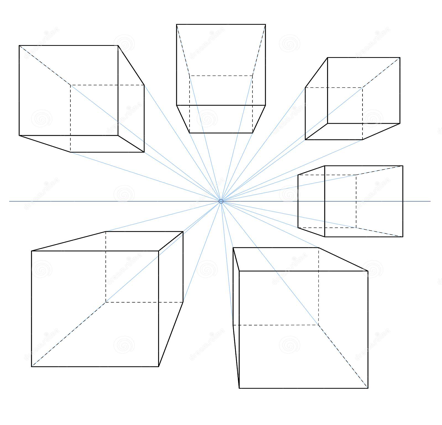
LINEAR ONE-POINT PERSPECTIVE
A drawing has one-point perspective when it contains only one vanishing point on the horizon line. This type of perspective is typically used for images of roads, railway tracks, hallways, or buildings viewed so that the front is directly facing the viewer. Any objects that are made up of lines either directly parallel with the viewer's line of sight or directly perpendicular (the railroad slats) can be represented with one-point perspective. These parallel lines converge at the vanishing point.
ONE-POINT PERSPECTIVE
Renaissance
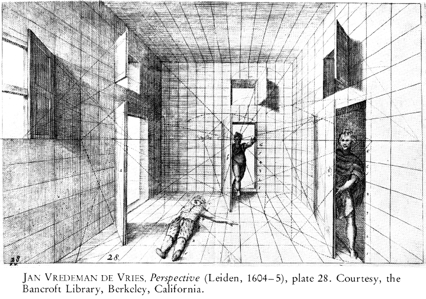
Italian Renaissance
Writings on the topic of perspective by Alberti give credit to Brunelleschi for his study of perspective. The new application of perspective coincides with other interests of Italian Renaissance artists and thinkers. There is an interest in beauty, perfection, the classics in literature, revival of lost knowledge, fusion of ideas of the ancient philosophers like Plato and Christian theology, innovations, and money flowing from wealthy patrons like the Medici and other banking families as well as the Roman Catholic church. With knowledge of linear persepctive, painters began to explore the creation of an illusion of depth in painting. This became quite a fascination for painters for centuries to come.
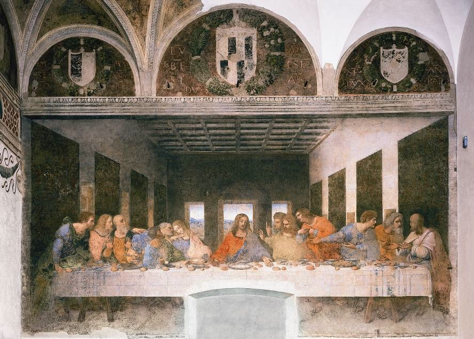
Leonardo da Vinci created a wall painting that unfortunately has deterioated over time in the humid conditions of Milan, Italy. It is, however, an excellent early example of a correct use of one-point perspective.
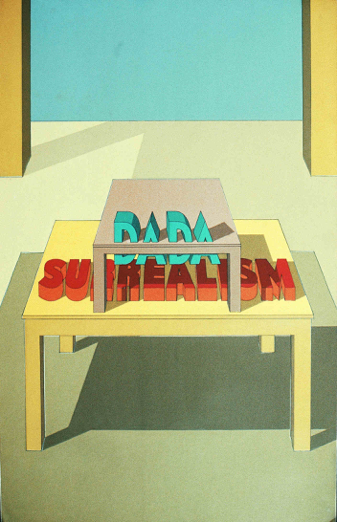
Modern illustration also uses one-point perspective.
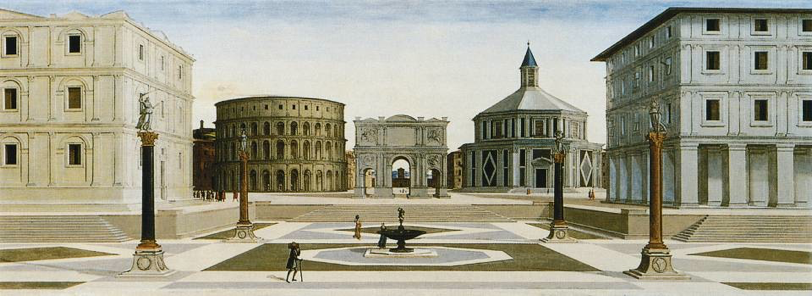
Another great one-point perspective example by an anonymous artist painting during the Renaissance.

A more modern design from CalArts showing one-point perspective
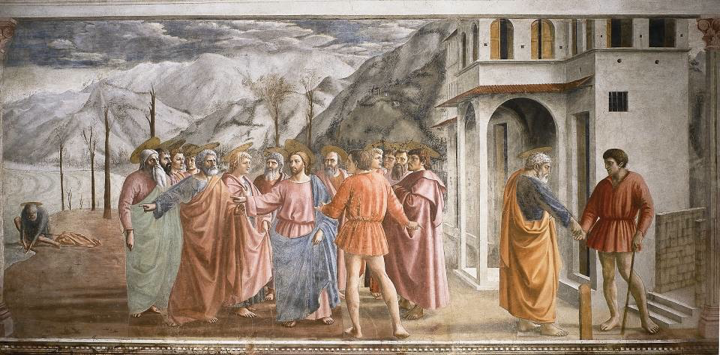
Early Renaissance painting demonstrating reasonable one-point perspective
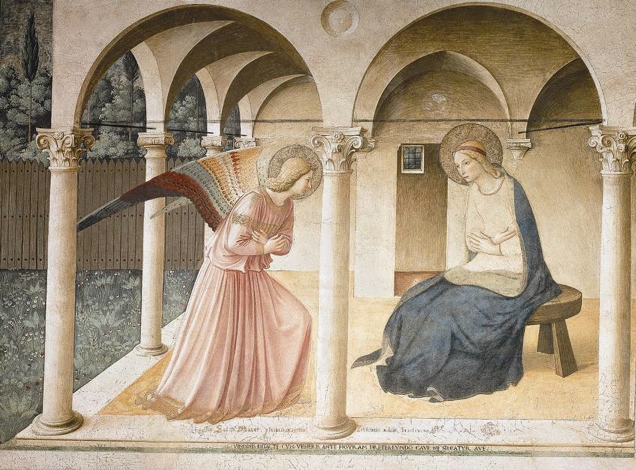
Brunelleschi architecture represented in this one-point perspective fresco
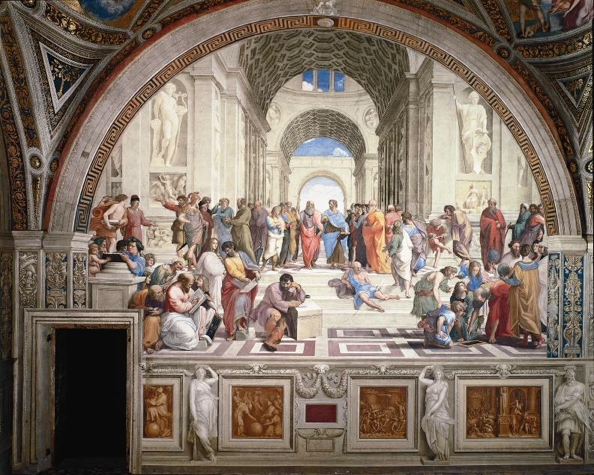
Vatican fresco by Raphael is a great example of High Renaissance one-point perspective
• Linear Perspective
– 1435 “discovery” by Filippo Brunelleschi
– 1st treatise on painting by Alberti
• Oil Painting
– Flanders artists used oils as a painting medium in early 1400s; advanced painting significantly
• Artistic Geniuses helped push art in the west forward
– Jan van Eyck, Albrecht Dürer, Leonardo Da Vinci, Michelangelo
LINEAR TWO-POINT PERSPECTIVE
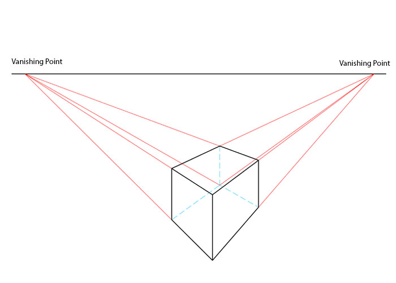
A drawing has two-point perspective when it contains two vanishing points on the horizon line. In an illustration, these vanishing points can be placed arbitrarily along the horizon. Two-point perspective can be used to draw the same objects as one-point perspective, rotated: looking at the corner of a house, or at two forked roads shrinking into the distance, for example. One point represents one set of parallel lines, the other point represents the other. Seen from the corner, one wall of a house would recede towards one vanishing point while the other wall recedes towards the opposite vanishing point.
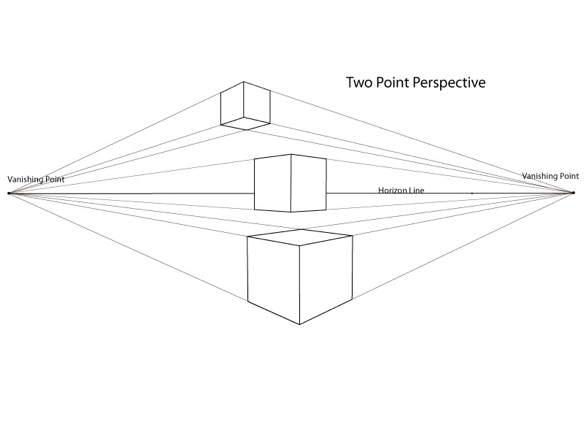
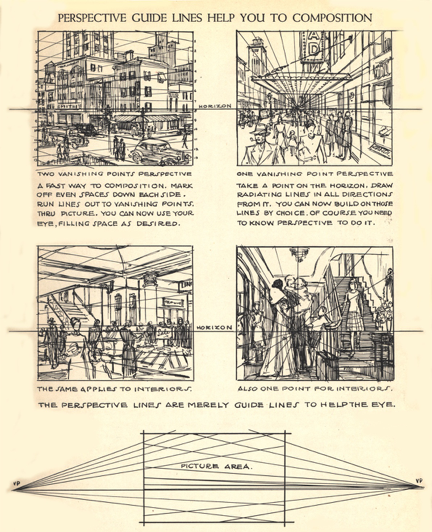
Two-point perspective = two vanishing points on the horizon line. Note how vertical the vertical lines of the box are. The verticals are 90 degree angles from the horizon line since the box is viewed at a distance.
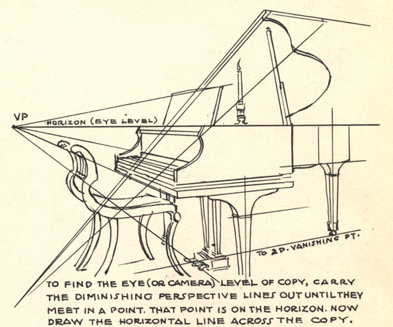
Without knowledge of perspective, drawing something as complicated as a grand piano and chair would be very difficult.
LINEAR THREE-POINT PERSPECTIVE
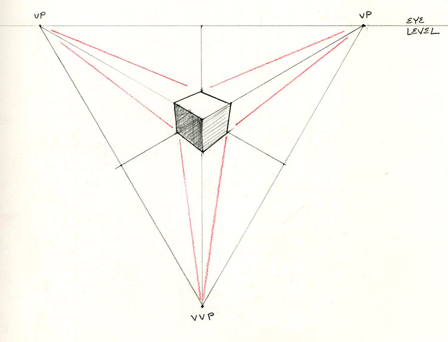
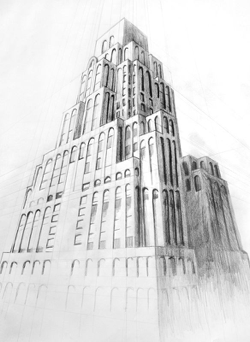
Three-point perspective is most commonly used when drawing buildings viewed from a low or high eye-level. The low eye level in our illustration above creates the illusion that the box shape is towering above us and that we are looking up. It naturally suggests the scale of a tall building.

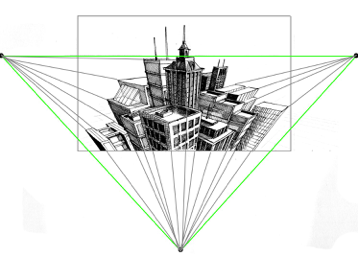
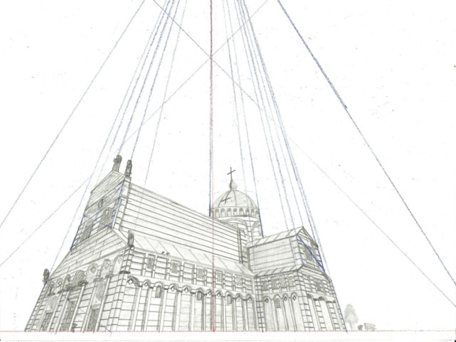
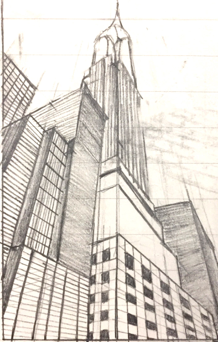
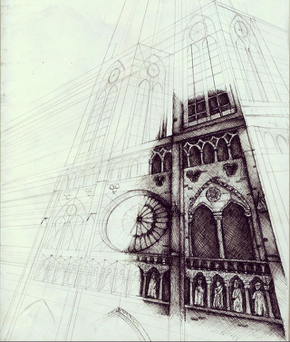
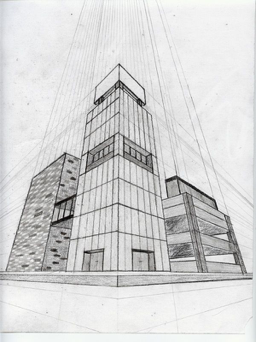
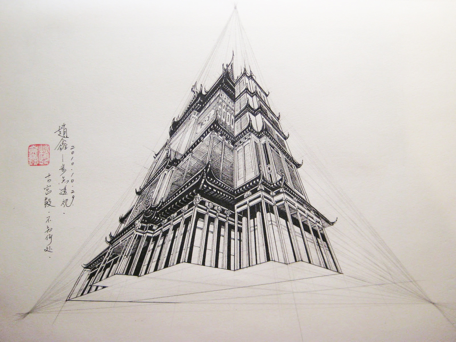
Note how the vertical transversal lines, which were parallel in one and two point perspective, now appear to recede. They form a third set of orthogonal lines, which rise from the ground plane and eventually meet at vanishing point 3, high above the picture plane.
Four-point perspective (see below drawing) is achieved by combining the an upward and downward looking three-point perspectives in a drawing.
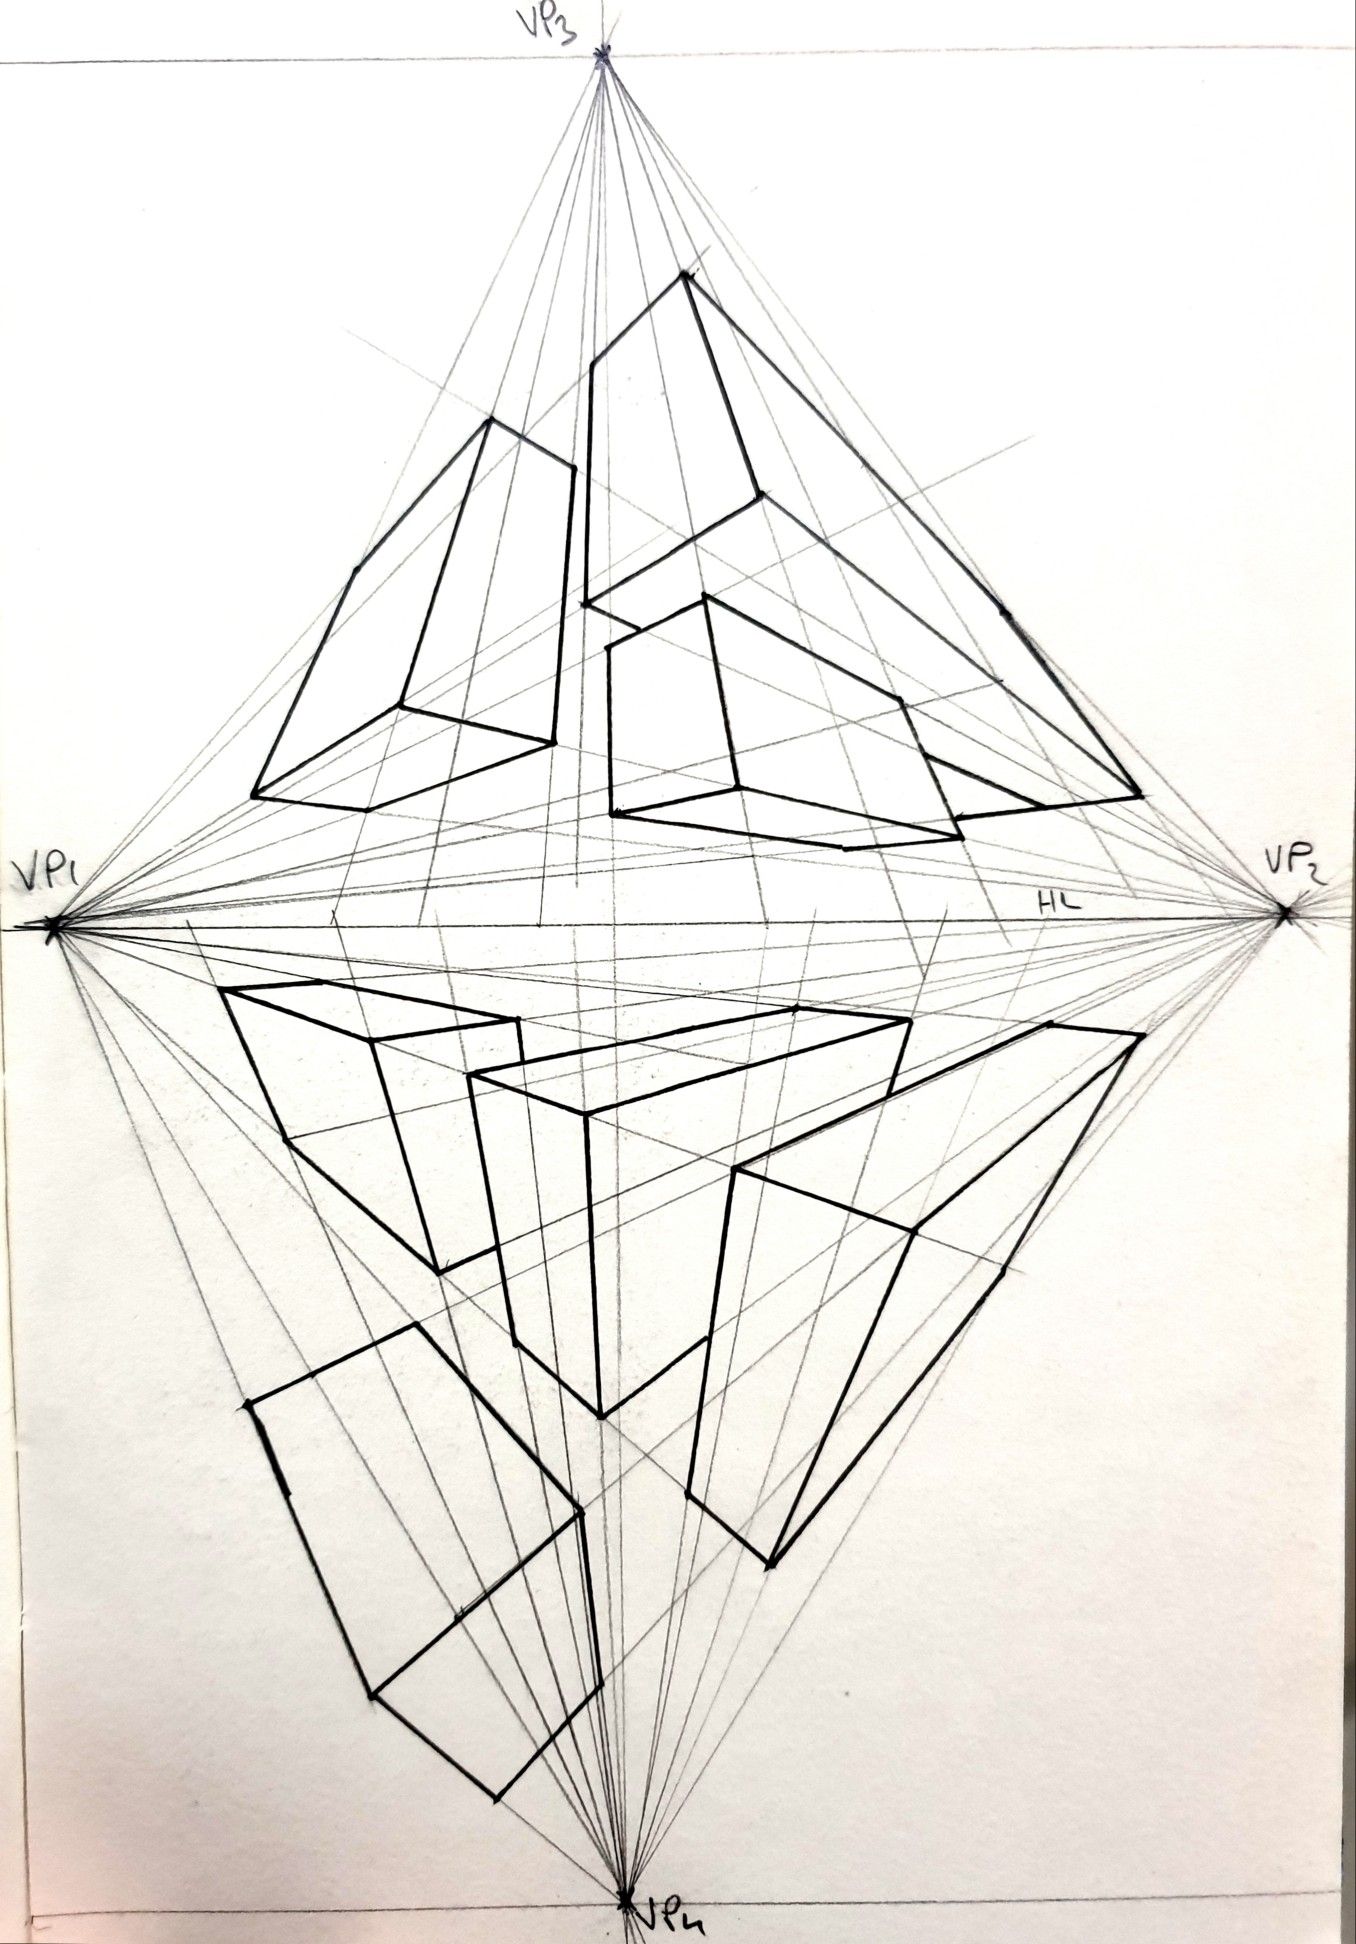
Aerial Perspective
Aerial Perspective or atmospheric perspective refers to the effect the atmosphere has on the appearance of an object as it is viewed from a distance.
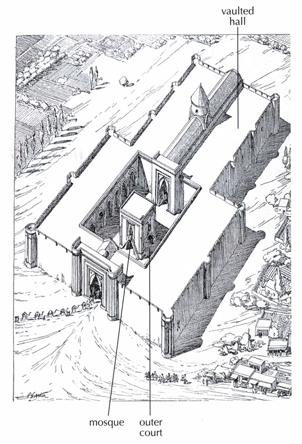

Isometric Perspective
In isometric perspective views, all lines on each axis are parallel to each other, and the lines do not converge. Such drawings are commonly used in technical illustrations because of their clarity, simplicity and speed of creation.
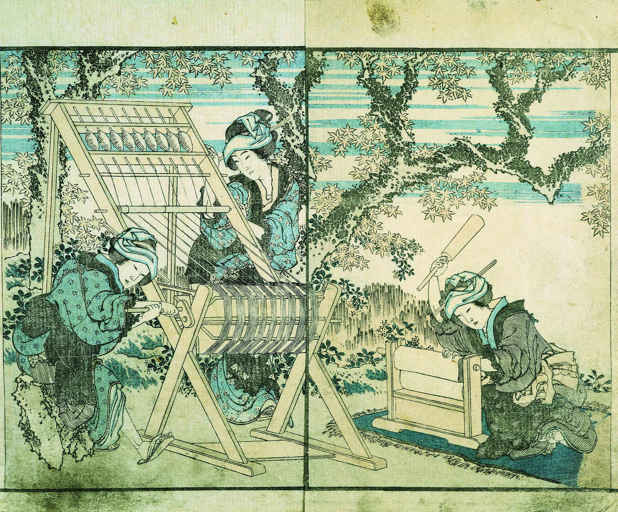

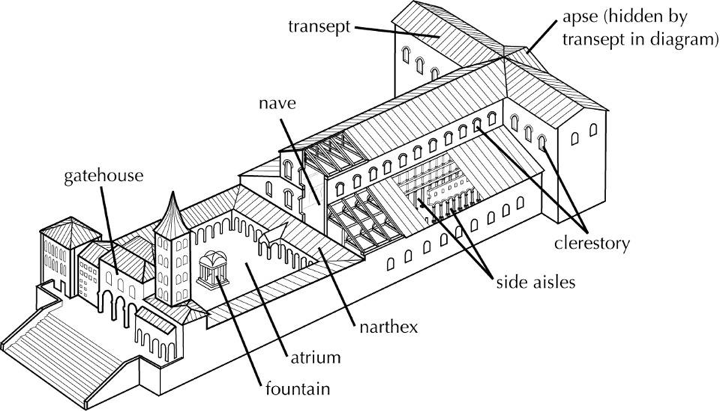
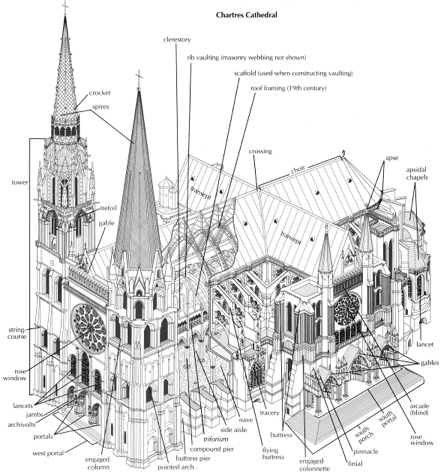

• A favorite of Japanese artists
• Frequently used by graphic designers
• Has a playful quality
Ellipses
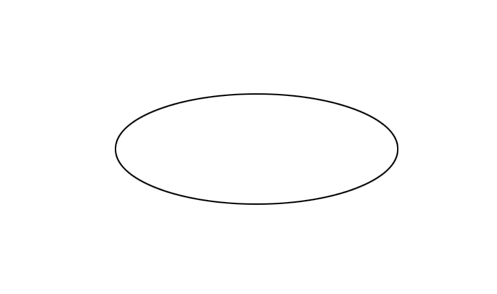
An ellipse is a continuous curved line without pointed ends and without straight lines. It is a circle viewed in perspective. Drawing accurate ellipses takes practice!
• An ellipse is a foreshortened circle. In geometry, it's a closed curve, like a circle, but with a long axis and a short axis.
• In terms of perspective drawing, an ellipse is what we see when we view a circle from its edge, rather than from directly overhead.
• An ellipse has a continuous curve. It does not have straight lines anywhere along its path.
• An ellipse does not have pointed ends.
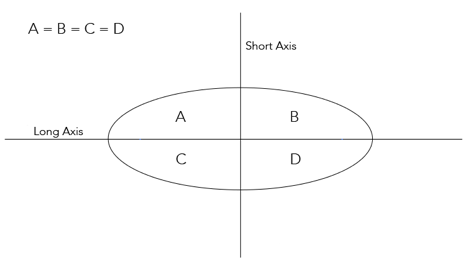
• An ellipse has four identical quarters. It is also easier to draw if you divide the ellipse using a Long Axis and a Short Axis.
• An ellipse has a continuous curve around the entirety of the shape.
IS THIS AN ELLIPSE?
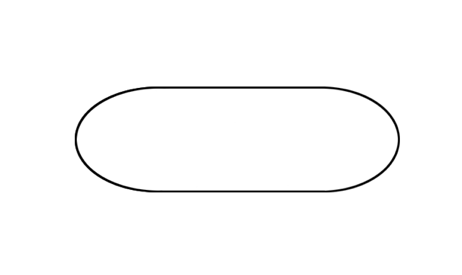
THIS IS NOT AN ELLIPSE
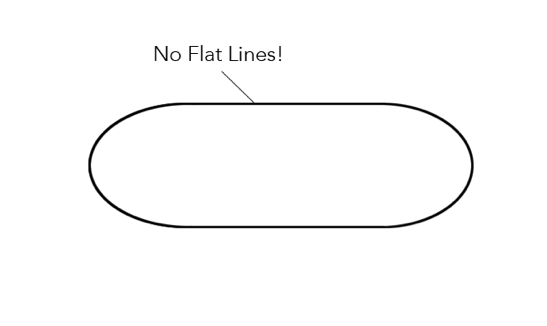
This is NOT an ellipse since it has flat lines and is not a continuous curve!
IS THIS AN ELLIPSE?

Answer: NO!
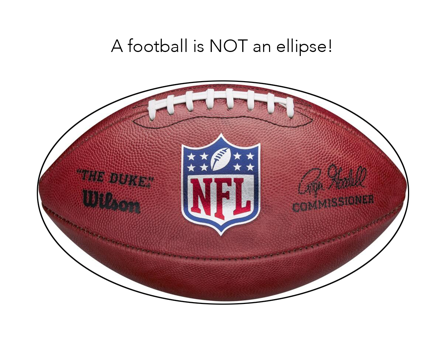
Although an American football may look like an ellipse, in fact, it is not! As you see it does not conform to an elliptical shape. Why?
THE AMERICAN FOOTBALL
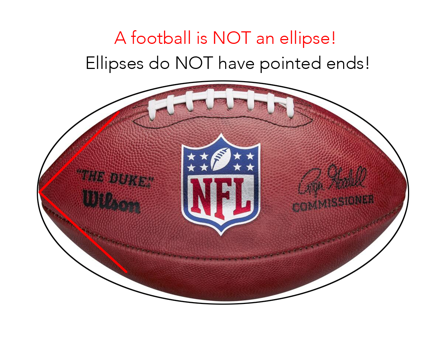
An American football has pointed ends, thus making it different from an ellipse. If your drawn ellipse looks like this, you must change the curved ends making them rounder. This is a common error in drawing ellipses!
ELLIPSE IN RELATION TO THE HORIZON LINE
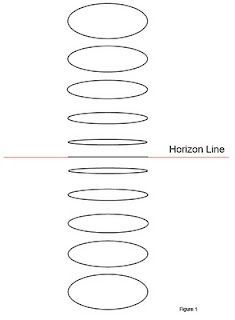
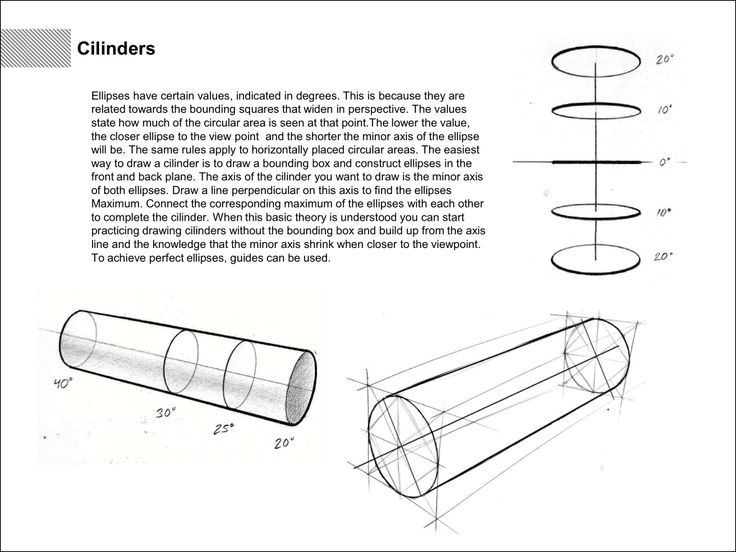
At the Horizon Line, an ellipse is visible as a Line. As you move above or below the Horizon Line, the ellipse is viewed wider. You can demonstrate this by looking at the top edge of a cup. As you drop the cup down from your eye level, the ellipse widens.
ELLIPSES IN PERSPECTIVE
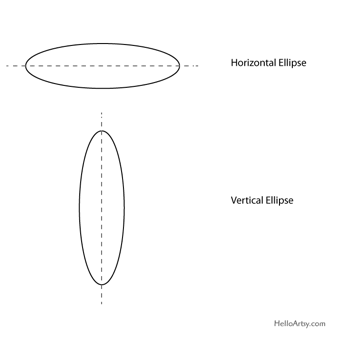
Ellipses can be horizontal or vertical. They conform to the laws of perspective. It is important to identify the orientation of the Long Axis and the Short Axis.
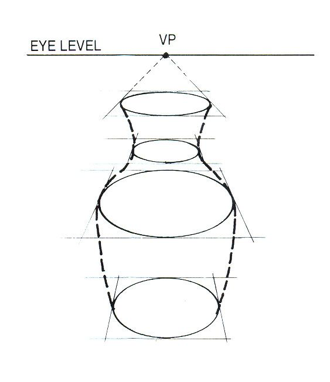
When viewing a vase, cup or bowl, the ellipse closest to your eye level will be the thinnest and the bottom of the vase, cup or bowl will be a rounder (wider) ellipse.
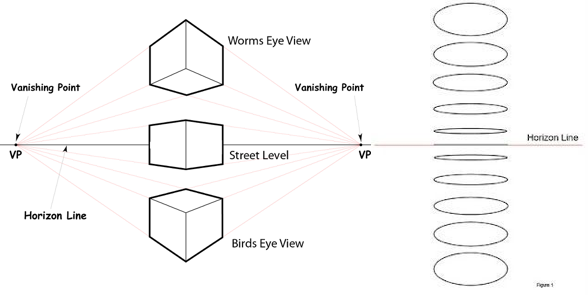
Ellipses follow the laws of Linear Perspective!
DRAWING ELLIPSES
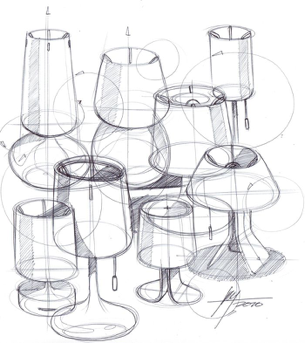
Drawing ellipses is best done using a loose sketching approach. It takes a lot of practice to master drawing ellipses! Since we see ellipses in many man-made objects, it is important to master drawing this shape.
ELLIPSE AXIS LINES
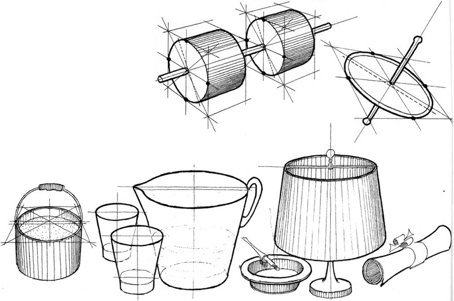
Using axis lines may help you to draw accurate ellipses.
DRAW ELLIPSES USING THE SKETCHING GRIP
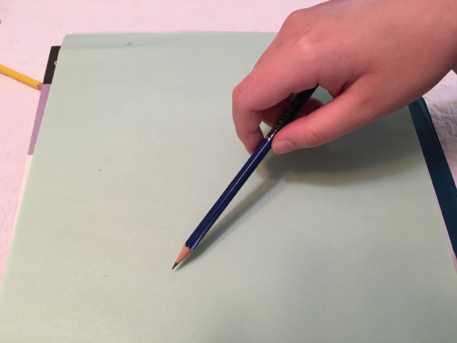
Using the sketching pencil grip is a good way to begin drawing the ellipse. Finish using the thumb and index finger for accuracy.
DRAWING THE ELLIPSE
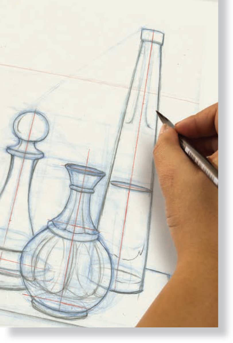
Here we see the thumb and finger grip used for finishing the drawing. Notice the axis lines! Also note the horizon line (eye level) has been drawn in lightly in red.
ELLIPSES ARE ONE OF THE BASIC FORMS
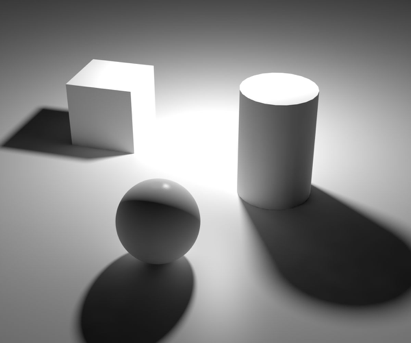
Mastering drawing the Cube, Cylinder and Sphere helps to understand drawing the basic shapes of many subjects including the human figure.
ELLIPSES AND THE HORIZON LINE
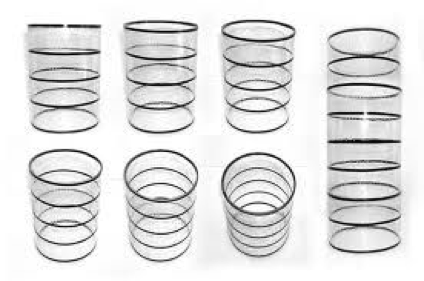
Can you identify the Horizon Line (eye level) for each of these images?
Assignment:
Part 1:
Arrange three or more objects from magazines or printed out on 8.5" x 11" white paper using the following criteria:
1. Establish a Horizon Line (eye level)
2. Arrange the objects in proper linear (vanishing point) perspective establishing one-point, two-point or three-point perspective
Part 2:
Arrange three or more objects from magazines or printed out on 8.5" x 11" white paper using the following criteria:
1. Use isometric perspective


