4: Line
- Page ID
- 63696
\( \newcommand{\vecs}[1]{\overset { \scriptstyle \rightharpoonup} {\mathbf{#1}} } \)
\( \newcommand{\vecd}[1]{\overset{-\!-\!\rightharpoonup}{\vphantom{a}\smash {#1}}} \)
\( \newcommand{\dsum}{\displaystyle\sum\limits} \)
\( \newcommand{\dint}{\displaystyle\int\limits} \)
\( \newcommand{\dlim}{\displaystyle\lim\limits} \)
\( \newcommand{\id}{\mathrm{id}}\) \( \newcommand{\Span}{\mathrm{span}}\)
( \newcommand{\kernel}{\mathrm{null}\,}\) \( \newcommand{\range}{\mathrm{range}\,}\)
\( \newcommand{\RealPart}{\mathrm{Re}}\) \( \newcommand{\ImaginaryPart}{\mathrm{Im}}\)
\( \newcommand{\Argument}{\mathrm{Arg}}\) \( \newcommand{\norm}[1]{\| #1 \|}\)
\( \newcommand{\inner}[2]{\langle #1, #2 \rangle}\)
\( \newcommand{\Span}{\mathrm{span}}\)
\( \newcommand{\id}{\mathrm{id}}\)
\( \newcommand{\Span}{\mathrm{span}}\)
\( \newcommand{\kernel}{\mathrm{null}\,}\)
\( \newcommand{\range}{\mathrm{range}\,}\)
\( \newcommand{\RealPart}{\mathrm{Re}}\)
\( \newcommand{\ImaginaryPart}{\mathrm{Im}}\)
\( \newcommand{\Argument}{\mathrm{Arg}}\)
\( \newcommand{\norm}[1]{\| #1 \|}\)
\( \newcommand{\inner}[2]{\langle #1, #2 \rangle}\)
\( \newcommand{\Span}{\mathrm{span}}\) \( \newcommand{\AA}{\unicode[.8,0]{x212B}}\)
\( \newcommand{\vectorA}[1]{\vec{#1}} % arrow\)
\( \newcommand{\vectorAt}[1]{\vec{\text{#1}}} % arrow\)
\( \newcommand{\vectorB}[1]{\overset { \scriptstyle \rightharpoonup} {\mathbf{#1}} } \)
\( \newcommand{\vectorC}[1]{\textbf{#1}} \)
\( \newcommand{\vectorD}[1]{\overrightarrow{#1}} \)
\( \newcommand{\vectorDt}[1]{\overrightarrow{\text{#1}}} \)
\( \newcommand{\vectE}[1]{\overset{-\!-\!\rightharpoonup}{\vphantom{a}\smash{\mathbf {#1}}}} \)
\( \newcommand{\vecs}[1]{\overset { \scriptstyle \rightharpoonup} {\mathbf{#1}} } \)
\(\newcommand{\longvect}{\overrightarrow}\)
\( \newcommand{\vecd}[1]{\overset{-\!-\!\rightharpoonup}{\vphantom{a}\smash {#1}}} \)
\(\newcommand{\avec}{\mathbf a}\) \(\newcommand{\bvec}{\mathbf b}\) \(\newcommand{\cvec}{\mathbf c}\) \(\newcommand{\dvec}{\mathbf d}\) \(\newcommand{\dtil}{\widetilde{\mathbf d}}\) \(\newcommand{\evec}{\mathbf e}\) \(\newcommand{\fvec}{\mathbf f}\) \(\newcommand{\nvec}{\mathbf n}\) \(\newcommand{\pvec}{\mathbf p}\) \(\newcommand{\qvec}{\mathbf q}\) \(\newcommand{\svec}{\mathbf s}\) \(\newcommand{\tvec}{\mathbf t}\) \(\newcommand{\uvec}{\mathbf u}\) \(\newcommand{\vvec}{\mathbf v}\) \(\newcommand{\wvec}{\mathbf w}\) \(\newcommand{\xvec}{\mathbf x}\) \(\newcommand{\yvec}{\mathbf y}\) \(\newcommand{\zvec}{\mathbf z}\) \(\newcommand{\rvec}{\mathbf r}\) \(\newcommand{\mvec}{\mathbf m}\) \(\newcommand{\zerovec}{\mathbf 0}\) \(\newcommand{\onevec}{\mathbf 1}\) \(\newcommand{\real}{\mathbb R}\) \(\newcommand{\twovec}[2]{\left[\begin{array}{r}#1 \\ #2 \end{array}\right]}\) \(\newcommand{\ctwovec}[2]{\left[\begin{array}{c}#1 \\ #2 \end{array}\right]}\) \(\newcommand{\threevec}[3]{\left[\begin{array}{r}#1 \\ #2 \\ #3 \end{array}\right]}\) \(\newcommand{\cthreevec}[3]{\left[\begin{array}{c}#1 \\ #2 \\ #3 \end{array}\right]}\) \(\newcommand{\fourvec}[4]{\left[\begin{array}{r}#1 \\ #2 \\ #3 \\ #4 \end{array}\right]}\) \(\newcommand{\cfourvec}[4]{\left[\begin{array}{c}#1 \\ #2 \\ #3 \\ #4 \end{array}\right]}\) \(\newcommand{\fivevec}[5]{\left[\begin{array}{r}#1 \\ #2 \\ #3 \\ #4 \\ #5 \\ \end{array}\right]}\) \(\newcommand{\cfivevec}[5]{\left[\begin{array}{c}#1 \\ #2 \\ #3 \\ #4 \\ #5 \\ \end{array}\right]}\) \(\newcommand{\mattwo}[4]{\left[\begin{array}{rr}#1 \amp #2 \\ #3 \amp #4 \\ \end{array}\right]}\) \(\newcommand{\laspan}[1]{\text{Span}\{#1\}}\) \(\newcommand{\bcal}{\cal B}\) \(\newcommand{\ccal}{\cal C}\) \(\newcommand{\scal}{\cal S}\) \(\newcommand{\wcal}{\cal W}\) \(\newcommand{\ecal}{\cal E}\) \(\newcommand{\coords}[2]{\left\{#1\right\}_{#2}}\) \(\newcommand{\gray}[1]{\color{gray}{#1}}\) \(\newcommand{\lgray}[1]{\color{lightgray}{#1}}\) \(\newcommand{\rank}{\operatorname{rank}}\) \(\newcommand{\row}{\text{Row}}\) \(\newcommand{\col}{\text{Col}}\) \(\renewcommand{\row}{\text{Row}}\) \(\newcommand{\nul}{\text{Nul}}\) \(\newcommand{\var}{\text{Var}}\) \(\newcommand{\corr}{\text{corr}}\) \(\newcommand{\len}[1]{\left|#1\right|}\) \(\newcommand{\bbar}{\overline{\bvec}}\) \(\newcommand{\bhat}{\widehat{\bvec}}\) \(\newcommand{\bperp}{\bvec^\perp}\) \(\newcommand{\xhat}{\widehat{\xvec}}\) \(\newcommand{\vhat}{\widehat{\vvec}}\) \(\newcommand{\uhat}{\widehat{\uvec}}\) \(\newcommand{\what}{\widehat{\wvec}}\) \(\newcommand{\Sighat}{\widehat{\Sigma}}\) \(\newcommand{\lt}{<}\) \(\newcommand{\gt}{>}\) \(\newcommand{\amp}{&}\) \(\definecolor{fillinmathshade}{gray}{0.9}\)Line
This is where we begin when we learn to draw. But what is a line? If we consider a dot as the simplest of marks we make in drawing, then a line becomes the second simplest mark since a line is defined in geometry as the shortest distance between two points and can be thought of as a series of dots placed side by side and viewed as a line. Another way of looking at it is a mark that is longer than its breadth (width).
The figure below defines seven primary functions of line:

https://www.joshuanava.biz/creative-illustration/the-form-principle-as-a-basis-of-approach.html
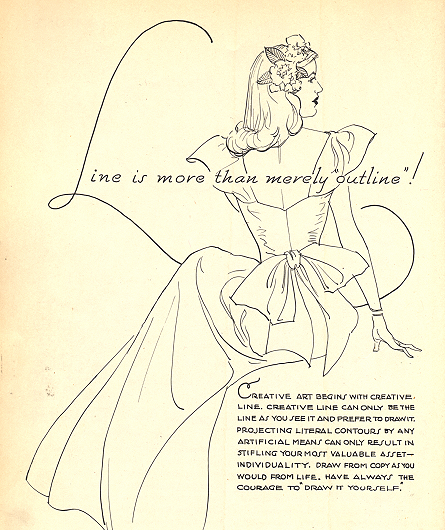
The figure below shows aesthetic qualities of line such as thick and thin lines, implied lines, "loose and find" lines, and lines suggesting a shadow at the bottom of forms. These types of lines are quite sensual and often used to draw organic forms. The term for these lines is sensual lines. Prior to the Modern Art movement of the early 20th Century, academic drawings and paintings were dominated by the use of sensual lines.
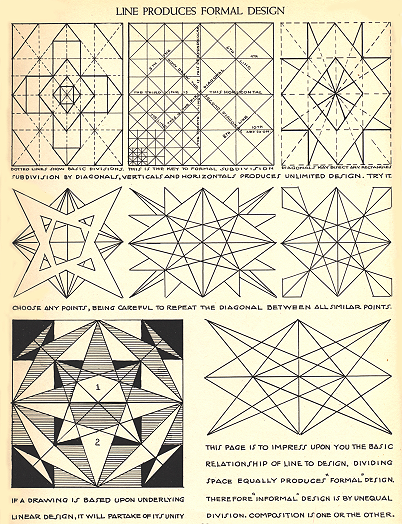
Lines, as we see in the figure below, can be used to create formal designs. Symmetric designs such as these are visually balanced and stable by nature. They also lack the fluidity of the lines in the above figure. These lines appear more mechanical and are referred to as impersonal lines. Several 20th Century Modern Art movements looked to the impersonal line as a means of expressing new ways art concepts.
Historical Uses of Line
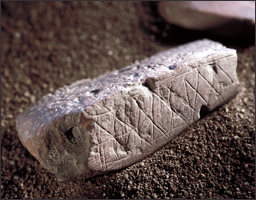
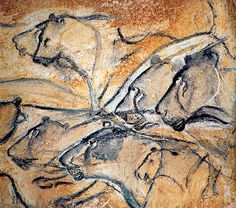
Drawing and mark-making using line played a role in human development leading to civilized cultures and societies. From the earliest rock carvings in Africa, to the Pre-historic cave paintings and drawings, we see art in the form of drawing telling stories, visually communicating, and being a part of these ancient ceremonies and traditions of peoples across the globe. Evolution of line drawings coincides with human evolution leading to pictographs. Line drawings in ancient societies representing words and eventually lead to the creation of alphabets and written languages. With documents in translatable languages comes documented history. By reading cuneiform we can better understand the daily, administrative, military, religious and political lives of Sumerians. Although knowledge of their spoken language is lost, we still have the library of recovered cunieform writings to study this most ancient culture. Egyptians also leave an invaluable legacy of hieroglyphs which also document the lives and culture of this ancient empire.
• Earliest rock art drawings and engravings are found in Africa around 100,000 BCE
http://www.bradshawfoundation.com/africa/oldest_art/index.php
• Cave paintings are the most impressive pre-historic images and are dated between 40,000 - 12,000 BCE
https://www.smithsonianmag.com/history/journey-oldest-cave-paintings-world-180957685/
• Egyptian pictographs evolve into hieroglyphics around 3100 BCE
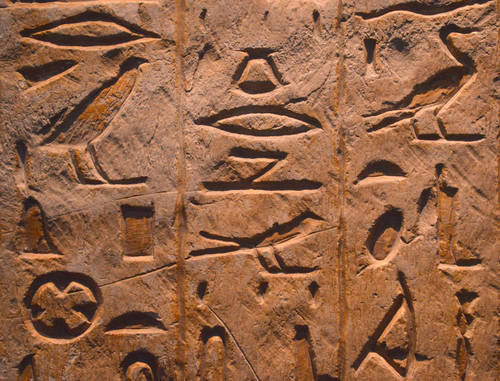
https://www.ancient.eu/image/3912/egyptian-hieroglyphics/
• Sumerian pictographs are dated around 3000 BCE and evolve into cuneiform writing

https://www.history.com/news/sumerians-inventions-mesopotamia
• Code of Hammurabi dated 1800 BCE (example of cuneiform writing in Babylon)

https://sheg.stanford.edu/history-lessons/hammurabis-code

https://www.history.com/topics/ancient-history/hammurabi
https://www.louvre.fr/en/oeuvre-notices/law-code-hammurabi-king-babylon
Drawing with a Sensual Line
Drawing with a sensual line is an expressive approach to art. Sensuality is linked to things which are pleasing to the senses such as emotions, sensitivity, close observation of nature, the beauty of nature, and the appreciation of organic forms. The sensual line is a dynamic line which may curve in expressive ways denoting the play of light on forms, shadows, movement and gesture. Contrast in the line is a key component of creating this sensuality. Contrast may be in the form of light and dark; thick or thin; "loose and find," and implied lines. Imagine you are preparing a meal from scratch. Chances are you'll add salt or possibly spices to the dish. Contrast is just that. It is the salt or spice in your drawing. Without contrast, often the drawing will not have desired the visual impact.
Drawing Exercise #1 - Blind Contour Drawing
The first drawing in the course is one that forces you to feel your senses and experience drawing in a new way. It is called a blind contour drawing. Using an organic form like a branch of a small tree, or house plant with interesting shapes to the leaves, you draw the contour (outside edge) of the plant carefully without looking at your paper once you begin the drawing. It is sometimes best to start at the top of the plant and the top of the paper. So you look to place the pencil and then look at the top of the plant and not at the paper again until you complete the exercise. Recommended pencil grip with this exercise is Thumb and index finger grip and the pencil choice is an HB. Do not press too hard but feel the pencil move across the surface of the paper. Create a comfortable rhythm with your continuous contour line. Do not lift your pencil during the exercise. You are not sketching, you are also not concerned about composition. Your goal is to slow down and carefully observe the contours of the leaves, stems and branches of your chosen plant. If it is in a planter or pot, focus just on the plant, not the container. You will be taught how to draw ellipses and geometric shapes later on the course.


The above drawing is an example of a blind contour drawing
Drawing Exercise #2 - Contour Drawing
This example below is the second drawing assignment titled Contour Drawing. It is also a continuous line drawing but with added elements of thick and thin lines and contrast. Use the entire sheet of paper and draw while closely observing the plant and occasionally looking at your paper. Apply what you learned from the first drawing assignment. Try to bring the same sensitivity needed to concentrate on drawing the subtle contours of the leaves, stems and branches while not looking at the paper that you used in drawing exercise #1. Do not sketch, but practice keeping your pencil to the paper and creating a continuous, organic line. Darker lines should be placed on the shadow sides of the leaves, stems and branches. Leaves closer to you may be rendered a bit darker to bring them visually closer. Note that overlapping forms also create a depth cue demonstrating that one is closer than the other. Do not press too hard while using the HB pencil for this drawing. Hold the pencil the same as Exercise #1 and please do not erase. Just draw.
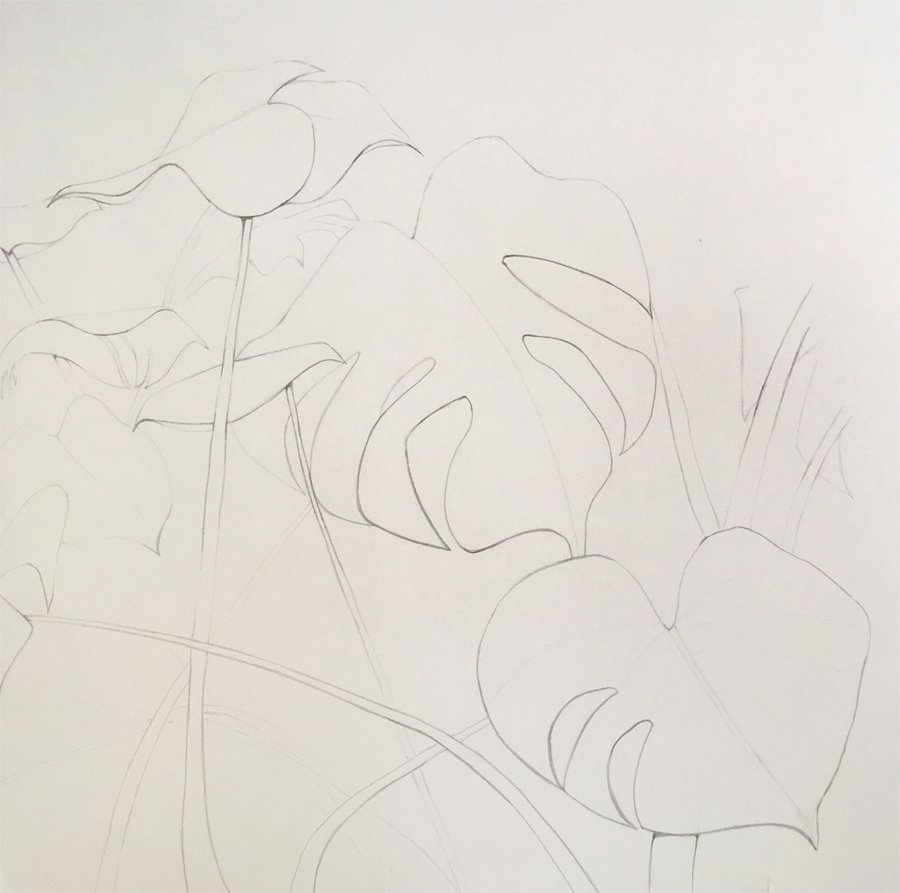

The above drawing is an example of a contour drawing (looking at plant and paper)
Drawing Lesson:
Drawing with an Impersonal Line
This will be covered in the Perspective chapter.
Line Drawing Examples

illustration by Michael E. Leonard


drawing by Michael E. Leonard illustration by Michael E. Leonard


