1.4: Body Language Elements of Performance
- Page ID
- 222956
\( \newcommand{\vecs}[1]{\overset { \scriptstyle \rightharpoonup} {\mathbf{#1}} } \)
\( \newcommand{\vecd}[1]{\overset{-\!-\!\rightharpoonup}{\vphantom{a}\smash {#1}}} \)
\( \newcommand{\id}{\mathrm{id}}\) \( \newcommand{\Span}{\mathrm{span}}\)
( \newcommand{\kernel}{\mathrm{null}\,}\) \( \newcommand{\range}{\mathrm{range}\,}\)
\( \newcommand{\RealPart}{\mathrm{Re}}\) \( \newcommand{\ImaginaryPart}{\mathrm{Im}}\)
\( \newcommand{\Argument}{\mathrm{Arg}}\) \( \newcommand{\norm}[1]{\| #1 \|}\)
\( \newcommand{\inner}[2]{\langle #1, #2 \rangle}\)
\( \newcommand{\Span}{\mathrm{span}}\)
\( \newcommand{\id}{\mathrm{id}}\)
\( \newcommand{\Span}{\mathrm{span}}\)
\( \newcommand{\kernel}{\mathrm{null}\,}\)
\( \newcommand{\range}{\mathrm{range}\,}\)
\( \newcommand{\RealPart}{\mathrm{Re}}\)
\( \newcommand{\ImaginaryPart}{\mathrm{Im}}\)
\( \newcommand{\Argument}{\mathrm{Arg}}\)
\( \newcommand{\norm}[1]{\| #1 \|}\)
\( \newcommand{\inner}[2]{\langle #1, #2 \rangle}\)
\( \newcommand{\Span}{\mathrm{span}}\) \( \newcommand{\AA}{\unicode[.8,0]{x212B}}\)
\( \newcommand{\vectorA}[1]{\vec{#1}} % arrow\)
\( \newcommand{\vectorAt}[1]{\vec{\text{#1}}} % arrow\)
\( \newcommand{\vectorB}[1]{\overset { \scriptstyle \rightharpoonup} {\mathbf{#1}} } \)
\( \newcommand{\vectorC}[1]{\textbf{#1}} \)
\( \newcommand{\vectorD}[1]{\overrightarrow{#1}} \)
\( \newcommand{\vectorDt}[1]{\overrightarrow{\text{#1}}} \)
\( \newcommand{\vectE}[1]{\overset{-\!-\!\rightharpoonup}{\vphantom{a}\smash{\mathbf {#1}}}} \)
\( \newcommand{\vecs}[1]{\overset { \scriptstyle \rightharpoonup} {\mathbf{#1}} } \)
\( \newcommand{\vecd}[1]{\overset{-\!-\!\rightharpoonup}{\vphantom{a}\smash {#1}}} \)
\(\newcommand{\avec}{\mathbf a}\) \(\newcommand{\bvec}{\mathbf b}\) \(\newcommand{\cvec}{\mathbf c}\) \(\newcommand{\dvec}{\mathbf d}\) \(\newcommand{\dtil}{\widetilde{\mathbf d}}\) \(\newcommand{\evec}{\mathbf e}\) \(\newcommand{\fvec}{\mathbf f}\) \(\newcommand{\nvec}{\mathbf n}\) \(\newcommand{\pvec}{\mathbf p}\) \(\newcommand{\qvec}{\mathbf q}\) \(\newcommand{\svec}{\mathbf s}\) \(\newcommand{\tvec}{\mathbf t}\) \(\newcommand{\uvec}{\mathbf u}\) \(\newcommand{\vvec}{\mathbf v}\) \(\newcommand{\wvec}{\mathbf w}\) \(\newcommand{\xvec}{\mathbf x}\) \(\newcommand{\yvec}{\mathbf y}\) \(\newcommand{\zvec}{\mathbf z}\) \(\newcommand{\rvec}{\mathbf r}\) \(\newcommand{\mvec}{\mathbf m}\) \(\newcommand{\zerovec}{\mathbf 0}\) \(\newcommand{\onevec}{\mathbf 1}\) \(\newcommand{\real}{\mathbb R}\) \(\newcommand{\twovec}[2]{\left[\begin{array}{r}#1 \\ #2 \end{array}\right]}\) \(\newcommand{\ctwovec}[2]{\left[\begin{array}{c}#1 \\ #2 \end{array}\right]}\) \(\newcommand{\threevec}[3]{\left[\begin{array}{r}#1 \\ #2 \\ #3 \end{array}\right]}\) \(\newcommand{\cthreevec}[3]{\left[\begin{array}{c}#1 \\ #2 \\ #3 \end{array}\right]}\) \(\newcommand{\fourvec}[4]{\left[\begin{array}{r}#1 \\ #2 \\ #3 \\ #4 \end{array}\right]}\) \(\newcommand{\cfourvec}[4]{\left[\begin{array}{c}#1 \\ #2 \\ #3 \\ #4 \end{array}\right]}\) \(\newcommand{\fivevec}[5]{\left[\begin{array}{r}#1 \\ #2 \\ #3 \\ #4 \\ #5 \\ \end{array}\right]}\) \(\newcommand{\cfivevec}[5]{\left[\begin{array}{c}#1 \\ #2 \\ #3 \\ #4 \\ #5 \\ \end{array}\right]}\) \(\newcommand{\mattwo}[4]{\left[\begin{array}{rr}#1 \amp #2 \\ #3 \amp #4 \\ \end{array}\right]}\) \(\newcommand{\laspan}[1]{\text{Span}\{#1\}}\) \(\newcommand{\bcal}{\cal B}\) \(\newcommand{\ccal}{\cal C}\) \(\newcommand{\scal}{\cal S}\) \(\newcommand{\wcal}{\cal W}\) \(\newcommand{\ecal}{\cal E}\) \(\newcommand{\coords}[2]{\left\{#1\right\}_{#2}}\) \(\newcommand{\gray}[1]{\color{gray}{#1}}\) \(\newcommand{\lgray}[1]{\color{lightgray}{#1}}\) \(\newcommand{\rank}{\operatorname{rank}}\) \(\newcommand{\row}{\text{Row}}\) \(\newcommand{\col}{\text{Col}}\) \(\renewcommand{\row}{\text{Row}}\) \(\newcommand{\nul}{\text{Nul}}\) \(\newcommand{\var}{\text{Var}}\) \(\newcommand{\corr}{\text{corr}}\) \(\newcommand{\len}[1]{\left|#1\right|}\) \(\newcommand{\bbar}{\overline{\bvec}}\) \(\newcommand{\bhat}{\widehat{\bvec}}\) \(\newcommand{\bperp}{\bvec^\perp}\) \(\newcommand{\xhat}{\widehat{\xvec}}\) \(\newcommand{\vhat}{\widehat{\vvec}}\) \(\newcommand{\uhat}{\widehat{\uvec}}\) \(\newcommand{\what}{\widehat{\wvec}}\) \(\newcommand{\Sighat}{\widehat{\Sigma}}\) \(\newcommand{\lt}{<}\) \(\newcommand{\gt}{>}\) \(\newcommand{\amp}{&}\) \(\definecolor{fillinmathshade}{gray}{0.9}\)Our voices are only part of the performance equation. Your body language is also critical to the process and product. Your body language is the first element that audience members notice about you, before you even begin performing. Maintaining a command presence and total control over the way you use your body language can help you create much more effective performances.
There are many ways in which you can modify your body to create feeling and amplify a message.
Eye Contact and Focal Points
You've probably heard the expression that "the eyes are the windows to the soul." This sentence definitely rings true in an interp course. Your ability to connect to both the material and the audience with your eyes is likely the most valuable physical resource you can use in a performance.
In most other Communication courses that involve presentations, instructors will tell you to look at your audience when you present, and they emphasize the importance of eye contact. Rather than having you read an entire speech from notes or a manuscript, public speaking instructors say your goal should be to look at audience members more directly while glancing only occasionally at notes. In interpretation of literature, audiences also do not want to watch a performer stare at a text the entire time they perform as it does not allow them to become immersed in the performance. However, interp performers are not often expected to have an entire script memorized either. After all, the script is in their hands while they are performing. However, in interp, a performer's goal is not so much to always look at the audience but rather to direct eye gazes in the most appropriate direction for that moment of the performance, which may not always be at the audience. This is where analysis of a piece of literature becomes critical. For every section in a text and for every persona within it, an interper should understand TO WHOM that persona is speaking and direct eye gazes accordingly. These directions are known as focal points. There are four primary types: audience, inward, off-stage, and on-stage.
Focus on Audience
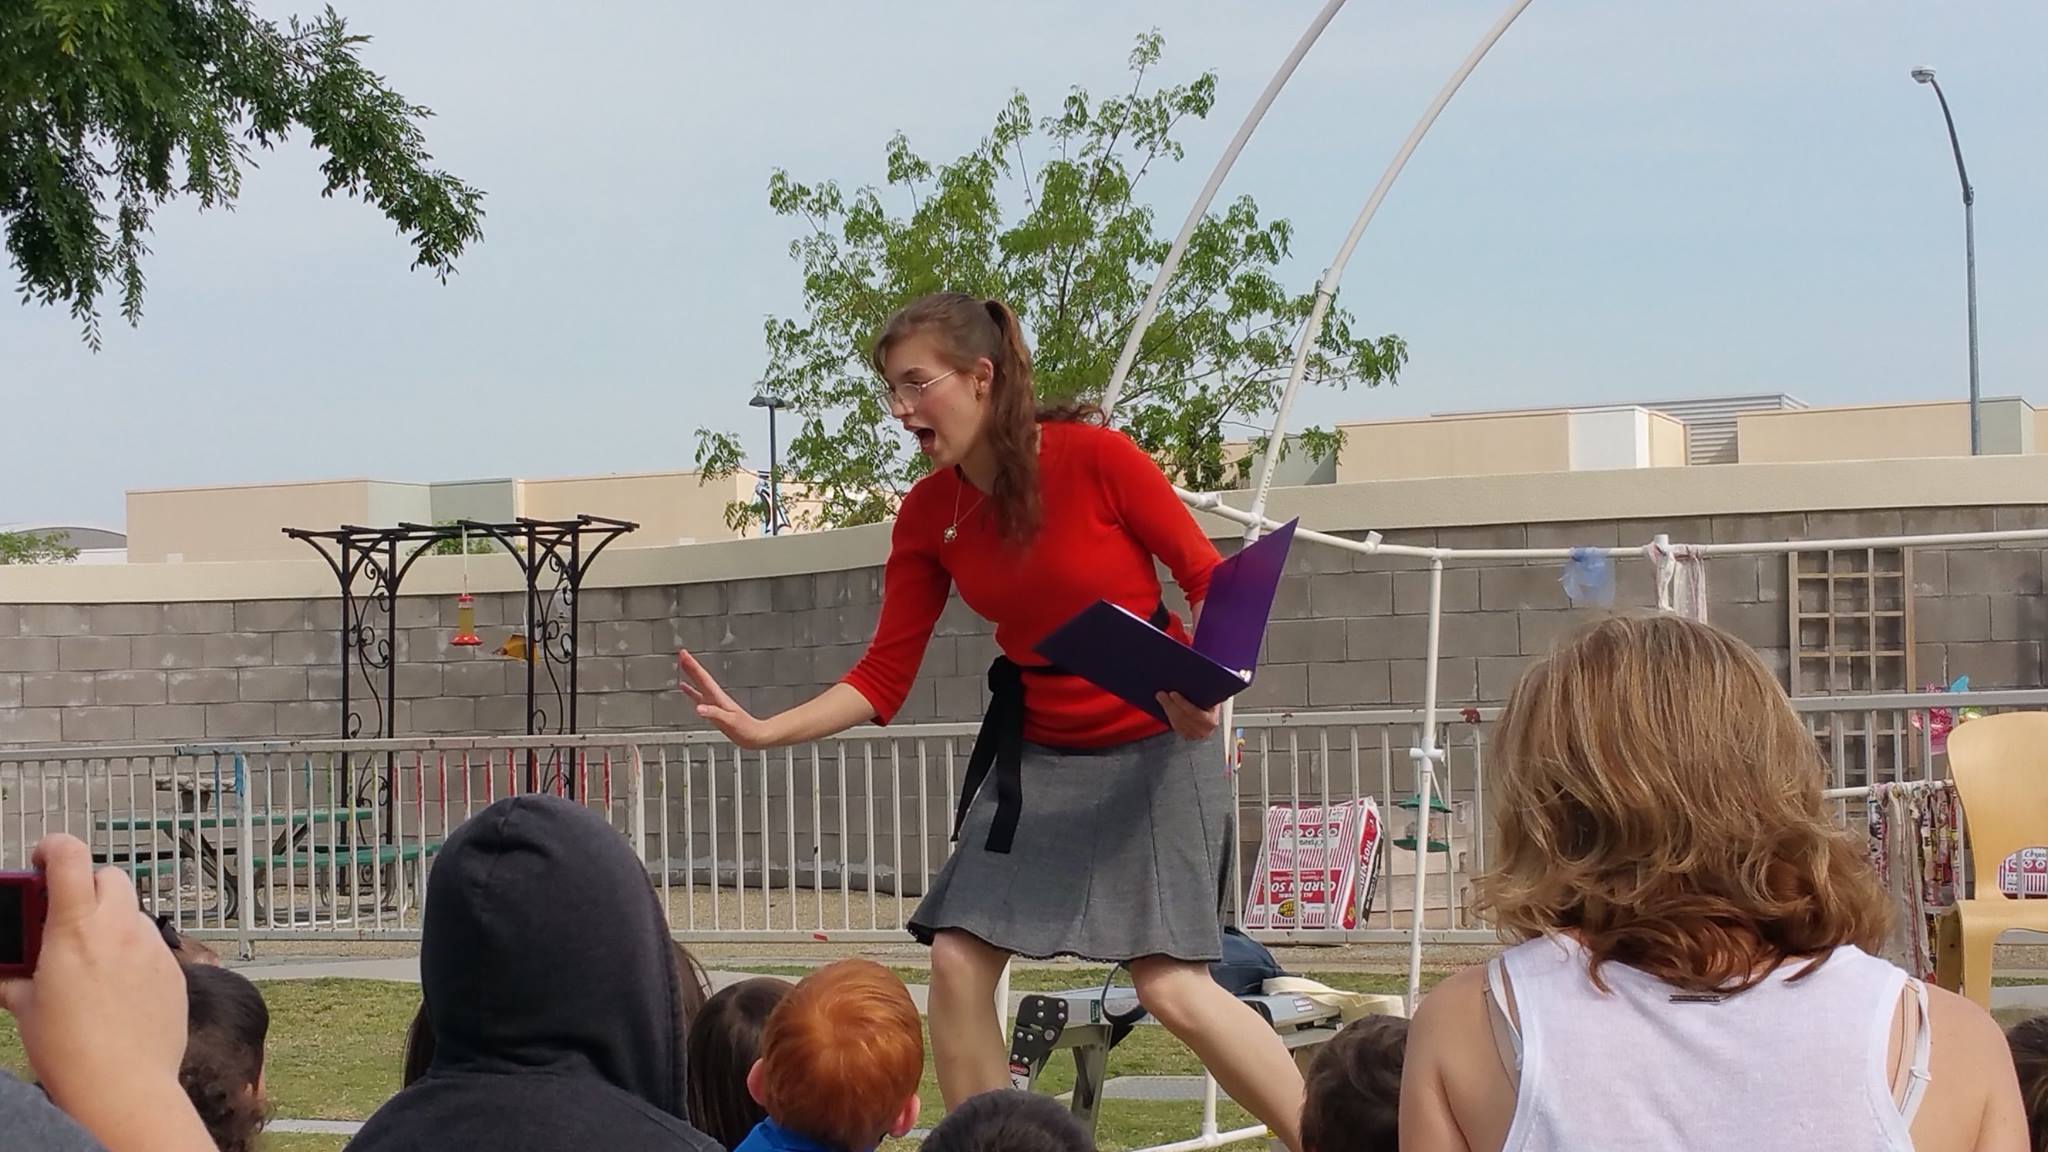
This is where the performer directs his gaze directly to audience members, bringing them directly into the performance (figure 1).

Performers usually use this form of focal points during introductions (when the performer is speaking as himself, introducing the piece and establishing its significance), but they also use it frequently when performing a prose story during narration lines. Performers may also choose to use this sort of focal point in expository sorts of literature, for example, when performing a section of an informative essay they wrote in college. Or, if a character in a story is addressing a large crowd, the performer can make the actual audience become the crowd in the story by looking directly at everyone present. Essentially, anytime you feel as though the persona speaking in a moment of your performance might be addressing the crowd as a whole, consider looking at your audience directly as you perform that portion.
Focus Off-Stage
Some literature typically chosen for interp performances include dialogue or moments where a persona (or personae) is (are) speaking to one other specific character or characters. In these moments, it might be confusing if the performer gazes at audience members while performing these lines. For example, if you are performing a bit of dialogue from Shakespeare's Romeo and Juliet, it might be awkward and confusing to audience members if you look at them during these lines. You can still immerse them in the literature and bring it to life, however, by establishing off-stage focal points for these characters. Whenever you say a line as Juliet, you might angle your eye gaze toward the back wall behind the audience, aimed slightly right. For Romeo, your eye gaze might also look at the back wall but aimed slightly left. Then, the audience sort of sits in the middle of this "conversation" you are having between the two characters (figure 2).
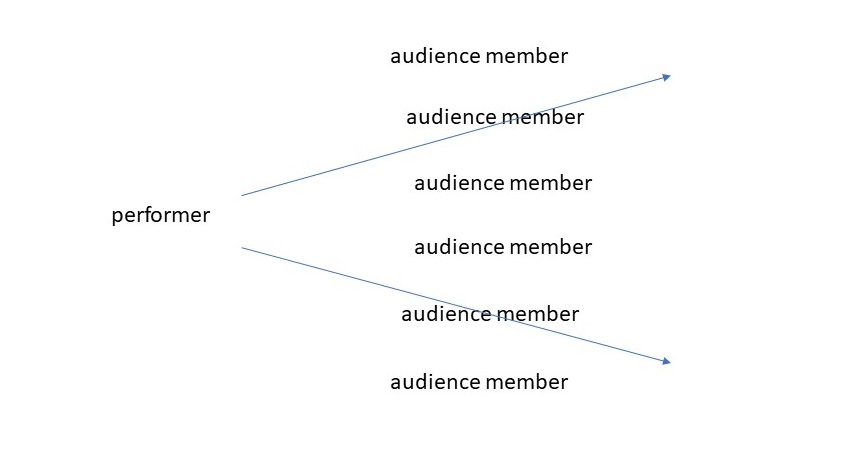
When these focal points pair with effective body language and vocal techniques, it will always be clear to your audience which character is speaking. You can also use off-stage focus when performing a monologue where a persona is speaking to one specific person, for example, a letter from a daughter to a mother.
Essentially, any time a persona within a piece of literature is speaking to a specific other or others, consider using off-stage focus.
Focus On-Stage
This sort of focus is not used often in interp, but it warrants mentioning as it is used (but sparingly) in group interp performances. This focus involves directing one's eye gaze to another persona on the same stage (figure 3).

This focus is often problematic in solo interp performances because if a performer is playing two or more characters, she must turn her body too far to the left or right to make it appear as though she is addressing a persona next to her. Therefore, solo performers are best advised to use a focus off-stage when establishing focal points for different characters.
In group interp performances, however, this sort of focus is more tempting and often feels more natural for performers. But while looking at their fellow group mates might feel more natural, group interp performers should use caution in choosing this sort of focus in any part of the performance as off-stage focus is considered by many interp enthusiasts to be a major differentiation between oral interpretation vs. plays/theatre/acting. Group performers will often look at one another in an introduction to their performance, but once the literature begins, you will mostly see them maintain an off-stage focus, even when the personae they are portraying are speaking to personae portrayed by another group mate.
Focus Inward
Sometimes, a persona is not speaking to any particular group of people or to any other individual present in the persona's same physical space. Examples of these types of personae might include one speaking in a diary entry or a character leaving a message on a voicemail. In these cases, a performer's gaze might not be on the audience or any particular point off-stage but rather everywhere and nowhere at once. Consider how one looks when talking to someone else on the phone. That person's eyes might gaze up or down or all around during the conversation. Or, think about where a character might look when talking to themselves or, perhaps, to their god. Again, it might be confusing to aim eye gazes at audience members during these lines, so directing a gaze at no particular spot (or all spots) while performing the literature might be best.
To establish effective focal points, you need to become familiar with the literature you are choosing to perform. This "familiarity" will allow you to take advantage of these focal point techniques to connect more to your audience and immerse them in your performance. While memorizing your script is fine, do not feel as though you must. You should aim to look up from your script somewhere around 75% of the time. No audience member wants to watch an interp performer stare at the text/script for the entire performance, and it will be much harder for the audience to see your great facial expressions and hear your voice in full if you stare down at a script the entire time. Become familiar with your text to allow you to break from staring at it, and use focal points effectively for a more immersive experience for your audience.
Facial Expressions
Many of us don't realize that we have almost 20 muscles in our faces that allow us to show a range of feelings and emotions. Even the subtlest of movements (often called micro expressions) can convey meaningful messages to those who perceive them. Think about what it might mean to someone if you frown at them when you are saying hello (as opposed to smiling at them). Consider how many times you've suspected someone was lying to you when their mouth kept twitching as they gave reasons for being late in meeting you for lunch.
It will add so much more meaning to your performance when you make conscious choices in facial expressions. For example, if a character is envious of another during a bit of dialogue you are performing, consider narrowing your eyes, furrowing your brows, and tightening your lips as you speak the character's lines to demonstrate this emotion to your audience. Or, as a third person narrator describes a disgusting stench coming from a nearby dumpster in a story, consider wrinkling up your nose and narrowing your eyes to communicate a feeling of disgust. Even if the material you are performing is somewhat expository/informative in nature rather than emotional, when your facial expressions "match" the vibe of the information you are sharing with your audience, it will make it easier and more pleasing for your audience to attend to your presentation.
Posture
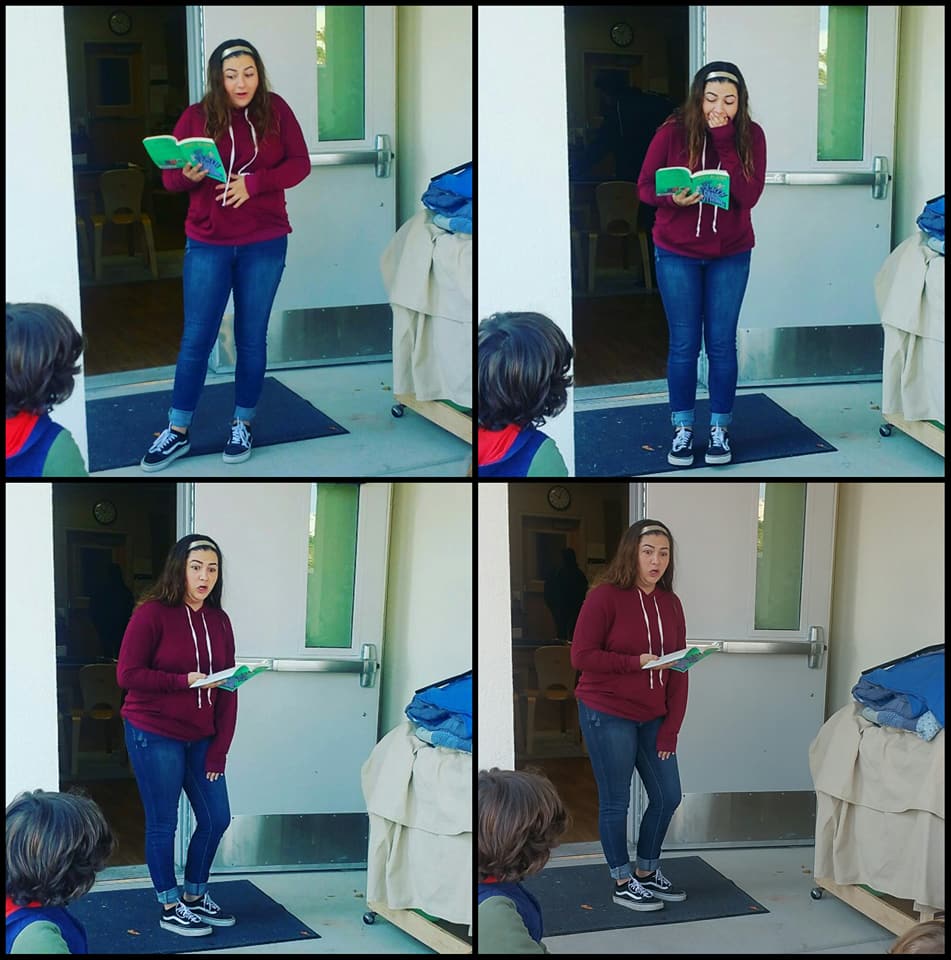
The way we position our shoulders and torso in relation to our head and limbs sends messages to others. For example, if your professor walks into class with his shoulders hunched forward more so than usual, you might assume he injured his back or that he is tired. We can take advantage of this movement in our performances to create character and convey feelings.
If your literature includes a soldier persona, you might say that character's lines while erecting a stick-straight posture every time she has a line. If the narrator of a piece you are performing has a secret they'd like to share with the audience, they might lean forward a bit, maybe shifting one shoulder forward to create a barrier preventing another imaginary persona in the story from hearing the secret.
Hand Gestures
Using hand movement to convey meaning and feeling is a powerful tool for performers. Gestures can be used as symbols that signify or even substitute for particular words (e.g. an OK sign made with the hands), or they can be supplementary to words, adding feeling and meaning without actually standing for the words on their own (e.g. a palms up, hands out gesture while explaining something important).
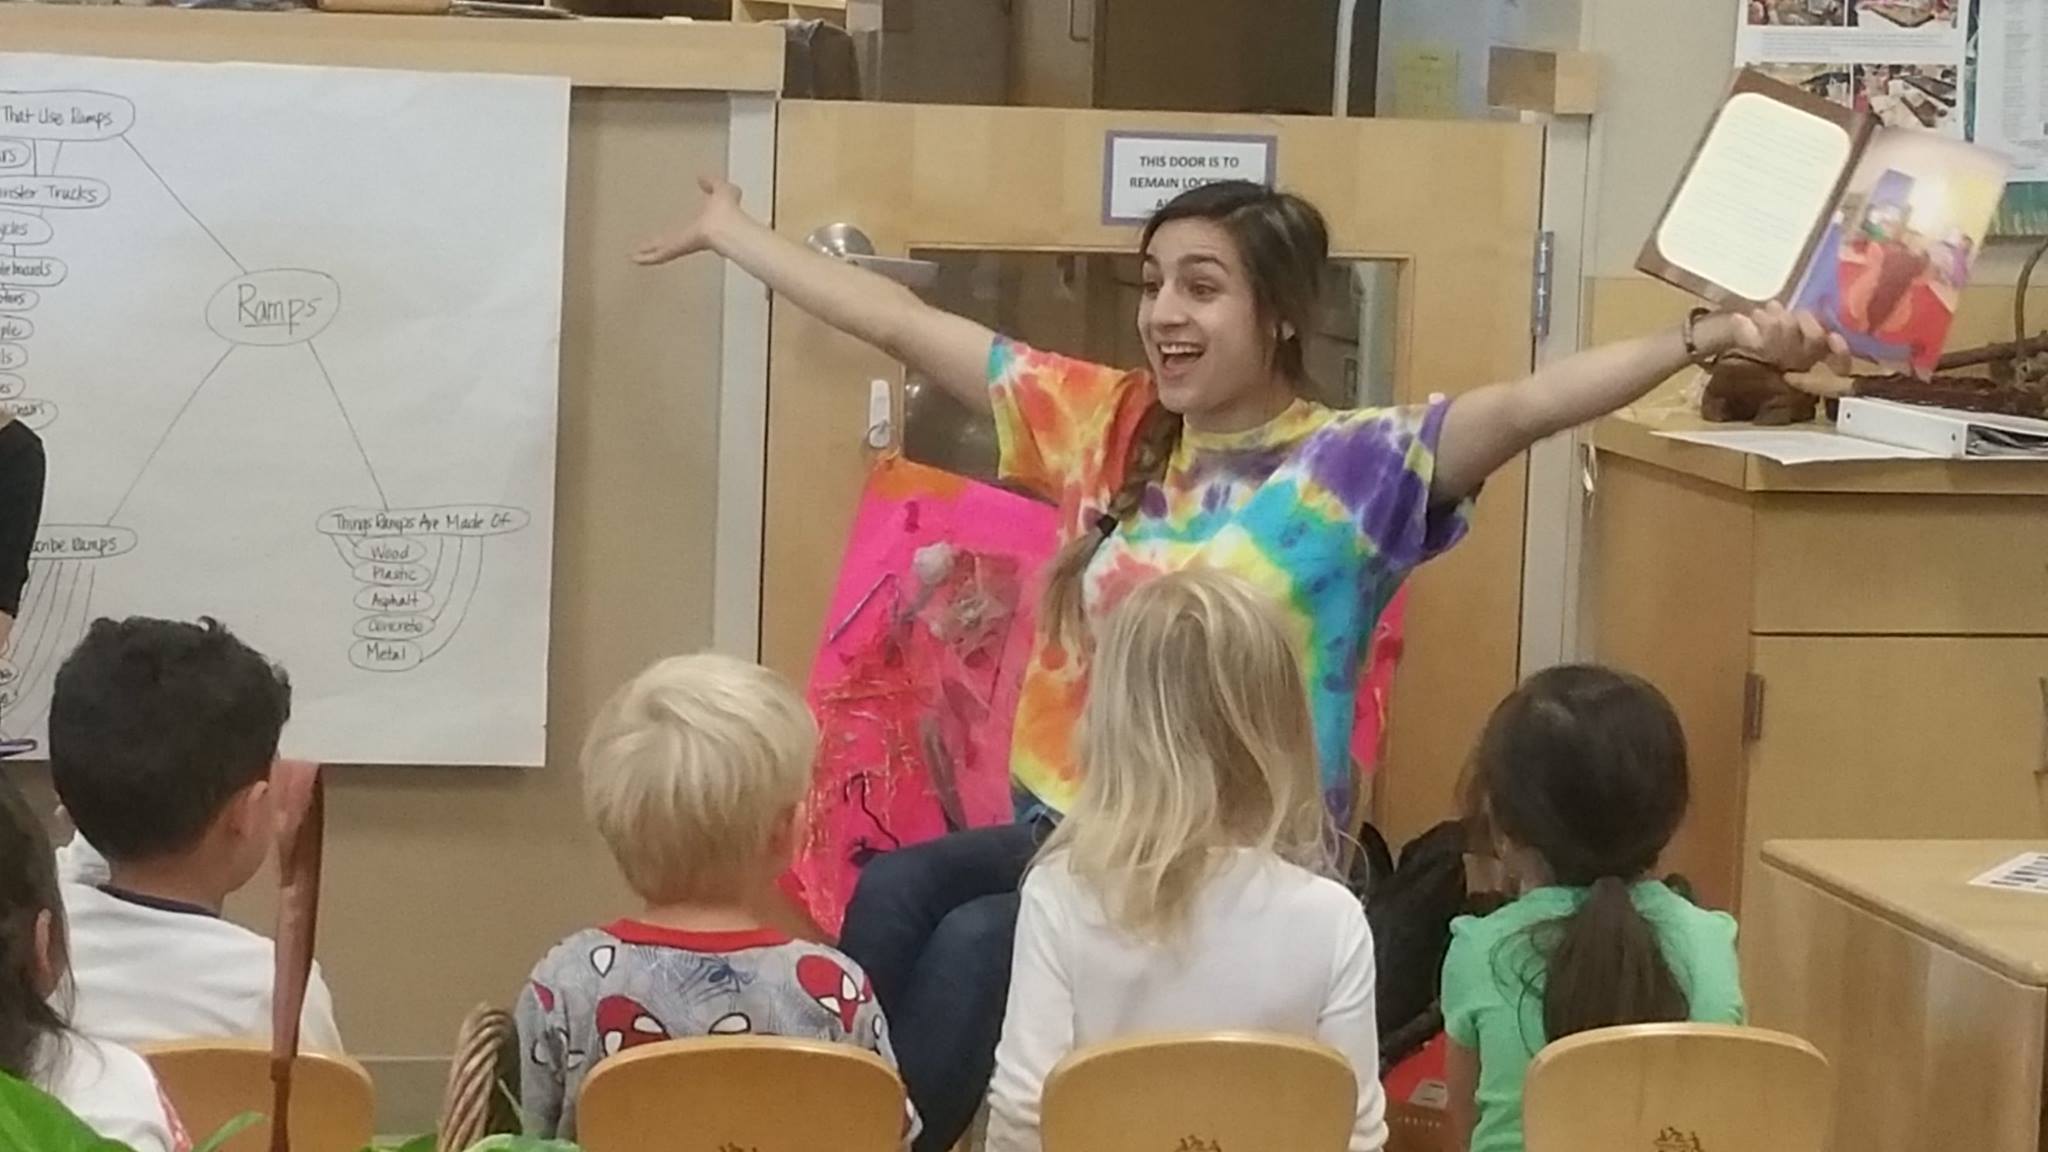
Hand gestures can also be particularly helpful when you need to establish physical differences between personae in a performance. For example, if a teacher is speaking to an uninterested student in a bit of dialogue, you might have the teacher often repeat a pointed-finger gesture as she speaks to the student. For the student, you might have her mime a phone in her hand by constantly doing a texting movement with your thumb.
Sometimes, beginning interp performers make the mistake of trying to use gestures to paint pictures of almost everything they say in a performance. This is not necessary and often results in a stilted appearance. If a specific gesture will help an audience understand a concept or feeling, you should probably use it. Otherwise, think of your hand movements more as accompaniments to your lines, similarly to what we do with our hands in normal conversation.
Movement
While hand gestures are the movements of your hands (and perhaps arms), movement refers to repositioning of the entire body. Typically, full-stage movement is minimal in solo interp performances. There is sometimes a bit more in group performance, but it still isn't quite as much as the way actors in a play might use an entire stage. Once again, full-stage movement is considered by interp enthusiasts to be a definitive factor separating stage plays from interp performance. That being said, you can use some movement to communicate meaning and feeling to your audience, and you can also use it to create transitions between literature pieces within one performance.
If a character dances in a piece of literature, you can feel free to use your space a bit to demonstrate this. If a character is dodging a bullet, it would be appropriate for you to jump to the side to show this. Be mindful, however, of trying to do too much movement in a performance. Since interp does not involve scenery, costumes, props, etc., literature that involves a lot of physical movement can be incredibly challenging to perform and often quite confusing for audiences to watch.
When performing bits from multiple pieces within one performance, a bit of movement can help show your audience when you are shifting out of one piece and into another. For example, you might set the script on the lectern and present your poem from there, but you might take your script and step in front of the lectern, closer to the audience to perform the prose piece that follows.
Attire
What we wear and how we adorn our bodies communicates messages. As stated before, costumes are not used in interp, but it is often a nice touch to dress honoring the mood/theme of a performance. When I was in high school, I performed excerpts of an anti-racism play entitled God's Country, by Stephen Dietz. I played multiple characters of various genders, races, and attitudes, and the message of the performance had dark and scary undertones. For every performance, I wore black shoes, black pants, a black turtleneck sweater, and pulled my hair back in a tight, low ponytail. I wanted to appear androgynous and wearing any sort of color felt like dishonor to the piece. It wasn't by any means a costume, but it allowed me to help set the mood of the piece for my audience before I had even said a word.
If you are performing a children's bedtime book, perhaps wear a comfortable pastel shirt with kittens on it. If you are performing a Christmas poem, you could wear red pants. Disneyland prohibits adult visitors from wearing costumes, so many people engage in something called "Disney bounding" where they dress in usual street clothes that have a similar color scheme and style that suggests their favorite Disney character. You can use this technique as inspiration to make purposeful choices in attire for your performances.
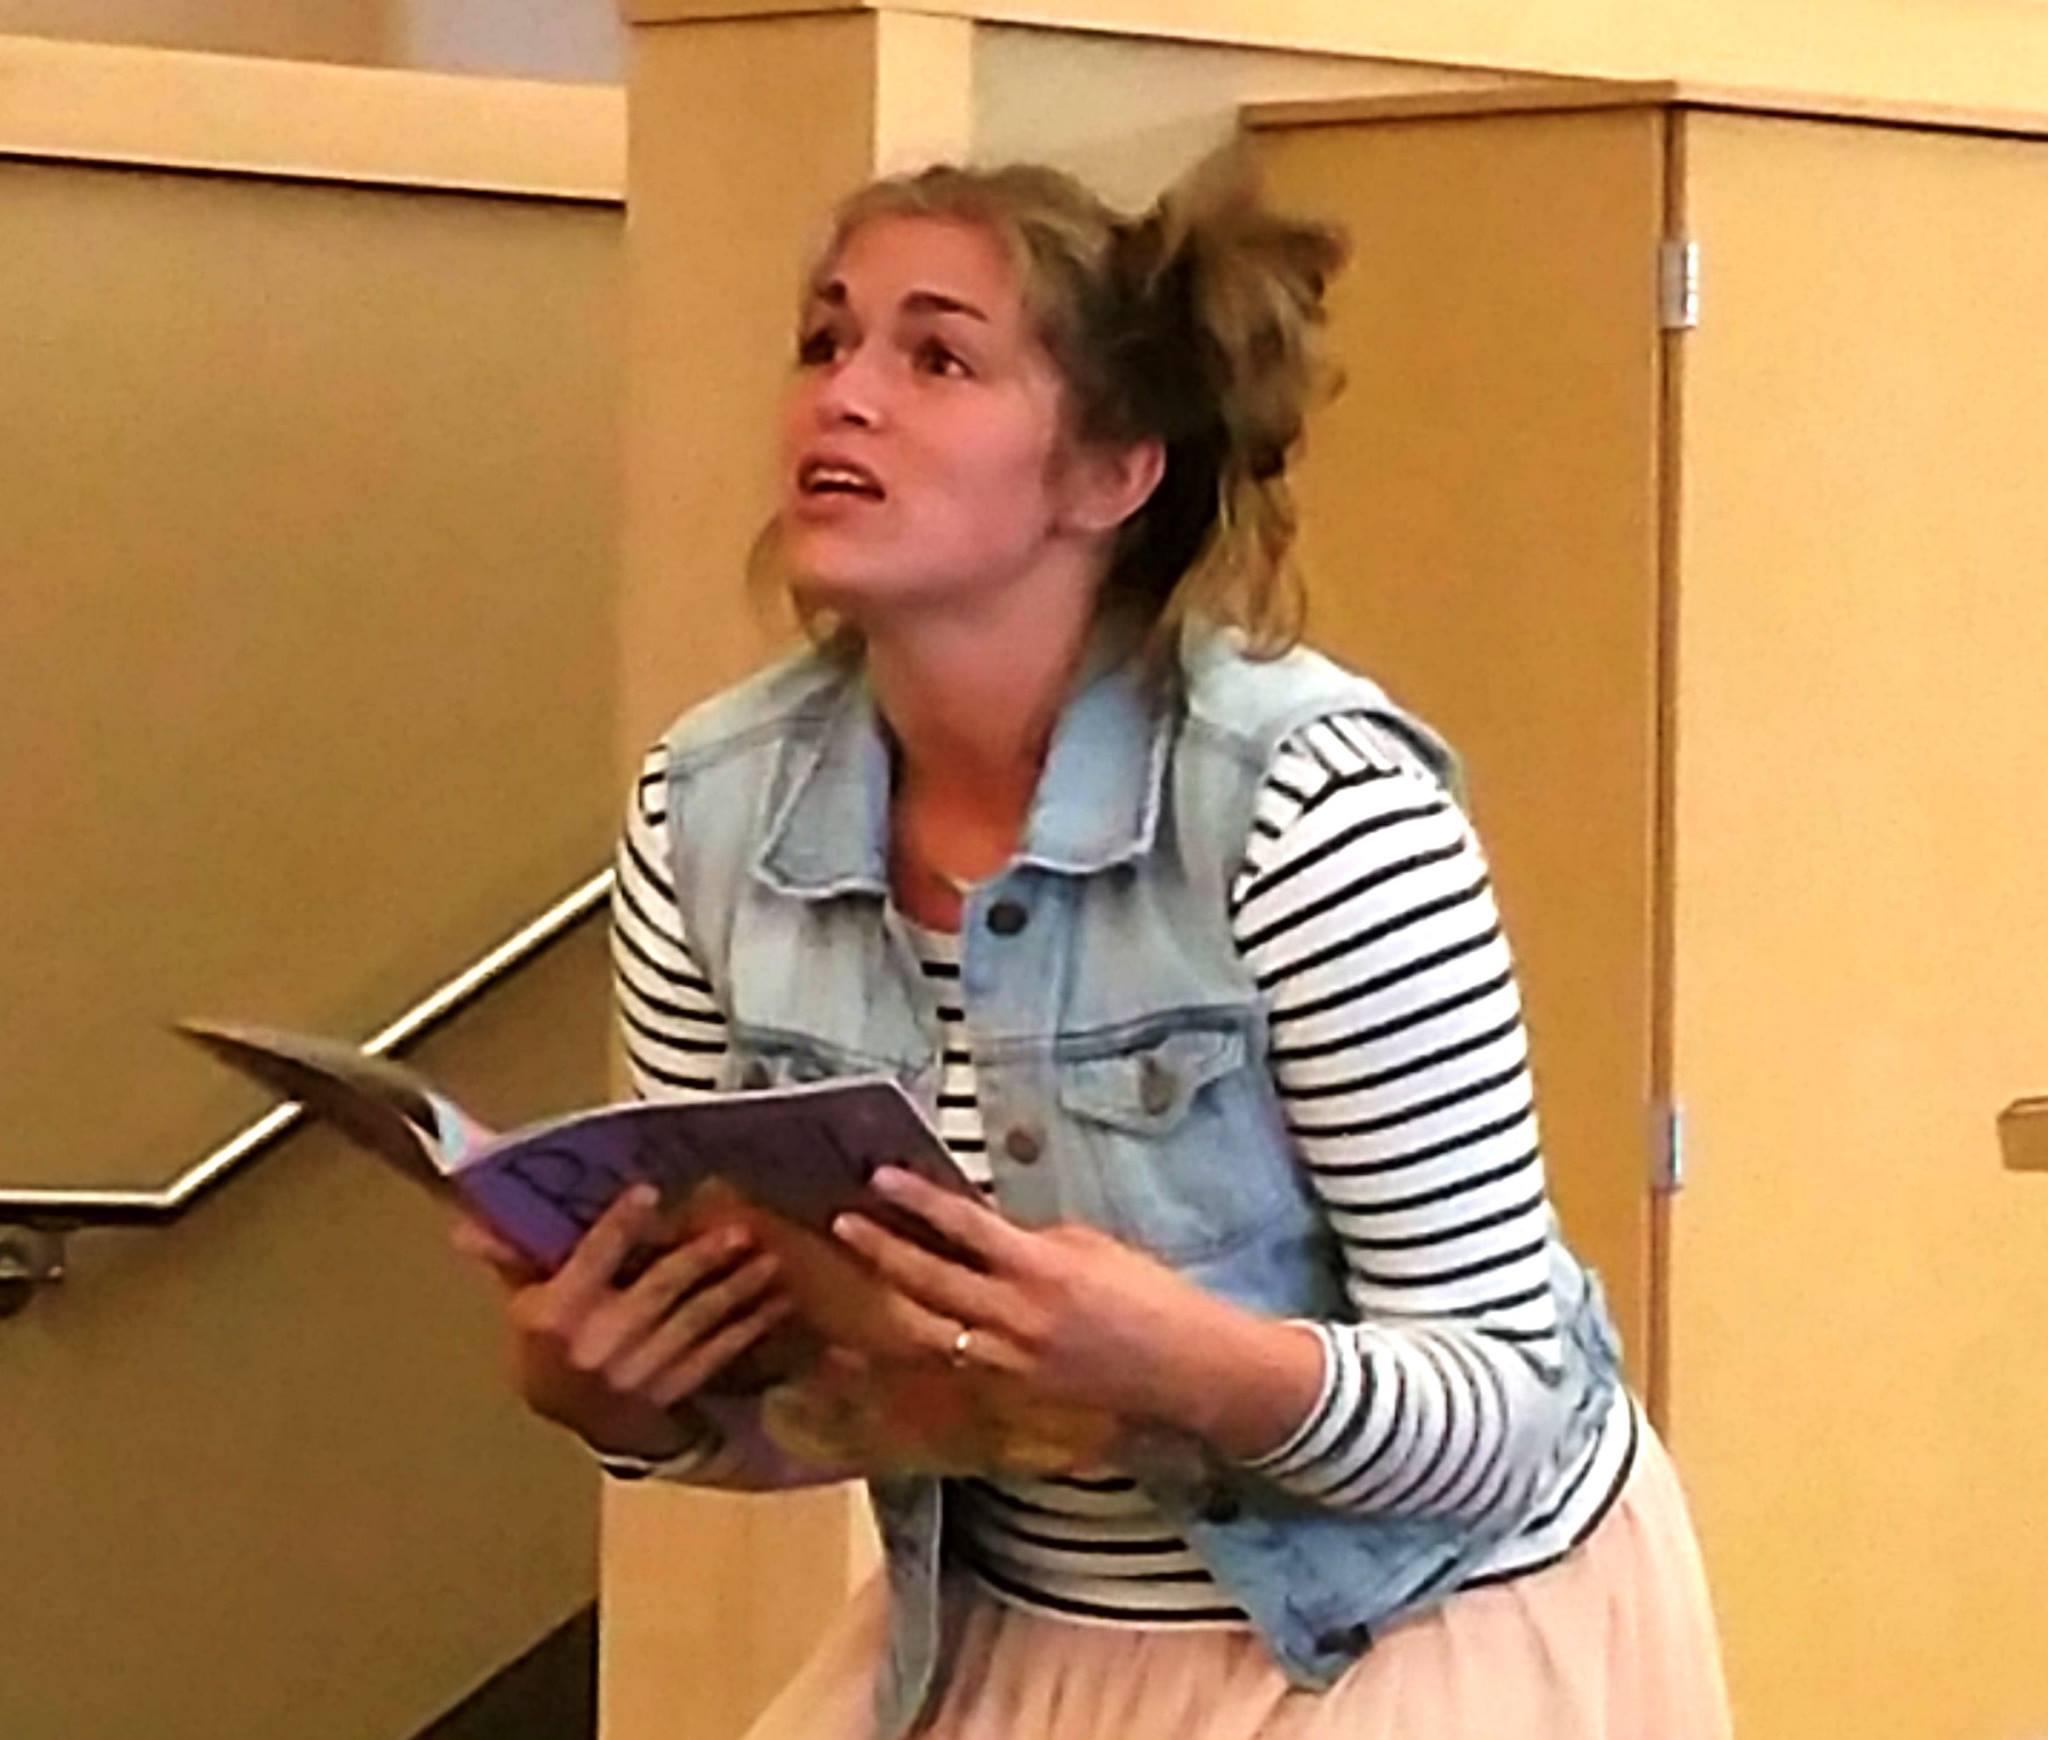
Employing Vocals and Body Language
Many beginning performers have a hard time using these vocal and body language delivery resources more dynamically than they are accustomed to. This is where “play” from chapter 1 becomes critical. Give yourself permission to be “bigger” in your vocal characteristics and body language when you work in this course and practice at home.
As you learn which of the vocal and body language characteristics you might need to work on in your performances, consider using an old trick I used to employ during my high school competitive oral interpretation days. When you practice for an upcoming performance, go overboard with that particular characteristic. For example, if your peers and instructor have remarked that you could use more hand gestures in your presentations, move your hand(s) with every word you utter as you practice your performance. Don’t worry about whether the movement makes sense at first, just move for movement’s sake to get used to how it feels. You’ll find that after doing this a time or two, using more natural gestures will begin to come more naturally. Similarly, if you have heard that you are monotone when you speak, try practicing the words while exploring every note in your musical range of inflection. Again, don’t worry about the inflection making sense, just try almost “singing” the words. Of course, you would not employ these extreme techniques during an actual performance. However, going “bigger” in practice will help you break the ice and learn what it feels like to fully employ those elements, making it easier to pull back as needed in a performance.
As you learn to incorporate gestures into your performances, you may even want to write little side notes in your script/text to remind you when to do certain movements. As you gain in experience, using natural gestures will start to feel more natural to you.

