
LibreTexts Course Mapping Guide
- Page ID
- 217569
\( \newcommand{\vecs}[1]{\overset { \scriptstyle \rightharpoonup} {\mathbf{#1}} } \)
\( \newcommand{\vecd}[1]{\overset{-\!-\!\rightharpoonup}{\vphantom{a}\smash {#1}}} \)
\( \newcommand{\dsum}{\displaystyle\sum\limits} \)
\( \newcommand{\dint}{\displaystyle\int\limits} \)
\( \newcommand{\dlim}{\displaystyle\lim\limits} \)
\( \newcommand{\id}{\mathrm{id}}\) \( \newcommand{\Span}{\mathrm{span}}\)
( \newcommand{\kernel}{\mathrm{null}\,}\) \( \newcommand{\range}{\mathrm{range}\,}\)
\( \newcommand{\RealPart}{\mathrm{Re}}\) \( \newcommand{\ImaginaryPart}{\mathrm{Im}}\)
\( \newcommand{\Argument}{\mathrm{Arg}}\) \( \newcommand{\norm}[1]{\| #1 \|}\)
\( \newcommand{\inner}[2]{\langle #1, #2 \rangle}\)
\( \newcommand{\Span}{\mathrm{span}}\)
\( \newcommand{\id}{\mathrm{id}}\)
\( \newcommand{\Span}{\mathrm{span}}\)
\( \newcommand{\kernel}{\mathrm{null}\,}\)
\( \newcommand{\range}{\mathrm{range}\,}\)
\( \newcommand{\RealPart}{\mathrm{Re}}\)
\( \newcommand{\ImaginaryPart}{\mathrm{Im}}\)
\( \newcommand{\Argument}{\mathrm{Arg}}\)
\( \newcommand{\norm}[1]{\| #1 \|}\)
\( \newcommand{\inner}[2]{\langle #1, #2 \rangle}\)
\( \newcommand{\Span}{\mathrm{span}}\) \( \newcommand{\AA}{\unicode[.8,0]{x212B}}\)
\( \newcommand{\vectorA}[1]{\vec{#1}} % arrow\)
\( \newcommand{\vectorAt}[1]{\vec{\text{#1}}} % arrow\)
\( \newcommand{\vectorB}[1]{\overset { \scriptstyle \rightharpoonup} {\mathbf{#1}} } \)
\( \newcommand{\vectorC}[1]{\textbf{#1}} \)
\( \newcommand{\vectorD}[1]{\overrightarrow{#1}} \)
\( \newcommand{\vectorDt}[1]{\overrightarrow{\text{#1}}} \)
\( \newcommand{\vectE}[1]{\overset{-\!-\!\rightharpoonup}{\vphantom{a}\smash{\mathbf {#1}}}} \)
\( \newcommand{\vecs}[1]{\overset { \scriptstyle \rightharpoonup} {\mathbf{#1}} } \)
\(\newcommand{\longvect}{\overrightarrow}\)
\( \newcommand{\vecd}[1]{\overset{-\!-\!\rightharpoonup}{\vphantom{a}\smash {#1}}} \)
\(\newcommand{\avec}{\mathbf a}\) \(\newcommand{\bvec}{\mathbf b}\) \(\newcommand{\cvec}{\mathbf c}\) \(\newcommand{\dvec}{\mathbf d}\) \(\newcommand{\dtil}{\widetilde{\mathbf d}}\) \(\newcommand{\evec}{\mathbf e}\) \(\newcommand{\fvec}{\mathbf f}\) \(\newcommand{\nvec}{\mathbf n}\) \(\newcommand{\pvec}{\mathbf p}\) \(\newcommand{\qvec}{\mathbf q}\) \(\newcommand{\svec}{\mathbf s}\) \(\newcommand{\tvec}{\mathbf t}\) \(\newcommand{\uvec}{\mathbf u}\) \(\newcommand{\vvec}{\mathbf v}\) \(\newcommand{\wvec}{\mathbf w}\) \(\newcommand{\xvec}{\mathbf x}\) \(\newcommand{\yvec}{\mathbf y}\) \(\newcommand{\zvec}{\mathbf z}\) \(\newcommand{\rvec}{\mathbf r}\) \(\newcommand{\mvec}{\mathbf m}\) \(\newcommand{\zerovec}{\mathbf 0}\) \(\newcommand{\onevec}{\mathbf 1}\) \(\newcommand{\real}{\mathbb R}\) \(\newcommand{\twovec}[2]{\left[\begin{array}{r}#1 \\ #2 \end{array}\right]}\) \(\newcommand{\ctwovec}[2]{\left[\begin{array}{c}#1 \\ #2 \end{array}\right]}\) \(\newcommand{\threevec}[3]{\left[\begin{array}{r}#1 \\ #2 \\ #3 \end{array}\right]}\) \(\newcommand{\cthreevec}[3]{\left[\begin{array}{c}#1 \\ #2 \\ #3 \end{array}\right]}\) \(\newcommand{\fourvec}[4]{\left[\begin{array}{r}#1 \\ #2 \\ #3 \\ #4 \end{array}\right]}\) \(\newcommand{\cfourvec}[4]{\left[\begin{array}{c}#1 \\ #2 \\ #3 \\ #4 \end{array}\right]}\) \(\newcommand{\fivevec}[5]{\left[\begin{array}{r}#1 \\ #2 \\ #3 \\ #4 \\ #5 \\ \end{array}\right]}\) \(\newcommand{\cfivevec}[5]{\left[\begin{array}{c}#1 \\ #2 \\ #3 \\ #4 \\ #5 \\ \end{array}\right]}\) \(\newcommand{\mattwo}[4]{\left[\begin{array}{rr}#1 \amp #2 \\ #3 \amp #4 \\ \end{array}\right]}\) \(\newcommand{\laspan}[1]{\text{Span}\{#1\}}\) \(\newcommand{\bcal}{\cal B}\) \(\newcommand{\ccal}{\cal C}\) \(\newcommand{\scal}{\cal S}\) \(\newcommand{\wcal}{\cal W}\) \(\newcommand{\ecal}{\cal E}\) \(\newcommand{\coords}[2]{\left\{#1\right\}_{#2}}\) \(\newcommand{\gray}[1]{\color{gray}{#1}}\) \(\newcommand{\lgray}[1]{\color{lightgray}{#1}}\) \(\newcommand{\rank}{\operatorname{rank}}\) \(\newcommand{\row}{\text{Row}}\) \(\newcommand{\col}{\text{Col}}\) \(\renewcommand{\row}{\text{Row}}\) \(\newcommand{\nul}{\text{Nul}}\) \(\newcommand{\var}{\text{Var}}\) \(\newcommand{\corr}{\text{corr}}\) \(\newcommand{\len}[1]{\left|#1\right|}\) \(\newcommand{\bbar}{\overline{\bvec}}\) \(\newcommand{\bhat}{\widehat{\bvec}}\) \(\newcommand{\bperp}{\bvec^\perp}\) \(\newcommand{\xhat}{\widehat{\xvec}}\) \(\newcommand{\vhat}{\widehat{\vvec}}\) \(\newcommand{\uhat}{\widehat{\uvec}}\) \(\newcommand{\what}{\widehat{\wvec}}\) \(\newcommand{\Sighat}{\widehat{\Sigma}}\) \(\newcommand{\lt}{<}\) \(\newcommand{\gt}{>}\) \(\newcommand{\amp}{&}\) \(\definecolor{fillinmathshade}{gray}{0.9}\)Introduction
LibreTexts offers customizable and clean pages that can be companions to your course content and texts! It especially serves as a great platform for a course map. The following guide will show you how to:
- Create Pages from your LibreTexts Sandbox
- Use the Editor panel in Pages to create a course map
- Tweak your map to your liking
- Upload an already-designed course map to your page
Getting Started
A great course map will be easy to read, easy to find, and just detailed enough for your students to know what to expect in the course, without being overwhelmed by information. LibreTexts's Sandbox tool gives you access to great formatting tools to design clear pages for your course! Let's learn how to create a Page from the Sandbox.
From your homepage, click on your name at the top right when you're logged in. Then go to Your Sandbox.

Click on the Sandbox that shows on the next page. It should be titled as whatever email address you created your LibreTexts account with.
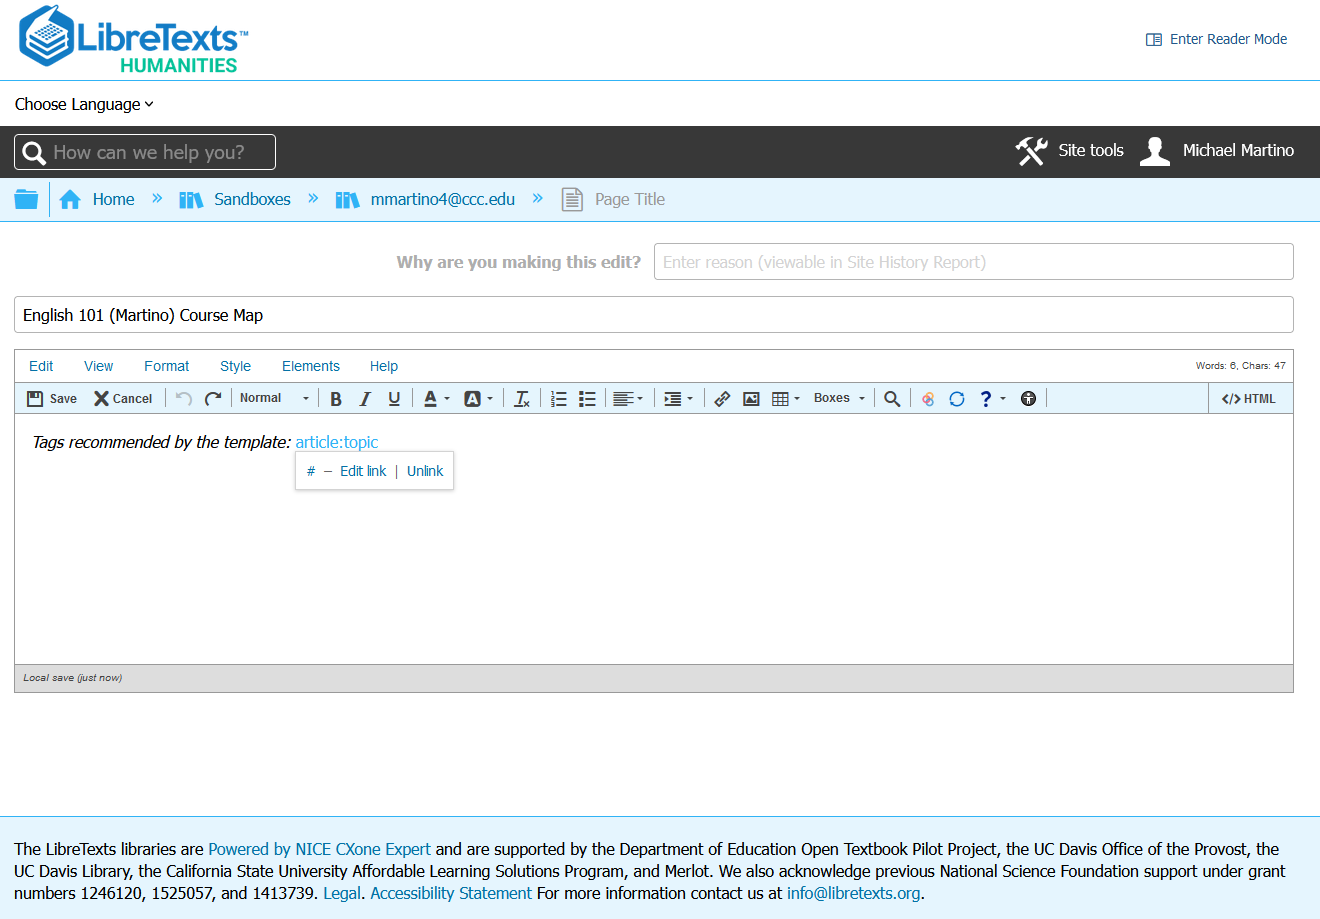
Once on the Sandbox page, click on the "New" button at the top right, which will open up the following window. Make sure to check the box for "Show all 6 available templates." Then, select the Section/Page template and click create.

You now have a page to create a course map with! When you click Edit at the top right, you'll have several tools to use for editing the page.
Creating a Course Map in LibreTexts
The following table is just one example of what your course map could look like in LibreTexts. Three columns should be plenty to outline your course, though you can add as many rows as you want to organize the outline. Maybe you would prefer to have a row for each week of the semester, or only rows for each module of the course, that take place over the course of a few weeks.
| Week / Module | Content | Assignments Due |
|---|---|---|
|
Week 1 |
Introduction to LibreTexts | Forum post #1 |
|
Week 2 |
The Libraries and Shelves of LibreTexts | Forum post #2 |
|
Week 3 |
Creating and Remixing Content on LibreTexts | Assignment #1 |
Let's create a simple course map in the page we just made. We can start by giving our page Headings to organize it, which will also be accessible for screenreader users.
In the following image, I click on the Headings button at the top left of the Editor, and select Heading 2 as my headings for the Introduction and Course Map sections. I won't use lower levels of headings in this example, but they will organize your page better if you have multiple sections with different levels of specificity. Using headings will also automatically populate the Page's Table of Contents!

Here is a screenshot of what the Page will look like when you click Save and view the changes. Notice on the right side of the Page the Table of Contents! You can change this to always be opened / dropped down in the Page Settings section at the top, just below Contents and Home.

Using Tables to Build a Course Map
Now let's build a table! As said earlier, a perfectly fine table will have 3 columns maximum, and as many rows as there are weeks or modules for the course. You can tweak these as your course needs, but make sure the table is easy to read at a glance. Students will have different levels of ease with glancing and navigating.
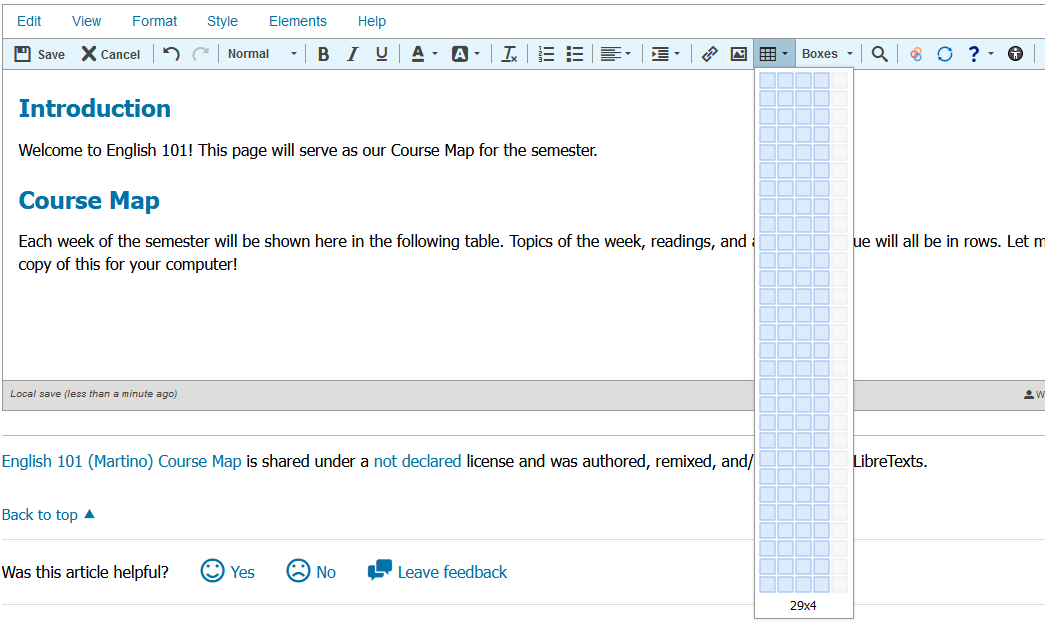
To create a table in our Editor, click on the gridded table icon at the top right, which will be just to the left of the Boxes icon.

At a glance, the Editor allows us to create a table that's 5 columns by 5 rows. However, we can create bigger tables in two different ways. If we use the same table icon in the Editor, we can actually hover over the edges of the grid to create more rows or columns! This function will be limited by how big your screen is :)
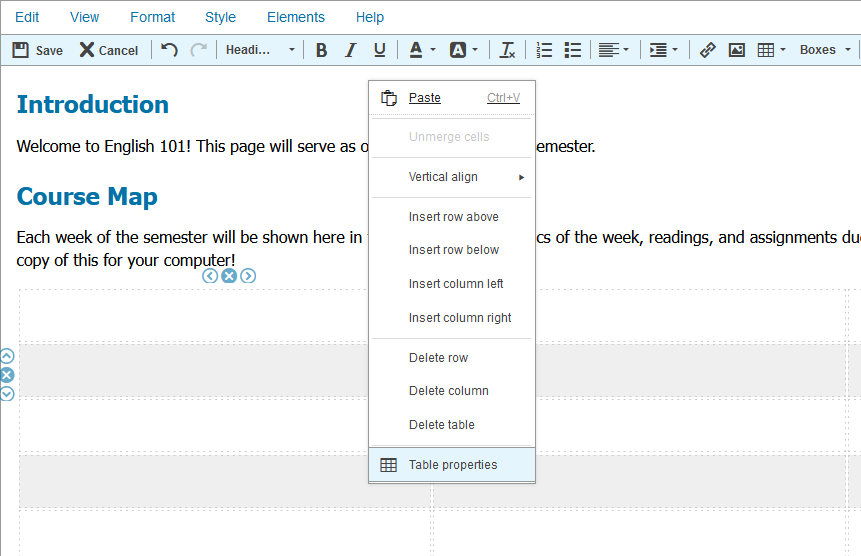
Once a table is built, we can also add rows and columns one at a time. At the top left corner of the built table, arrows along each side of the table are present, which allow you to add or subtract additional rows and columns as you need! My mouse in the following screenshot is hovering over the button that would insert an additional column in my table.

Before we start filling out the table with course info, we need to make sure it has headings on the first row. With a table in our Page, right click on it, and click on "Table properties" in the menu. Under the "Headings" section at the top left, check the box for "1st row."

This will turn the 1st row or column of our table a light blue, and give us a proper place for labeling. I've labeled the table for this English 101 Course Map similar to the one earlier.
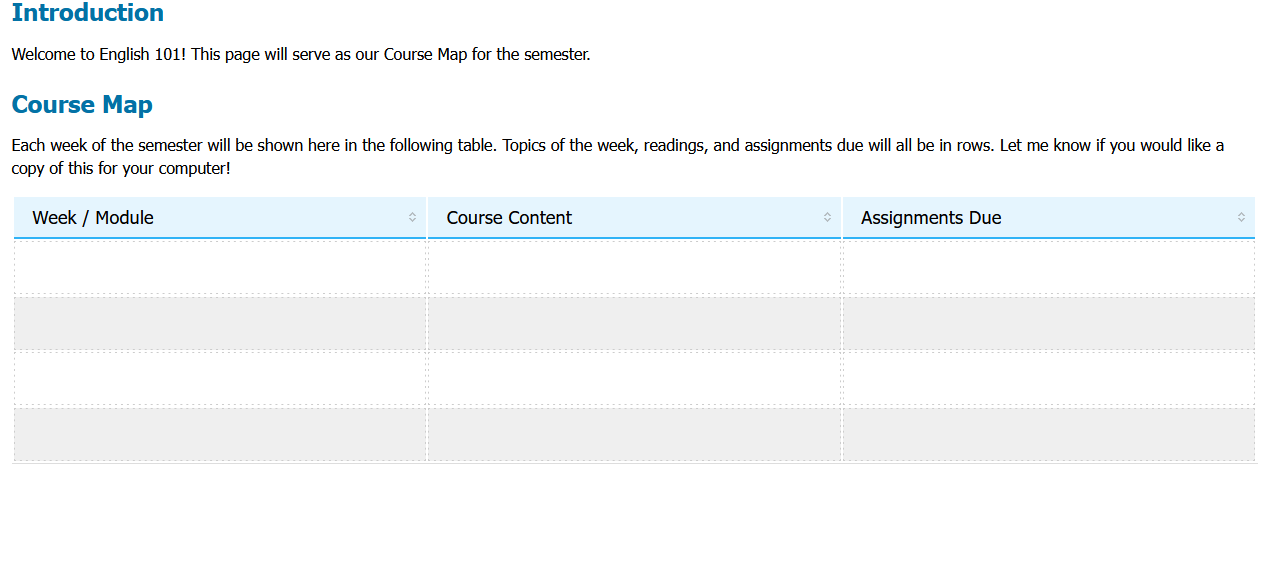
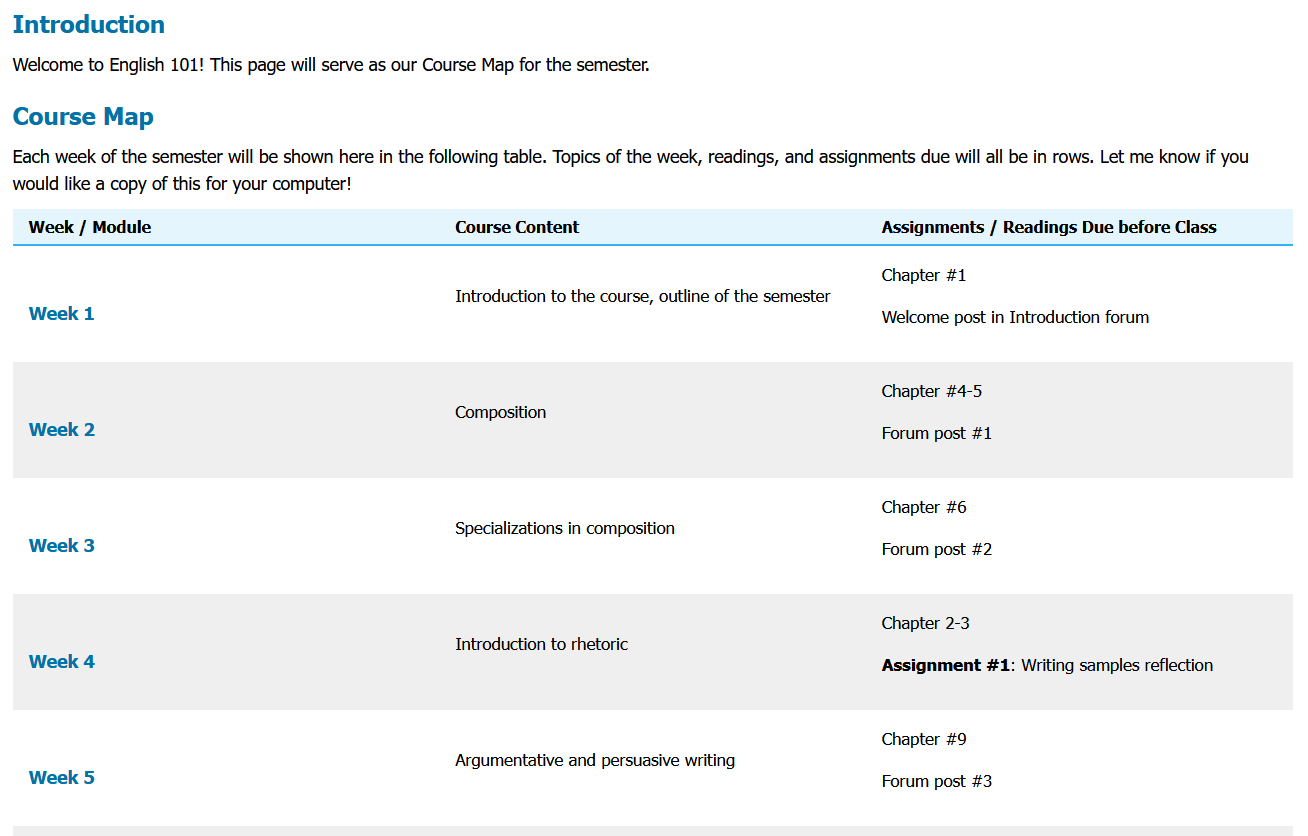
And with that, you've got a simple, working course map for your students! Here is a small example of what a fleshed-out course map could look like using LibreTexts.
Uploading Your Own Course Map to a Page in LibreTexts
You are also free to upload your own designed course maps into LibreTexts. If you created your course map in an online service like Google Drive or OneDrive, you can share links to those documents directly into the page! However, if you have course maps created on your computer using Excel, Word, or another program, you will need to take screenshots and upload them as images in order to share them to LibreTexts pages. The following section will show you how to do both.
Sharing Links to Google Drive or OneDrive Documents
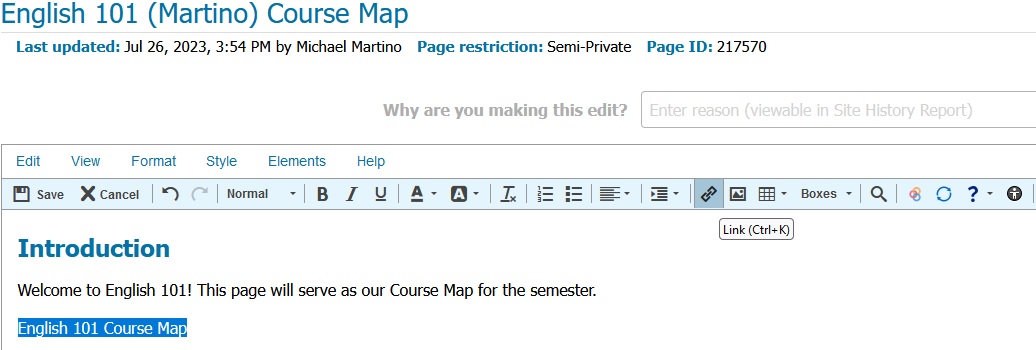
If you would like your course page more consolidated, with links and downloads for all course documents, you can share a link to your course map if it was built in Google Docs or a similar service. An easy way to do this is to hyperlink text, which can be done by typing out text like:
English 101 Course Map
Then, highlight the text you want hyperlinked, click on the chainlink symbol center-right of the edit panel (next to the Image, Tables, and Boxes buttons), or press CTRL+K on your keyboard. This will bring up the link window, which by default will include the Page you're editing's link under the "Link to:" field. Erase that link, then paste whatever Drive or other link you'd like.

Creating Screenshots of your Course Map and Uploading them to your Page
If you already have an existing course map or template you'd like to use, unfortunately LibreTexts does not have an option for attaching non-image files and previewing them on Pages at the moment. The work around for this, though, is attaching screenshots of your course map to your Page.
The following screenshot is a course map template in Word from Course Map Guide.

Sources
Thank you to Anna Mills for her useful course maps! The map that inspired this guide can be found here.
Anna Mills based her course maps off a guide from CourseMapGuide.com, which is a project from the Digital Learning Hub at UC San Diego. They offer a great walkthrough on designing effective course maps using backwards design.