Humanities LibreTexts

3.3: Prewriting

  • Page ID
    23333
  • \( \newcommand{\vecs}[1]{\overset { \scriptstyle \rightharpoonup} {\mathbf{#1}} } \)

    \( \newcommand{\vecd}[1]{\overset{-\!-\!\rightharpoonup}{\vphantom{a}\smash {#1}}} \)

    \( \newcommand{\id}{\mathrm{id}}\) \( \newcommand{\Span}{\mathrm{span}}\)

    ( \newcommand{\kernel}{\mathrm{null}\,}\) \( \newcommand{\range}{\mathrm{range}\,}\)

    \( \newcommand{\RealPart}{\mathrm{Re}}\) \( \newcommand{\ImaginaryPart}{\mathrm{Im}}\)

    \( \newcommand{\Argument}{\mathrm{Arg}}\) \( \newcommand{\norm}[1]{\| #1 \|}\)

    \( \newcommand{\inner}[2]{\langle #1, #2 \rangle}\)

    \( \newcommand{\Span}{\mathrm{span}}\)

    \( \newcommand{\id}{\mathrm{id}}\)

    \( \newcommand{\Span}{\mathrm{span}}\)

    \( \newcommand{\kernel}{\mathrm{null}\,}\)

    \( \newcommand{\range}{\mathrm{range}\,}\)

    \( \newcommand{\RealPart}{\mathrm{Re}}\)

    \( \newcommand{\ImaginaryPart}{\mathrm{Im}}\)

    \( \newcommand{\Argument}{\mathrm{Arg}}\)

    \( \newcommand{\norm}[1]{\| #1 \|}\)

    \( \newcommand{\inner}[2]{\langle #1, #2 \rangle}\)

    \( \newcommand{\Span}{\mathrm{span}}\) \( \newcommand{\AA}{\unicode[.8,0]{x212B}}\)

    \( \newcommand{\vectorA}[1]{\vec{#1}}      % arrow\)

    \( \newcommand{\vectorAt}[1]{\vec{\text{#1}}}      % arrow\)

    \( \newcommand{\vectorB}[1]{\overset { \scriptstyle \rightharpoonup} {\mathbf{#1}} } \)

    \( \newcommand{\vectorC}[1]{\textbf{#1}} \)

    \( \newcommand{\vectorD}[1]{\overrightarrow{#1}} \)

    \( \newcommand{\vectorDt}[1]{\overrightarrow{\text{#1}}} \)

    \( \newcommand{\vectE}[1]{\overset{-\!-\!\rightharpoonup}{\vphantom{a}\smash{\mathbf {#1}}}} \)

    \( \newcommand{\vecs}[1]{\overset { \scriptstyle \rightharpoonup} {\mathbf{#1}} } \)

    \( \newcommand{\vecd}[1]{\overset{-\!-\!\rightharpoonup}{\vphantom{a}\smash {#1}}} \)

    \(\newcommand{\avec}{\mathbf a}\) \(\newcommand{\bvec}{\mathbf b}\) \(\newcommand{\cvec}{\mathbf c}\) \(\newcommand{\dvec}{\mathbf d}\) \(\newcommand{\dtil}{\widetilde{\mathbf d}}\) \(\newcommand{\evec}{\mathbf e}\) \(\newcommand{\fvec}{\mathbf f}\) \(\newcommand{\nvec}{\mathbf n}\) \(\newcommand{\pvec}{\mathbf p}\) \(\newcommand{\qvec}{\mathbf q}\) \(\newcommand{\svec}{\mathbf s}\) \(\newcommand{\tvec}{\mathbf t}\) \(\newcommand{\uvec}{\mathbf u}\) \(\newcommand{\vvec}{\mathbf v}\) \(\newcommand{\wvec}{\mathbf w}\) \(\newcommand{\xvec}{\mathbf x}\) \(\newcommand{\yvec}{\mathbf y}\) \(\newcommand{\zvec}{\mathbf z}\) \(\newcommand{\rvec}{\mathbf r}\) \(\newcommand{\mvec}{\mathbf m}\) \(\newcommand{\zerovec}{\mathbf 0}\) \(\newcommand{\onevec}{\mathbf 1}\) \(\newcommand{\real}{\mathbb R}\) \(\newcommand{\twovec}[2]{\left[\begin{array}{r}#1 \\ #2 \end{array}\right]}\) \(\newcommand{\ctwovec}[2]{\left[\begin{array}{c}#1 \\ #2 \end{array}\right]}\) \(\newcommand{\threevec}[3]{\left[\begin{array}{r}#1 \\ #2 \\ #3 \end{array}\right]}\) \(\newcommand{\cthreevec}[3]{\left[\begin{array}{c}#1 \\ #2 \\ #3 \end{array}\right]}\) \(\newcommand{\fourvec}[4]{\left[\begin{array}{r}#1 \\ #2 \\ #3 \\ #4 \end{array}\right]}\) \(\newcommand{\cfourvec}[4]{\left[\begin{array}{c}#1 \\ #2 \\ #3 \\ #4 \end{array}\right]}\) \(\newcommand{\fivevec}[5]{\left[\begin{array}{r}#1 \\ #2 \\ #3 \\ #4 \\ #5 \\ \end{array}\right]}\) \(\newcommand{\cfivevec}[5]{\left[\begin{array}{c}#1 \\ #2 \\ #3 \\ #4 \\ #5 \\ \end{array}\right]}\) \(\newcommand{\mattwo}[4]{\left[\begin{array}{rr}#1 \amp #2 \\ #3 \amp #4 \\ \end{array}\right]}\) \(\newcommand{\laspan}[1]{\text{Span}\{#1\}}\) \(\newcommand{\bcal}{\cal B}\) \(\newcommand{\ccal}{\cal C}\) \(\newcommand{\scal}{\cal S}\) \(\newcommand{\wcal}{\cal W}\) \(\newcommand{\ecal}{\cal E}\) \(\newcommand{\coords}[2]{\left\{#1\right\}_{#2}}\) \(\newcommand{\gray}[1]{\color{gray}{#1}}\) \(\newcommand{\lgray}[1]{\color{lightgray}{#1}}\) \(\newcommand{\rank}{\operatorname{rank}}\) \(\newcommand{\row}{\text{Row}}\) \(\newcommand{\col}{\text{Col}}\) \(\renewcommand{\row}{\text{Row}}\) \(\newcommand{\nul}{\text{Nul}}\) \(\newcommand{\var}{\text{Var}}\) \(\newcommand{\corr}{\text{corr}}\) \(\newcommand{\len}[1]{\left|#1\right|}\) \(\newcommand{\bbar}{\overline{\bvec}}\) \(\newcommand{\bhat}{\widehat{\bvec}}\) \(\newcommand{\bperp}{\bvec^\perp}\) \(\newcommand{\xhat}{\widehat{\xvec}}\) \(\newcommand{\vhat}{\widehat{\vvec}}\) \(\newcommand{\uhat}{\widehat{\uvec}}\) \(\newcommand{\what}{\widehat{\wvec}}\) \(\newcommand{\Sighat}{\widehat{\Sigma}}\) \(\newcommand{\lt}{<}\) \(\newcommand{\gt}{>}\) \(\newcommand{\amp}{&}\) \(\definecolor{fillinmathshade}{gray}{0.9}\)
    Learning Objectives
    • Identify purpose and defining characteristics of prewriting
    • Identify various prewriting strategies, including freewriting, listing, questioning, clustering, and dialoguing
    • Identify rhetorical context for the writing task
    • Identify working thesis statement

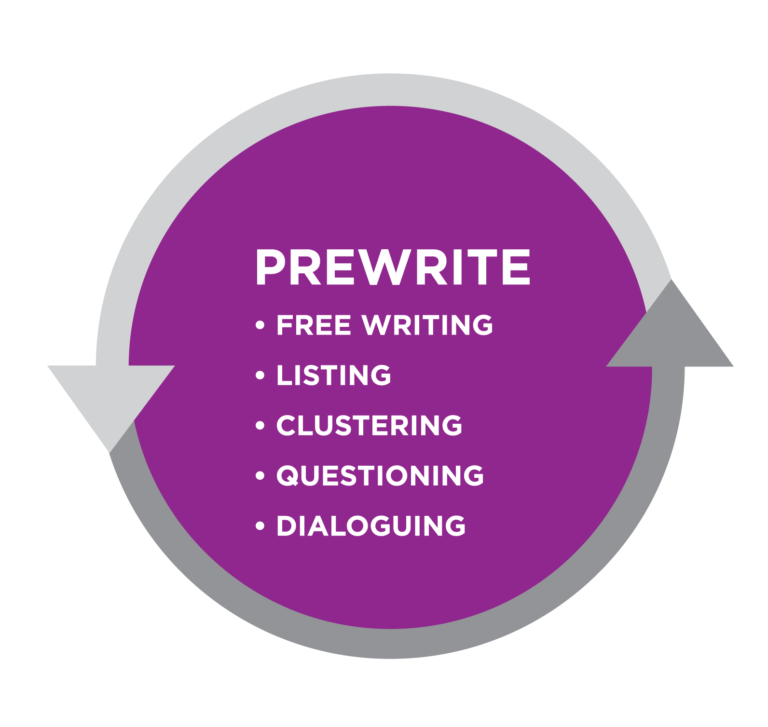
    Graphic titled Prewrite. Bullet list: Free writing, listing, clustering, questioning, dialoguing. All text in a purple circle bordered by gray arrows.

    Figure \(\PageIndex{1}\)

    Many students — and some teachers — want to skip the pre-writing stage of the writing process because they see it as unnecessarily burdensome and time-consuming. However, teachers who dismiss the pre-writing stage as being completely unnecessary are performing a disservice to many of their students. Pre-writing is an essential part of the entire writing process because it enables you to begin documenting the process by which the eventual essay will be formed and evaluated.

    The term “pre-writing” may be a bit misleading because writing can and often does occur at this critical stage. For example, written notes and outlines, including graphic organizers, can serve as a record of one’s ideas and the sources of those ideas. A preliminary thesis or hypothesis could inform the process and the product.

    Many people do brainstorm via their thoughts without recording those ideas and sources in permanent form prior to the next steps in the writing process. Most developing writers, however, need to record their pre-writing ideas in permanent form so that those ideas can clearly inform and guide the thinking and writing process, resulting in a coherent, well-organized product or text.

    Prewriting Strategies

    The term “pre-writing” conjures up a lot of strange activities and practices. You’ve probably tried many different prewriting strategies in the past, and may have a good idea of what works for you and what doesn’t.

    Keep in mind that the KIND of writing project you’re working on can impact how effective a particular technique is to use in a given situation. Something that you’ve relied on before may not be as effective as you move into new subjects. Experiment often.

    Make it fun! Here are some to try:

    Freewriting

    black colored pencil

    Figure \(\PageIndex{2}\)

    Set a timer for a short amount of time (5 minutes or 10 minutes are good options). During that period, write anything that comes to mind related to your topic. The goal is to not worry about what comes out of your pen or keyboard. Instead, just free your mind to associate as it wishes. It’s amazingly productive for rich ideas, and it’s nice not to have to worry about spelling and grammar.

    If it’s hard for you to “turn off” the worry about writing well, challenge yourself to write a few awful, terrible sentences as the beginning.

    List-Making

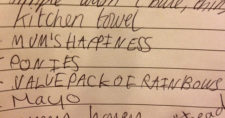
    handwritten shopping list. The legible lines read: kitchen towel, mum's happiness, ponies, value pack of rainbows, mayo

    Figure \(\PageIndex{3}\)

    If you’re a list-maker by nature, there’s no reason not to harness that for academic writing purposes. Jot notes about major ideas related to the subject you’re working with. This also works well with a time limit, like 10 minutes. A bonus feature–after you’ve had time to reflect on your list, you can rearrange it in hierarchical order, and create a basic outline quickly.

    Clustering

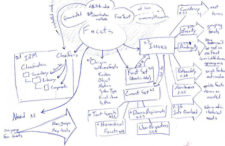
    handwritten mind map in blue ink. Topic: Faceted Classification, IT. Moves from bubble at central top, to squares on left, to arrow call-outs on right

    Figure \(\PageIndex{4}\)

    Also known as “mapping,” this is a more visual form of brainstorming. It asks you to come up with topic ideas, and draw lines to connect ideas and figure out sub-categories and related ideas. You can end up with a quite extensive “bubble cloud” as a result. This also works well within a time limit, like 10 minutes.

    Questioning

    question mark in speech bubble agains blue circle background

    Figure \(\PageIndex{5}\)

    The way to find answers is to ask questions–seems simple enough. This applies to early-stage writing processes, just like everything else. When you have a topic in mind, asking and answering questions about it is a good way to figure out directions your writing might take.

    Start with just listing the questions. What do you want or need to know the answers to regarding your topic?

    Dialoging

    Illustration of two people with overlapping speech bubbles, one pink and one blue (forming purple where they overlap)

    Figure \(\PageIndex{6}\)

    Another approach to getting inside a topic is to imagine two people talking about it. Write out a script for two characters you invent. Give them names and brief personalities–why are they interested in this subject? Assume one of them knows more than the other about it.

    An option is to find another person to participate with you. Write down a back and forth conversation you have about the topic. Try texting or emailing one another to make it feel authentic.

    Rhetorical Context For Yourself as a Writer

    External forces work to shape any text you read. The author’s background, the intended audience, and the intended purpose of a text combine to influence the text itself.

    The same is true for items you write. Who you are as an author, who you anticipate as your audience, and what your purpose for writing is, will all shape what you produce.

    This presentation addresses considerations about Author, Audience, and Purpose when you write.

    Author, audience, purpose in writing from Lumen Learning

    The Working Thesis Statement

    Students often see a thesis statement as an object of mystery. It helps to realize that they are friend, not foe. They are often quite useful tools, both in helping you write and in making sure the final product is powerful.

    Two cats in an urban setting. Tabby on right has thought bubble: "Who goes there? Friend or foe?" Black cat on left, in submissive position, has thought bubble: "f-f-f-friend."

    Figure \(\PageIndex{7}\)

    Simply put, a thesis tells the reader your topic and your position on that topic.

    When you’ve decided on a topic and explored it with prewriting activities, drafting a working thesis is a very helpful next step. As the name implies, a working thesis is a work in progress–it helps you form initial ideas, but is open to change as you keep working on the project.

    A working thesis statement is just like a regular thesis statement, except that you can tweak it and change it as you research and write. It’s sort of like making a plan for the weekend on Tuesday night: you know the plan will probably be modified, but it’s a good place to start. — Portland State University Writing Center[1]

    Self-Check

    References

    1. "Step Three: Developing a Working Thesis Statement" Writing Resources Guided Tour

    3.3: Prewriting is shared under a not declared license and was authored, remixed, and/or curated by LibreTexts.

    • Was this article helpful?