4: Sensor
- Page ID
- 91119
\( \newcommand{\vecs}[1]{\overset { \scriptstyle \rightharpoonup} {\mathbf{#1}} } \)
\( \newcommand{\vecd}[1]{\overset{-\!-\!\rightharpoonup}{\vphantom{a}\smash {#1}}} \)
\( \newcommand{\dsum}{\displaystyle\sum\limits} \)
\( \newcommand{\dint}{\displaystyle\int\limits} \)
\( \newcommand{\dlim}{\displaystyle\lim\limits} \)
\( \newcommand{\id}{\mathrm{id}}\) \( \newcommand{\Span}{\mathrm{span}}\)
( \newcommand{\kernel}{\mathrm{null}\,}\) \( \newcommand{\range}{\mathrm{range}\,}\)
\( \newcommand{\RealPart}{\mathrm{Re}}\) \( \newcommand{\ImaginaryPart}{\mathrm{Im}}\)
\( \newcommand{\Argument}{\mathrm{Arg}}\) \( \newcommand{\norm}[1]{\| #1 \|}\)
\( \newcommand{\inner}[2]{\langle #1, #2 \rangle}\)
\( \newcommand{\Span}{\mathrm{span}}\)
\( \newcommand{\id}{\mathrm{id}}\)
\( \newcommand{\Span}{\mathrm{span}}\)
\( \newcommand{\kernel}{\mathrm{null}\,}\)
\( \newcommand{\range}{\mathrm{range}\,}\)
\( \newcommand{\RealPart}{\mathrm{Re}}\)
\( \newcommand{\ImaginaryPart}{\mathrm{Im}}\)
\( \newcommand{\Argument}{\mathrm{Arg}}\)
\( \newcommand{\norm}[1]{\| #1 \|}\)
\( \newcommand{\inner}[2]{\langle #1, #2 \rangle}\)
\( \newcommand{\Span}{\mathrm{span}}\) \( \newcommand{\AA}{\unicode[.8,0]{x212B}}\)
\( \newcommand{\vectorA}[1]{\vec{#1}} % arrow\)
\( \newcommand{\vectorAt}[1]{\vec{\text{#1}}} % arrow\)
\( \newcommand{\vectorB}[1]{\overset { \scriptstyle \rightharpoonup} {\mathbf{#1}} } \)
\( \newcommand{\vectorC}[1]{\textbf{#1}} \)
\( \newcommand{\vectorD}[1]{\overrightarrow{#1}} \)
\( \newcommand{\vectorDt}[1]{\overrightarrow{\text{#1}}} \)
\( \newcommand{\vectE}[1]{\overset{-\!-\!\rightharpoonup}{\vphantom{a}\smash{\mathbf {#1}}}} \)
\( \newcommand{\vecs}[1]{\overset { \scriptstyle \rightharpoonup} {\mathbf{#1}} } \)
\(\newcommand{\longvect}{\overrightarrow}\)
\( \newcommand{\vecd}[1]{\overset{-\!-\!\rightharpoonup}{\vphantom{a}\smash {#1}}} \)
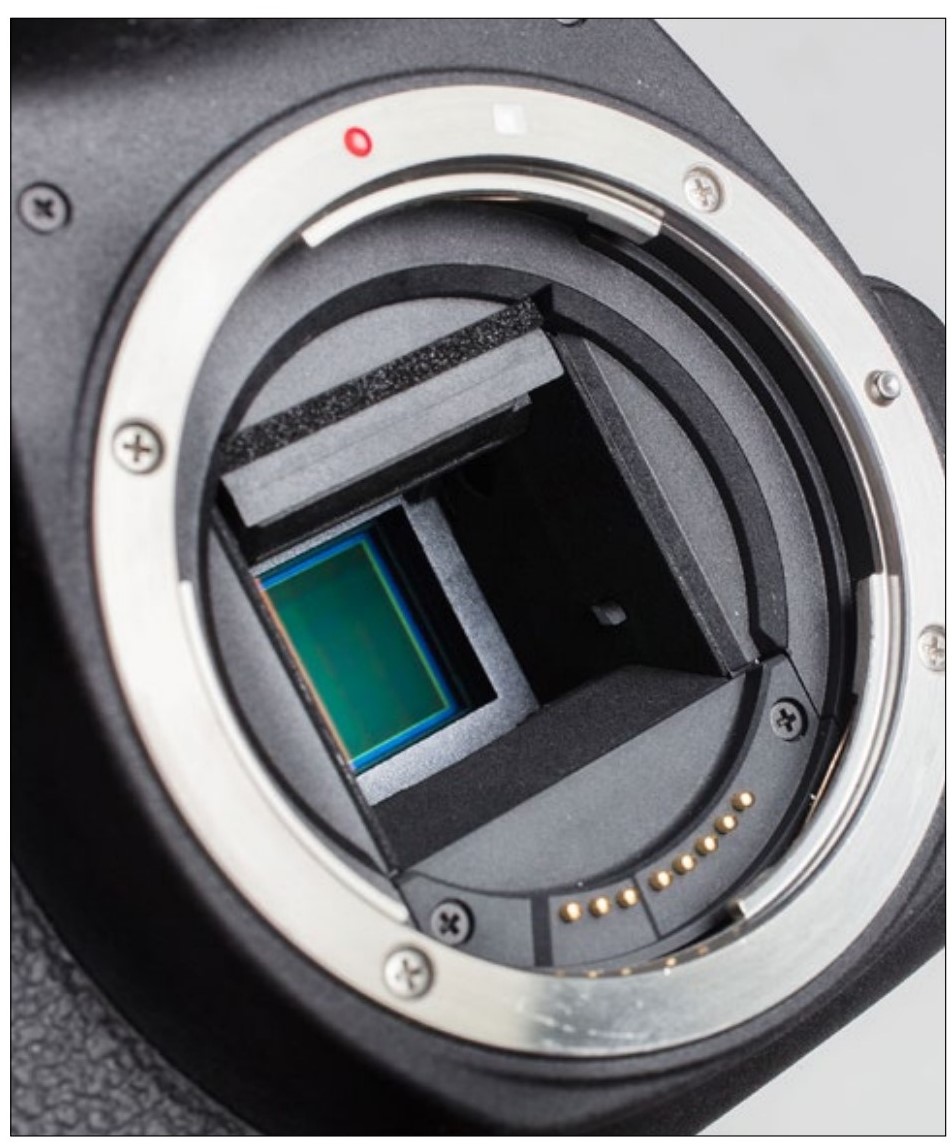
\(\newcommand{\avec}{\mathbf a}\) \(\newcommand{\bvec}{\mathbf b}\) \(\newcommand{\cvec}{\mathbf c}\) \(\newcommand{\dvec}{\mathbf d}\) \(\newcommand{\dtil}{\widetilde{\mathbf d}}\) \(\newcommand{\evec}{\mathbf e}\) \(\newcommand{\fvec}{\mathbf f}\) \(\newcommand{\nvec}{\mathbf n}\) \(\newcommand{\pvec}{\mathbf p}\) \(\newcommand{\qvec}{\mathbf q}\) \(\newcommand{\svec}{\mathbf s}\) \(\newcommand{\tvec}{\mathbf t}\) \(\newcommand{\uvec}{\mathbf u}\) \(\newcommand{\vvec}{\mathbf v}\) \(\newcommand{\wvec}{\mathbf w}\) \(\newcommand{\xvec}{\mathbf x}\) \(\newcommand{\yvec}{\mathbf y}\) \(\newcommand{\zvec}{\mathbf z}\) \(\newcommand{\rvec}{\mathbf r}\) \(\newcommand{\mvec}{\mathbf m}\) \(\newcommand{\zerovec}{\mathbf 0}\) \(\newcommand{\onevec}{\mathbf 1}\) \(\newcommand{\real}{\mathbb R}\) \(\newcommand{\twovec}[2]{\left[\begin{array}{r}#1 \\ #2 \end{array}\right]}\) \(\newcommand{\ctwovec}[2]{\left[\begin{array}{c}#1 \\ #2 \end{array}\right]}\) \(\newcommand{\threevec}[3]{\left[\begin{array}{r}#1 \\ #2 \\ #3 \end{array}\right]}\) \(\newcommand{\cthreevec}[3]{\left[\begin{array}{c}#1 \\ #2 \\ #3 \end{array}\right]}\) \(\newcommand{\fourvec}[4]{\left[\begin{array}{r}#1 \\ #2 \\ #3 \\ #4 \end{array}\right]}\) \(\newcommand{\cfourvec}[4]{\left[\begin{array}{c}#1 \\ #2 \\ #3 \\ #4 \end{array}\right]}\) \(\newcommand{\fivevec}[5]{\left[\begin{array}{r}#1 \\ #2 \\ #3 \\ #4 \\ #5 \\ \end{array}\right]}\) \(\newcommand{\cfivevec}[5]{\left[\begin{array}{c}#1 \\ #2 \\ #3 \\ #4 \\ #5 \\ \end{array}\right]}\) \(\newcommand{\mattwo}[4]{\left[\begin{array}{rr}#1 \amp #2 \\ #3 \amp #4 \\ \end{array}\right]}\) \(\newcommand{\laspan}[1]{\text{Span}\{#1\}}\) \(\newcommand{\bcal}{\cal B}\) \(\newcommand{\ccal}{\cal C}\) \(\newcommand{\scal}{\cal S}\) \(\newcommand{\wcal}{\cal W}\) \(\newcommand{\ecal}{\cal E}\) \(\newcommand{\coords}[2]{\left\{#1\right\}_{#2}}\) \(\newcommand{\gray}[1]{\color{gray}{#1}}\) \(\newcommand{\lgray}[1]{\color{lightgray}{#1}}\) \(\newcommand{\rank}{\operatorname{rank}}\) \(\newcommand{\row}{\text{Row}}\) \(\newcommand{\col}{\text{Col}}\) \(\renewcommand{\row}{\text{Row}}\) \(\newcommand{\nul}{\text{Nul}}\) \(\newcommand{\var}{\text{Var}}\) \(\newcommand{\corr}{\text{corr}}\) \(\newcommand{\len}[1]{\left|#1\right|}\) \(\newcommand{\bbar}{\overline{\bvec}}\) \(\newcommand{\bhat}{\widehat{\bvec}}\) \(\newcommand{\bperp}{\bvec^\perp}\) \(\newcommand{\xhat}{\widehat{\xvec}}\) \(\newcommand{\vhat}{\widehat{\vvec}}\) \(\newcommand{\uhat}{\widehat{\uvec}}\) \(\newcommand{\what}{\widehat{\wvec}}\) \(\newcommand{\Sighat}{\widehat{\Sigma}}\) \(\newcommand{\lt}{<}\) \(\newcommand{\gt}{>}\) \(\newcommand{\amp}{&}\) \(\definecolor{fillinmathshade}{gray}{0.9}\)Deep in the bowels of your camera, behind the lens and shutter (also behind the mirror on DSLRs), lies the sensor. This is the delicate (and expensive) silicon chip that the image is projected upon. Like your eye’s retina, this chip is responsible for recording an optical image and converting it to something the brain can recognize. In the camera’s case, the brain is a little computer inside the camera. This chapter examines how a sensor works along with some practical implications of this.
|
The sensor here is green. It is normally covered by both the shutter and the mirror on a DSLR. |
The surface of a sensor is made up of millions of microscopic squares in a grid. These squares are called pixels. Each one of these pixels is capable of reading the brightness of light that falls upon it from the lens and converting this brightness to a number between 0 and 255. These numbers are called levels. If no light hits the tiny pixel it will output the level 0. If a lot of light hits the pixel it will output the level 255. Your camera’s ‘brain’ interprets 0 as black and 255 as white and every level in between as varying lightnesses. Each of these millions of pixels output different levels according to the brightness of the light hitting it. This is how an image is constructed by the camera’s computer.
A newer camera may have a grid of 6000 by 4000 pixels. If you remember your math, 6,000 x 4,000 is 24 million. That is a lot of those microscopic pixels, each reporting to your camera’s computer the amount of light that hit it.
|
The effective sensor for this image has a grid of 100 by 50 pixels. Since each pixel can be only one color or tone at once, having 5,000 pixels is not enough. Fewer pixels means each pixel has to be bigger. That is why the pixels here are big enough to clearly see. |
|
On the left is an enlarged pixel on the sensor. On the right it is shown actual size. Each pixel on the sensor is too small to be seen with the naked eye. |
|
The pixel on the left was hit by no light, so has a level of 0 and will be black in the image. The pixel next to it was hit by a small amount of light so has a level of 70 and will be dark gray in the image. So on for the others. Sometimes these numbers are expressed as a range from 1–256. |
Film and SensorThe main operating parts of a camera have remained unchanged for over fifty years. The only significant change has been to replace the film, a light sensitive piece of plastic, with a sensor. So, with a film camera, you would load a strip of film and take a picture. This would make an image on a small portion of it. You would then wind to a new piece of film. |
Having a high number of these pixels is crucial. Imagine a sensor that only had four (below). Every photograph you took would only have four differently toned areas. It would be a stretch to call this image a photograph. So, the more pixels there are, the better. This is why camera manufacturers tout the number of pixels as a megapixel number, with 24 million pixels reported as 24 megapixel.
|
4 pixel image of a calico cat chasing a mouse |
Pixel is short for picture element, and since each can only be one color, pixels are indeed the basic elements that make up an image, whether it is in a camera, on a computer screen, or contained as information in an image file.
Color
Humans are only sensitive to three different colors (wavelengths, but let’s not get too complicated) of light. These colors are (very) approximately red, green, and blue.
Wait (I can hear you say), I see more than three colors! Not really—when you perceive a color such as yellow, what you are really seeing is a mix of red and green. By mixing red, green, and blue in varying amounts of intensity (brightnesses) you perceive many different colors.
A camera’s sensor works in much the same way as our eyes. Each microscopic pixel has a color filter covering it. This filter is either Red, Green, or Blue (RGB), making that pixel sensitive to only that color. If it has a blue filter covering it, only blue light is let in to activate the pixel. The same for red and green. This is how the sensor interprets a full range of color.
Pixels Don’t ExistThe term pixel is actually a lot more slippery than you might think, and some would claim that in reference to a sensor, there is really no such thing because pixels are descriptions, not objects. But, like defining light as light rays, defining a whole range of similar things as pixels has practical benefits and isn’t terribly incorrect. |
Rods & ConesThe bright-light sensors in your eyes are cones, and they are each sensitive to one of three wavelengths (colors) of light, which is how you see color. The rods are for dim light, and there is only one kind, so in very dim situations you do not see color. Some people have four or more types of cones, but it is unknown what functionality the extra ones have. ...Remember that I have pointed out that you didn’t have to read these gray sidebars. |
Since every pixel in the camera sees only one of three colors, the number of pixels that accurately depict color is only a third of the total number of pixels. The camera’s processor guesses at (interpolates) what color each pixel should be based on its neighbors’ color and tone.
Most color is made or viewed using three colors, and it is a process that has been in use for well over a hundred years.
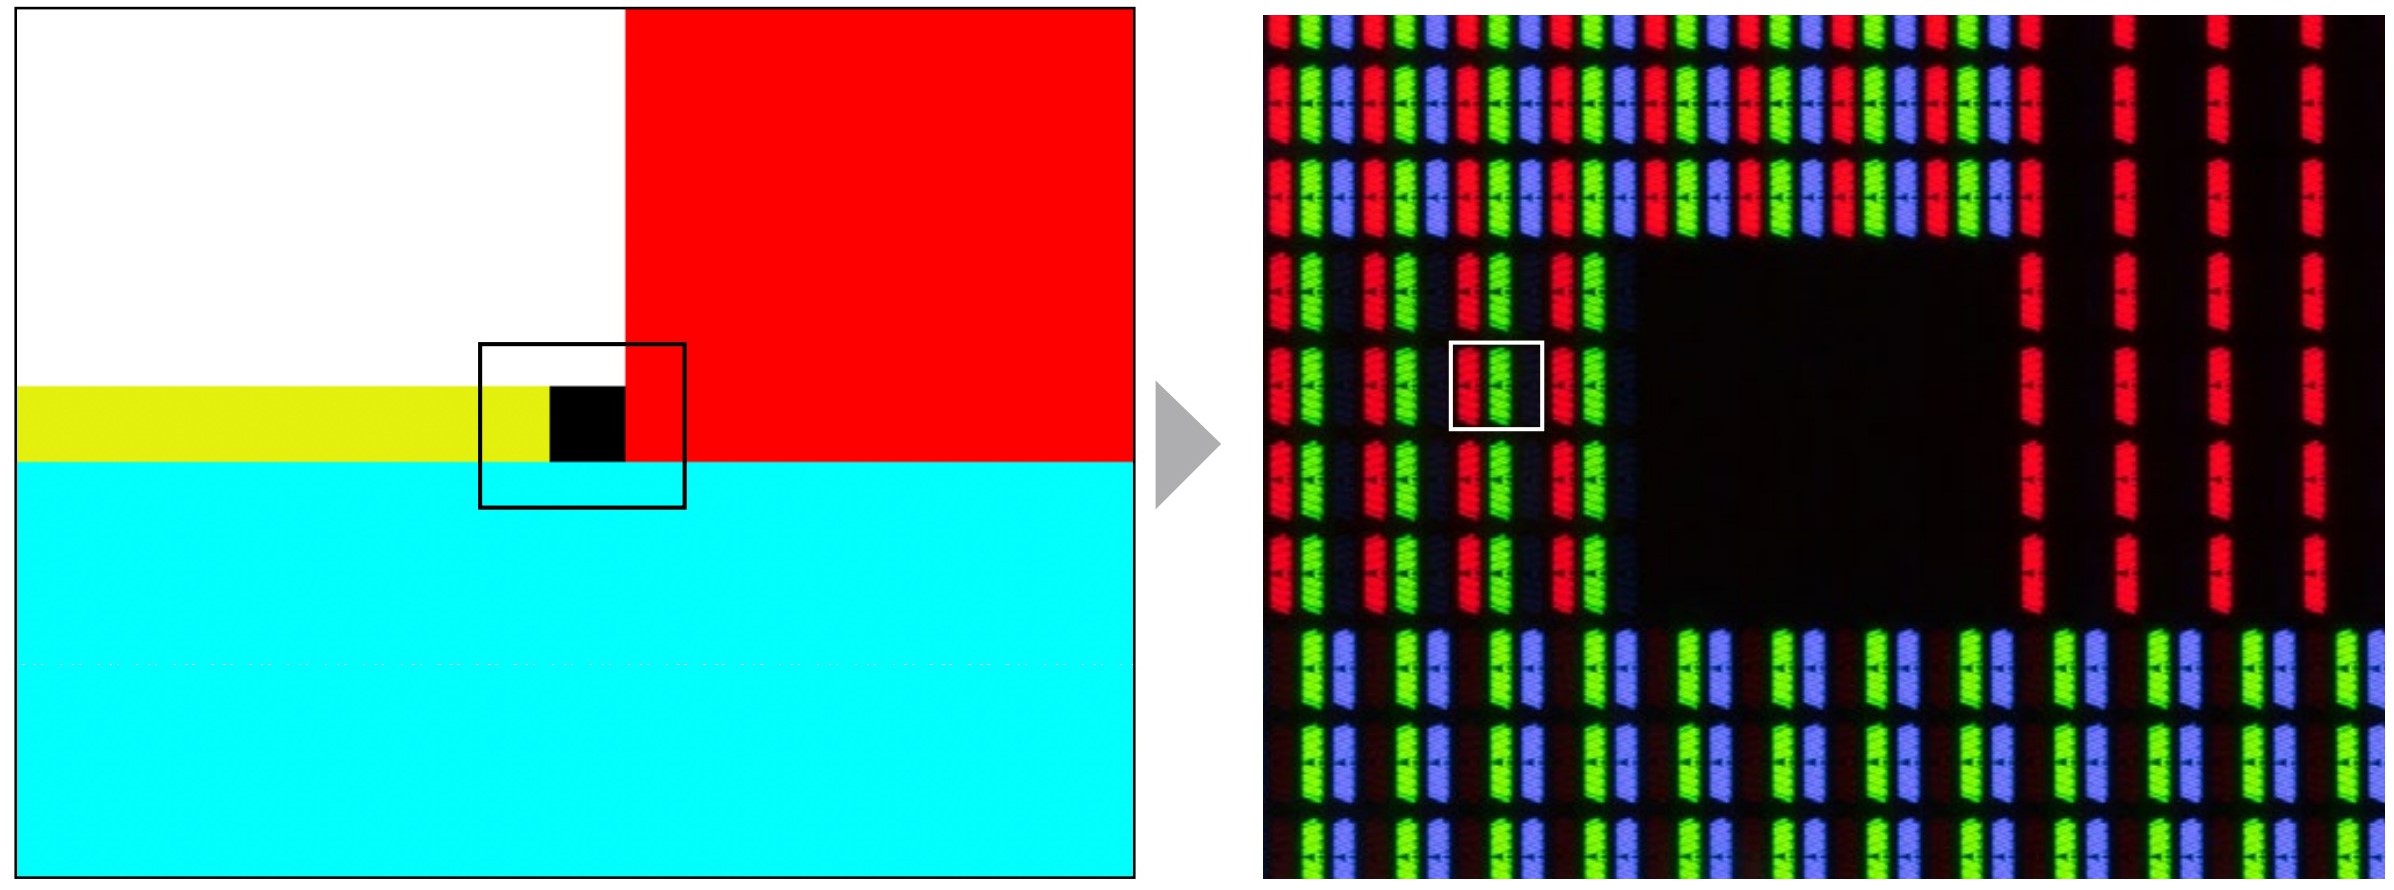
For example, three colors make all colors that can be seen on the display with which you are viewing this book. The screen is actually made up of very small areas of only red, green, and blue. Unlike the sensor, each set of the three RGB colors makes up one ‘pixel’ on the screen.
So, while a pixel in a camera image is one color made from components of RGB, the screen has the set of three RGB colors contained in each ‘pixel’.
Pixels and Bits
Since those tiny pixels in the camera image are the basic building-blocks of an image, they deserve a closer look in relation to to color. Remember that unlike the screen, each pixel in a photographic image is simply a square of a single color.
In a black and white (grayscale) image, each of the pixels can be any one of 256 levels, or shades of gray. This 256 level image is called an 8 bit image.
|
LEFT Color image in Photoshop unmagnified. Black rectangle shows detail magnified at... RIGHT A detail of this same image showing a very high magnification of the screen. A yellow ‘pixel’ is shown with the white square. The red, green, and blue portions The image on the right is an actual photograph of part of the left image displayed on a screen. A macro lens which allows for a high degree of magnification was used to photograph the screen. |
More Pixels and Bits8 bit means that there are 8 binary options for each pixel. These binary options are the computer’s most basic way of storing information. So, 2x2x2x2x2x2x2x2=256. This range of tonal (or color) possibilities is also called the bit depth of an image. 24 bit images have one of these channels for each of the three (R-G-B) colors, so 8 bit+8 bit+8 bit=24 bit. |
Color images have one of these 8 bit channels for each of the three colors (Red, Green, and Blue). These are called 24 bit RGB images. Each pixel in 24 bit images can be one of about 17 million colors.
You might see some images that are described as having more than 24 bits (8 bits per channel). Each pixel is still a single color, but there is added information such as tones that exceed 256 levels or an overlay of transparency information.
Pixel Flaws
Previously it was stated that the more pixels a sensor has, the better. This is not strictly correct because in the real world, every pixel is far from perfect. We have already seen that each pixel can only decode one of the three colors by itself, so must interpolate some color information.
|
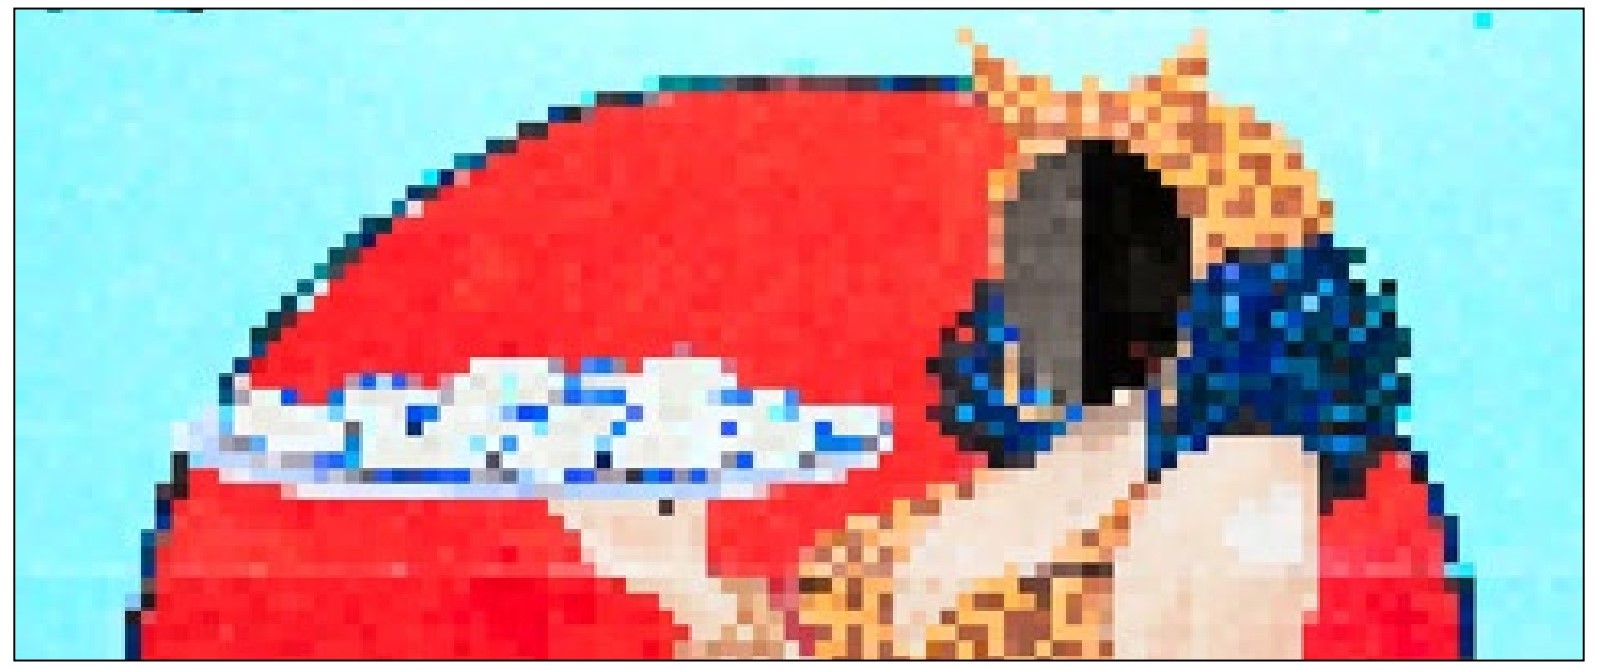
Enlarge any digital image and the individual pixels are easily seen. Each pixel is only one color. Since the pixels are usually too small for our vision to distinguish, they merge to form a coherent image. |
|
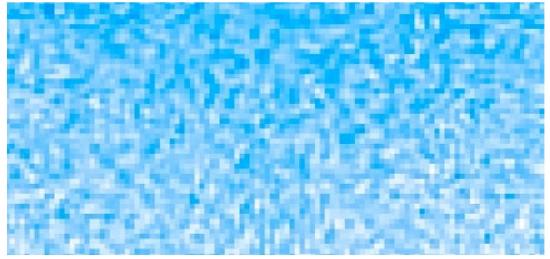
Close crop (detail) of clear blue sky. Contrast is increased to clearly show pixel variations. |
When working together, individual pixels in camera sensors have many flaws. One of these flaws can be readily seen: In Photoshop or some other image program, look at a photograph with a large color area like the sky. Now enlarge it enough to see the individual pixels. You will notice that what should be all the same color and tone of pixels is populated with many different colors and tones. The better the sensor, the less variation in tone and color you will see, but even with a sensor in an expensive camera you will see quite a bit of variation.
This sensor defect is called noise, and in some situations it can very noticeable, such as with small-sensor cameras and photographs taken in low-light situations. There are a many other sensors defects (including in the route from the sensor to the processor), but it is enough to know that all pixels have faults, and as a general rule, inexpensive cameras have inferior pixels and more faults in sharpness, noise, color, and tonality.
Sensor Size
A general rule of thumb is that larger sensors (in physical size) have better pixel quality and therefore better image quality. This is regardless of the number of megapixels. Unfortunately, a larger sensor also means a larger, heavier, and more expensive camera.
The largest common sensor size is called a full-frame sensor because it takes it’s size from the 35 mm film used in film cameras. The width of this sensor is 36 mm (1.4 inches). This size of sensor is capable of very high quality, but the sensor itself can cost well over a thousand dollars, and cameras that use this size are large.
The next size smaller in common sensor sizes is called an APS-C, which also takes its size from a film camera format. This sensor’s width is 23 mm (0.9 inches). It is the sensor size used in most cameras discussed at the beginning of this book, and in many ways it is the sweet spot in sensor size. Although it has less than half of the area of a full-frame sensor, it is still big enough to make very high quality images. It is a fraction of the cost of the bigger sensor, and allows the camera to be much smaller and less expensive. Only slightly smaller is the Four Thirds System sensor which is also a very common size.
Sensor sizes smaller than the one inch sensors found in smaller mirrorless cameras come with much lower potential image quality. With improvements in cellphone camera sensors (which are necessarily extremely small), it would even be safe to say that small point & shoot cameras are rarely worth buying unless you want the telephoto feature they have. These small cameras have few usable controls and their image quality is only slightly better than cellphones.
|
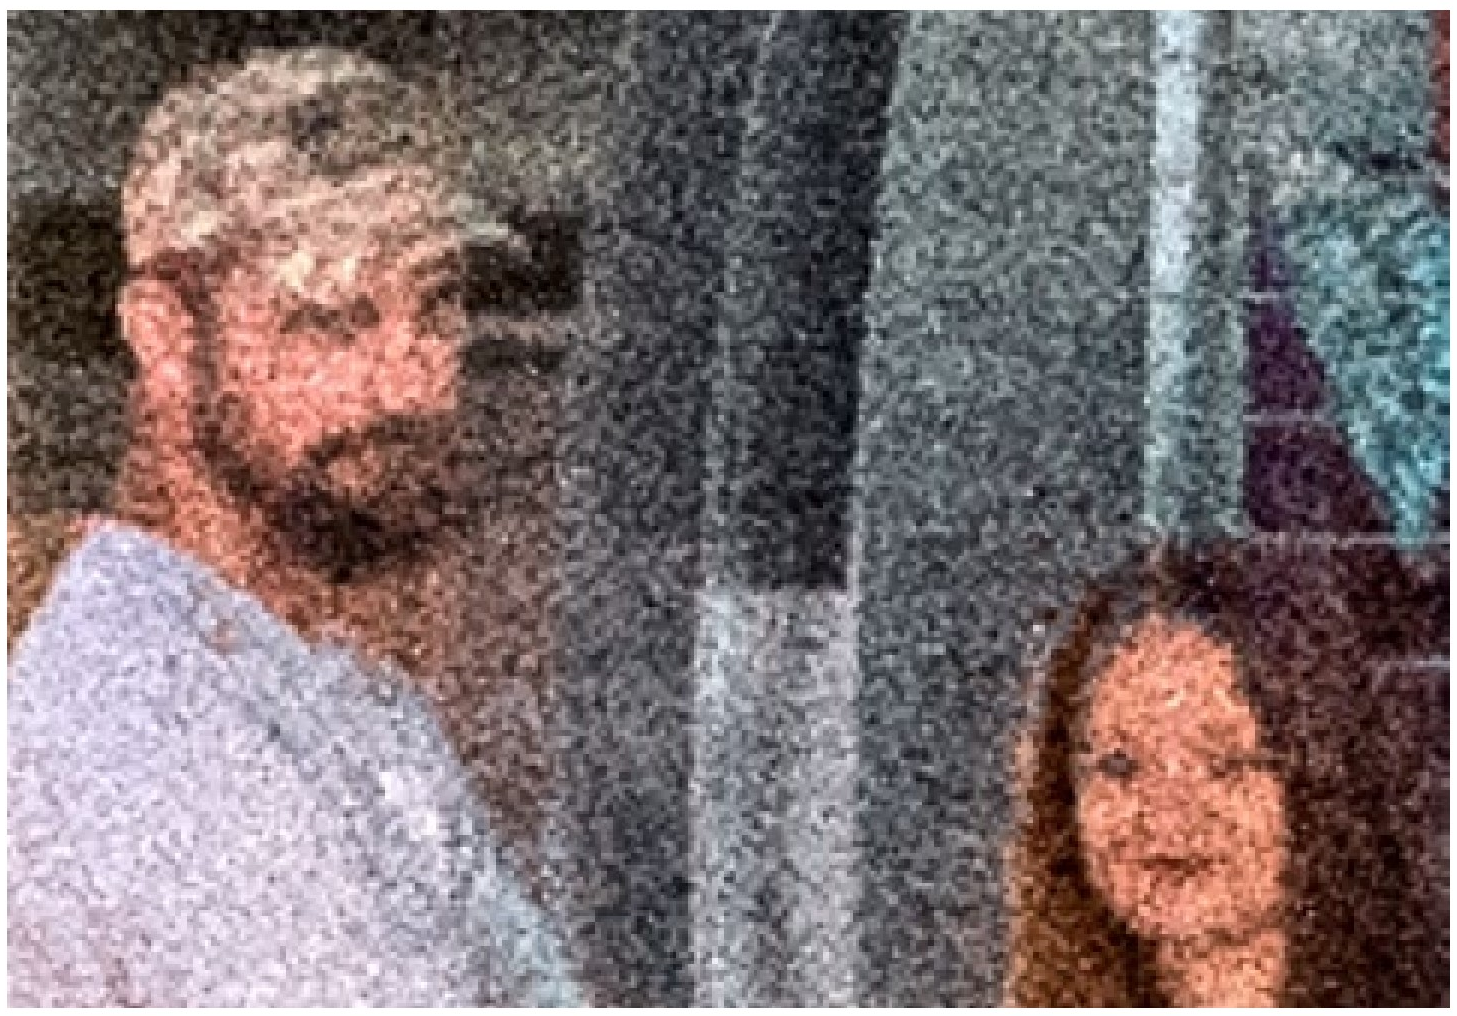
Image detail of people in low light. Without noise (with perfect pixels) the shirt would be one color and tone. I am not sure if the woman would be winking or not... |
|
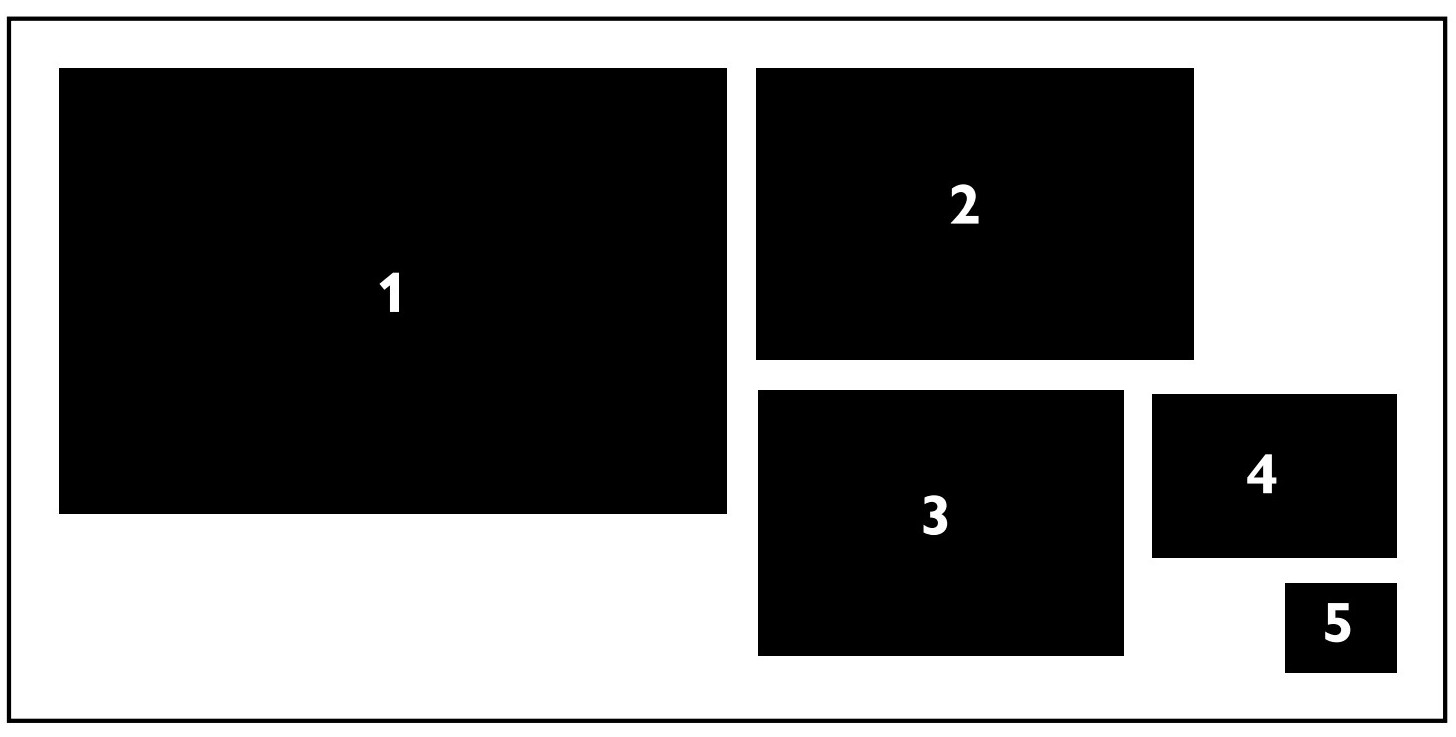
Relative sizes of 1 a full frame sensor, 2 the APS-C sensor found in most DSLRS, 3 the Four-Thirds sensor in many mirrorless cameras, 4 the one inch sensor in some better point and shoot cameras, and 5 the sensor in a cellphone camera. Interestingly, one inch sensors are not really one inch in any dimension. |
White Balance
Different light sources emit different colors. For instance, the light from the sun is yellowish-orange compared to the light from the sky, and the light from the sky gets much more blue after the sun goes down. Indoor lighting is much more yellowish than daylight, unless it is fluorescent light, which is also greenish.
Your eyes (actually brain) pretty much always adapt to the color of these light sources, so you don’t even notice that they are different colors. But you can see them by fooling your brain a bit: After the sun goes down, but while it is still light out, turn on your inside lights, then walk out of your dwelling and look back into the windows. See how yellowish it looks in there? Walk back in and the yellow will disappear.
|
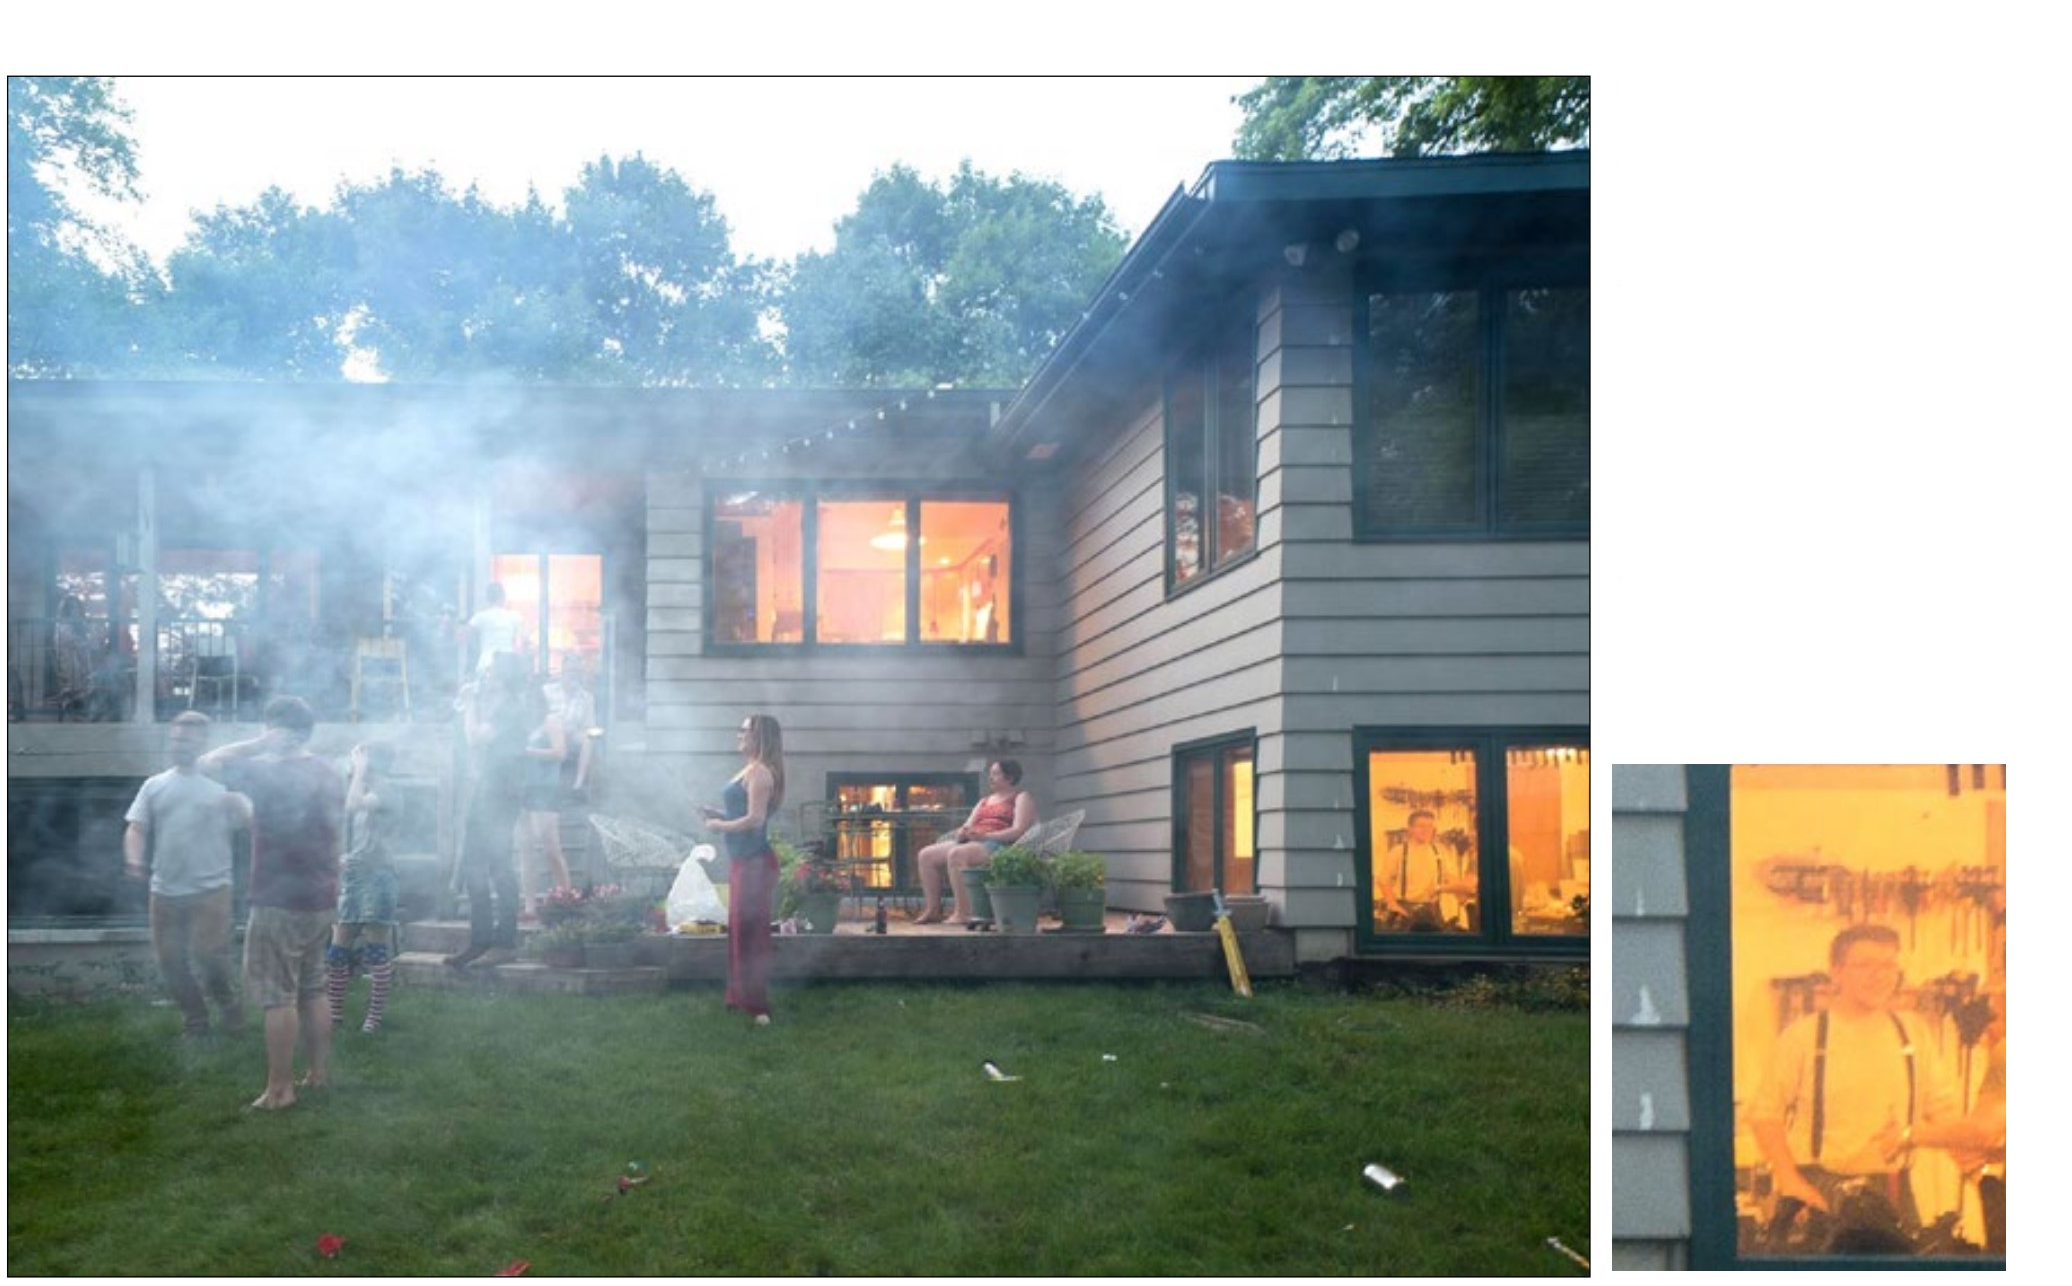
The same scene at different white balances. At left the white balance is set to daylight, the approximate color of the light hitting the outside of the house (notice the yellowish light inside the house). |
|
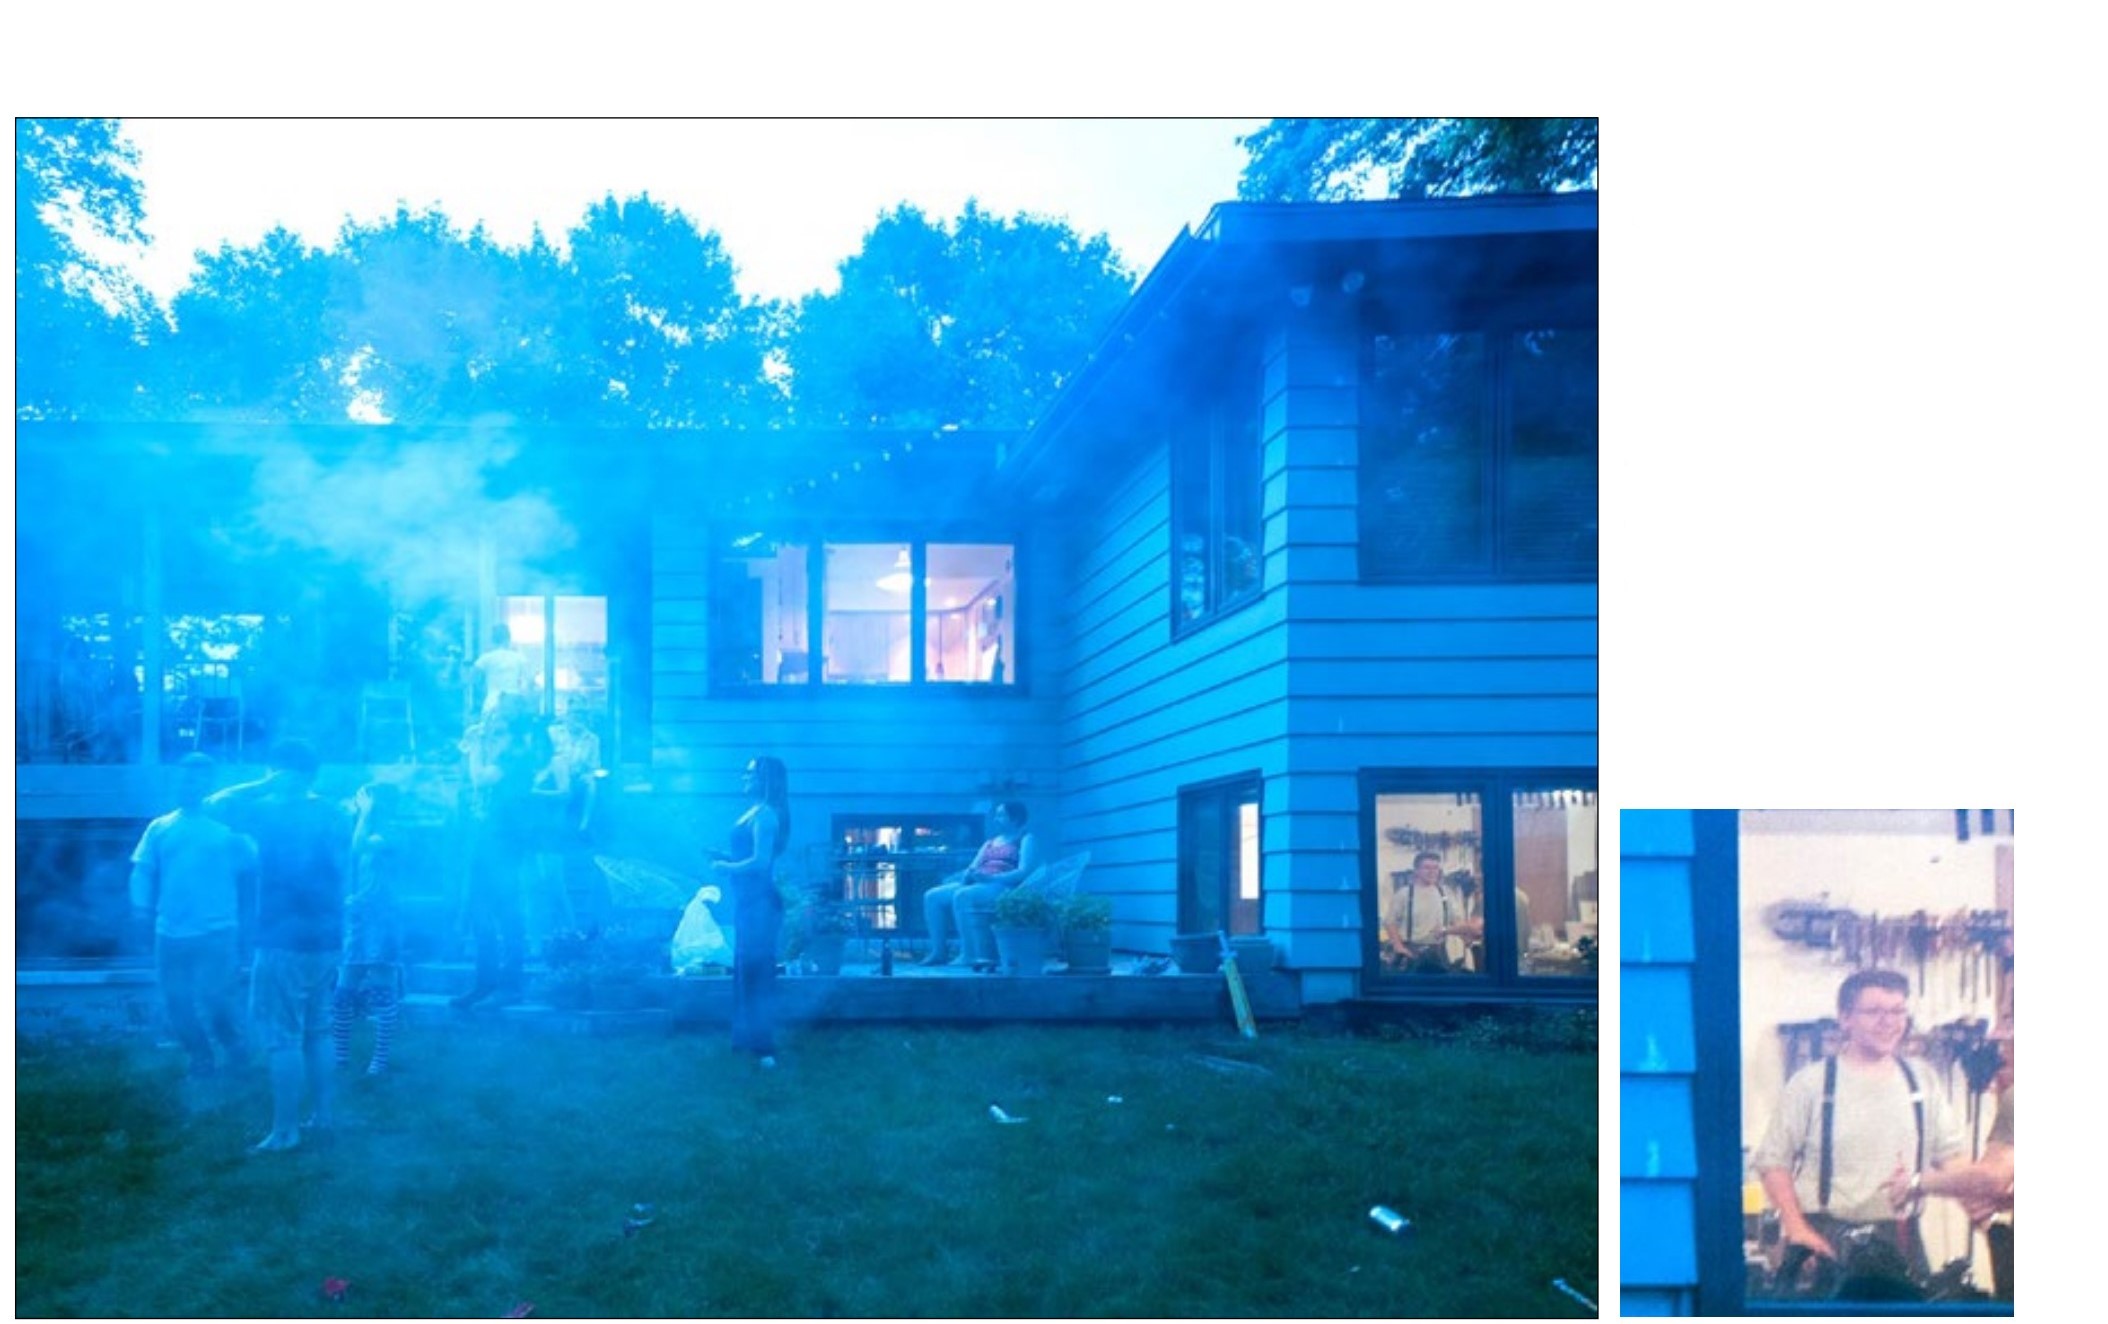
This image is set to incandescent, the approximate color of the interior lighting of the house. In the evening (as in this example) you can see the different colors of light with the naked eye if you are aware of it. |
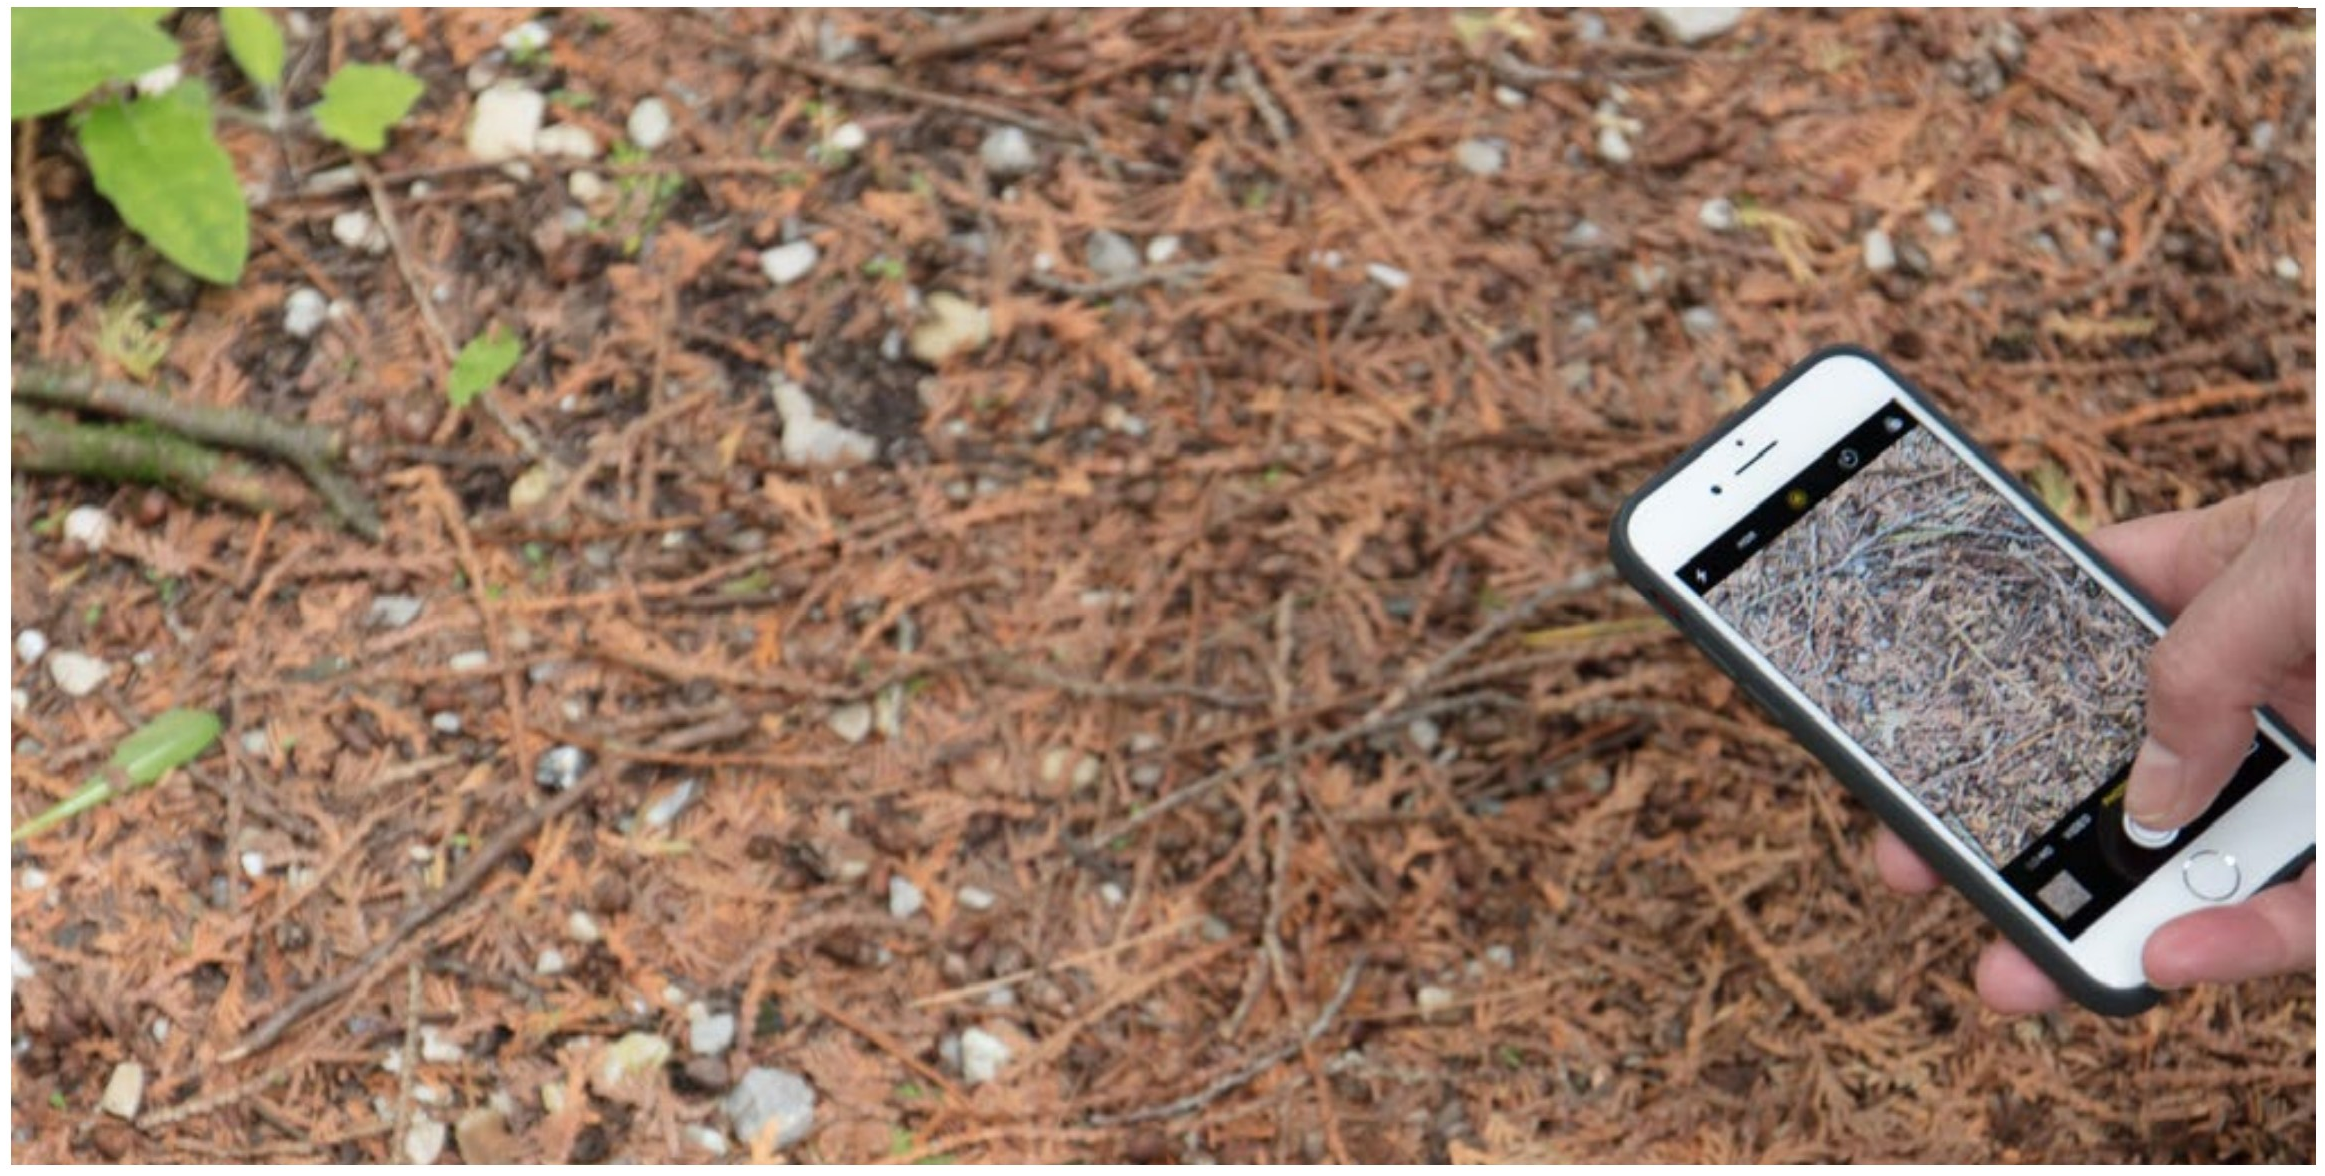
The camera, like our eyes, adjusts to different colors of light if you leave it set to Automatic White Balance. But our eyes do a much better job than the camera. Take a photograph of green grass and your camera might think you are taking a photograph in an office building and take out a large portion of the green. Or take a picture indoors and your camera might think you are just taking a picture of a bunch of yellowish things, so it won’t take the yellow out.
If you are saving images as JPEG, this color cast cannot be removed effectively during editing.
You have two choices to solve this white balance problem. The first is to tell the camera directly what type of light is illuminating the scene. You will find white balance settings for many lighting situations on your camera, but there are three main categories.
DAYLIGHT is the color balance for things lit by the sun. There are pickier settings on your camera, but any one of the daylight (sunlight, shade, cloudy) will get you into a range where you can make final adjustments in an image editing program.
INCANDESCENT (sometimes called tungsten) is the color of indoor lights that get very hot to the touch. This is also the color of many of the newer LED lights that are labeled as warm white.
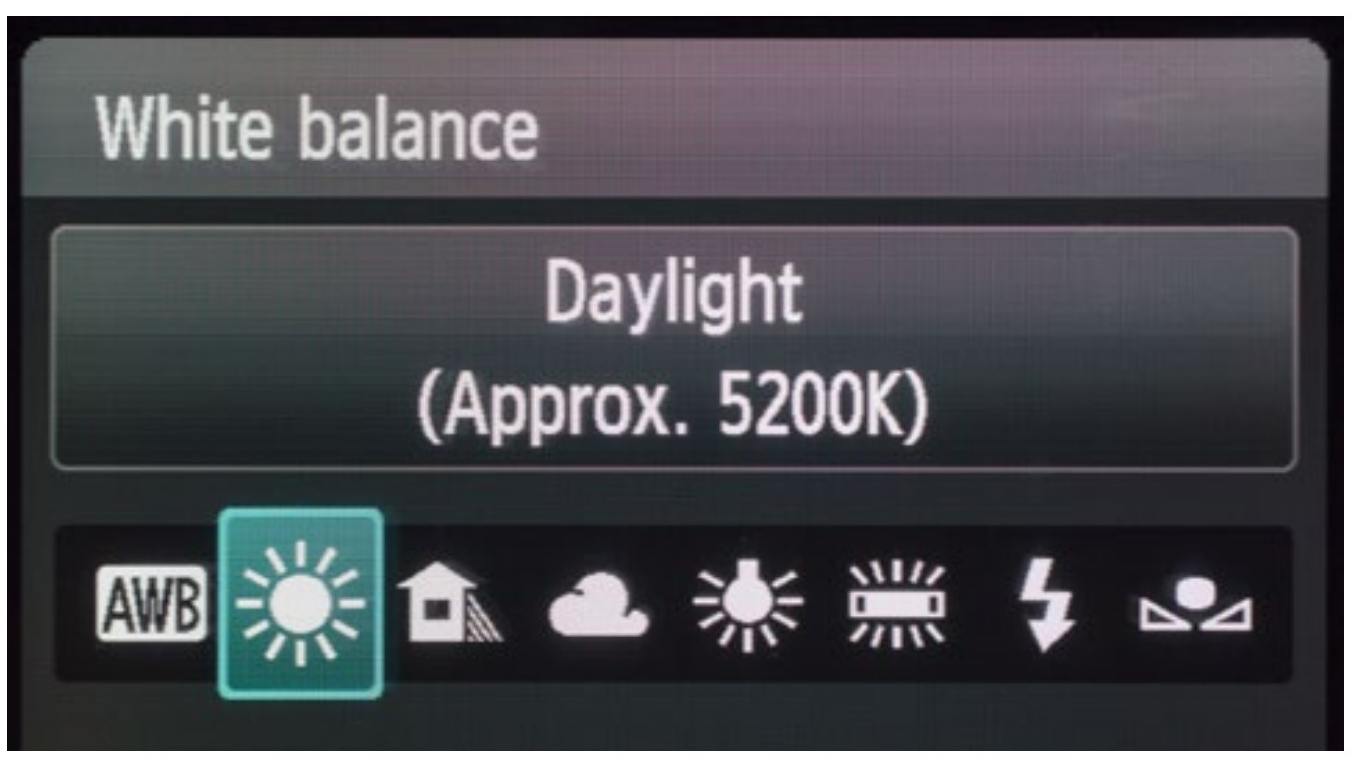
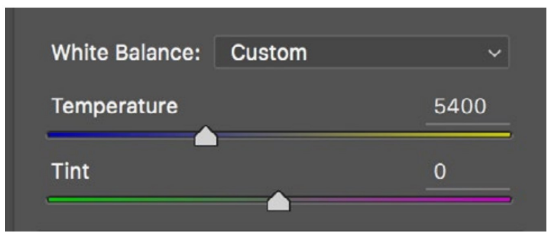
The different colors of the light (from daylight colors to incandescent light) can be described as a color temperature, which is designated by Kelvin. 5200K (Kelvin) is the approximate color of mid-day day-light, and 2800K is the approximate color of that light bulb that gets hot or the LED. This is important because you will see these K (Kelvin) numbers going by both on your camera and in image processing applications (where it will be in the form of a slider labeled temperature).
|
The cellphone camera is seeing a lot of orange, so it thinks the image is being illuminated with orangish light, and it removes what it thinks is this color cast. This works the same with all cameras when set on automatic white balance. |
|
Typical white balance setting in a camera menu. Note the 5200K (Kelvin) description. |
FLUORESCENT is the description for lights that are fairly cool to the touch and are shaped as tubes or as coiled tubes. The color of these lights cannot be described only by Kelvin, and the additional setting and correction for this color is labeled as tint in image editing applications.
Setting the color for the light source in your camera is the first solution to this problem of the color of lights. The second solution is a lot easier and better in most circumstances. It is to use RAW format.
RAW Format
In the first chapter RAW format was briefly explained and you were directed to save your files in this format. Following is a more complete explanation of why RAW is better than JPEG.
Remember that the sensor outputs numbers according to the amount of light hitting the pixels. RAW format saves those levels from the sensor fairly directly, without much input from the camera’s computer—instead, it uses the computer you download them onto to process the images. There are significant advantages to this way of processing images:
WHITE BALANCE: With a RAW image, the white balance is not applied to the image in the camera as it is with JPEG. Instead the white balance your camera is set to is only used as a reference, and it can be changed in editing.
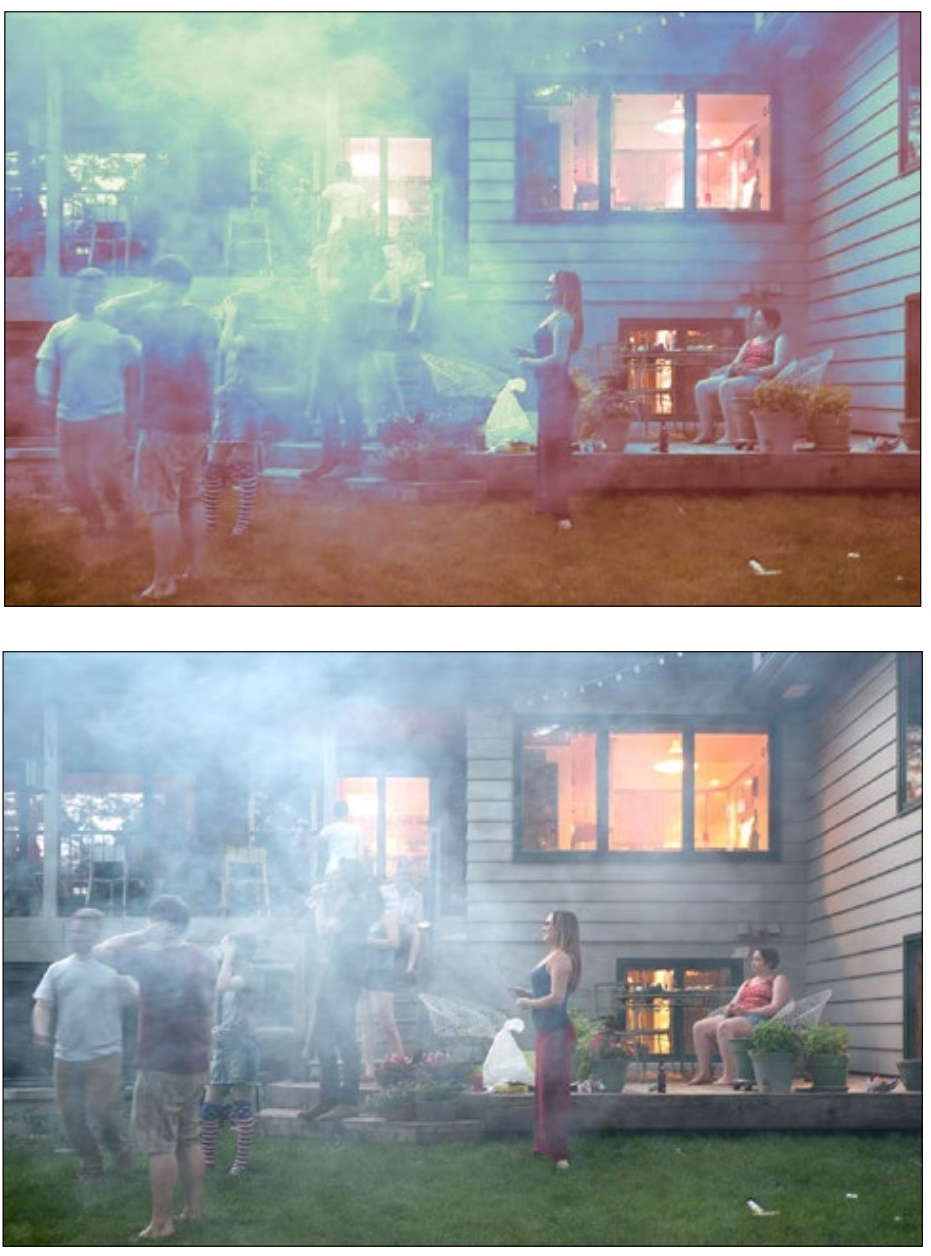
So in the previous examples of white balance, the photograph of the smoky house is balanced two different ways from the RAW file. If instead it was saved as a JPEG and the color temperature was set to 2800K (either by auto white balance or setting it for tungsten), the best color that could be had would look something like the top image to the right. No amount of adjustments can correct the color.
If this was the only advantage of RAW format it would be a terrific way to save images. But there are more advantages...
EXPOSURE CORRECTION: At the beginning of this chapter it was noted that an image is made up of 256 tones or levels. With RAW images, more levels are actually saved. So, a color RAW image is more than 24 bit. How much more depends on the camera. What this means is that if your exposure is a little off, it can be easily corrected, as the sensor is actually saving tones above white (255) and below black (0). Getting the correct exposure is still important, but not nearly as important as with a JPEG format image.
|
White balance in Adobe Camera Raw. |
|
JPEG file (top) and RAW file adjusted to the evening light. Notice that the top image is both reddish and greenish at the same time. Since these colors are opposites (color crossover) they cannot be balanced out. |
More levels being saved also means that an image can have more adjustments applied during image editing. In a Raw processing program such as Adobe Photoshop Camera Raw, contrast can be increased, colors changed, and tonality fine tuned. The quality of the image will not be diminished as with a JPEG.
OTHER SETTINGS: Many other parameters of the image are also set in the camera with JPEG format, such as sharpness and type of color rendition. With RAW files these parameters can instead be set or changed any time after the image is taken.
PERMANENCE: You cannot change the tonal information in a RAW format file. Although this might not seem like an advantage, it is. When you make a change to a RAW file, it doesn’t change the image information in the file, but instead lists instructions on how the changes should be made. These changes are applied whenever you view the image.
For example, if you open a RAW image, then make it too bright, it will not actually change the image part of the file, but instead includes instructions to make this image too bright. This means that you can always go back to every bit of information contained in the original image.
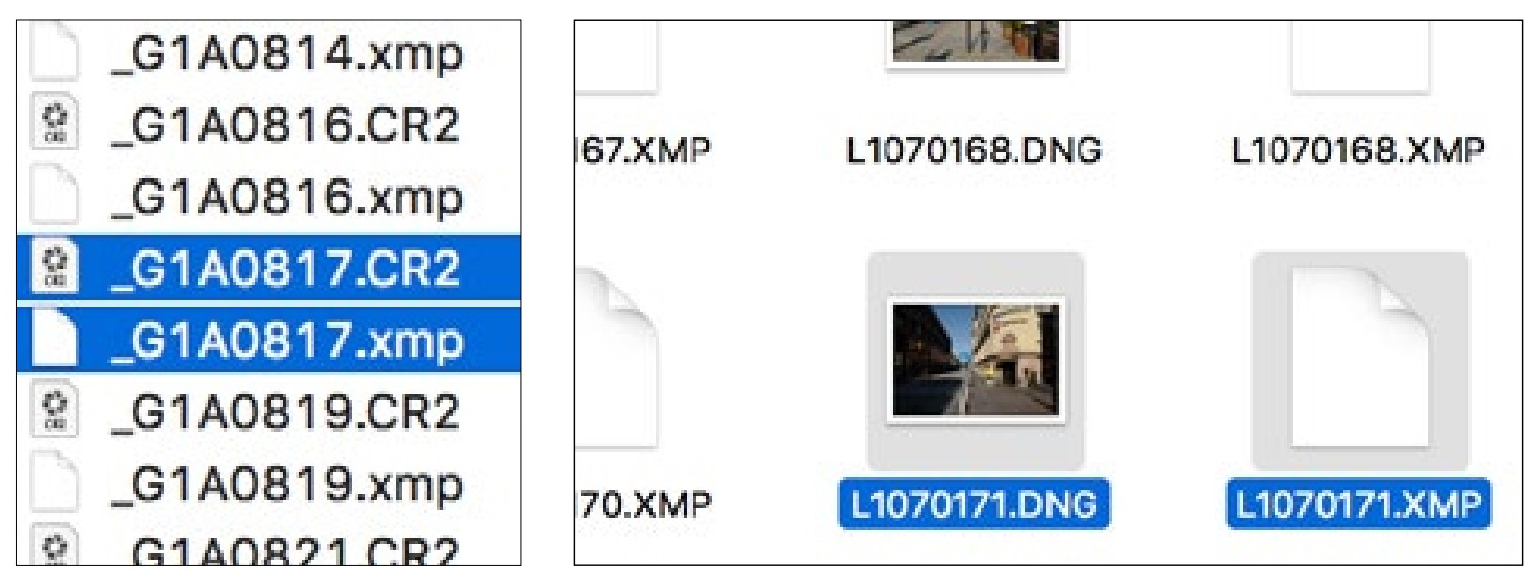
These instructions for the RAW changes may be saved in several places, including in a portion of the file reserved for instructions or in the image editing application itself. Often they are saved in a separate file, called a sidecar file. This file should always be moved whenever you move your image file.
These are the reasons people interested in taking good photographs almost always save their images as RAW format.
Any RAW format file can also be converted to a Digital Negative (.DNG). This is a format Adobe developed as a standard RAW format. The Digital Negative format has a good chance to become a standard across the industry. Already some manufacturers are using it as their cameras’ RAW file format.
|
Two views of RAW image files and their sidecar files (.xmp) in the Macintosh finder. Sidecar files are automatically created when you first make edits to an image. |
Color Temperature?It was found that the color of light could be quantified by heating a metal. As the metal got hotter, it would first be yellowish, then gradually change to blue. The temperature of the metal was then used as the reference point for the color it emitted. The temperature scale used was devised by Lord Kelvin. Hence, the color temperature (e.g. 5000 Kelvin, or 5000K for short). |
Light Source
Any light falling on your subject is actually a combination of many different wave-lengths (colors). Not all lights are created equal, however, and some light sources are deficient in some colors. If you can find a orangish streetlight, stand under it in a colorful outfit. You will find that your outfit will be totally without color. Your clothes just can’t reflect a color that is not there to begin with.
Generally, lights with bad color are found in big-box stores, arenas, and other large areas that need inexpensive lighting. Try to avoid photographing with these.
ISO
How sensitive the sensor is to light is governed by the number you set for the ISO Speed (often called just ISO so as not to be confused with shutter speed). So, to take photographs in low light situations you can set the ISO to a higher number to allow you to take photographs at a shutter speed that will prevent blur.
Most things in photography come at a cost, however, and being able to make the sensor more sensitive to light also degrades the image. The most noticeable effect is an increase in noise—that random dot pattern covering the entire image that was discussed earlier. At higher ISO settings there is also an unpleasant shift in colors and sometimes horizontal bands across the image.
|
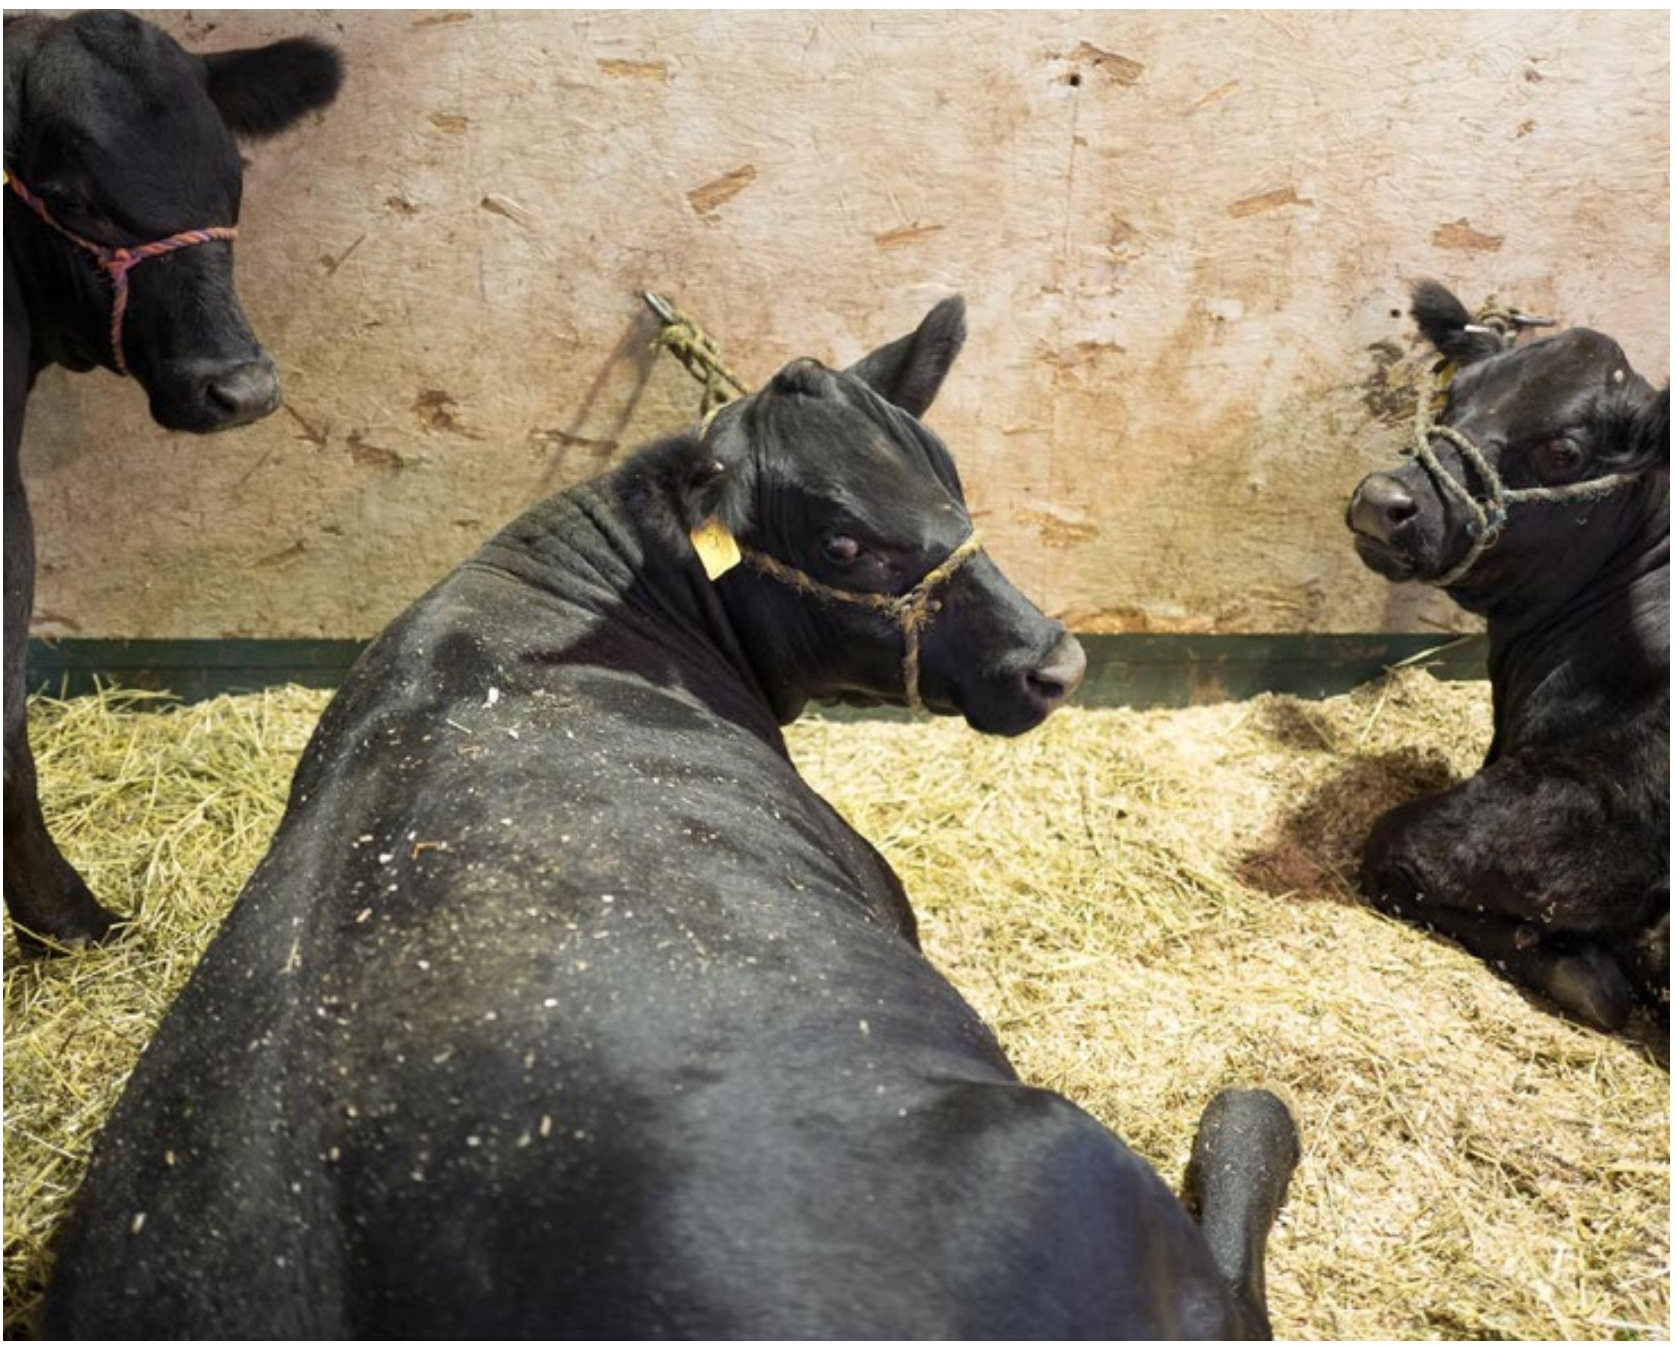
The light illuminating these fetching bovines doesn’t have a full spectrum of colors so accurate color cannot be had, even with RAW format. |
Disappearing filesImage files from my first digital camera cannot be opened in any application made today, nor can any application with which they can be viewed run on a modern computer. Like videotape, not only has the medium become obsolete, but any creation done with that medium is gone. The same will happen with today’s file formats. Different computer file formats come and then they go. Like JPEG, the Digital Negative file format is in use by many people, which fortunately means that it has less of a chance of going away. So in twenty or thirty years you will have a better chance of opening that file. It is nice to know that Digital Negative exists, although you probably don’t need to convert your files to that format yet. |
Newer and larger-sensor cameras perform better at higher ISO settings, but following are some general observations that apply to most cameras. Your camera will also have intermediary ISO settings.
ISO 100: This is the lowest ISO on most cameras. It needs the most amount of light and has the highest quality.
ISO 200: This number makes the sensor twice as sensitive to light as ISO 100. In most cameras, this is almost indistinguishable in quality from ISO 100.
In photography, twice or half the amount of light is referred to as a stop. This will get more important later in this book, but you should remember that definition now.
ISO 400: This is a good all-around setting for most cameras. There is some increase in noise, but you get 2 stops more sensitivity to light as you do with ISO 100 (4 times the sensitivity).
ISO 800–1600: 3–4 stops more sensitive to light than ISO 100. Are you getting the way ISO numbers double with each stop of sensitivity? You can really see the noise at these speeds. In other words, a strong curse or two is in order when I forget to reset my ISO from 1600 if I am taking photographs where I need quality but don’t need the sensitivity.
ISO 3200–[your camera’s maximum]: These very high ISO speeds show glaring faults, with not only plenty of noise, but also banding and color shifts. But if that is the only way to get the photograph, then go for it. Life is not always ideal.
ISO and NoiseNoise is an interesting concept. The word comes from the Latin nausea, meaning sea-sickness. In English nausea is something that is also unwanted (although you might want an excuse to get off a boat). Noise is perhaps familiar to you from audio. Even with digital audio (without volume cut-outs), turn up the volume for quiet sounds and often you will start to hear artifacts of the electrical system. A hiss or static. This is exactly what noise is in camera images. Light that is very quiet (low) starts to become indistinguishable from the electronics reproducing it. The word noise can be used in many other circumstances, such as needless information that obscures pertinent facts. Like the fact that it is hard to see climate change because of all the normal variations in weather. In the same way, noise in images obscures the subject of the image. |
|
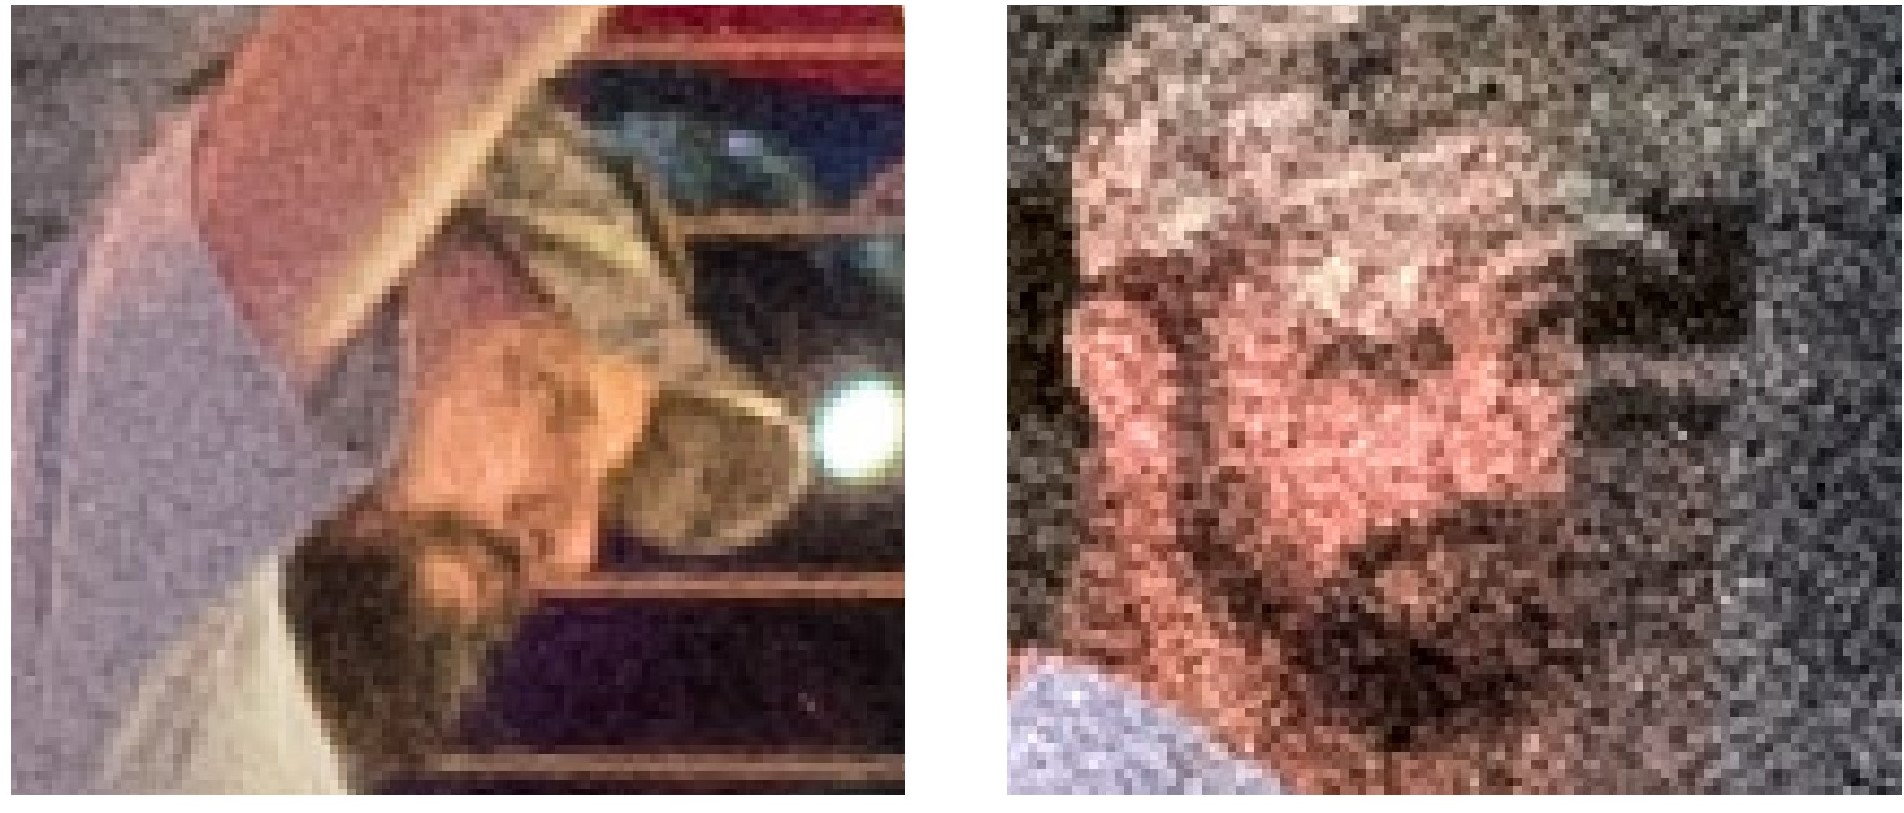
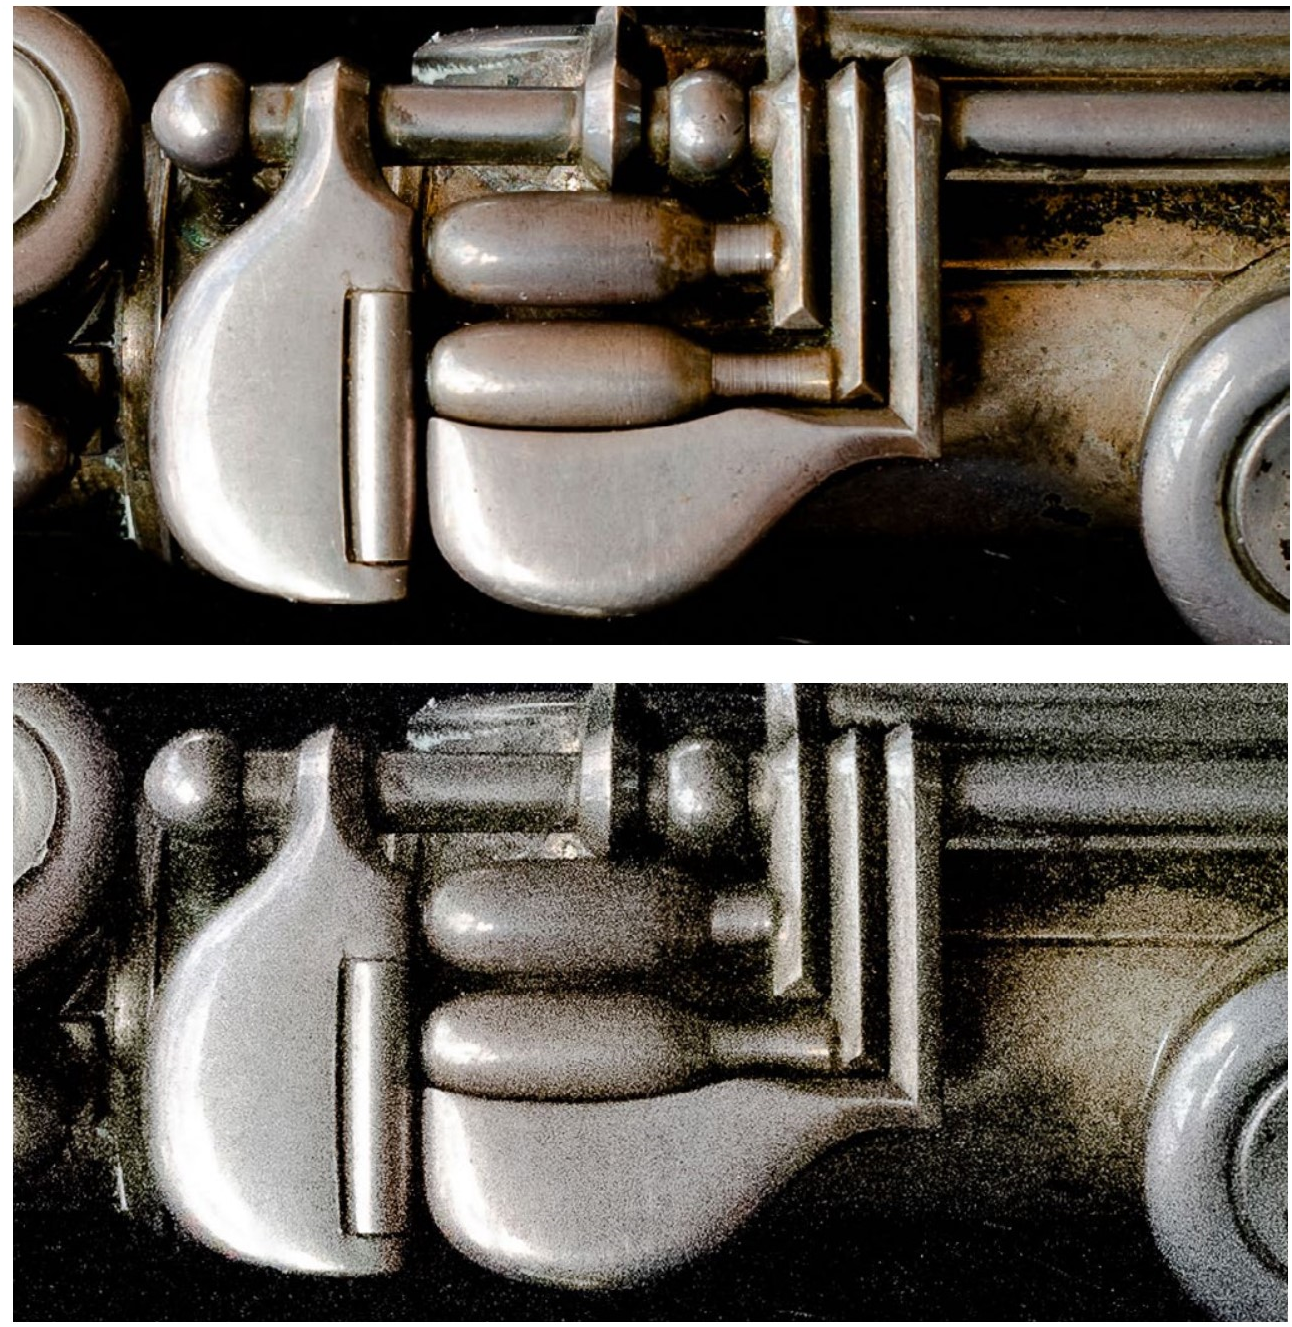
Close crop of two images. The left image is ISO 1600. The right image is ISO 12,500. High ISOs produce more noise in an image. |
Changing the ISO setting while shooting is straightforward. If you can’t hold the camera still enough or the subject is moving fast enough to cause blur, you probably want to set your ISO higher (to a higher number). Otherwise, just leave it at 400 (perhaps 100 if you are out on a sunny day).
If you need to see the amount of noise or blur using the camera review, enlarge the review image (see your camera instructions) since the small image will not readily show details such as these.
Automatic ISO
When camera designers set up the parameters for automatic ISO, they err on the side of getting a photograph without motion blur. What this means is that ISO goes up very soon in auto ISO mode, making for very noisy images. Not good. I have had plenty of students who complain of very noisy images on automatic ISO—this is one reason why I had you disable auto ISO at the beginning of this book.
That being said, there may be times when you want to use auto ISO and let the camera pick the speed for you. Perhaps you are in a situation where the light varies widely from one second to the next, when you just don’t want to think about it, or when you loan a camera to your grandmother.
Some cameras (especially newer ones) have automatic ISO settings that let you specify how it works. These settings make automatic ISO much more controllable and practical.
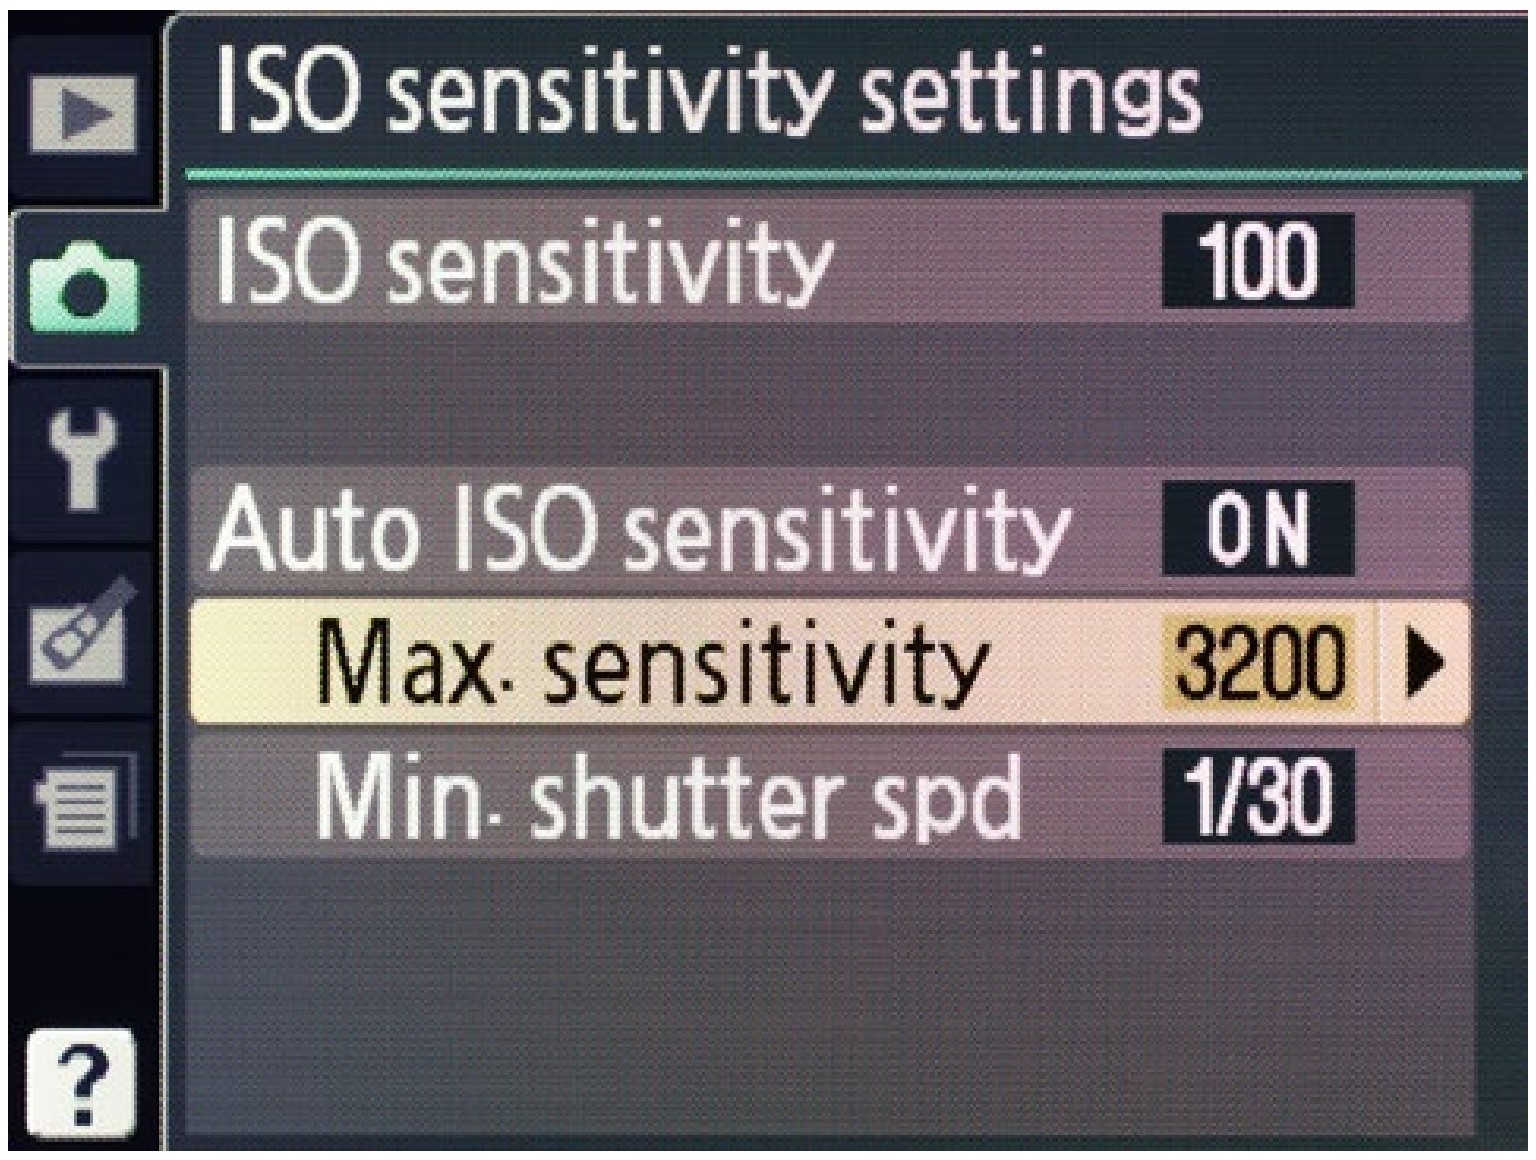
You can set the highest ISO the camera will choose so that you can avoid those ISO speeds which look like shite to you. You can also pick the slowest shutter speed (sometimes called the minimum shutter speed and sometimes called the maximum exposure time!) so that the ISO will not increase unnecessarily.
|
This camera menu allows you to specify how automatic ISO is used. |
ISO...stands for International Organization for Standardization. This organization sets standards for all sorts of things. I wish that explanation could have been more interesting. But why not IOS instead? Try to imagine coming up with a name (ISO) that sort of translates into many languages. You can’t make it for only one language because... well, think about it. |
Now Go Shoot
Like the last chapter, a hefty portion of this one has background information that serves to increase your understanding of the photographic process. What is hap-pening behind the curtain is important whenever you are trying to get better in any pursuit.
But the chapter also contains some things you can use right away. The color of different types of light and what to expect from this. The importance of using RAW format. Changing your ISO to make the trade-off between image quality and preventing blur.
Keep these things in mind as you shoot photographs. Some day there may be cameras that do all of this thinking for you—that can read your mind about how to interpret a subject or the colors of that subject. But I doubt it.
EXPERIMENT
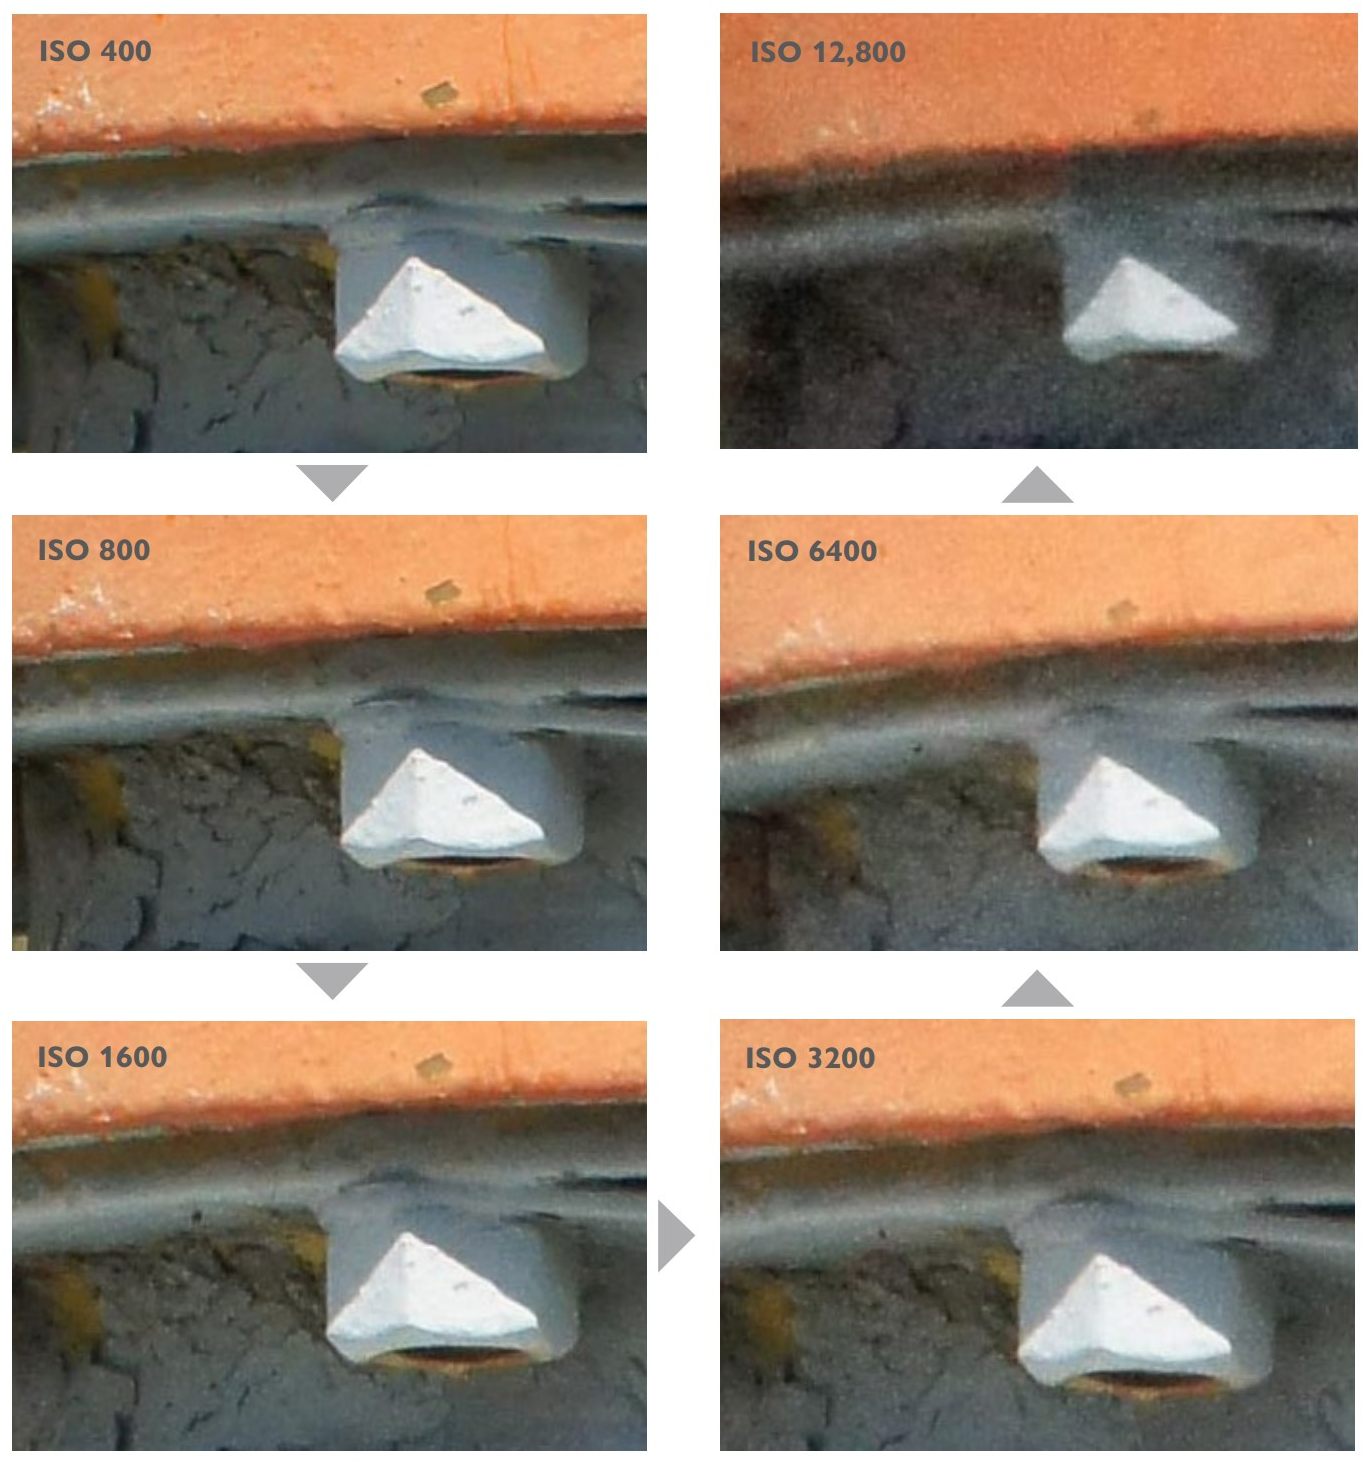
Take four or more photographs of exactly the same thing, but change the ISO setting on your camera.
You might want to have plenty of light for this, as lower ISOs will automatically set your shutter speed slower. This might cause a blurry image which will prevent a valid comparison. You could instead use a tripod or some other camera support to ensure sharpness.
Rename your files something like ISO 100, ISO 200, ISO 1600. You don’t have to remember which is which since all image editing programs will report the ISO used along with other metadata.
|
Comparison of two ISO settings (detail) |
In an image editing program compare these at 100 percent (1:1) magnification and note the differences. Which is the highest ISO that has the most quality? How bad is the quality of the highest ISO?
Now view the image in the fit to window magnification. How is the quality at this magnification? Could the images be used small on a web site or email? Different cameras will present different answers to these questions.
|
Ali Brown, ISO experiments. Entire image above, details at right. ISOs below 400 were omitted since in these illustrations the differences were minimal. |
Sensor Questions
What device in your camera converts light levels to numbers?How many pixels are in a modern sensor (very approximately)?What three colors is the sensor sensitive to?
How many colors can one image pixel be at once?
How many shades of gray are possible in an 8 bit image?How many ‘bits’ are there in an RGB (color) image?
What is one shortcoming (defect) of pixels on a sensor?What is an advantage of a smaller sensor? A disadvantage?How did the full-frame sensor size originate?
Why can you usually not see the different colors of light? Why might your camera get the color of a scene wrong? What type of light is hot to the touch? What type is cool?
What measuring system defines the color temperature of light?
What is an advantage to shooting in RAW relative to white balance?
What is an advantage to shooting in RAW relative to exposure?In what type of file are changes to RAW images often stored?What is the Adobe standard format for RAW files?
Why are some light sources bad?
What defects do high ISOs introduce?
What ISO gives the best quality?
What term describes twice or half the amount of light?Which ISO best for very low light?


