
4.2: 4CR LOCAL ADJUSTMENT
- Page ID
- 91122
\( \newcommand{\vecs}[1]{\overset { \scriptstyle \rightharpoonup} {\mathbf{#1}} } \)
\( \newcommand{\vecd}[1]{\overset{-\!-\!\rightharpoonup}{\vphantom{a}\smash {#1}}} \)
\( \newcommand{\id}{\mathrm{id}}\) \( \newcommand{\Span}{\mathrm{span}}\)
( \newcommand{\kernel}{\mathrm{null}\,}\) \( \newcommand{\range}{\mathrm{range}\,}\)
\( \newcommand{\RealPart}{\mathrm{Re}}\) \( \newcommand{\ImaginaryPart}{\mathrm{Im}}\)
\( \newcommand{\Argument}{\mathrm{Arg}}\) \( \newcommand{\norm}[1]{\| #1 \|}\)
\( \newcommand{\inner}[2]{\langle #1, #2 \rangle}\)
\( \newcommand{\Span}{\mathrm{span}}\)
\( \newcommand{\id}{\mathrm{id}}\)
\( \newcommand{\Span}{\mathrm{span}}\)
\( \newcommand{\kernel}{\mathrm{null}\,}\)
\( \newcommand{\range}{\mathrm{range}\,}\)
\( \newcommand{\RealPart}{\mathrm{Re}}\)
\( \newcommand{\ImaginaryPart}{\mathrm{Im}}\)
\( \newcommand{\Argument}{\mathrm{Arg}}\)
\( \newcommand{\norm}[1]{\| #1 \|}\)
\( \newcommand{\inner}[2]{\langle #1, #2 \rangle}\)
\( \newcommand{\Span}{\mathrm{span}}\) \( \newcommand{\AA}{\unicode[.8,0]{x212B}}\)
\( \newcommand{\vectorA}[1]{\vec{#1}} % arrow\)
\( \newcommand{\vectorAt}[1]{\vec{\text{#1}}} % arrow\)
\( \newcommand{\vectorB}[1]{\overset { \scriptstyle \rightharpoonup} {\mathbf{#1}} } \)
\( \newcommand{\vectorC}[1]{\textbf{#1}} \)
\( \newcommand{\vectorD}[1]{\overrightarrow{#1}} \)
\( \newcommand{\vectorDt}[1]{\overrightarrow{\text{#1}}} \)
\( \newcommand{\vectE}[1]{\overset{-\!-\!\rightharpoonup}{\vphantom{a}\smash{\mathbf {#1}}}} \)
\( \newcommand{\vecs}[1]{\overset { \scriptstyle \rightharpoonup} {\mathbf{#1}} } \)
\( \newcommand{\vecd}[1]{\overset{-\!-\!\rightharpoonup}{\vphantom{a}\smash {#1}}} \)
The Camera Raw adjustments covered so far work across the entire image. For example, when one area is made lighter, all areas of the same tonality will become lighter.

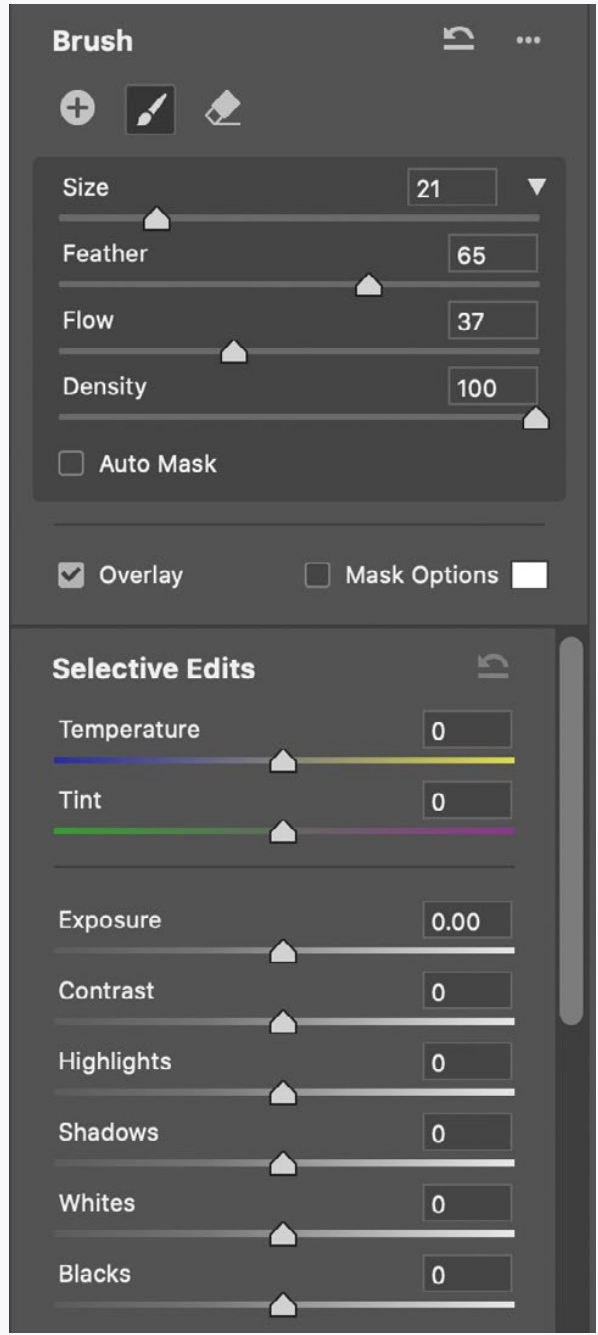
But what if you want to adjust only part of an image without influencing other parts? This is what local adjustments do. To start making these, click on the adjustment brush icon on the right of the Camera Raw workspace.
Two things happen when you click this brush. First, the panels on the right are replaced with the Adjustment Brush panel. Second, the cursor turns into a double circle when over your image. The outer circle shows the brush size that you will be using when you paint in your adjustments. The inner circle shows what will be fully painted. The adjustment will fade out (feather) to the outer circle. Outside of that circle there will be no effect. Without this fading you would see hard lines bordering the adjustment.

On the upper panel, Size is the outer circle, and Feather is the inner circle compared to the outer circle. Flow is the amount each brush stroke will paint in (you can paint multiple strokes over each other). Density is the total effect of multiple brush strokes (this can be left at 100 since you can decrease the adjustment just as easily). Make sure Color (scroll down in the panel to see this) is set to none. Otherwise your adjustment will take on a color cast you probably don’t want (I don’t know how students keep stumbling upon this!).
Most of the important adjustments available with the adjustment brush should be familiar to you by now.
You can make adjustments either before or after painting the area for them, but you should probably set the approximate adjustments you are considering before you start painting—this way you can see the results as you paint.
Important: Using the adjustment brush in this way you are not changing the tonality of objects. Instead, you are changing the tonality of areas.
You can make as many adjustment brushes as you need by clicking the plus button at the top of the Adjustment Brush panel. Clicking the eraser button allows you to erase parts of the adjustment painting you have done.
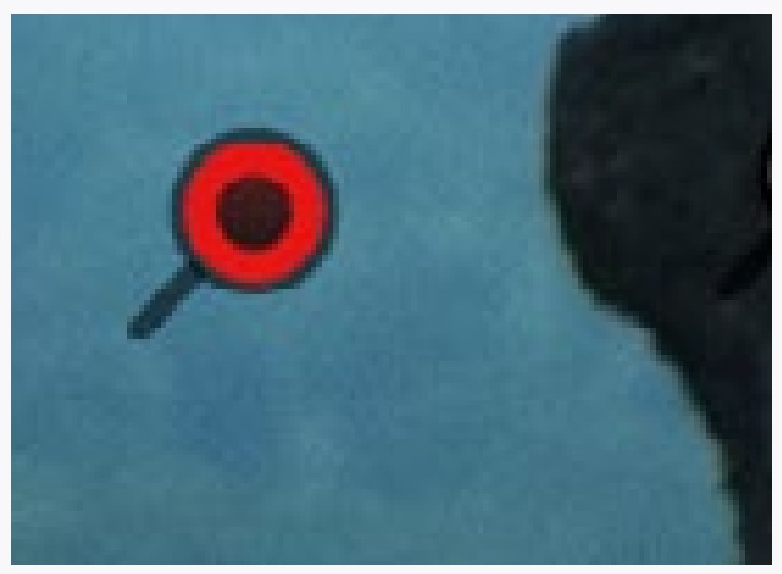
Each session of painting is marked by a small circle (an overlay) where you started painting. This is red when active, and white when inactive. You can make a session active by clicking on the circle, and you can delete an active session by hitting the delete key when it is active.
When you go back to a session of painting, the adjustment brush options will zero out. If you are using the same adjustments multiple times you can turn off this reset at the very bottom of the panel (scroll down).
Notice that you can change the color (hue) of your adjustment by either using the temperature/tint sliders or by using the Hue slider. Don’t use Color as pointed out before.
|
Trevor Finchcamp, before local adjustments |
|
Trevor Finchcamp, after local adjustments to darken the top area of the image and lighten and increase contrast on bottom |

|
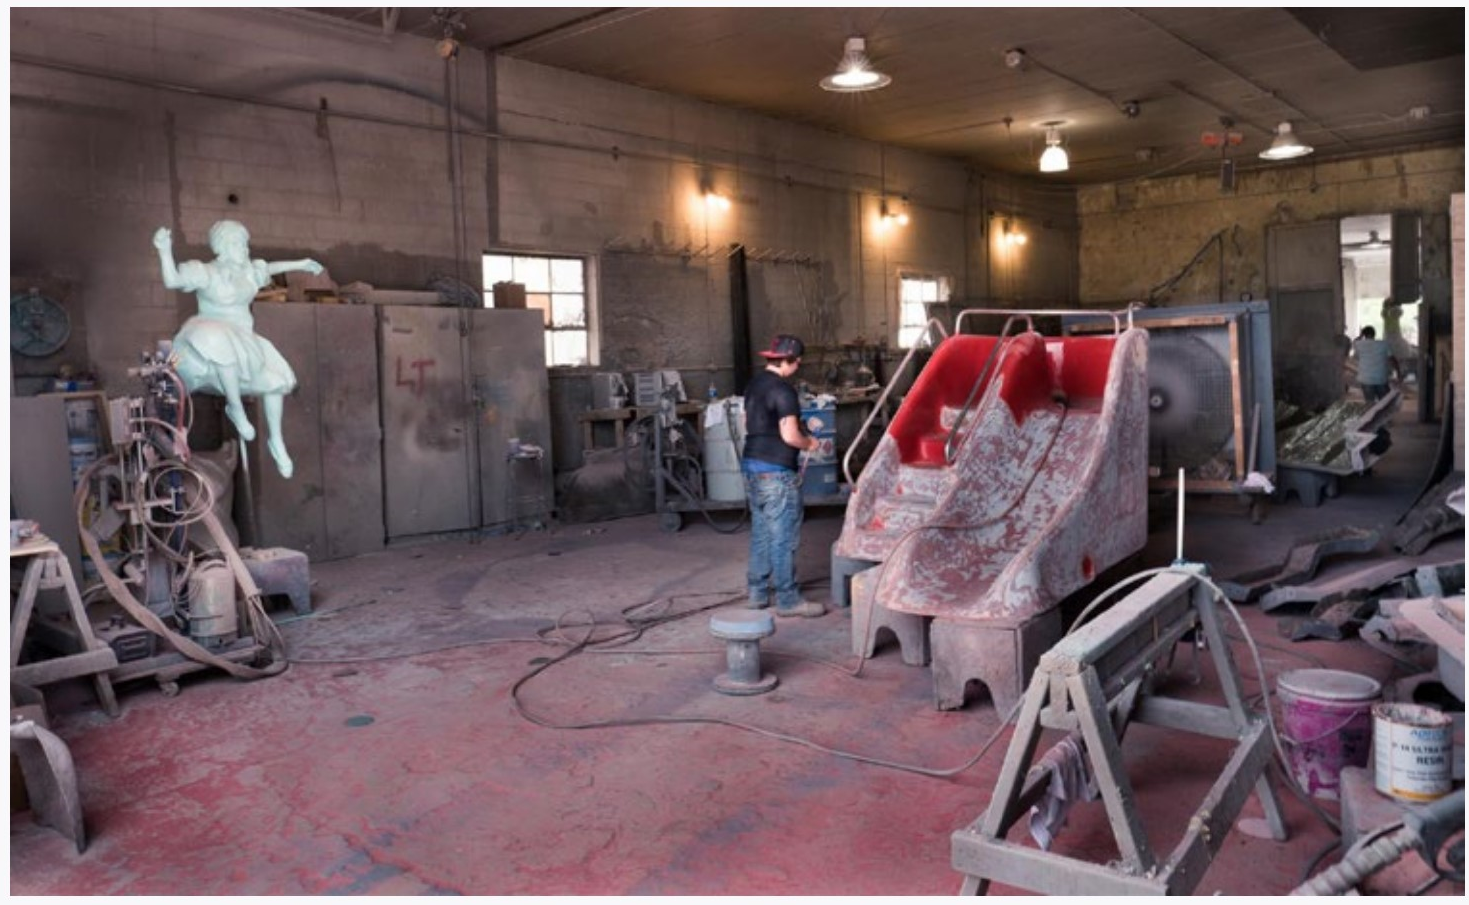
Original image |

|
Background area was lightened and foreground area darkened. The sculpture on the left was lightened more by using auto mask (next page). |
A Mask in Camera Raw is a selected area. When you are painting in adjustments, you can view the mask by clicking the Mask button below the adjustment brush panel. This color of the mask can be changed by clicking the color rectangle next to the Mask button.

Showing the mask is simply a viewing aid —it will not change the image.
Auto Mask
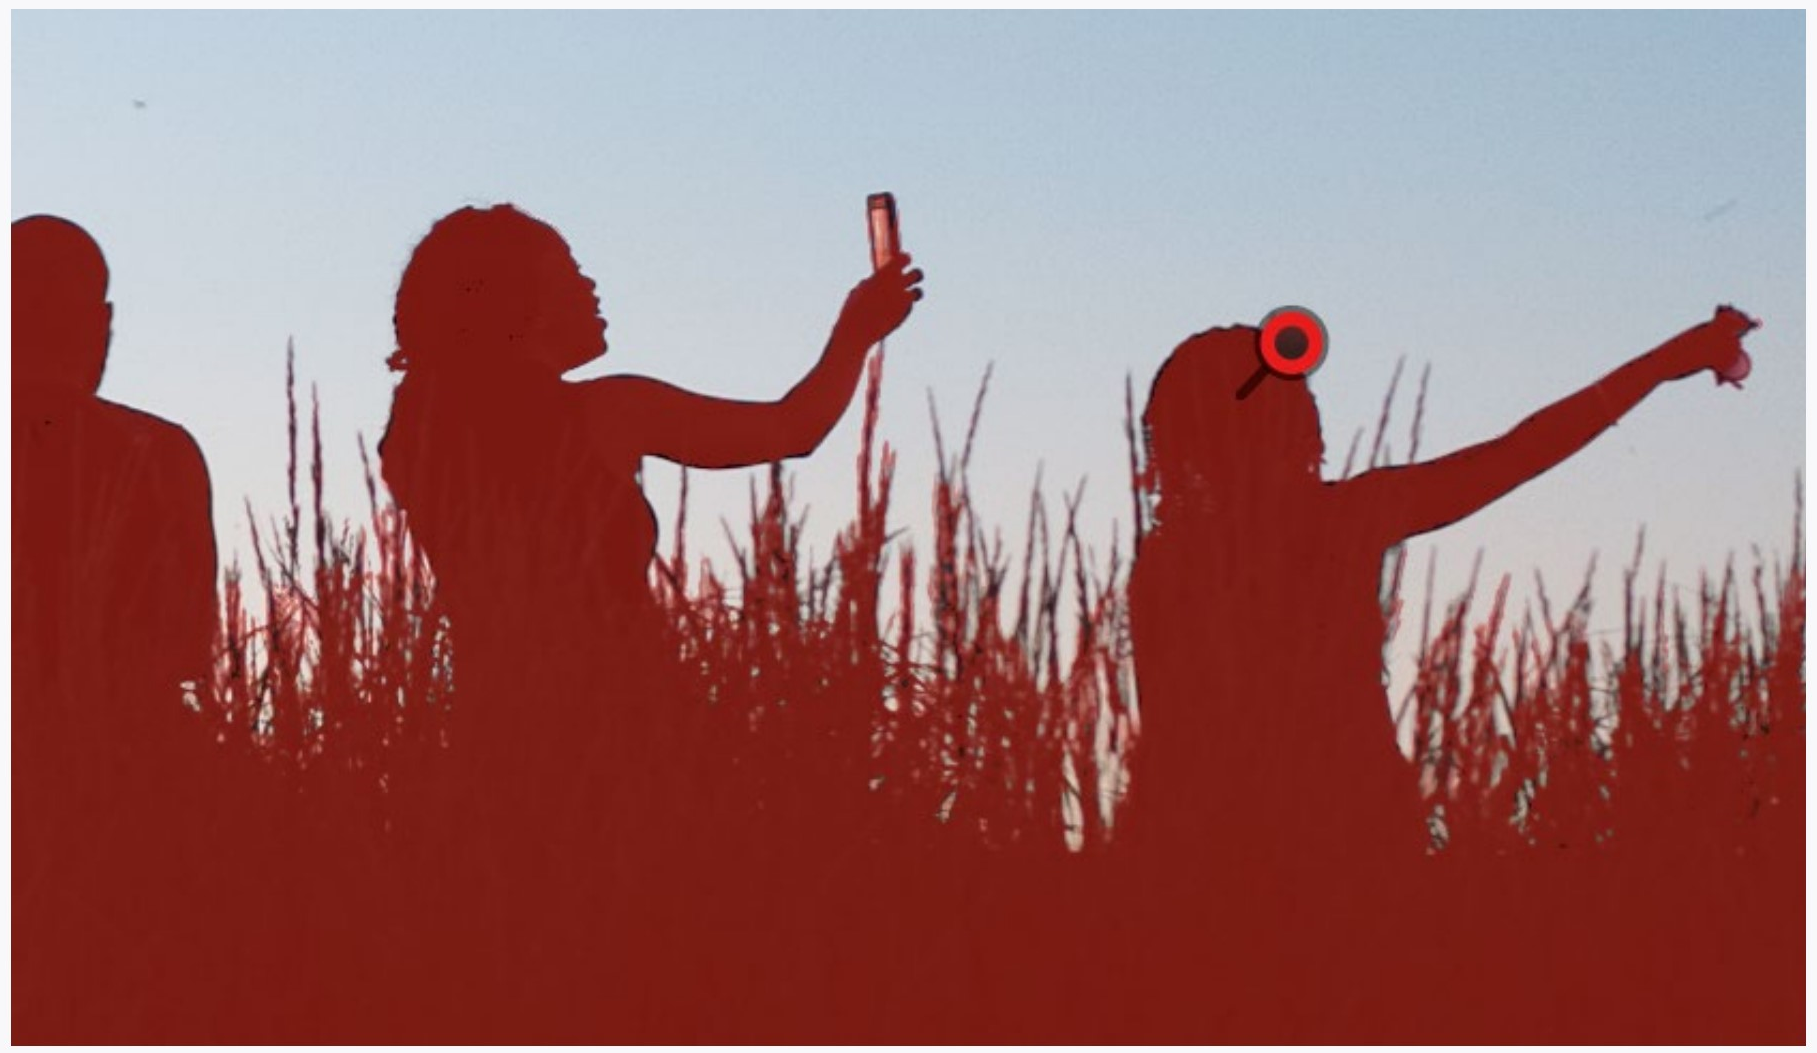
Much different from the viewing mask above, with Auto Mask turned on (arrow below),
the adjustments brush will attempt to find boundaries in the image and constrain the painting to within those boundaries. What
this means is that you can actually use the adjustments brush to not only adjust areas, but also to adjust things in the image.
Often when using auto mask you should first paint within the edges of the thing you want adjusted, then turn off Auto Mask to paint in the rest of the thing to be selected.
Painting and erasing (also using auto mask) at enlarged views is a way to refine the edge, and you may have to repeat this several times to get the right masking edge.
Auto mask does have its limits. Edges in images often include transition pixels that are neither the color of the object nor of the background.
In general, do not expect to make radical adjustments using auto mask to define things.
|
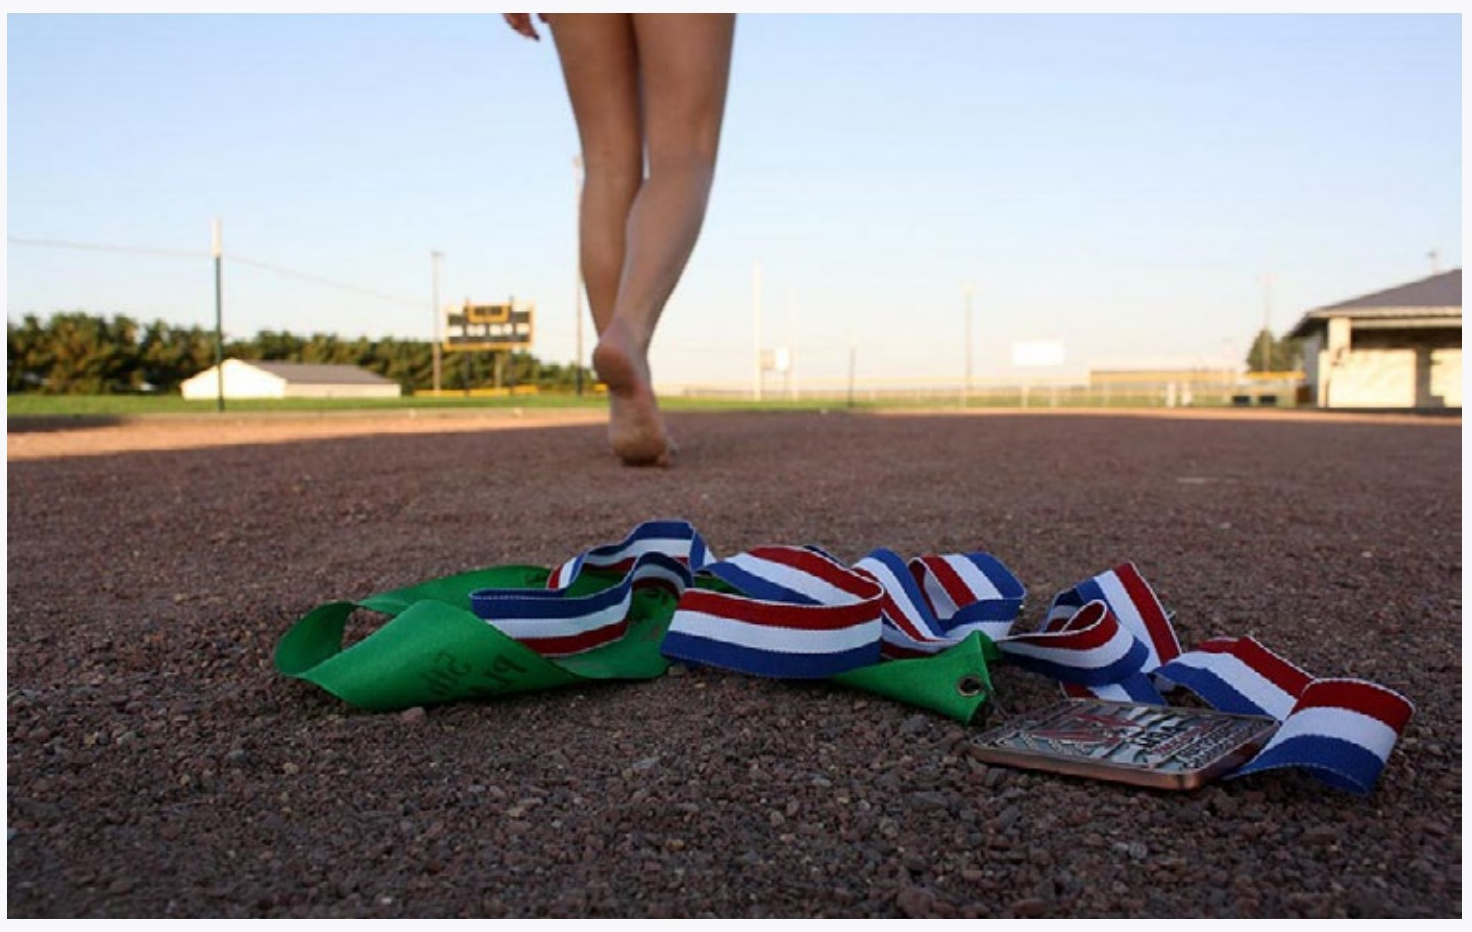
The image above shows the red mask defining areas painted while using auto mask. While auto mask does a good job in large areas with definite borders (the people), it has a very difficult job selecting smaller areas and areas with less defined edges (grass). Hard edges are actually composed of transition pixels (below right) which can cause problems with extreme adjustments.
|

LOCAL ADJUSTMENTS
Being able to adjust only parts of an image is a powerful technique, but one that takes a lot of practice. You might as well get started now.
Pick some images that might need an adjustment in areas that is different from the overall adjustments, and see what you can do. Make areas lighter, darker, and maybe increase the contrast. Try changing the color of an area using the white balance tools at the top of the adjustment brush panel.
Perhaps find some images that don’t need obvious adjustments. Can you improve the image using them? In general, lighter areas draw the viewer’s eye and darker areas recede. Can you use this fact to control the way the viewer sees elements in the image?
Experiment. As always, view your changes side by side with the unchanged version to compare them.
AUTO MASK
Use auto mask to limit your local adjustments to just one thing in the image, such as the sky, or perhaps a person’s face which is too dark in relation to the rest of the image.
Get the hang of how accurate auto mask can be by enlarging the adjusted image to 100% to view it. In general the heavier the adjustment the more accurate auto mask needs to be.
CAN YOU...
Effectively change only parts of an image?
Make your local adjustments seem natural?Erase and add to portions of your adjustments?Use appropriate brush sizes and feathers?
Use flow to control the strength of the adjustments within an adjustment area?
Make multiple adjustments and then go back and edit each one individually?
View your adjustment areas using a mask and change the color of that mask?
Use auto mask to limit adjustments to objects (tonal edges)?
Use auto mask to paint edges, then fill in areas to be selected with auto mask off?
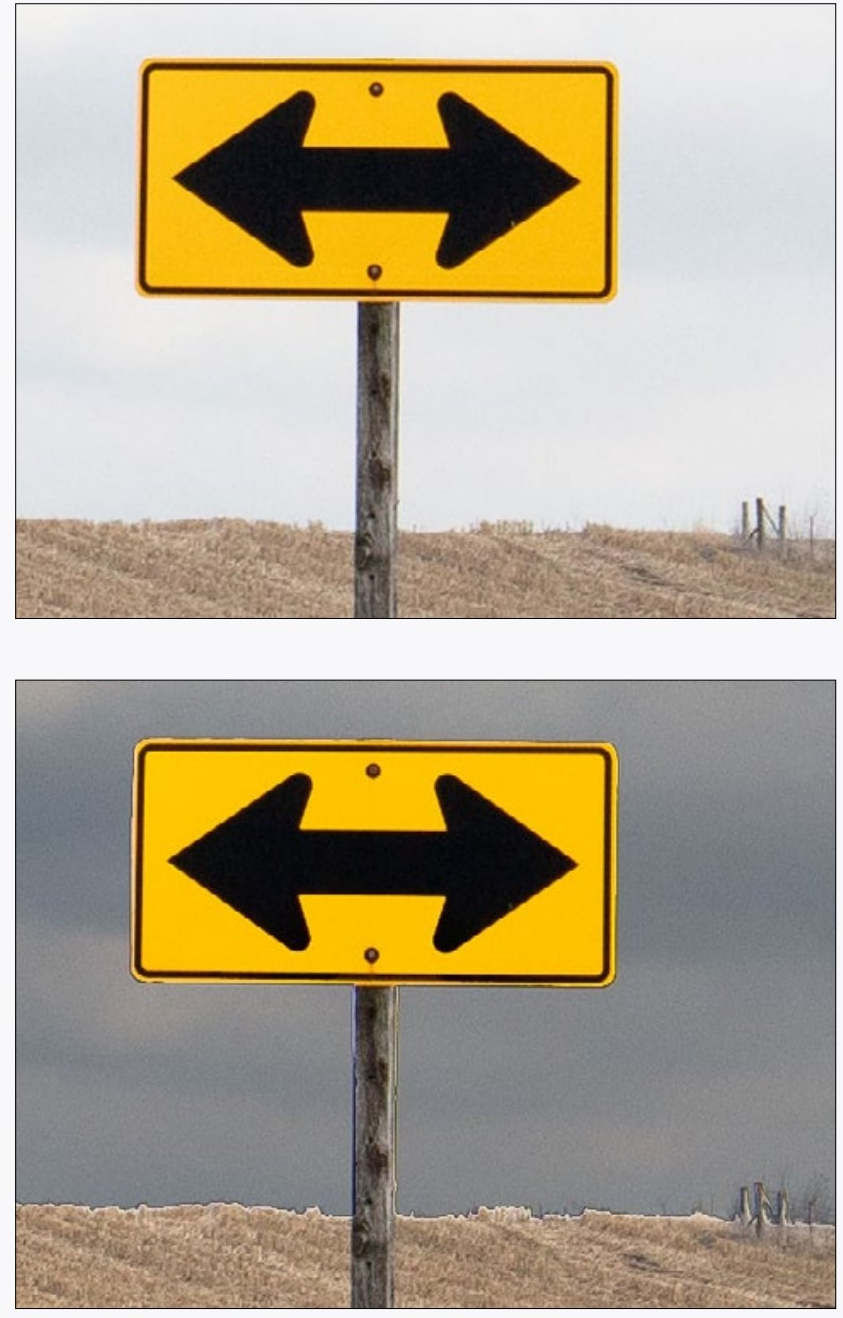
|
Small section of a photograph before and after the sky was darkened with the adjustment brush using auto mask. The transition line along the horizon is very obvious on the adjusted image. Auto mask does have limitations, especially with the heavy adjustment seen here. Two options to hide this limitation would be to make the adjustment not as extreme or make the photograph (and therefore the imperfections) smaller—as shown at right. |
