15.7: Salisbury Cathedral
( \newcommand{\kernel}{\mathrm{null}\,}\)
The Biggest and the Highest
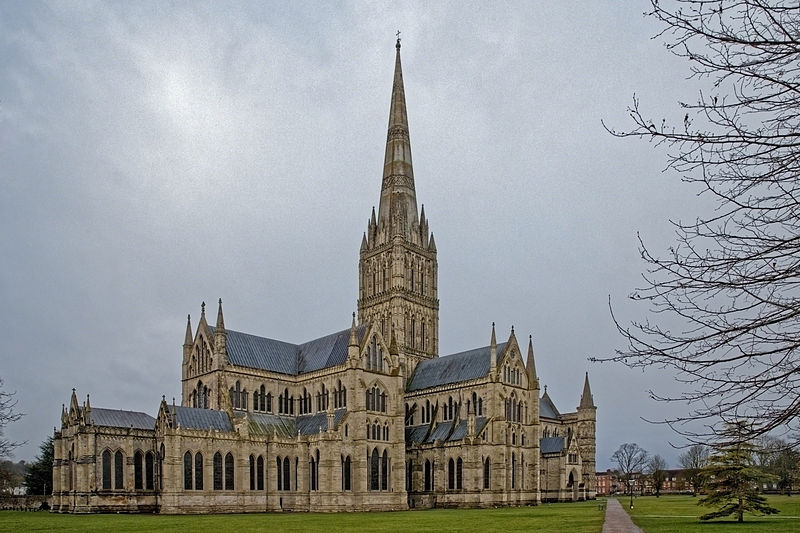
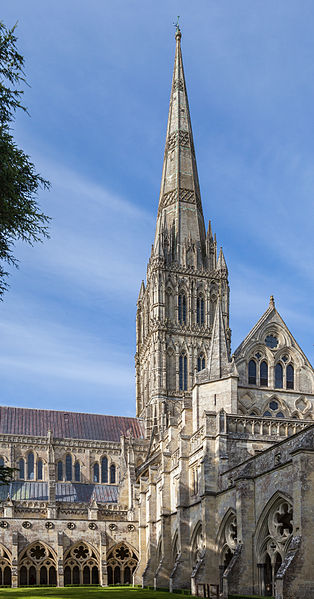
There are so many superlatives consorting with the Cathedral Church of the Blessed Virgin Mary in Salisbury: it has the tallest spire in Britain (404 feet); it houses the best preserved of the four surviving original copies of the Magna Carta (1215 CE); it has the oldest working clock in Europe (1386 CE); it has the largest cathedral cloisters and cathedral close in Britain; the choir (or quire) stalls are the largest and earliest complete set in Britain; the vault is the highest is Britain. Bigger, better, best—and built in a mere 38 years, roughly from 1220 to 1258, which is a pretty short construction schedule for a large stone building made without motorized equipment.

One factor that enabled Salisbury Cathedral to become so extraordinary is that it was the first major cathedral to be built on an unobstructed site. The architect and clerics were able to conceive a design and lay it out exactly as they wanted. Construction was carried out in one campaign, giving the complex a cohesive motif and singular identity. The cloisters were started as a purely decorative feature only five years after the cathedral building was completed, with shapes, patterns, and materials that copy those of the cathedral interior.

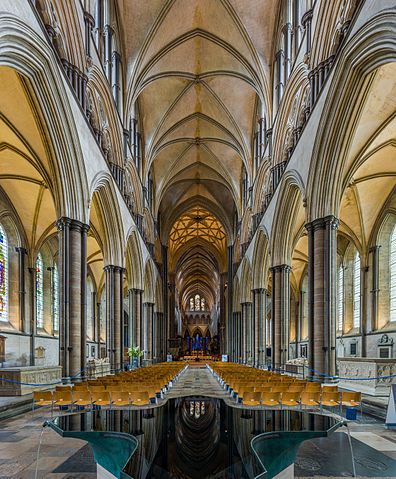
It was an ideal opportunity in the development of Early English Gothic architecture, and Salisbury Cathedral made full use of the new techniques of this emerging style. Pointed arches and lancet shapes are everywhere, from the prominent west windows to the painted arches of the east end. The narrow piers of the cathedral were made of cut stone rather than rubble-filled drums, as in earlier buildings, which changed the method of distributing the structure’s weight and allowed for more light in the interior. The piers are decorated with slender columns of dark gray Purbeck marble, which reappear in clusters and as stand-alone supports in the arches of the triforium, clerestory, and cloisters. The triforium and cloisters repeat the same patterns of plate tracery—basically stone cut-out shapes—of quatrefoils, cinquefoils, even hexafoils and octofoils. Proportions are uniform throughout.
One deviation from the typical Gothic style is the way the lower arcade level of the nave is cut off by a string course that runs between it and the triforium. In most churches of this period, the columns or piers stretch upwards in one form or another all the way to the ceiling or vault. Here at Salisbury the arcade is merely an arcade, and the effect is more like a layer cake with the upper tiers sitting on top of rather than extending from the lower level.
The Tower and the Spire

The original design called for a fairly ordinary square crossing tower of modest height. But in the early part of the 14th century, two stories were added to the tower, and then the pointed spire was added in 1330. The spire is the most readily identified feature of the cathedral and is visible for miles. However, the addition of this landmark tower and spire added over 6,000 tons of weight to the supporting structure. Because the building had not been engineered to carry the extra weight, additional buttressing was required internally and externally. The transepts now sport masonry girders, or strainer arches, to support the weight. Not surprisingly, the spire has never been straight and now tilts to the southeast by about 27 inches.
Restorations
Over the centuries the cathedral has been subject to well-intentioned, but heavy-handed restorations by later architects such as James Wyatt and Sir George Gilbert Scott, who tried to conform the building to contemporary tastes. Therefore, the interior has lost some of its original decoration and furnishings, including stained glass and small chapels, and new things have been added. This is pretty typical, though, of a building that is several centuries old. Fortunately, the regularity and clean lines of the cathedral have not been tampered with. It is still refined, polished, and generally easy on the eye.
Sunlight
Although it inspires the usual awe felt in such a grand and substantial building, and is as pretty as a wedding cake, it has had some criticism from art historians: Nikolaus Pevsner and Harry Batsford both disliked the west front, with its encrustation of statues and “variegated pettiness” (Batsford). John Ruskin, the Victorian art critic and writer, found the building “profound and gloomy.” Indeed, in gray weather, the monochromatic scheme of Chilmark stone and Purbeck marble is just gray upon gray.
However, the cathedral has a widely changing character of neutral tones; sunlight transforms the building, and the visitor’s experience of it. This very quality is what made the Gothic style so revolutionary—the ability to get sunlight into a large building with massive stone walls. Windows are everywhere, and when the light streams through the clerestory arches and the enormous west window, the interior turns from drear gray to transcendent gold.

