
2: Basic Camera
- Page ID
- 90586
\( \newcommand{\vecs}[1]{\overset { \scriptstyle \rightharpoonup} {\mathbf{#1}} } \)
\( \newcommand{\vecd}[1]{\overset{-\!-\!\rightharpoonup}{\vphantom{a}\smash {#1}}} \)
\( \newcommand{\dsum}{\displaystyle\sum\limits} \)
\( \newcommand{\dint}{\displaystyle\int\limits} \)
\( \newcommand{\dlim}{\displaystyle\lim\limits} \)
\( \newcommand{\id}{\mathrm{id}}\) \( \newcommand{\Span}{\mathrm{span}}\)
( \newcommand{\kernel}{\mathrm{null}\,}\) \( \newcommand{\range}{\mathrm{range}\,}\)
\( \newcommand{\RealPart}{\mathrm{Re}}\) \( \newcommand{\ImaginaryPart}{\mathrm{Im}}\)
\( \newcommand{\Argument}{\mathrm{Arg}}\) \( \newcommand{\norm}[1]{\| #1 \|}\)
\( \newcommand{\inner}[2]{\langle #1, #2 \rangle}\)
\( \newcommand{\Span}{\mathrm{span}}\)
\( \newcommand{\id}{\mathrm{id}}\)
\( \newcommand{\Span}{\mathrm{span}}\)
\( \newcommand{\kernel}{\mathrm{null}\,}\)
\( \newcommand{\range}{\mathrm{range}\,}\)
\( \newcommand{\RealPart}{\mathrm{Re}}\)
\( \newcommand{\ImaginaryPart}{\mathrm{Im}}\)
\( \newcommand{\Argument}{\mathrm{Arg}}\)
\( \newcommand{\norm}[1]{\| #1 \|}\)
\( \newcommand{\inner}[2]{\langle #1, #2 \rangle}\)
\( \newcommand{\Span}{\mathrm{span}}\) \( \newcommand{\AA}{\unicode[.8,0]{x212B}}\)
\( \newcommand{\vectorA}[1]{\vec{#1}} % arrow\)
\( \newcommand{\vectorAt}[1]{\vec{\text{#1}}} % arrow\)
\( \newcommand{\vectorB}[1]{\overset { \scriptstyle \rightharpoonup} {\mathbf{#1}} } \)
\( \newcommand{\vectorC}[1]{\textbf{#1}} \)
\( \newcommand{\vectorD}[1]{\overrightarrow{#1}} \)
\( \newcommand{\vectorDt}[1]{\overrightarrow{\text{#1}}} \)
\( \newcommand{\vectE}[1]{\overset{-\!-\!\rightharpoonup}{\vphantom{a}\smash{\mathbf {#1}}}} \)
\( \newcommand{\vecs}[1]{\overset { \scriptstyle \rightharpoonup} {\mathbf{#1}} } \)
\(\newcommand{\longvect}{\overrightarrow}\)
\( \newcommand{\vecd}[1]{\overset{-\!-\!\rightharpoonup}{\vphantom{a}\smash {#1}}} \)
\(\newcommand{\avec}{\mathbf a}\) \(\newcommand{\bvec}{\mathbf b}\) \(\newcommand{\cvec}{\mathbf c}\) \(\newcommand{\dvec}{\mathbf d}\) \(\newcommand{\dtil}{\widetilde{\mathbf d}}\) \(\newcommand{\evec}{\mathbf e}\) \(\newcommand{\fvec}{\mathbf f}\) \(\newcommand{\nvec}{\mathbf n}\) \(\newcommand{\pvec}{\mathbf p}\) \(\newcommand{\qvec}{\mathbf q}\) \(\newcommand{\svec}{\mathbf s}\) \(\newcommand{\tvec}{\mathbf t}\) \(\newcommand{\uvec}{\mathbf u}\) \(\newcommand{\vvec}{\mathbf v}\) \(\newcommand{\wvec}{\mathbf w}\) \(\newcommand{\xvec}{\mathbf x}\) \(\newcommand{\yvec}{\mathbf y}\) \(\newcommand{\zvec}{\mathbf z}\) \(\newcommand{\rvec}{\mathbf r}\) \(\newcommand{\mvec}{\mathbf m}\) \(\newcommand{\zerovec}{\mathbf 0}\) \(\newcommand{\onevec}{\mathbf 1}\) \(\newcommand{\real}{\mathbb R}\) \(\newcommand{\twovec}[2]{\left[\begin{array}{r}#1 \\ #2 \end{array}\right]}\) \(\newcommand{\ctwovec}[2]{\left[\begin{array}{c}#1 \\ #2 \end{array}\right]}\) \(\newcommand{\threevec}[3]{\left[\begin{array}{r}#1 \\ #2 \\ #3 \end{array}\right]}\) \(\newcommand{\cthreevec}[3]{\left[\begin{array}{c}#1 \\ #2 \\ #3 \end{array}\right]}\) \(\newcommand{\fourvec}[4]{\left[\begin{array}{r}#1 \\ #2 \\ #3 \\ #4 \end{array}\right]}\) \(\newcommand{\cfourvec}[4]{\left[\begin{array}{c}#1 \\ #2 \\ #3 \\ #4 \end{array}\right]}\) \(\newcommand{\fivevec}[5]{\left[\begin{array}{r}#1 \\ #2 \\ #3 \\ #4 \\ #5 \\ \end{array}\right]}\) \(\newcommand{\cfivevec}[5]{\left[\begin{array}{c}#1 \\ #2 \\ #3 \\ #4 \\ #5 \\ \end{array}\right]}\) \(\newcommand{\mattwo}[4]{\left[\begin{array}{rr}#1 \amp #2 \\ #3 \amp #4 \\ \end{array}\right]}\) \(\newcommand{\laspan}[1]{\text{Span}\{#1\}}\) \(\newcommand{\bcal}{\cal B}\) \(\newcommand{\ccal}{\cal C}\) \(\newcommand{\scal}{\cal S}\) \(\newcommand{\wcal}{\cal W}\) \(\newcommand{\ecal}{\cal E}\) \(\newcommand{\coords}[2]{\left\{#1\right\}_{#2}}\) \(\newcommand{\gray}[1]{\color{gray}{#1}}\) \(\newcommand{\lgray}[1]{\color{lightgray}{#1}}\) \(\newcommand{\rank}{\operatorname{rank}}\) \(\newcommand{\row}{\text{Row}}\) \(\newcommand{\col}{\text{Col}}\) \(\renewcommand{\row}{\text{Row}}\) \(\newcommand{\nul}{\text{Nul}}\) \(\newcommand{\var}{\text{Var}}\) \(\newcommand{\corr}{\text{corr}}\) \(\newcommand{\len}[1]{\left|#1\right|}\) \(\newcommand{\bbar}{\overline{\bvec}}\) \(\newcommand{\bhat}{\widehat{\bvec}}\) \(\newcommand{\bperp}{\bvec^\perp}\) \(\newcommand{\xhat}{\widehat{\xvec}}\) \(\newcommand{\vhat}{\widehat{\vvec}}\) \(\newcommand{\uhat}{\widehat{\uvec}}\) \(\newcommand{\what}{\widehat{\wvec}}\) \(\newcommand{\Sighat}{\widehat{\Sigma}}\) \(\newcommand{\lt}{<}\) \(\newcommand{\gt}{>}\) \(\newcommand{\amp}{&}\) \(\definecolor{fillinmathshade}{gray}{0.9}\)This chapter introduces some very basic things about cameras that will be expanded upon later. It is like learning how to drive, where it helps to know there is an engine and you have to give it fuel every once in a while.
The Sensor
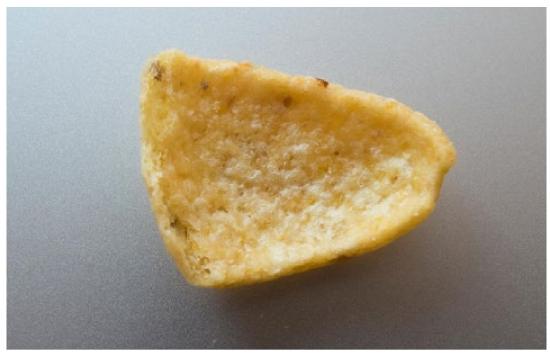
At the heart of any camera is the sensor. It is a flat rectangular chip that light from the lens falls upon during exposure. It converts this light to numbers which will form an image. Like the back of your eye takes light and converts it into stuff for your brain to figure out to make vision.
|
Corn chip. This one is about the size of the sensor chip in a camera. |
The Camera
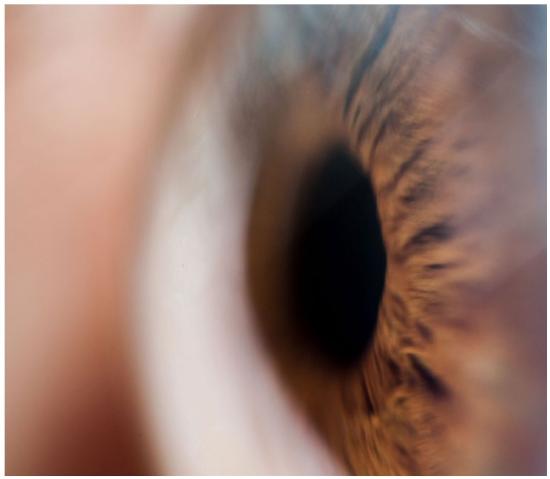
Just as the back of your eye is pretty useless without all the paraphernalia surrounding it (front of your eye, brain), the sensor chip needs other things, which are collectively called a camera.
|
Kate’s eye
|
There are two types of digital cameras that are controllable and capable of high-quality images. These are distinguished by their viewing systems. The first is a Digital Single Lens Reflex (DSLR or Digital SLR) camera. These cameras are the traditional mainstay of photographers, and they are the ubiquitous type of camera at anything from press conferences to sporting events. They are versatile and generally dependable work-horses. The basic design of DSLRs predates the advent of digital cameras by more than a half-century.
DSLR Camera Operation
With a DSLR viewing system the image from the lens (which forms the image) is reflected by a mirror up into the viewfinder. When the shutter is pressed, the mirror flips up and the image is allowed onto the sensor for the time it takes to record it. After the image is recorded, the mirror flips back down and the image is again diverted to the viewfinder. If you have one of these cameras you can see that the instant the picture is being taken the view-finder is dark.
While this type of camera is very good, it does have some disadvantages. What if the flipping mirror could be eliminated, enabling the camera to be quieter and smaller?
Mirrorless Cameras
The answer is the mirrorless camera. While the name is not too imaginative, it does describe a big difference from DSLRs. These cameras, since they do not rely on a mirror, are indeed both quieter and smaller. They are also somewhat more expensive than comparable DSLRs.
With a mirrorless camera, you are viewing an image made by the sensor when you look at it in the viewfinder. When you take a picture, a shutter closes, blocking light from the sensor, then opens again to expose the sensor, which is now in shooting mode. After the exposure, the shutter closes and then opens again in viewing mode. All of this in a fraction of a second.
Which type of camera is best depends on the photographer. Since the mirrorless camera’s viewfinder is an electronic image, the viewing is very different from viewing the optical image of a DSLR—some hate it and some like it. There are also some other differences in these cameras, such as how the camera auto-focuses.
|
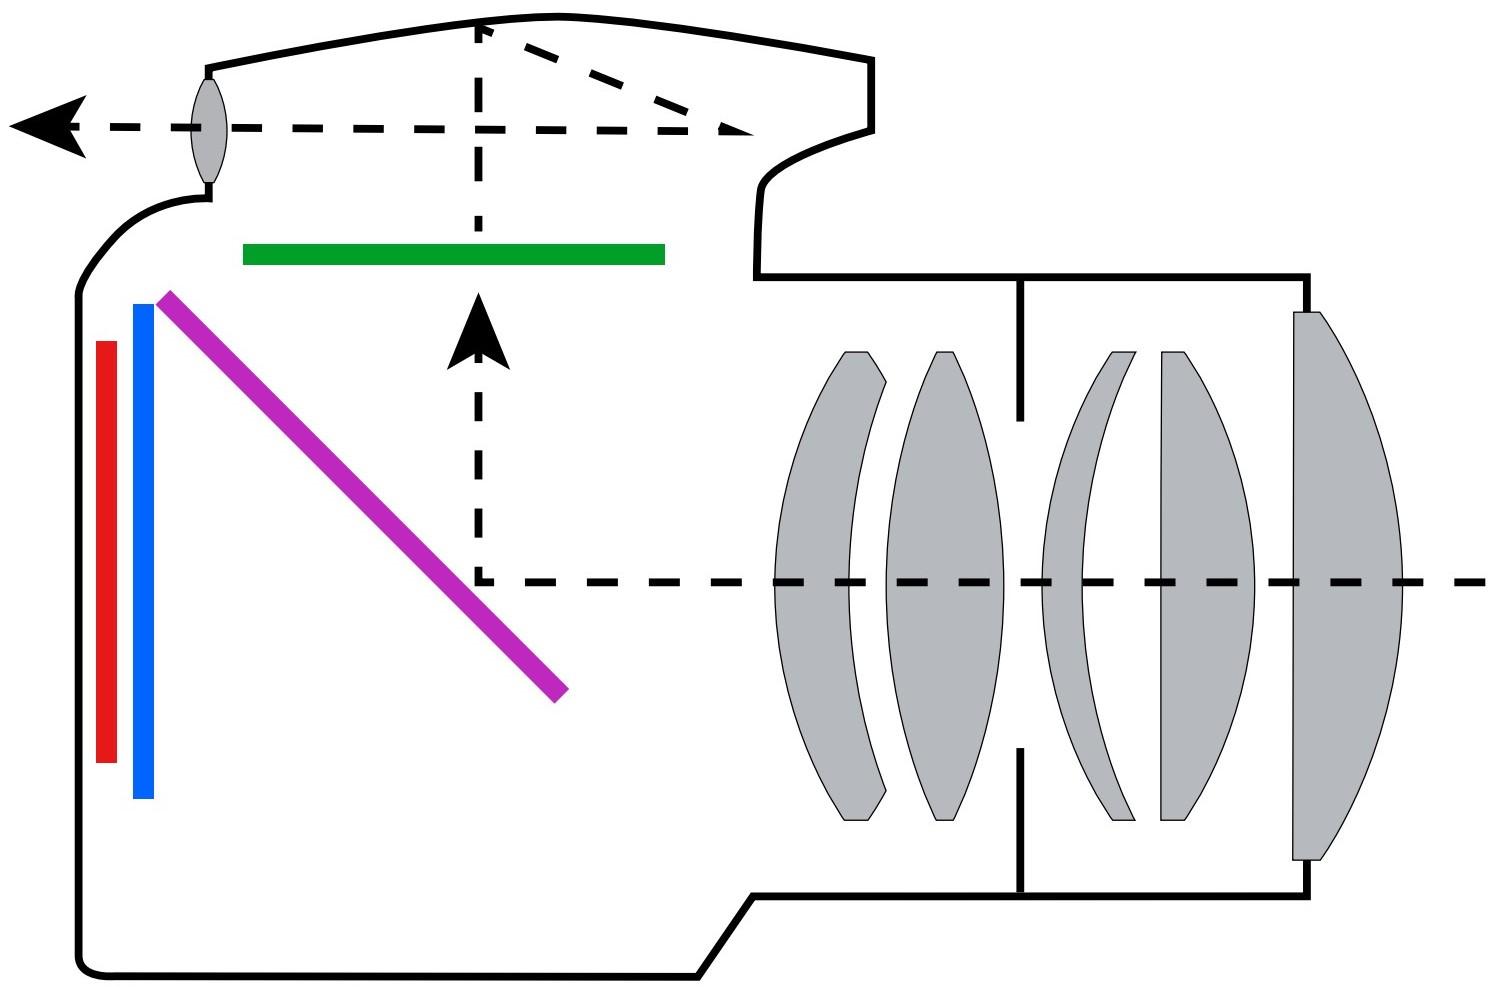
When viewing through your DSLR, the image comes through the lens, bounces off a mirror, and is projected on a screen. You view this optical image through a mirrored prism.
When you fully depress the shutter button, the mirror swings up out of the way, the shutter opens, and light is allowed to hit the sensor. In a fraction of a second after the sensor is exposed, the shutter closes and the mirror swings back down again for viewing.
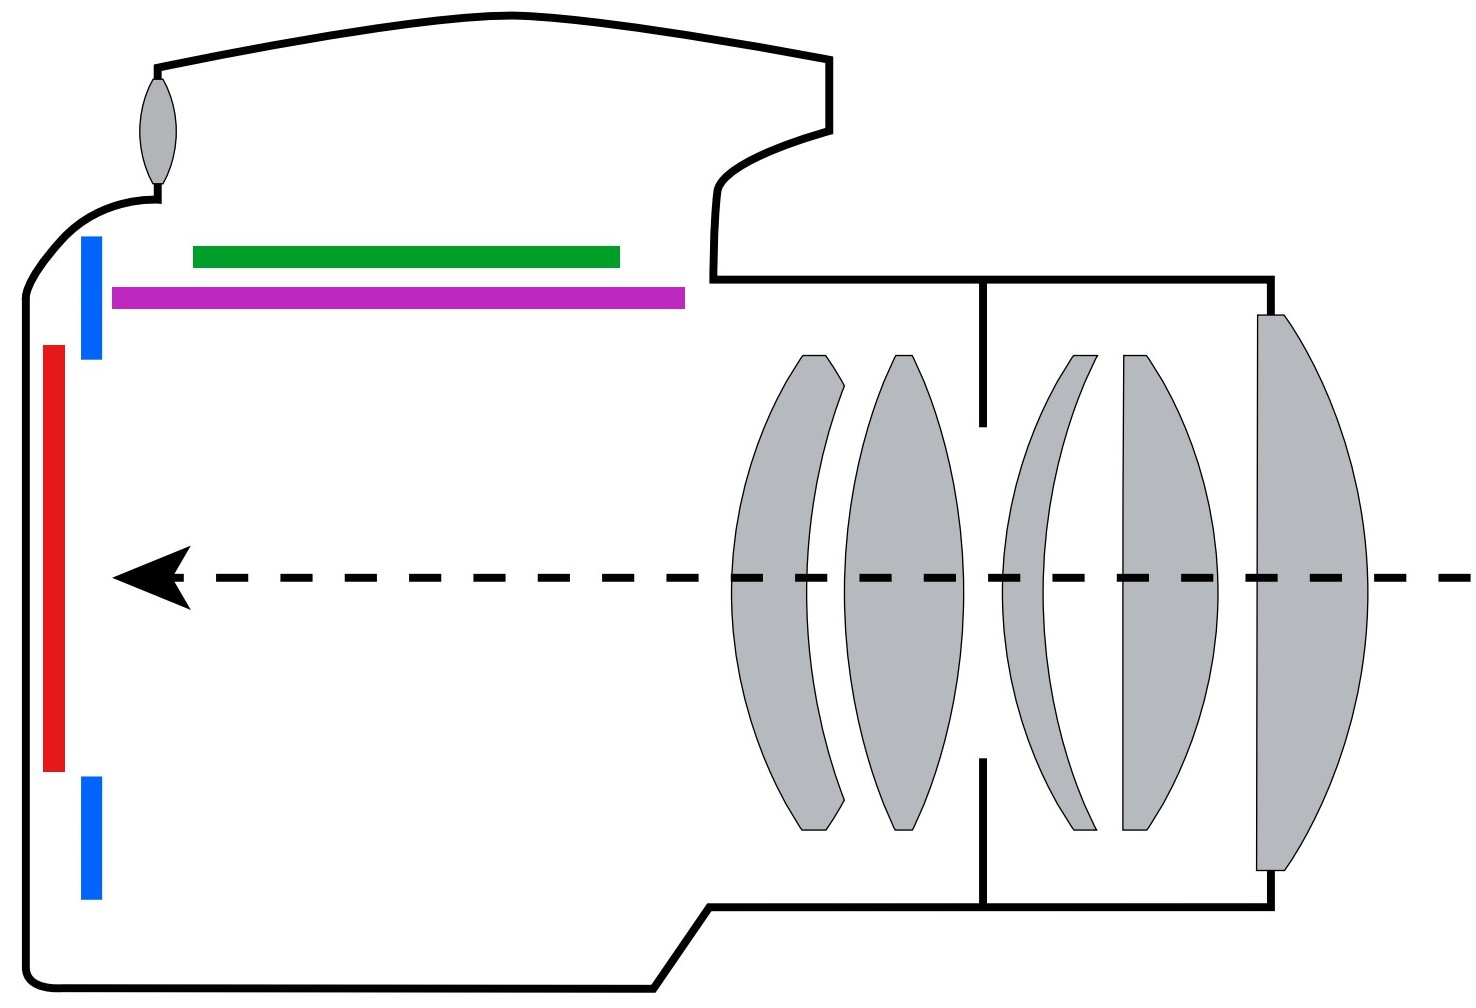
A mirrorless camera in viewing mode uses the sensor to form an electronic image on either the viewfinder screen or back viewing screen. When the picture is taken, the shutter closes, the sensor switches to shooting mode, and then the shutter opens for the duration of the exposure.
|

Sensor Size
Image quality is largely governed by sensor size. Common cameras generally have what are called APS-C (or four-thirds) size sensors, while more expensive cameras generally have larger full-frame sensors. These full-frame sensors give better image quality, but they might be a waste of money since the image quality of the smaller sensor is darned good. Since the APS-C sensors are smaller, the cameras that sport them are also smaller.
Other Cameras
There are many different types of cameras designed around very small sensors. As a matter of fact, a designer can put a sensor into just about anything. Add a lens, and you have a camera. Cellphone cameras, Go-Pros, and small point & shoot cameras are just a sampling. Sensors and lenses are put in watch-bands, eyeglasses, and even digital assistants which can assess how you are dressed.
Most of these have tiny sensors. The quality of an image is directly governed by the size of the sensor, so if you want the potential for having a high-quality image, you have to use to a bigger camera. This is not to say small sensors cannot take good photographs. They can, but are very limited in how well they can in different situations and for different uses.
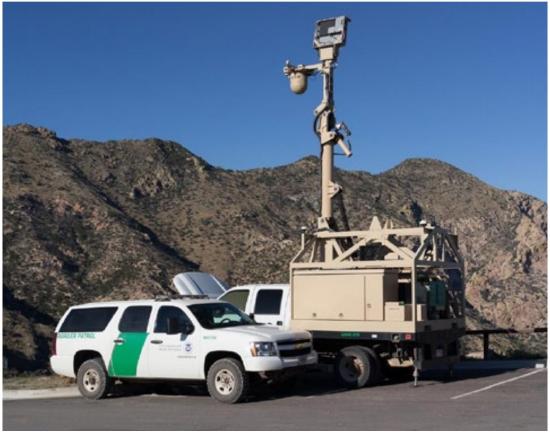
|
Arizona border patrol camera |
Using Your Camera
With most DSLR and mirrorless cameras, you have the choice of composing your photograph either through the viewfinder you put up to your eye or viewing it on the back viewing screen. Which method is better largely depends on the situation and your preferences, but generally viewing through the viewfinder allows you to at least brace the camera better for potentially sharper and more carefully composed images.
|
Self-portrait with my wife using Duluth Harbor-Cam (overall view and detail) |

Shutterless CamerasMost cameras with very small sensors (like cellphone cameras) don’t use a physical shutter, instead they just switch the sensor from viewing mode to shooting mode. |
There are other advantages to using the viewfinder. The back viewing screen is one of the highest users of power in your camera, so turning it off will conserve your battery. With DSLR cameras, using the back viewing screen to compose your images switches to a slower and less precise auto-focusing method.
Holding the Camera
In situations with a lot of light, how you hold your camera doesn’t matter too much as long as you can study the image carefully. But when taking photographs in lower light, the possibility of camera shake can make for some really blurry images. If you are using the viewfinder in low light, hold the camera with both hands, tuck your elbows against your body, and press the camera to your face to steady it. Calm your breath while you squeeze the shutter button. And if it is a really low-light situation, forgo that last cup of coffee.
When using the viewing screen on the back of the camera, is more difficult to steady it, but pushing the camera away from you so that the neck-strap is tight around the back of your neck helps. Neck straps will be discussed very soon.
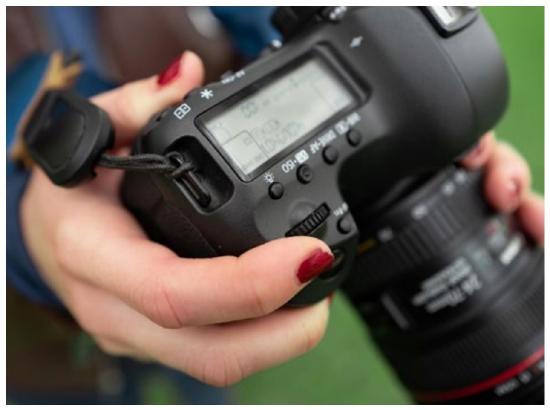
|
Cameras are right-handed. The thumb and index finger can easily reach the most used controls. The left hand helps brace the camera by holding the lens (overhand or underhand). It can also be used to turn the zoom ring or manually focus. Any switches on or near the lens are usually designed to be reached underhand, since this way of holding usually provides the most stability. |
If you really want to take photographs with very little light, look for a wall or pole to lean against. Even better, find a surface to put your camera on or hold it against.
Neck Strap
A neck strap for your camera is like a seat belt in your car. Use it. Gravity loves to eat cameras.
UV Filter
When you purchased a camera you may have been pressured to buy a clear filter to put over your lens. If you didn’t buy it, consider doing so. Doorknobs seem to love my lenses, and I am sure there are many things just waiting to put a dent on the front of your lens or crash right into the glass. It is much cheaper to replace a filter than an expensive lens. These filters are called something like UV filter since it sounds better than glass filter. They do block some UV (ultraviolet) light, but then again, so does plain glass.
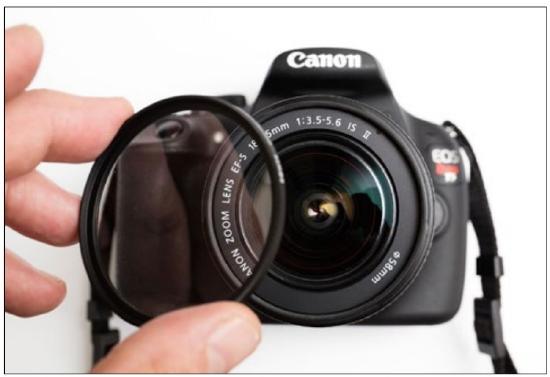
|
UV filter to protect the front of the lens |
Clean your Friggin Lens
Try this simple exercise: Eat a bunch of potato chips, then put finger marks all over your glasses or sunglasses. Now see how much worse your vision is. Your camera’s vision is very much like this.
All you have to do to clean your lens is fog it up with a HUH from your lungs, then with light pressure wipe it in a circular motion with a soft cotton cloth. A clean cotton shirt (not the one you were wearing when you ate all those chips) will do. For greasier situations you may need to apply a little eye-glass cleaner instead of the HUH.
Don’t worry if you have a few flecks of dust on or in your lens. If it is in modest amounts it will not effect image quality.
Tripod
When you have very little light, a support better than shaky human hands is needed. Although tables, chairs, and all sorts of other things can be used to steady the camera, a tripod made for this purpose is the most versatile.
|
With the cameras shown here you really need a tripod to take any photographs. Smaller digital cameras still benefit from tripods in many low-light situations. |
Tripods come in all sizes and at all costs, and even a very inexpensive one can get you a good photograph. If you want to use a tripod a lot, though, remember that you pretty much get what you pay for. More money means a steadier support, better durability, controls that securely lock the camera into place, and lighter weight relative to the size of the tripod.
Battery
The battery that powers your camera is pretty straightforward, but there are a couple of things you should be aware of. First, some operations on cameras (like using the LCD screen to view or review images) drain the battery fairly quickly.
Secondly, cold temperatures will not drain a battery, but will make it powerless until it is warmed up again. In the winter, consider keeping a spare battery in a warm pocket if you are outside for a while.
Rain
One of the reasons photographers buy expensive cameras is that they are often water-resistant. Each door, button, and dial has rubber grommets to protect the insides from a light rain and splashes.
Most less-expensive cameras are not waterproof at all. As your pappy (should have) told you, water and electricity don’t mix, and the inside of your camera is chock full of sensitive electronics. I just found out that spilled beer is also pretty darned good at sneaking into cameras. Keep your camera away from any liquids (beer or rain). I will try to as well.
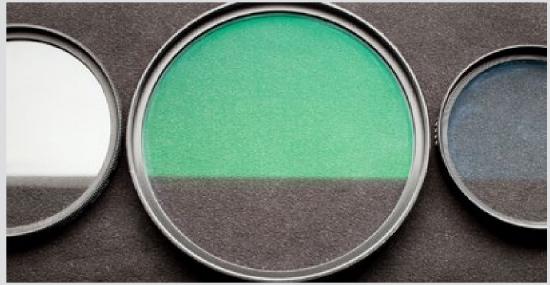
Coated and Multi Coated glassYou may have noticed when you looked into the front of your camera lens that the reflections have colors. This is because they are exposed to metal vapors in manufacturing (either once or multiple times). Besides making funny-colored reflections, this also makes the glass surface reflect less light (so it transmits more light), which is a good thing. Some coatings also improve the scratch-resistance of the glass. Cameras have used these coated or multi-coated lenses for more than fifty years, but eyeglasses have had the option of coating only since about the turn of this century. So the next time you are watching a movie set in 1950 and you see those colored reflections in the actors’ glasses you can jump up and down and yell about how unfaithful the movie is to real life. Since camera lenses contain many glass elements, it is a good thing that they are coated, since each piece of glass has a reflection from both the front and rear sides which can bounce back and forth between elements. With filters that go over the lens, coatings are less important since there is only one piece of glass, but you still may want to get a UV filter that is coated or multi-coated. |
|
The same light reflected from an uncoated filter (left), a multicoated filter (center), and a more expensive multicoated filter (right). The filter on the right is ten times more expensive than the filter on the left. |
Controls
Although your camera has dozens of different settings you can control, there are just four main settings on any camera that influence the interpretation of an image—focus, aperture, shutter speed, and ISO.
Focus
When you lightly push the shutter button the camera tries to find an area to focus on. When it does, it locks onto that focus (showing the area it picked in a rectangle or oval). If you lift your finger off the button, this focus is forgotten, but if you continue to press the button, the photograph is taken utilizing this focus area.
Aperture
Just like the iris of your eye, a camera has a variable size opening which controls the amount of light let through the lens. This is called the aperture. When you are using the ‘P’ setting on your main dial, this opening is controlled automatically by your camera according to the amount of light present in the scene.
Shutter Speed
Behind the lens, and very near to the sensor, there is a sliding curtain which controls the amount of time light is allowed to hit the sensor. This shutter governs the shutter speed. The time the shutter remains open is expressed in fractions of a second (whole seconds for long exposures). Like the aperture, the camera determines this time automatically based on the amount of light present in the scene.
ISO
The sensitivity of the sensor to light is governed by the ISO setting. The camera can set this automatically based on the amount of light present in the scene. But as mentioned before, you should have it set to ISO 400.
All Together
These four settings (three of which are for exposure) are almost always reported in the viewfinder or on the back viewing screen when you push halfway on the shutter button. They display as a group of two numbers: the first is the shutter speed (in fractions of a second), and the second is the aperture (sometimes with the letter ‘F’ before it). Separate from these, and usually labeled as such is the ISO number. The point of focus is shown as an overlay on the image itself.
Four ThingsAll cameras for over 150 years have had focus, aperture, shutter speed, and ISO. But they don’t always have a control for all of these things. For example, cellphone cameras have an aperture that is fixed to one setting. |
|
The exposure controls are reported at the bottom of the viewfinder in most cameras.
|


A camera makes all of the exposure adjustments based on the amount of light in a scene. But it doesn’t usually make the adjustments based on the subject. The camera is basically guessing what you are taking a photograph of. When you are new to photography, this system works fairly well. But as you get more experienced, you will want to make the decisions based on how you want to interpret the subject.
The Other Settings?
But what about the other dozens of buttons and settings on your camera? These govern many things, such as the file format used (it should be RAW), or the zoom setting that allows you to bring a bear closer without actually bringing the bear closer.
These other settings are responsible for a lot of complexity in your camera. On one camera of mine there are twenty-two menu items with no less than a hundred settings that govern how the camera carries out automatic focus. Yikes! I do not know how to use them all, nor do I need to since most are for special purposes.
More Clean LensCamera lens optics are sensitive. Smudges on your lens sends light in unwanted directions, destroying sharp focus and increasing unwanted reflections. As a matter of fact, an old trick that was used to blur blemishes on portraits or in movies was to put a little grease (like Vaseline) on the lens intentionally. Another trick is to place a layer of pantyhose over the lens to soften the image. You can intentionally soften the image from your cellphone camera a bit by wiping the side (outside!) of your nose (nose oil!), then smearing the lens. Dust on a lens does not appear as specks on your image because it is so far away from the place where things are in focus that it is just a big insignificant blur. If you see dust specks only when looking through your camera they are on the viewing screen. If you see dust specks on your images, the dust is on the sensor. |
|
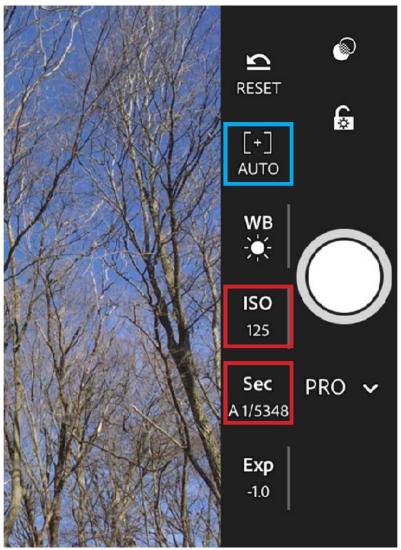
Cellphone cameras also have most of the controls this book will be investigating. To use some of them you need a special application. In this example, aperture is missing. This is because most cellphone cameras have an aperture that is non-adjustable. But there are still controls for focus (blue box), ISO, and shutter speed (red boxes). Because of quality and exposure limitations, these controls are much more useful with dedicated cameras. |
There are some expensive professional cameras that actually have very few settings. But all cameras dealt with in this text will have provisions for changing focus, aperture, shutter speed, and ISO.
Light Color
The type of light you use when taking photographs can make quite a difference. Avoid taking photographs using what is called mixed light. Light from different types of light sources is actually different colors, something our brain accounts for but cameras do not.
If you are taking photographs using a window for light, turn off the other lights in the room. Or, if you are taking photographs using the lights in a room, close the window curtain. Unless you are taking photographs that will be black and white, limiting the lighting to one type of source will make the color in your images much better.
Now Go Shoot
Actually, before you go shoot, study your camera. Pay attention to the things we have covered in this (and the first) chapter. I wouldn’t say bond with your camera, but do give it some attention. That hunk of metal, glass, and plastic will help you express yourself.
The information in this chapter has been mostly geared towards giving you background information which you can use to increase your understanding of that thing you hold to secure images of the world. Think about what is happening when your camera is taking a photograph. It is pretty incredible.
There is also practical information you can use while shooting. Clean the lens, try different ways of holding the camera (for both vertical and horizontal compositions), and don’t go out in the rain.
By just using your camera on program mode you can take wonderful pictures. Concentrate on that, but also look at those numbers (usually on the bottom of your screen) and see how they change. They are not very important now, but they will be as you learn how to better control your images.
The rest of this book will be covering many of the things in this chapter in greater detail. If you are really interested in learning about something sooner, feel free to find it using the table of contents or the term references in the appendix. Or you can search the web (of course).
|
Megan Stephenson |

|
Hannah Cox |
Basic Camera Questions
What device converts light levels to numbers that will form an image?
What is an advantage of a digital SLR camera compared to a mirrorless camera? A disadvantage?
Camera image quality is mostly governed by what?
What viewing method allows you to brace the camera better?Why is using a UV filter a good idea?
What device do you use to prevent camera shake?
What will make a camera battery temporarily powerless?
What is one the four main controls on a camera?
What camera part is equivalent to the iris in your eye?
What setting controls the sensitivity of the sensor to light?
What controls the amount of light getting to the sensor when you take a photograph?
What controls the time light is allowed to get to the sensor when you take a photograph?
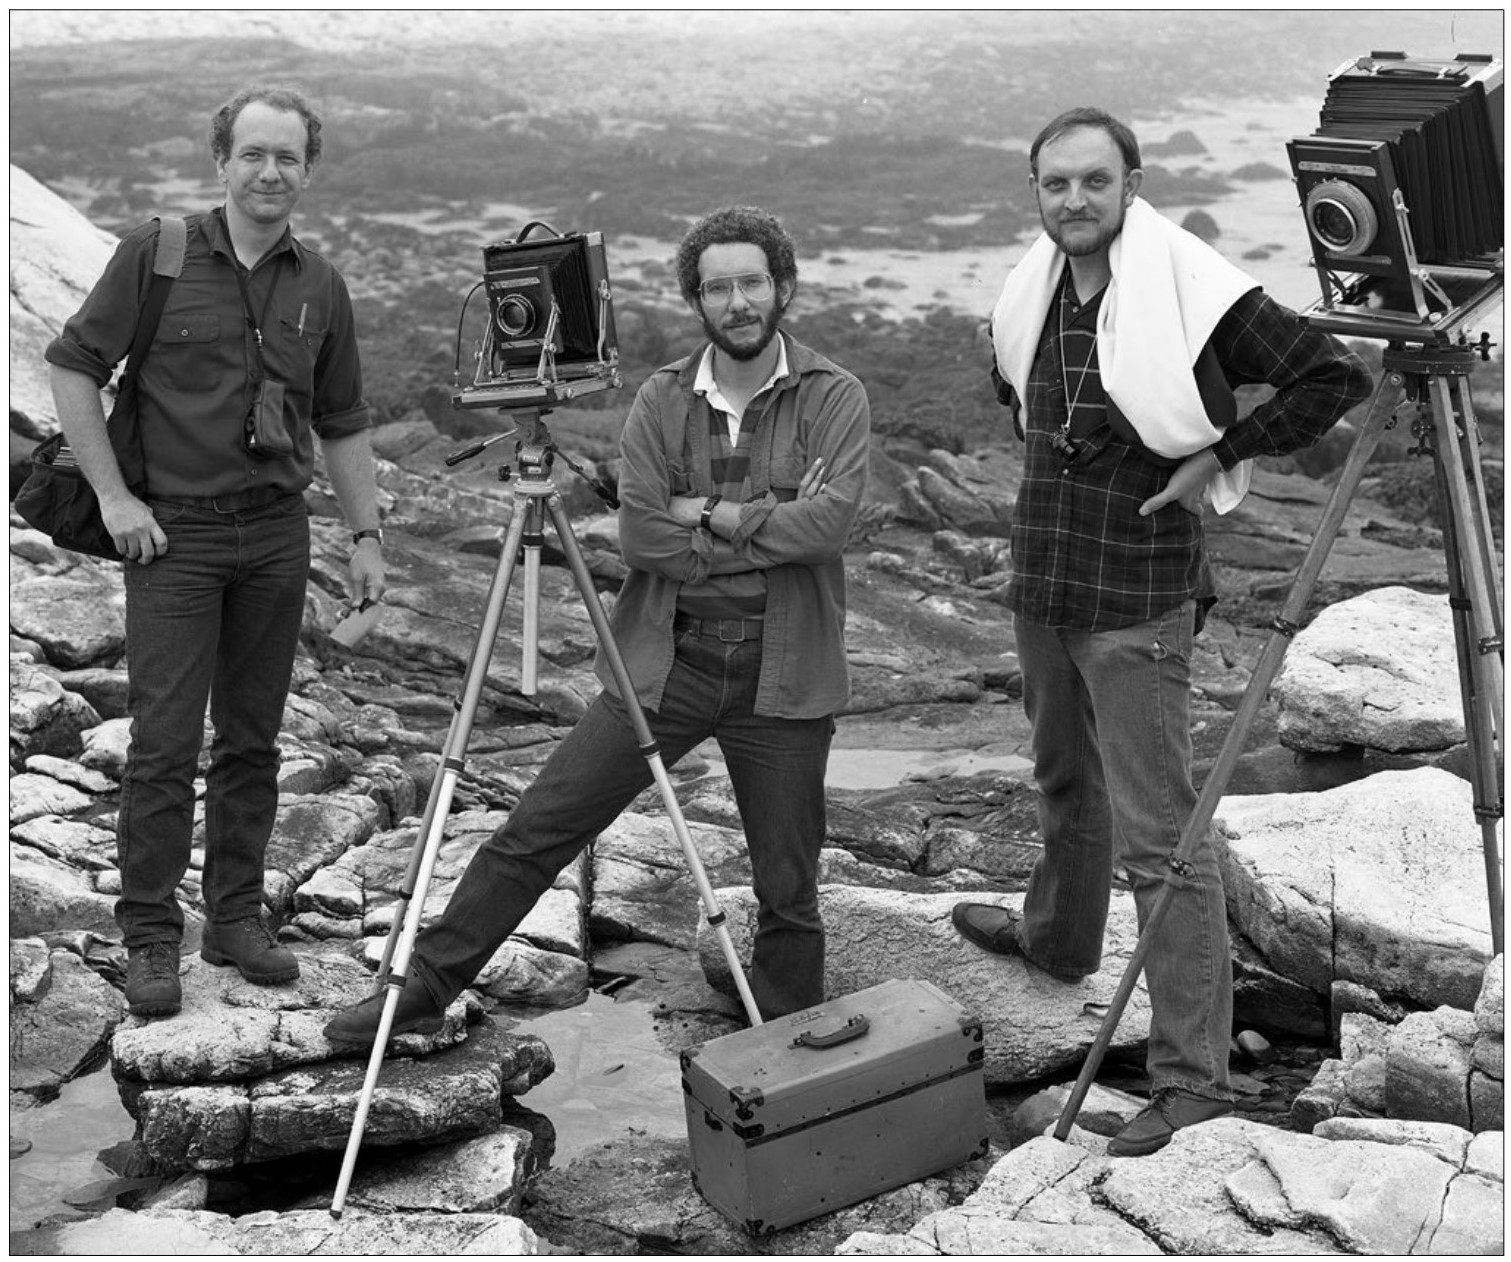
|
The images on these questions pages are basically non sequiturs, but this guy is doing a much better job of bracing the camera than the guy in the last chapter questions.
|
