
2.2: 2CR MULTIPLE EDITS
- Page ID
- 90591
Here are two things that don’t necessarily have much to do with the operation of Camera Raw, but are necessary to control your images.
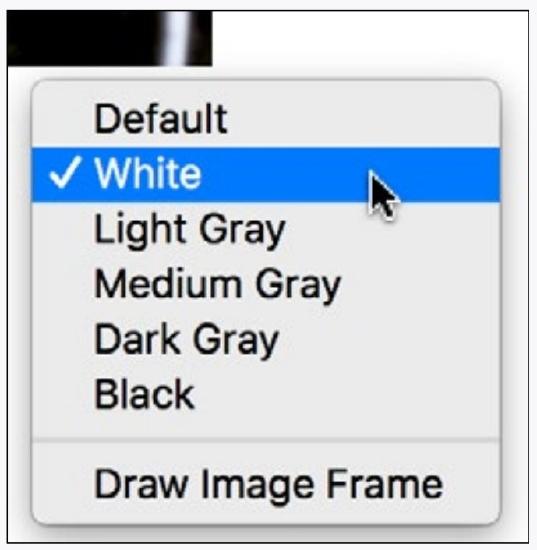
Set Camera Raw Background to White
If you hold the control key and click and hold on the border of your image (you may need to reduce the magnification of your view to see the border), you will have the option to make the background white.
This is a good idea if you are going to print your image or otherwise show it on a white background in an email or on the web.
Adjust Your Display Brightness
Different computer displays have different brightnesses, and even the same display appears at different brightnesses relative to the level of room light. This is a problem, since you can correct an image to be just perfect, but change the room light or the display and the result is not perfect.
The method I use to adjust display brightness is pretty straight-forward. Simple hold a piece of white paper to the side of the display and adjust the brightness of a white area on the display to match (or make a bit brighter) than the paper.
You can also apply many of the adjustments to multiple images by selecting all your images first, then applying the adjustments.
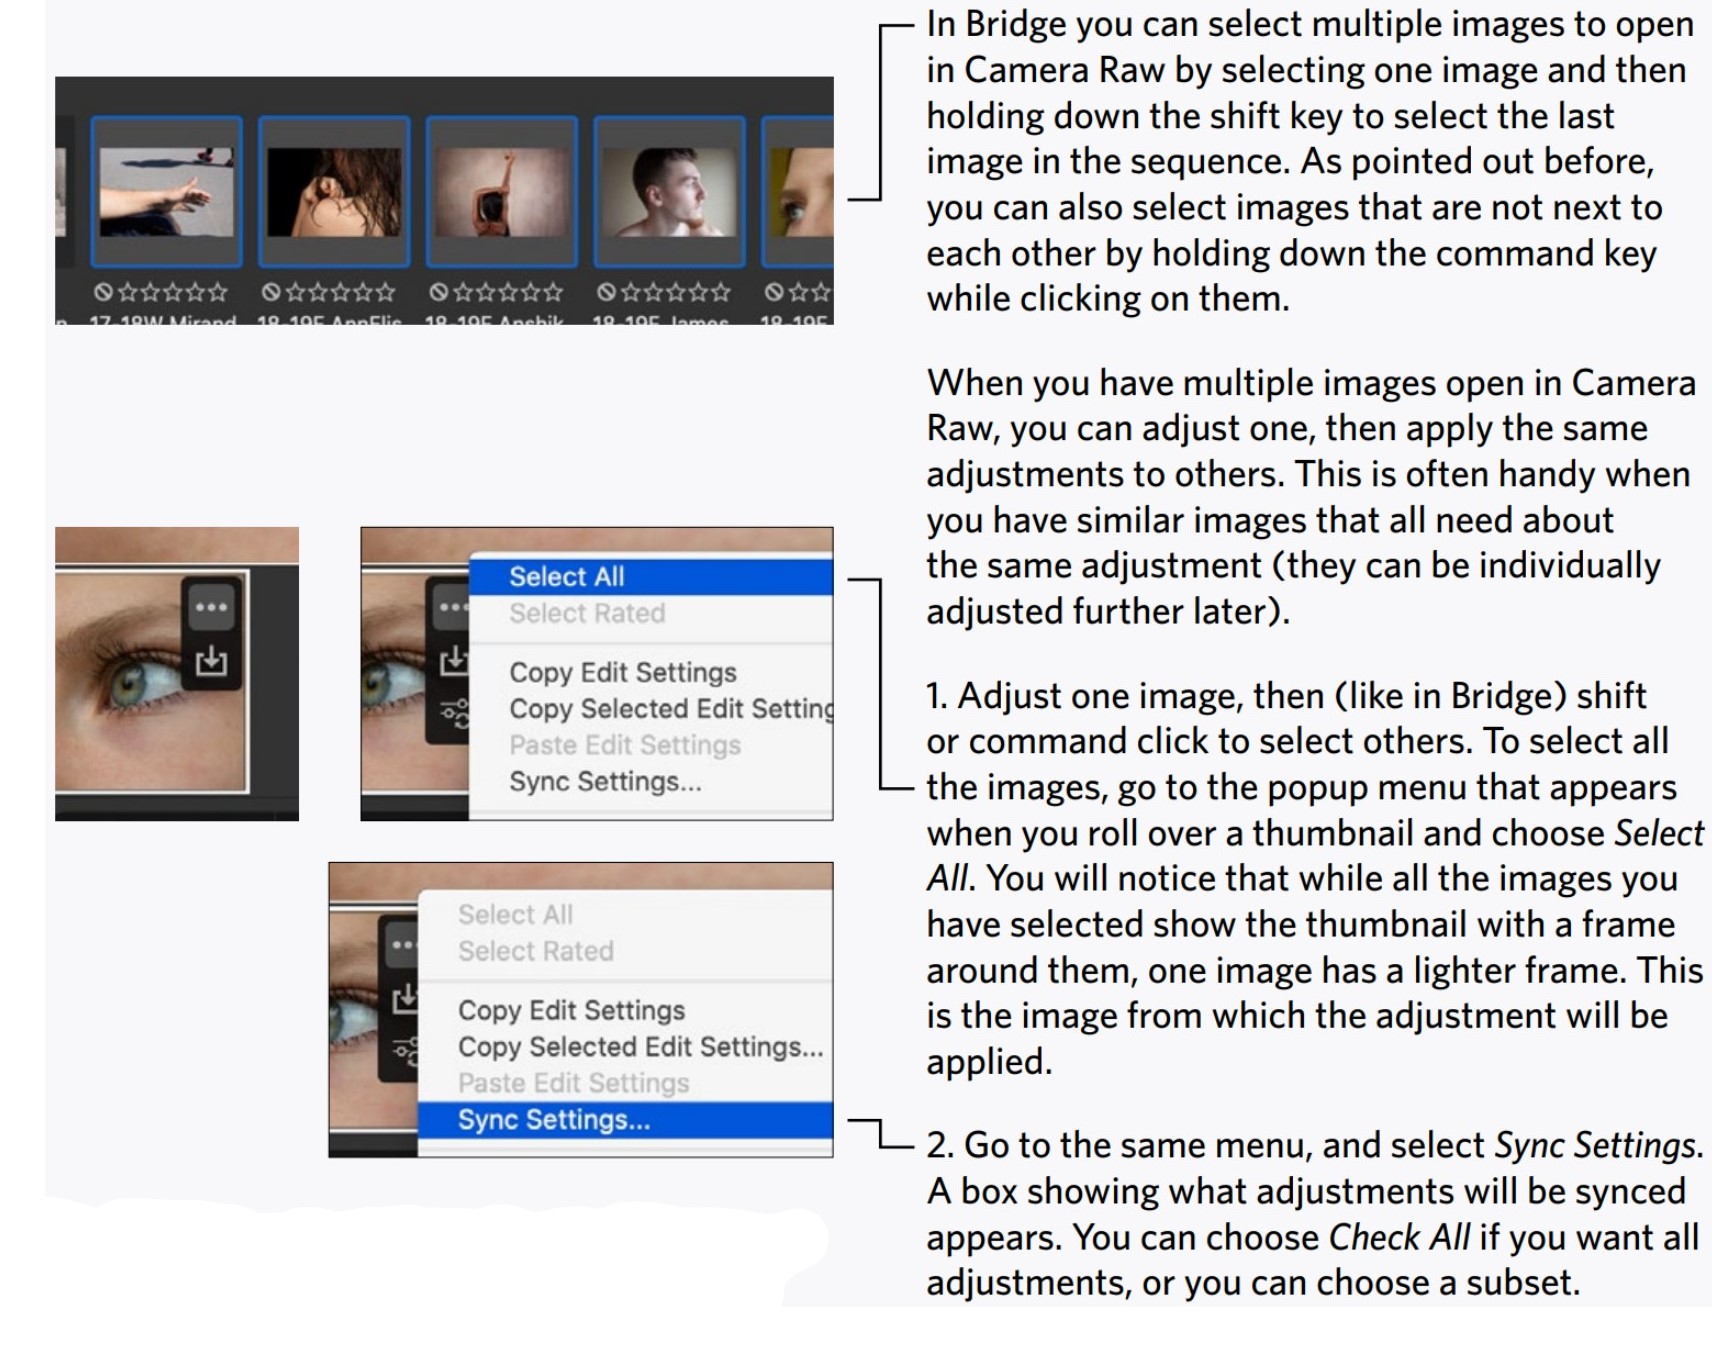
When you click Done and return to Bridge you may notice that it might take a little while to update the settings on the images there.
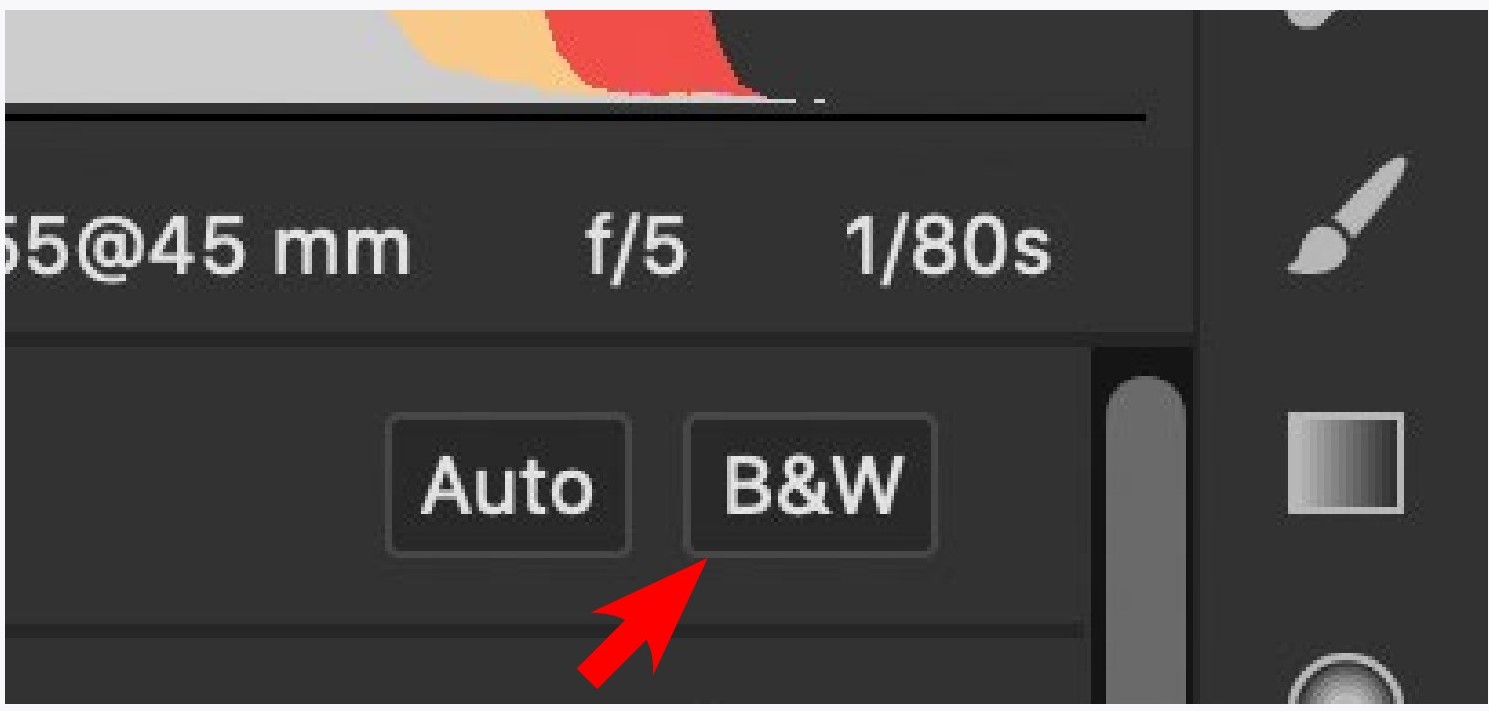
Try this to make all of your images black & white. This is a good way to see it working, although syncing images is usually done when you have a number of images taken in the same conditions that need the same adjustments.
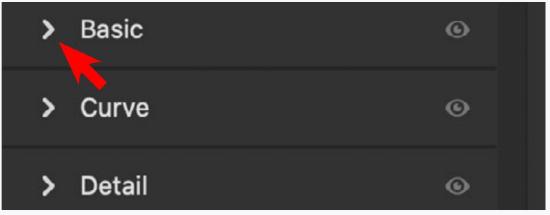
You may have noticed by now that the adjustments selection in Camera Raw has more panels than the Basic panel it defaults to. These can be shown or collapsed with the chevrons next to their title.
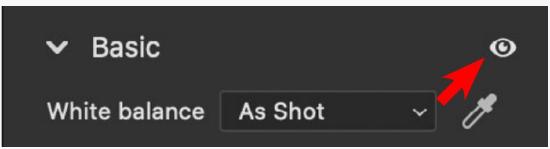
We will get to those other panels later, but the eyeball associated with them (arrow) is handy at this point. If you click and hold on it, the adjustments you made in the panel are hidden. Another way to compare your image edits!
Oops
If you are experimenting with Camera Raw the way you should be, you will probably get into trouble.
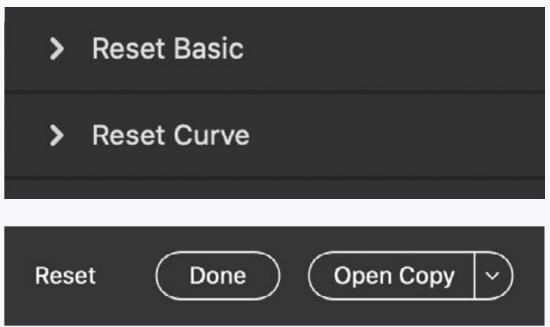
To reset all of the adjustments governed by a panel, hold down the option key. The panel title will change to Reset...
Also notice that the Cancel button at the bottom of Camera Raw will change to Reset as well when the option key is held down. This would be the equivalent to canceling out of Camera Raw and restarting it.
And lastly, single adjustments can be undone by pressing both the command and z keys at the same time. Holding down the shift key as well will redo an adjustment. You can alternate these keystoke combinations to see if that last adjustment made things better with the image or not. This method of comparing images can be used in conjunction with the multiple views covered in the last set of instructions.
Photoshop To Print
One thing you cannot do in Camera Raw is print an image. For that, you need to open your image in Photoshop by clicking Open at the bottom right of the application window.
Once in Photoshop, go to the menu Image > Image Size. In the resulting box, uncheck the Resample box if it is checked. Always make sure this is unchecked. Resample means change the quality of the image (by changing the number of pixels), and you want everything the image has.
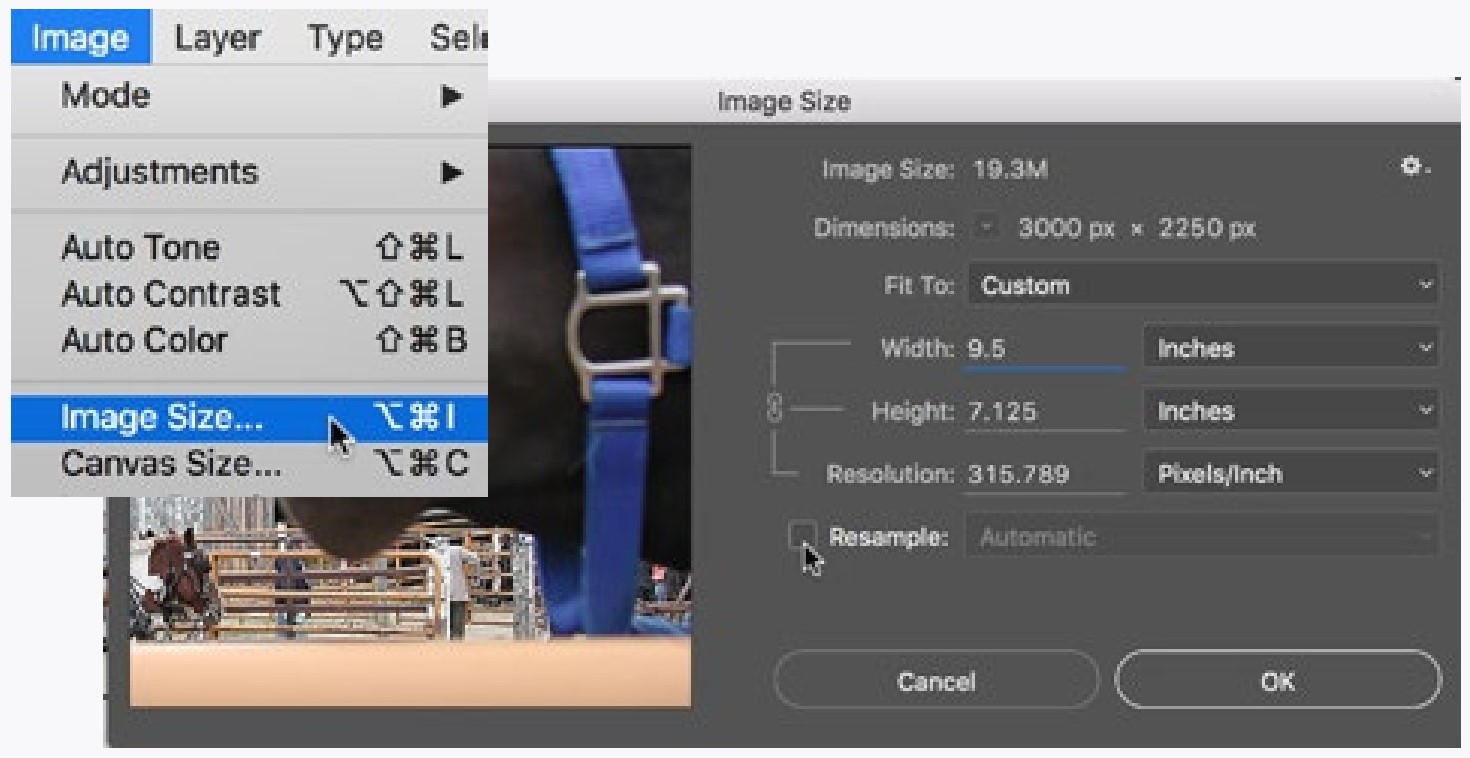
Now enter either the Width or the Height you want your image to be on the page. Letter size is 8.5 x 11 inches, so you need something smaller if you want borders on your print. Notice that when you change one dimension (like width), the other dimension (like height) will automatically change so the image will stay in proportion (not stretch). If you happen to figure out how to unlock proportions with the chain icon, lock them back on! Also make sure the resolution of the image is over 200 pixels per inch. If it is not, then something is amiss.
Go to File > Print to print. After you are done printing, just close the image without saving it (changes were saved in Camera Raw).
FIRST THINGS FIRST
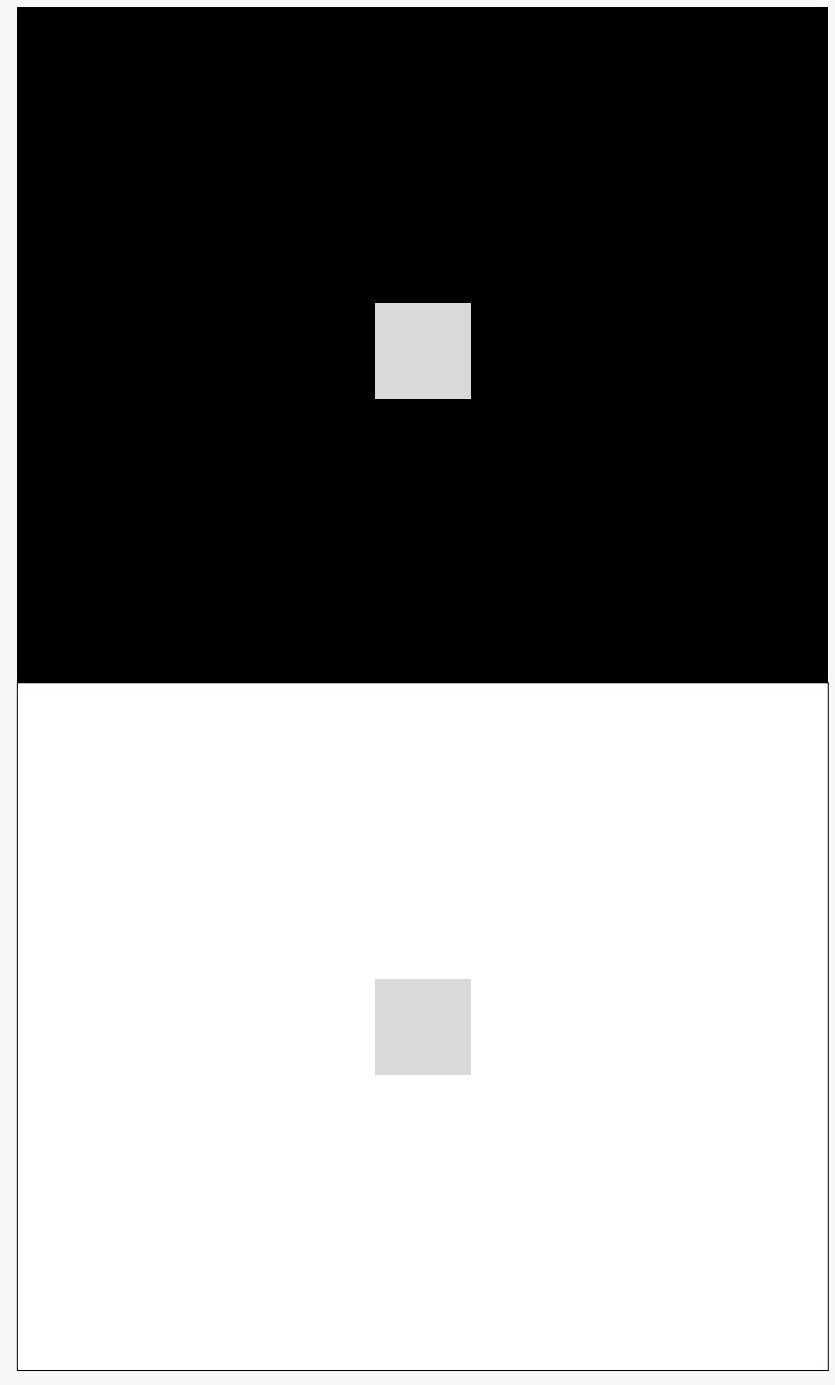
Think about this for a second: Say you have a photograph that you are viewing on a dark Camera Raw background. How are you going to know how light the lighter areas are? They may look very bright, but is that because your monitor is set to a high brightness? You can’t tell. I know that because I can’t either.
Set your background to white. Yes, I know it doesn’t look as cool, but for any photographs that are going to be printed or shown on a lighter background, it is the easiest way to judge the tones in an image.
But what about the darker tones? Yes, you can tell how dark the darker tones are better with the background set to black. But for a variety of reasons this is less of a problem unless the final viewing situation is on a black background.
Adjust your display brightness or you may have an embarrassingly bad image when you show someone the photograph you adjusted on a display that was set too bright.
MULTIPLE IMAGE ADJUSTMENTS
Try selecting a few images in Bridge, then go through the steps of adjusting one then applying that adjustment to others.
REVIEW
Now is a good time to go back to the last chapter (1cr) and review the things there while you are sitting at the computer. These are important basic techniques that we will be building on later.
|
Even with all the white on this page, it is difficult to tell how dark that little square is when it is on a dark background. It is much easier to see when the same square is on a white background. By the way, did you notice that all of the pages of this book are not actually white? Probably not, since in most PDF viewers there is nothing which to compare (key) the white. |
DID YOU...
Set your Camera Raw background to white and adjust the brightness of your display?
Change the color space at the bottom of the Camera Raw window (last chapter)?
CAN YOU...
Make an adjustment to one image, then apply that adjustment to other images?
Go back to the image as it came from the camera (without adjustments)?
Use the command-z keys to toggle your last adjustment?
Open an image in Photoshop and print it?
Still do everything covered in the last Camera Raw instructions (1cr)?