16.5: Video scopes for post-production
- Page ID
- 139481
Video Scopes and color correction
Video scopes are essential when you start to color correct your footage. They are a consistent guide you will need to optimize the color, exposure and contrast of the clips you are working on. However, while scopes can give you reliable and consistent information about the color and brightness of the pixels recorded, they are only a reference. By understanding scopes and adding your own unique taste (often influenced by your favorite videos and movies) you can methodically fix common color correction issues. After you master the related the tools and concepts you can choose to go beyond this step to create a certain mood or "look" in your video by using the same tools to "grade" your video. For now, find common concepts for color correction on this page.
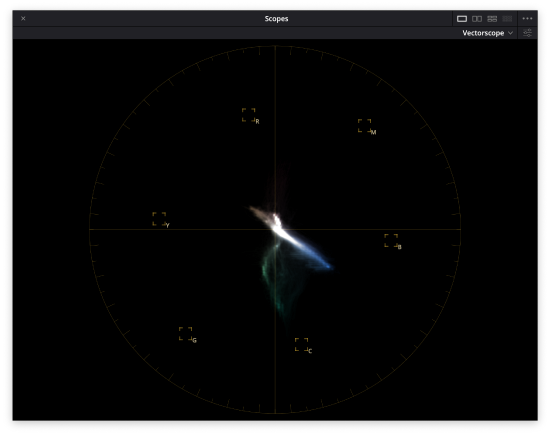
The Waveform Monitor
The waveform video shows you the luminance (brightness) values of an image on the vertical axis - the brightest parts (or trace) at the top and the darkest trace at the bottom. Horizontally, the Waveform monitor represents the amount of pixels a given brightness level in your image. While Waveform monitors can also display the distribution of the RGB color channels, many post-production specialists use them as a dedicated way to evaluate Luminance only.
Image of a digital Waveform Monitor (from DaVinci Resolve) showing the Luminance channel only (“Y”). Note that a “colorize” option and the display of the RGB channels have been turned off in the tool settings.
Here the Waveform Monitor (from DaVinci Resolve) shows the Luminance channel of the side shot of the biker. It displays the brightest values, of the sky and the white parts of the helmet on top and the darkest parts, the mountain and black parts of the shirt on the bottom.
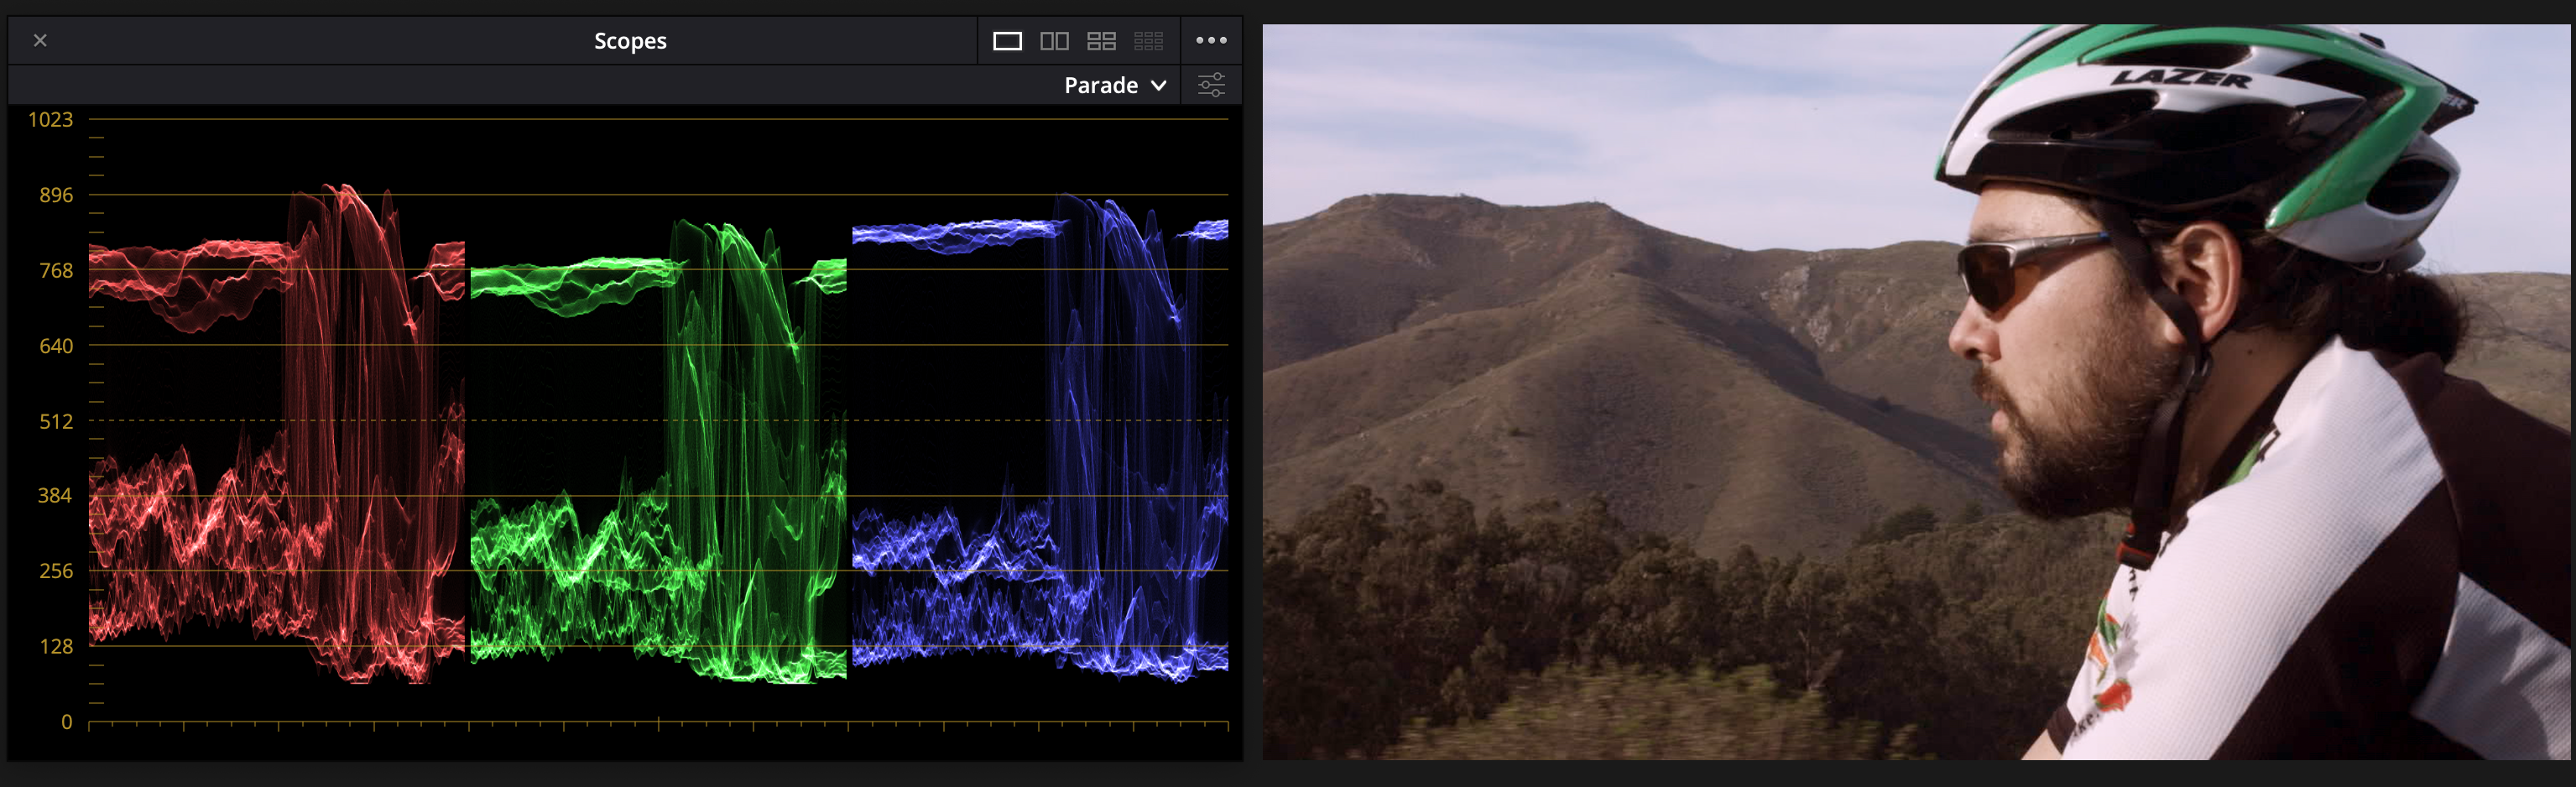
The RGB Parade
This scope displays 3 waveforms measuring the luminance of the red, green and blue (the RGB) channels separately. You read the brightness values the same as with the waveform, but the individual channels allow you to evaluate the balance between colors and to correct the white balance. White balance is color calibration done in camera while in production that makes the camera record the correct colors on set, allowing for white to appear as white without a “color cast” of blue or orange.
Image of a digital RGB Parade (DaVinci Resolve) showing the RGB color and luminance values.
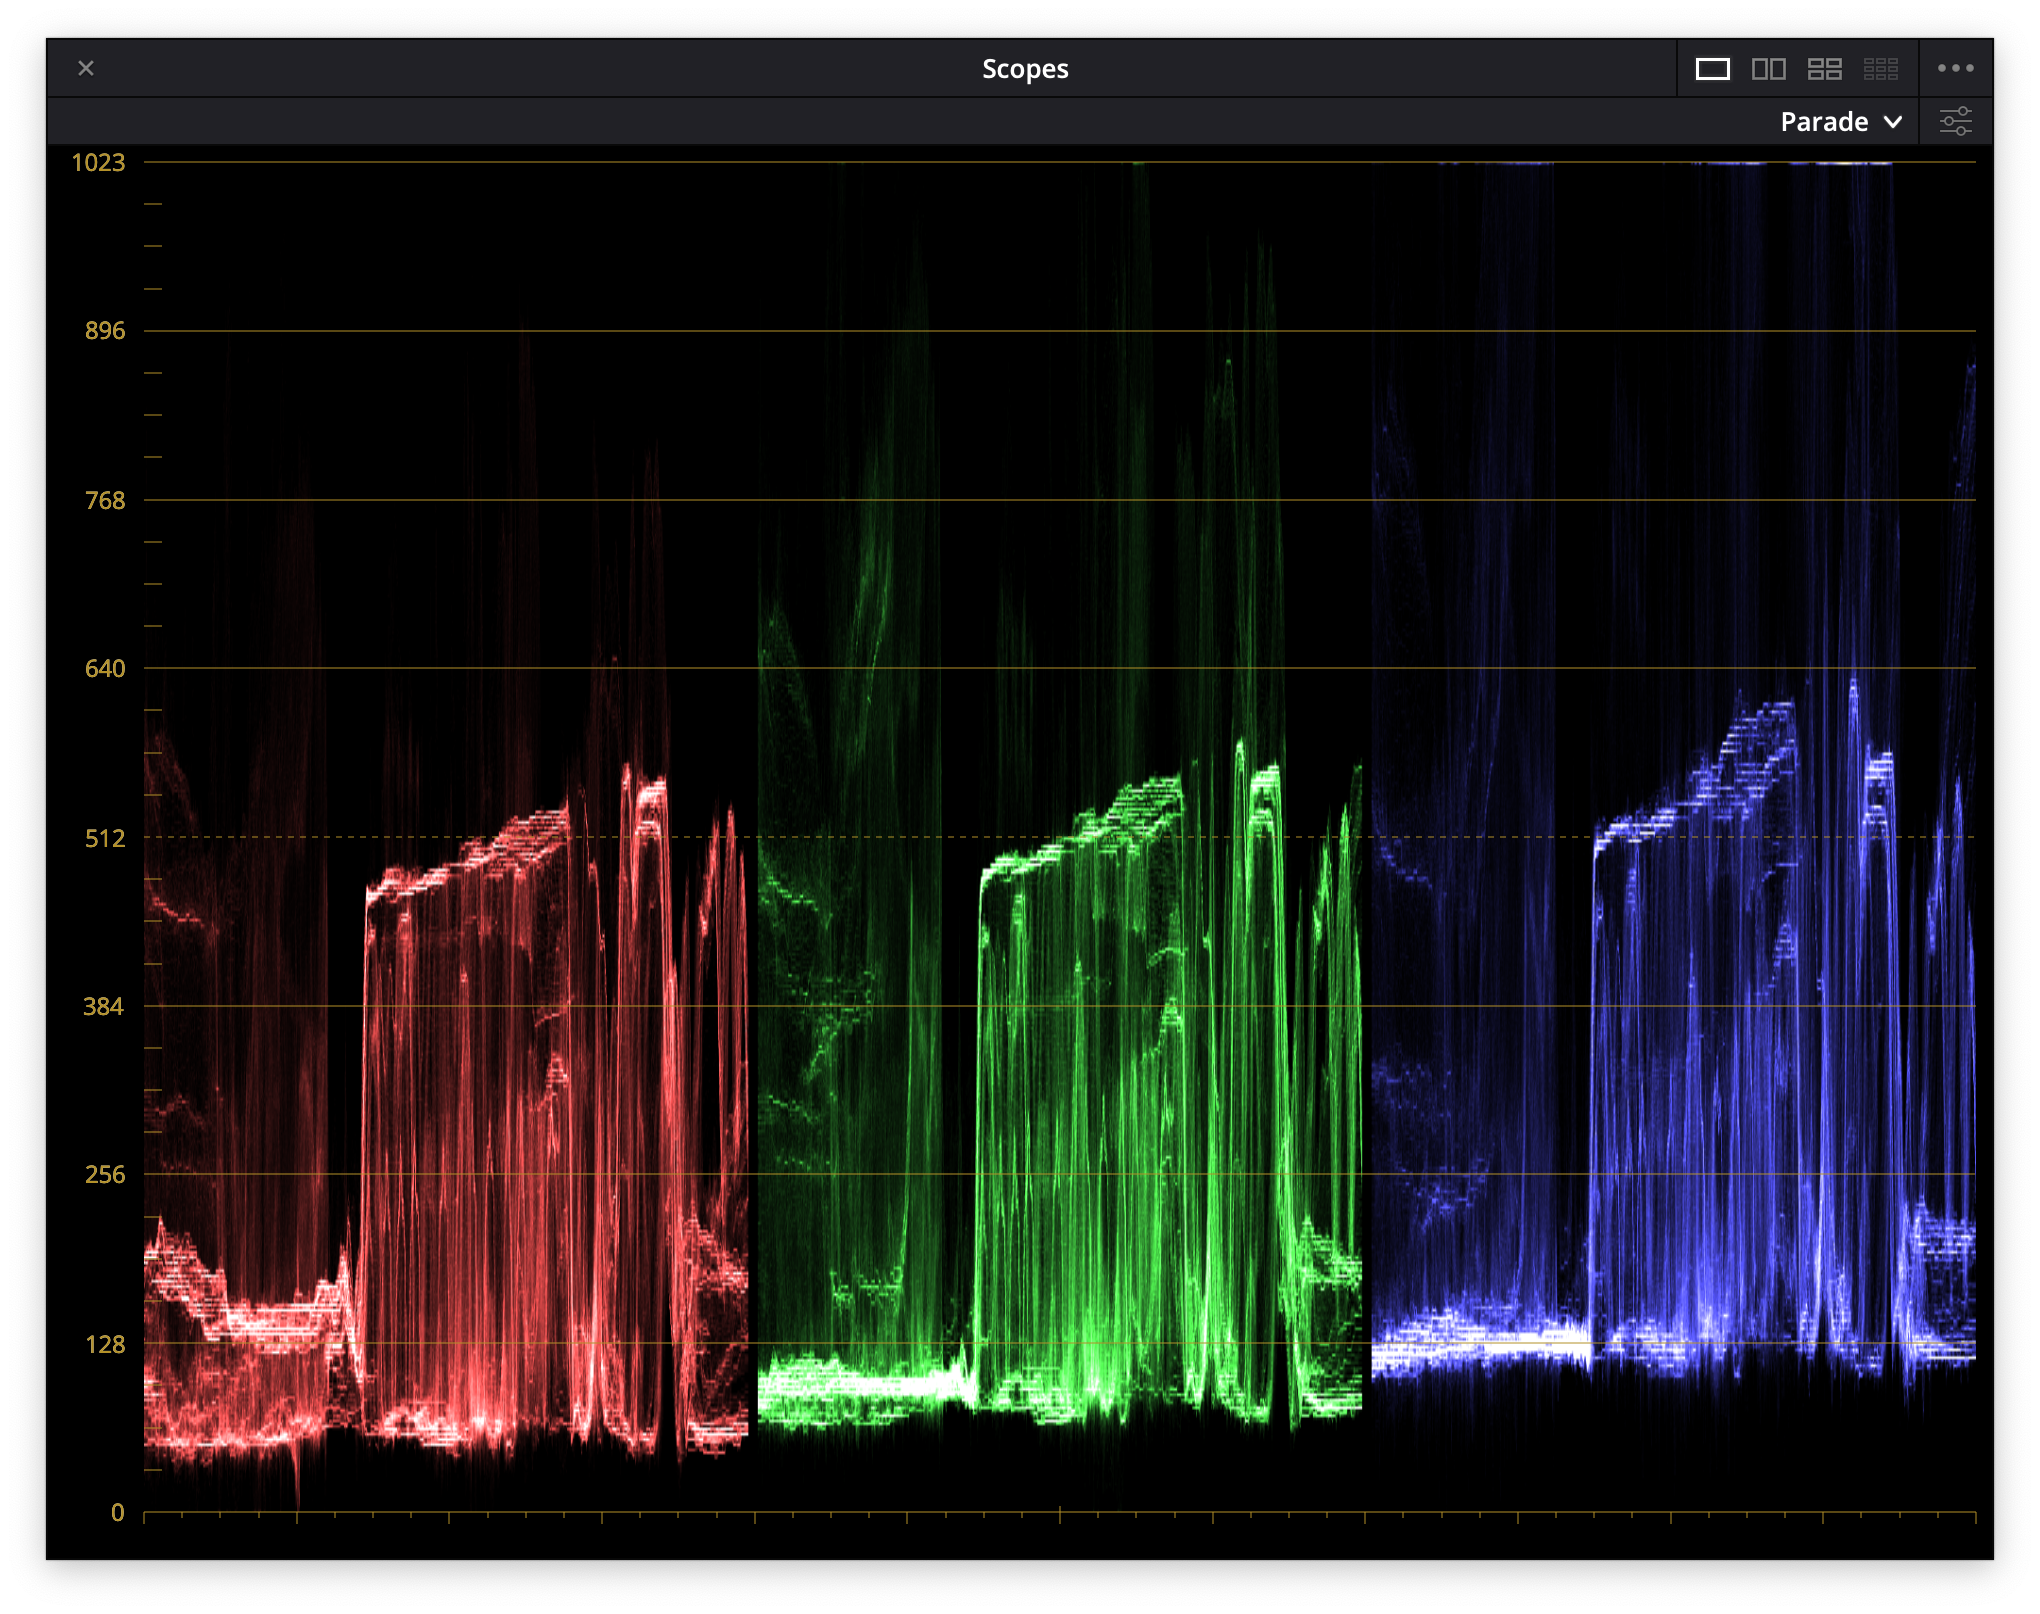
You can use the RGB parade tool to evaluate if and what colors dominate the image. In the image below, you can see that blues and red are dominate in the highlights of the image of the biker. Here the RGB Parade shows the distribution of color in the RGB channels of the shot.
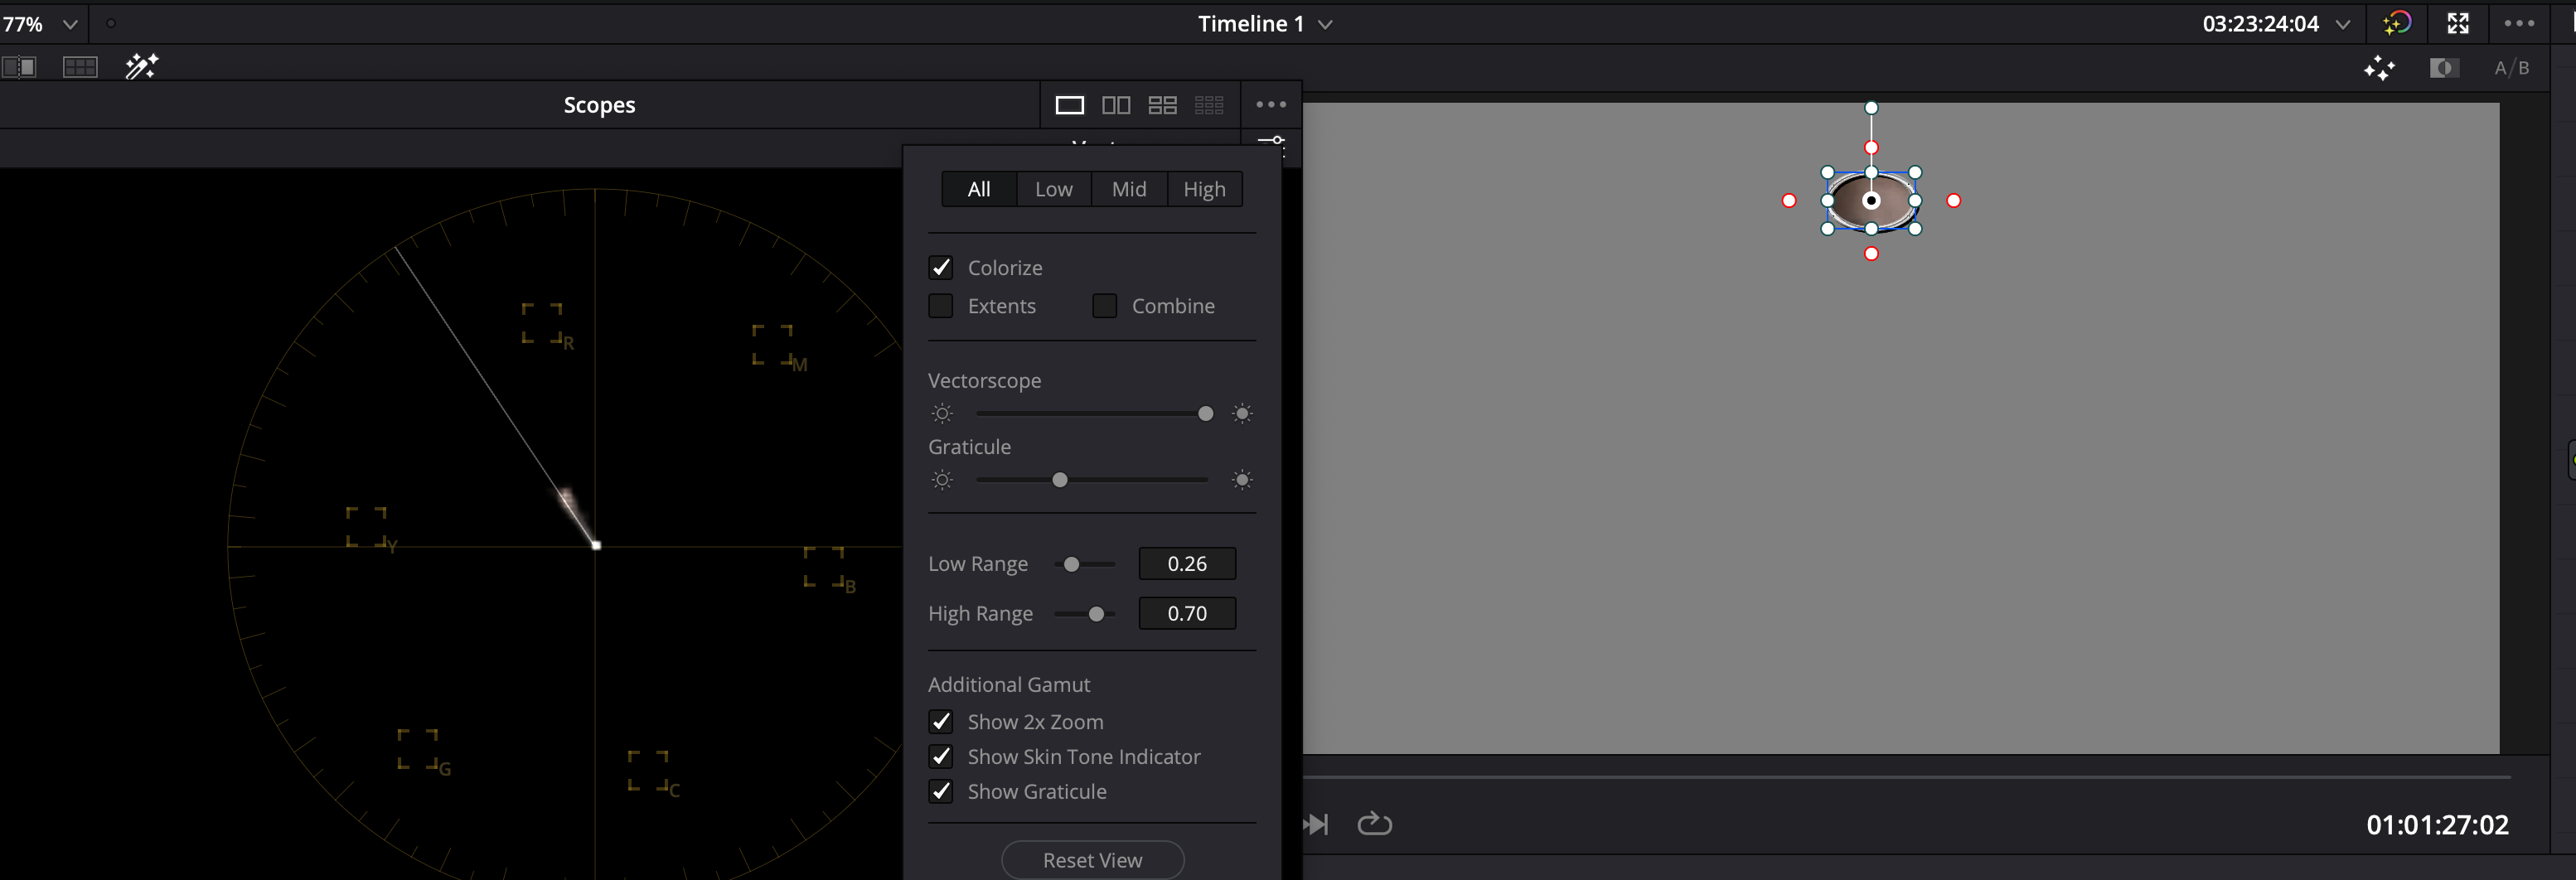
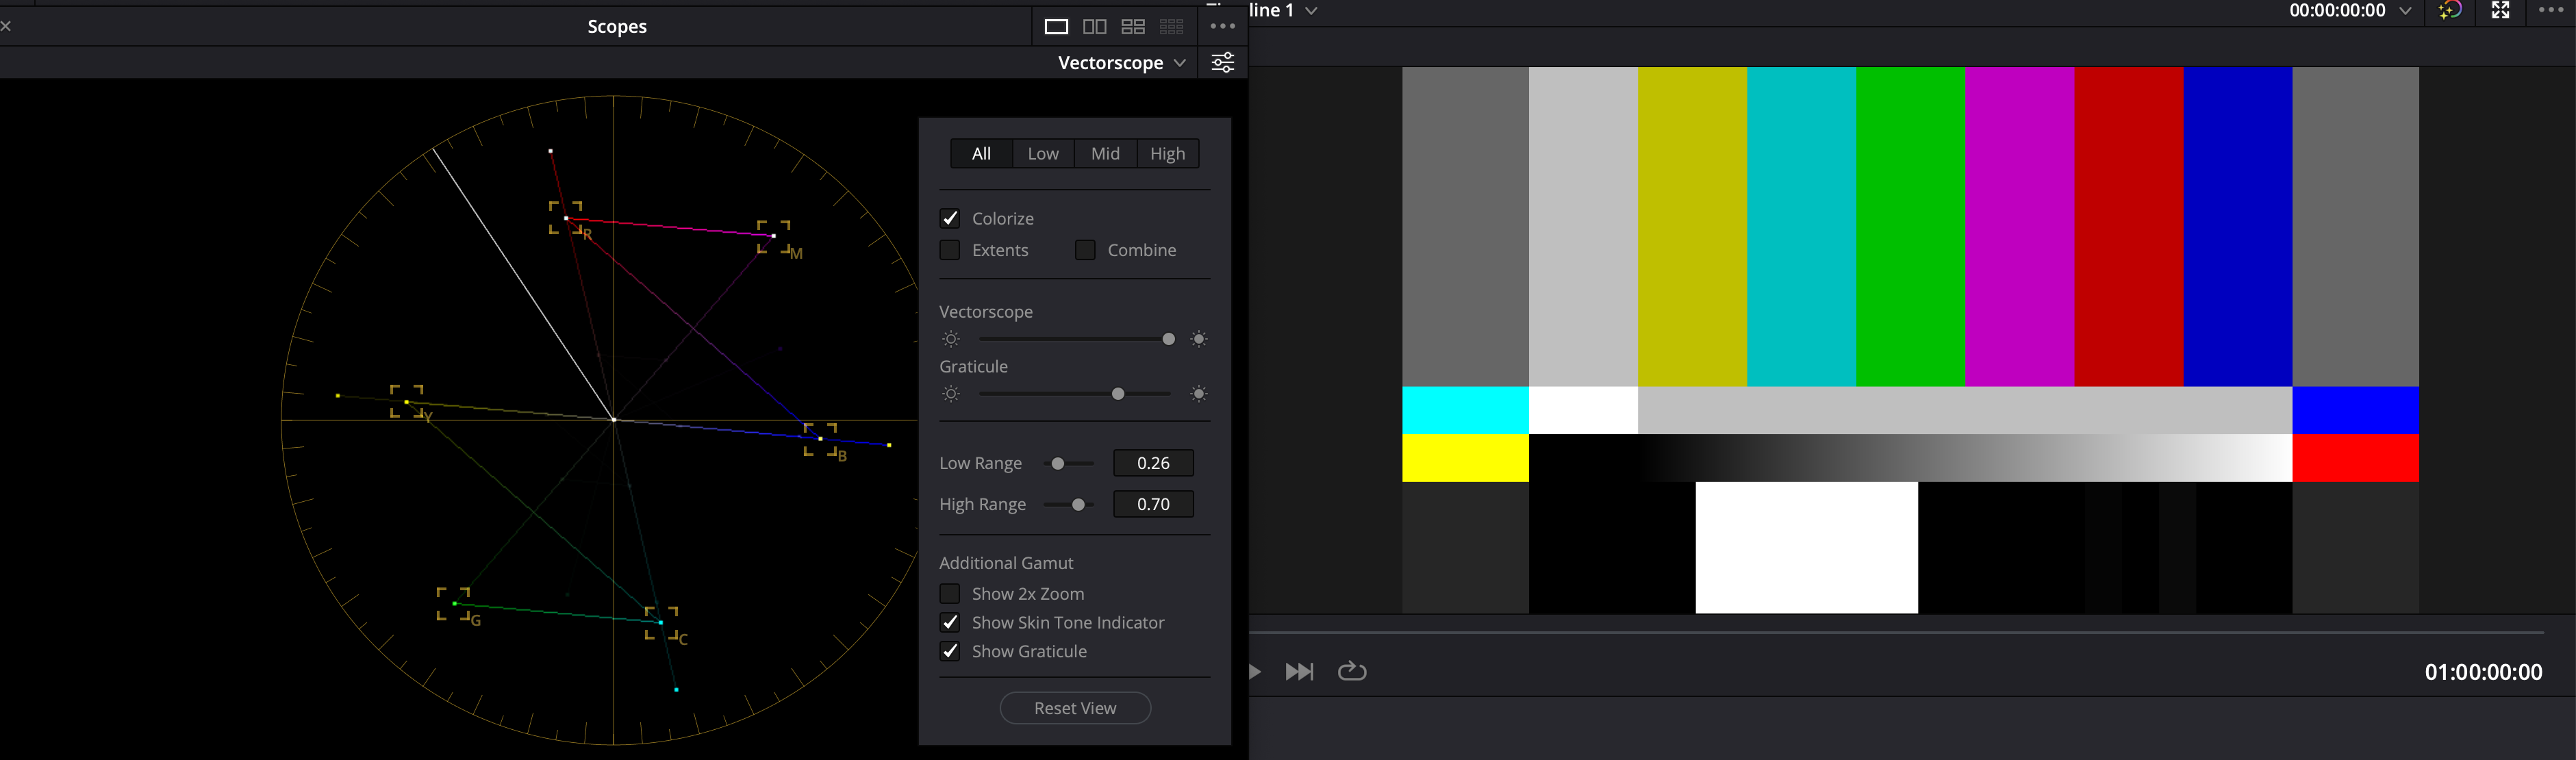
The Vectorscope
The Vectorscope shows you color values by displaying the hue (color) and the saturation (richness). In the circular display area, the overlay "trace" (or graticule) from the image visible in the scope, shows the direction of the color and their saturation. The further away from the center that away the graticule increases the more that displayed color are saturated or rich.
SMPTE test patterns, from the standards group, the Science and Motion Picture Television Engineers group will display color bars by displaying graticule in the appropriate boxes for Red, Green, Blue, Yellow, Magenta and Yellow (RGB and YUV, two color encoding system used in video). In this case, all hues are adhering correctly to the currently most common SMPTE standard, BT709.
For video editors, the main use of the Vectorscope, is in helping to figure out realistic skin tones of a shot. It's not as useful when applied to the whole image - with all included colors and regions. Instead, if you use masks, that hide and reveal areas in an image, to limit the analysis only to a subject's skin you can test if their skin falls along the skin color line, the prominent bold line at "11 O'Clock" on the graph.

In the image below, the mask has been turned. The trace is collected on and in the direction of the skin color line. Note how the graticule now lies along the skin tone line.