
1.3: Drawing Mechanics
- Page ID
- 67693
\( \newcommand{\vecs}[1]{\overset { \scriptstyle \rightharpoonup} {\mathbf{#1}} } \)
\( \newcommand{\vecd}[1]{\overset{-\!-\!\rightharpoonup}{\vphantom{a}\smash {#1}}} \)
\( \newcommand{\dsum}{\displaystyle\sum\limits} \)
\( \newcommand{\dint}{\displaystyle\int\limits} \)
\( \newcommand{\dlim}{\displaystyle\lim\limits} \)
\( \newcommand{\id}{\mathrm{id}}\) \( \newcommand{\Span}{\mathrm{span}}\)
( \newcommand{\kernel}{\mathrm{null}\,}\) \( \newcommand{\range}{\mathrm{range}\,}\)
\( \newcommand{\RealPart}{\mathrm{Re}}\) \( \newcommand{\ImaginaryPart}{\mathrm{Im}}\)
\( \newcommand{\Argument}{\mathrm{Arg}}\) \( \newcommand{\norm}[1]{\| #1 \|}\)
\( \newcommand{\inner}[2]{\langle #1, #2 \rangle}\)
\( \newcommand{\Span}{\mathrm{span}}\)
\( \newcommand{\id}{\mathrm{id}}\)
\( \newcommand{\Span}{\mathrm{span}}\)
\( \newcommand{\kernel}{\mathrm{null}\,}\)
\( \newcommand{\range}{\mathrm{range}\,}\)
\( \newcommand{\RealPart}{\mathrm{Re}}\)
\( \newcommand{\ImaginaryPart}{\mathrm{Im}}\)
\( \newcommand{\Argument}{\mathrm{Arg}}\)
\( \newcommand{\norm}[1]{\| #1 \|}\)
\( \newcommand{\inner}[2]{\langle #1, #2 \rangle}\)
\( \newcommand{\Span}{\mathrm{span}}\) \( \newcommand{\AA}{\unicode[.8,0]{x212B}}\)
\( \newcommand{\vectorA}[1]{\vec{#1}} % arrow\)
\( \newcommand{\vectorAt}[1]{\vec{\text{#1}}} % arrow\)
\( \newcommand{\vectorB}[1]{\overset { \scriptstyle \rightharpoonup} {\mathbf{#1}} } \)
\( \newcommand{\vectorC}[1]{\textbf{#1}} \)
\( \newcommand{\vectorD}[1]{\overrightarrow{#1}} \)
\( \newcommand{\vectorDt}[1]{\overrightarrow{\text{#1}}} \)
\( \newcommand{\vectE}[1]{\overset{-\!-\!\rightharpoonup}{\vphantom{a}\smash{\mathbf {#1}}}} \)
\( \newcommand{\vecs}[1]{\overset { \scriptstyle \rightharpoonup} {\mathbf{#1}} } \)
\(\newcommand{\longvect}{\overrightarrow}\)
\( \newcommand{\vecd}[1]{\overset{-\!-\!\rightharpoonup}{\vphantom{a}\smash {#1}}} \)
\(\newcommand{\avec}{\mathbf a}\) \(\newcommand{\bvec}{\mathbf b}\) \(\newcommand{\cvec}{\mathbf c}\) \(\newcommand{\dvec}{\mathbf d}\) \(\newcommand{\dtil}{\widetilde{\mathbf d}}\) \(\newcommand{\evec}{\mathbf e}\) \(\newcommand{\fvec}{\mathbf f}\) \(\newcommand{\nvec}{\mathbf n}\) \(\newcommand{\pvec}{\mathbf p}\) \(\newcommand{\qvec}{\mathbf q}\) \(\newcommand{\svec}{\mathbf s}\) \(\newcommand{\tvec}{\mathbf t}\) \(\newcommand{\uvec}{\mathbf u}\) \(\newcommand{\vvec}{\mathbf v}\) \(\newcommand{\wvec}{\mathbf w}\) \(\newcommand{\xvec}{\mathbf x}\) \(\newcommand{\yvec}{\mathbf y}\) \(\newcommand{\zvec}{\mathbf z}\) \(\newcommand{\rvec}{\mathbf r}\) \(\newcommand{\mvec}{\mathbf m}\) \(\newcommand{\zerovec}{\mathbf 0}\) \(\newcommand{\onevec}{\mathbf 1}\) \(\newcommand{\real}{\mathbb R}\) \(\newcommand{\twovec}[2]{\left[\begin{array}{r}#1 \\ #2 \end{array}\right]}\) \(\newcommand{\ctwovec}[2]{\left[\begin{array}{c}#1 \\ #2 \end{array}\right]}\) \(\newcommand{\threevec}[3]{\left[\begin{array}{r}#1 \\ #2 \\ #3 \end{array}\right]}\) \(\newcommand{\cthreevec}[3]{\left[\begin{array}{c}#1 \\ #2 \\ #3 \end{array}\right]}\) \(\newcommand{\fourvec}[4]{\left[\begin{array}{r}#1 \\ #2 \\ #3 \\ #4 \end{array}\right]}\) \(\newcommand{\cfourvec}[4]{\left[\begin{array}{c}#1 \\ #2 \\ #3 \\ #4 \end{array}\right]}\) \(\newcommand{\fivevec}[5]{\left[\begin{array}{r}#1 \\ #2 \\ #3 \\ #4 \\ #5 \\ \end{array}\right]}\) \(\newcommand{\cfivevec}[5]{\left[\begin{array}{c}#1 \\ #2 \\ #3 \\ #4 \\ #5 \\ \end{array}\right]}\) \(\newcommand{\mattwo}[4]{\left[\begin{array}{rr}#1 \amp #2 \\ #3 \amp #4 \\ \end{array}\right]}\) \(\newcommand{\laspan}[1]{\text{Span}\{#1\}}\) \(\newcommand{\bcal}{\cal B}\) \(\newcommand{\ccal}{\cal C}\) \(\newcommand{\scal}{\cal S}\) \(\newcommand{\wcal}{\cal W}\) \(\newcommand{\ecal}{\cal E}\) \(\newcommand{\coords}[2]{\left\{#1\right\}_{#2}}\) \(\newcommand{\gray}[1]{\color{gray}{#1}}\) \(\newcommand{\lgray}[1]{\color{lightgray}{#1}}\) \(\newcommand{\rank}{\operatorname{rank}}\) \(\newcommand{\row}{\text{Row}}\) \(\newcommand{\col}{\text{Col}}\) \(\renewcommand{\row}{\text{Row}}\) \(\newcommand{\nul}{\text{Nul}}\) \(\newcommand{\var}{\text{Var}}\) \(\newcommand{\corr}{\text{corr}}\) \(\newcommand{\len}[1]{\left|#1\right|}\) \(\newcommand{\bbar}{\overline{\bvec}}\) \(\newcommand{\bhat}{\widehat{\bvec}}\) \(\newcommand{\bperp}{\bvec^\perp}\) \(\newcommand{\xhat}{\widehat{\xvec}}\) \(\newcommand{\vhat}{\widehat{\vvec}}\) \(\newcommand{\uhat}{\widehat{\uvec}}\) \(\newcommand{\what}{\widehat{\wvec}}\) \(\newcommand{\Sighat}{\widehat{\Sigma}}\) \(\newcommand{\lt}{<}\) \(\newcommand{\gt}{>}\) \(\newcommand{\amp}{&}\) \(\definecolor{fillinmathshade}{gray}{0.9}\)Overview
Aesthetic drawing is both an intuitive and cerebral exercise. The cerebral aspects of drawing include logical decisions born out of knowledge gained by generations of artists working in drawing studios and creating finished drawings with a level of success and aesthetics. In this chapter, recommendations are made to facilitate drawing. These recommendations include best practices for holding drawing tools, and for positioning your drawing support and your body to best view both your drawing surface (support) and your subject.
How to Hold a Pencil
• Early in life you learned to hold a spoon, crayon, and pencil
• If your grip is awkward, you can retrain your grip
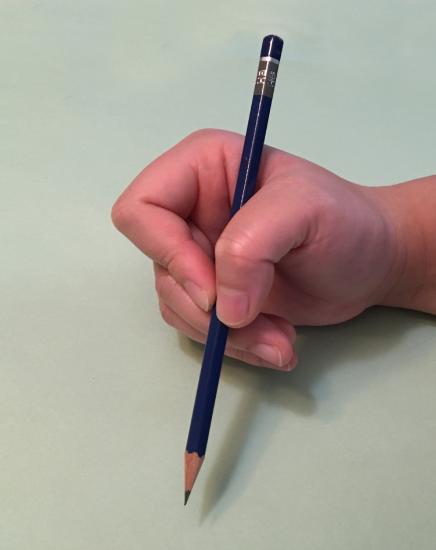
Index Finger and Thumb
• Using your index finger and thumb, pick up your pencil, and then support it with your other fingers
• Your grip should be relaxed
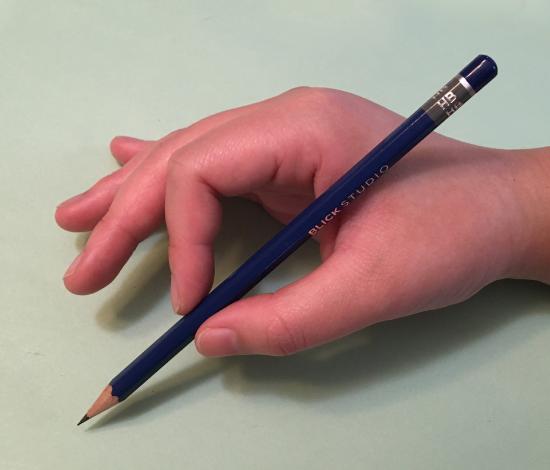

Add Support
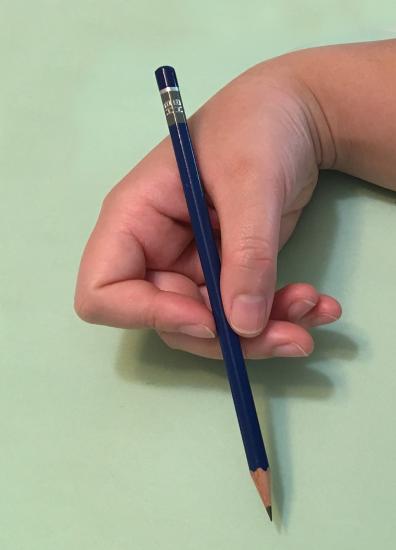
Sketching Grip
• Most drawing for fine art is actually done with a second type of pencil grip
• This grip may be awkward at first
• The pencil is held loosely and allows for a wide variety of mark-making
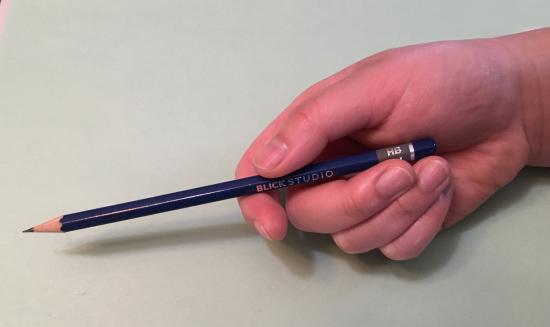

Sketching Grip
Types of Drawing Movements
• Finger Drawing (precise)
• Hand Drawing (good for sketching)
• Arm Drawing Movements (used for large drawings and sweeping marks)
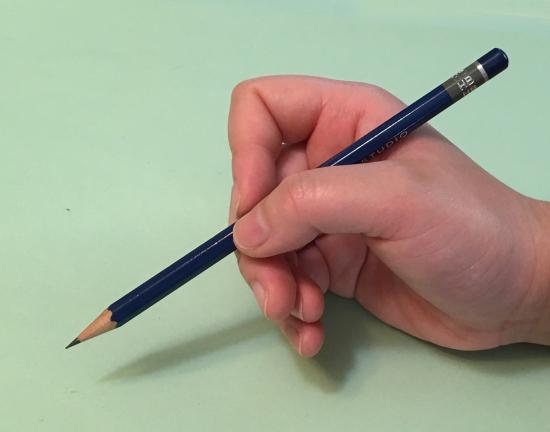
Finger Movements
Use fingers for precise detail and close-up drawing
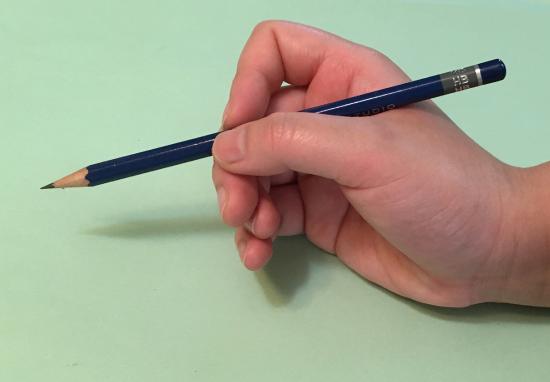
Hand Movements
Use hand and wrist for sketching and mark-making
Index Finger and Thumb
This is like using chopsticks – first grasp one chopstick
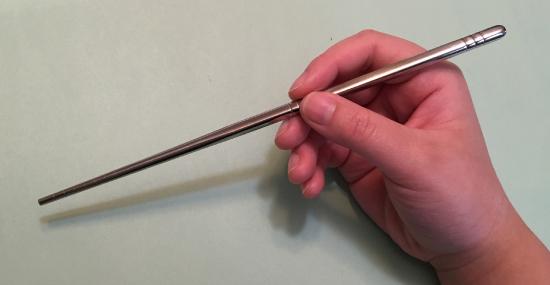
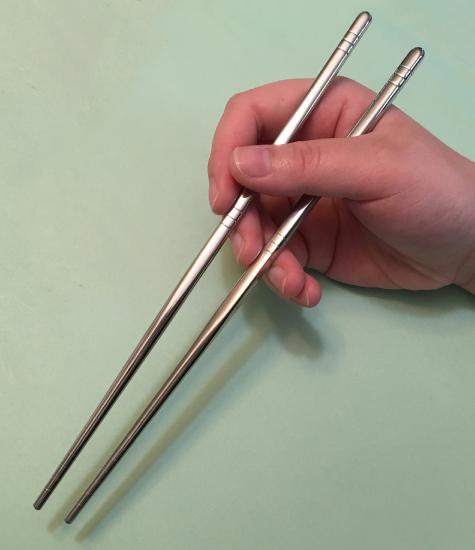
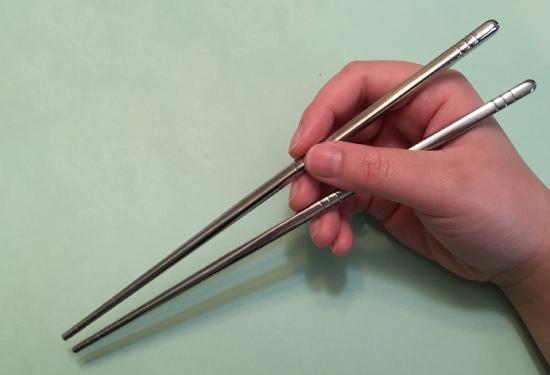
Chopsticks Grip
Then cradle the second chopstick between your thumb and palm – OK, you don’t need to worry about this second step when drawing
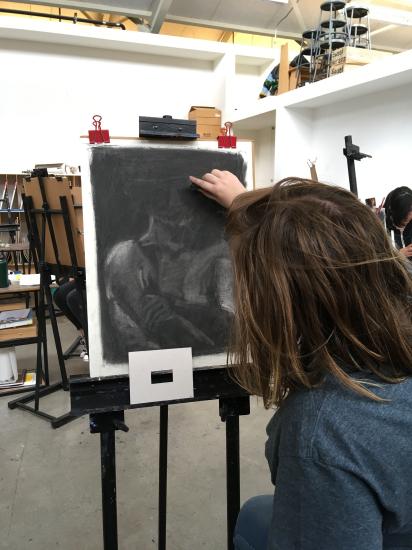
Body Positioning
When working from an easel, whether standing or sitting, keep the easel on the side of your drawing hand. If you are right handed, the easel is placed on the right side; if left handed, the easel is placed on the left. When drawing a portrait, have the easel the same height as your subject so you may view your subject and easily compare this visual information with your drawing (this will also be covered in the Sighting chapter). Avoid uncomfortable ergonomics when drawing.
Using Drawings Tools
Unless for intended visual effects, do no harm to the paper when drawing. Choose the correct pencil for the desired effect, such as a 6B for dark values, or an HB for lighter tones. Common errors include forcing an HB pencil to create really dark values and having the paper damaged in the process. Less effort is needed for a 4B or 6B pencil to create rich, dark values while also not damaging the paper with unnecessary pressed indentations. This takes practice, but having a light touch and "feeling" the tooth of the paper while drawing is an art unto itself.
White plastic erasers work well removing specific areas of a drawing and sometimes can remove marks nearly completely from the surface. They can also be cut into smaller sizes and shaped as needed with an X-ACTO® knife. Brass holders may be purchased to hold the shaped plastic eraser for customized work. Erasers may also be used as a drawing tool, rather than a drawing correction tool, by creating intentionally erased areas for visual effect. A disadvantage of the white plastic eraser is the left over plastic "eraser dust" created in the process of erasing on paper.
Kneaded erasers also can be shaped to suit the needs of the task. They can be formed into pointed ends for detailed erasing, or flattened out to erase larger areas. This latter technique is quite unique to the kneaded eraser. When flattened out, varying the pressure of the eraser can control how much of the drawing is removed. When practiced, this is quite useful and a technique unique to this eraser. This can technique can be used for graphite, charcoal, and Conté crayon drawings on paper.
Chamois was once made from a specific antelope skin, but today can be manufactured with pigskin or other material. It is very soft and absorbent and used for blending, erasing, and other drawing tasks.


Blending Stumps can be held with the index finger and thumb, or in the sketching position. They are made of paper and of various sizes and used for blending grahite, charcoal, and Conté as well as drawing directly if the tip is loaded with graphite, charcoal or Conté.
Viewfinders are another tool used to visually "frame" your subject as you close one eye and look through the opening to help create a drawing Composition. Viewfinders can be purchased or made by hand by cutting the opening out of mat board or other flat material. A 3:5 ratio for the cutout is similar to the Golden Ratio and an aesthetic choice that comes close to the ratio of most drawing pads.
