
10: Lighting
- Page ID
- 92243
\( \newcommand{\vecs}[1]{\overset { \scriptstyle \rightharpoonup} {\mathbf{#1}} } \)
\( \newcommand{\vecd}[1]{\overset{-\!-\!\rightharpoonup}{\vphantom{a}\smash {#1}}} \)
\( \newcommand{\dsum}{\displaystyle\sum\limits} \)
\( \newcommand{\dint}{\displaystyle\int\limits} \)
\( \newcommand{\dlim}{\displaystyle\lim\limits} \)
\( \newcommand{\id}{\mathrm{id}}\) \( \newcommand{\Span}{\mathrm{span}}\)
( \newcommand{\kernel}{\mathrm{null}\,}\) \( \newcommand{\range}{\mathrm{range}\,}\)
\( \newcommand{\RealPart}{\mathrm{Re}}\) \( \newcommand{\ImaginaryPart}{\mathrm{Im}}\)
\( \newcommand{\Argument}{\mathrm{Arg}}\) \( \newcommand{\norm}[1]{\| #1 \|}\)
\( \newcommand{\inner}[2]{\langle #1, #2 \rangle}\)
\( \newcommand{\Span}{\mathrm{span}}\)
\( \newcommand{\id}{\mathrm{id}}\)
\( \newcommand{\Span}{\mathrm{span}}\)
\( \newcommand{\kernel}{\mathrm{null}\,}\)
\( \newcommand{\range}{\mathrm{range}\,}\)
\( \newcommand{\RealPart}{\mathrm{Re}}\)
\( \newcommand{\ImaginaryPart}{\mathrm{Im}}\)
\( \newcommand{\Argument}{\mathrm{Arg}}\)
\( \newcommand{\norm}[1]{\| #1 \|}\)
\( \newcommand{\inner}[2]{\langle #1, #2 \rangle}\)
\( \newcommand{\Span}{\mathrm{span}}\) \( \newcommand{\AA}{\unicode[.8,0]{x212B}}\)
\( \newcommand{\vectorA}[1]{\vec{#1}} % arrow\)
\( \newcommand{\vectorAt}[1]{\vec{\text{#1}}} % arrow\)
\( \newcommand{\vectorB}[1]{\overset { \scriptstyle \rightharpoonup} {\mathbf{#1}} } \)
\( \newcommand{\vectorC}[1]{\textbf{#1}} \)
\( \newcommand{\vectorD}[1]{\overrightarrow{#1}} \)
\( \newcommand{\vectorDt}[1]{\overrightarrow{\text{#1}}} \)
\( \newcommand{\vectE}[1]{\overset{-\!-\!\rightharpoonup}{\vphantom{a}\smash{\mathbf {#1}}}} \)
\( \newcommand{\vecs}[1]{\overset { \scriptstyle \rightharpoonup} {\mathbf{#1}} } \)
\(\newcommand{\longvect}{\overrightarrow}\)
\( \newcommand{\vecd}[1]{\overset{-\!-\!\rightharpoonup}{\vphantom{a}\smash {#1}}} \)
\(\newcommand{\avec}{\mathbf a}\) \(\newcommand{\bvec}{\mathbf b}\) \(\newcommand{\cvec}{\mathbf c}\) \(\newcommand{\dvec}{\mathbf d}\) \(\newcommand{\dtil}{\widetilde{\mathbf d}}\) \(\newcommand{\evec}{\mathbf e}\) \(\newcommand{\fvec}{\mathbf f}\) \(\newcommand{\nvec}{\mathbf n}\) \(\newcommand{\pvec}{\mathbf p}\) \(\newcommand{\qvec}{\mathbf q}\) \(\newcommand{\svec}{\mathbf s}\) \(\newcommand{\tvec}{\mathbf t}\) \(\newcommand{\uvec}{\mathbf u}\) \(\newcommand{\vvec}{\mathbf v}\) \(\newcommand{\wvec}{\mathbf w}\) \(\newcommand{\xvec}{\mathbf x}\) \(\newcommand{\yvec}{\mathbf y}\) \(\newcommand{\zvec}{\mathbf z}\) \(\newcommand{\rvec}{\mathbf r}\) \(\newcommand{\mvec}{\mathbf m}\) \(\newcommand{\zerovec}{\mathbf 0}\) \(\newcommand{\onevec}{\mathbf 1}\) \(\newcommand{\real}{\mathbb R}\) \(\newcommand{\twovec}[2]{\left[\begin{array}{r}#1 \\ #2 \end{array}\right]}\) \(\newcommand{\ctwovec}[2]{\left[\begin{array}{c}#1 \\ #2 \end{array}\right]}\) \(\newcommand{\threevec}[3]{\left[\begin{array}{r}#1 \\ #2 \\ #3 \end{array}\right]}\) \(\newcommand{\cthreevec}[3]{\left[\begin{array}{c}#1 \\ #2 \\ #3 \end{array}\right]}\) \(\newcommand{\fourvec}[4]{\left[\begin{array}{r}#1 \\ #2 \\ #3 \\ #4 \end{array}\right]}\) \(\newcommand{\cfourvec}[4]{\left[\begin{array}{c}#1 \\ #2 \\ #3 \\ #4 \end{array}\right]}\) \(\newcommand{\fivevec}[5]{\left[\begin{array}{r}#1 \\ #2 \\ #3 \\ #4 \\ #5 \\ \end{array}\right]}\) \(\newcommand{\cfivevec}[5]{\left[\begin{array}{c}#1 \\ #2 \\ #3 \\ #4 \\ #5 \\ \end{array}\right]}\) \(\newcommand{\mattwo}[4]{\left[\begin{array}{rr}#1 \amp #2 \\ #3 \amp #4 \\ \end{array}\right]}\) \(\newcommand{\laspan}[1]{\text{Span}\{#1\}}\) \(\newcommand{\bcal}{\cal B}\) \(\newcommand{\ccal}{\cal C}\) \(\newcommand{\scal}{\cal S}\) \(\newcommand{\wcal}{\cal W}\) \(\newcommand{\ecal}{\cal E}\) \(\newcommand{\coords}[2]{\left\{#1\right\}_{#2}}\) \(\newcommand{\gray}[1]{\color{gray}{#1}}\) \(\newcommand{\lgray}[1]{\color{lightgray}{#1}}\) \(\newcommand{\rank}{\operatorname{rank}}\) \(\newcommand{\row}{\text{Row}}\) \(\newcommand{\col}{\text{Col}}\) \(\renewcommand{\row}{\text{Row}}\) \(\newcommand{\nul}{\text{Nul}}\) \(\newcommand{\var}{\text{Var}}\) \(\newcommand{\corr}{\text{corr}}\) \(\newcommand{\len}[1]{\left|#1\right|}\) \(\newcommand{\bbar}{\overline{\bvec}}\) \(\newcommand{\bhat}{\widehat{\bvec}}\) \(\newcommand{\bperp}{\bvec^\perp}\) \(\newcommand{\xhat}{\widehat{\xvec}}\) \(\newcommand{\vhat}{\widehat{\vvec}}\) \(\newcommand{\uhat}{\widehat{\uvec}}\) \(\newcommand{\what}{\widehat{\wvec}}\) \(\newcommand{\Sighat}{\widehat{\Sigma}}\) \(\newcommand{\lt}{<}\) \(\newcommand{\gt}{>}\) \(\newcommand{\amp}{&}\) \(\definecolor{fillinmathshade}{gray}{0.9}\)Light is crucial to photography. Yes, I know I have said that the lens is crucial. The sensor is also crucial, but light? That is really crucial. I mean it this time. Every photograph you have ever seen has at least one light source.
For this discussion all light sources—from a candle to the sun to the light reflecting from a wall—is the same. In photographic terms, they are pretty much the same.
Three Variables of Light
At its heart, lighting is pretty simple. There are only three variables—the size of the light source, the direction of the light source, and the number of light sources. There is one caveat to these, however, and that is that the word effective needs to be added to each of these variables. For example, the sun is quite large, but since it is very (very) far away, it functions as a small light source in photography.
As a matter of fact, look at the moon, which is visually the same size as the sun (but easier on the eyes) and you will see that it is about the size of a pea held at arms length. Hence, it is effectively small.
1) Size of Light Source
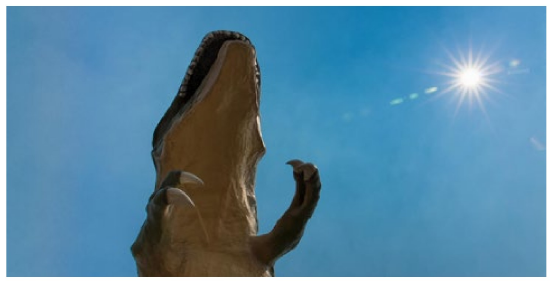
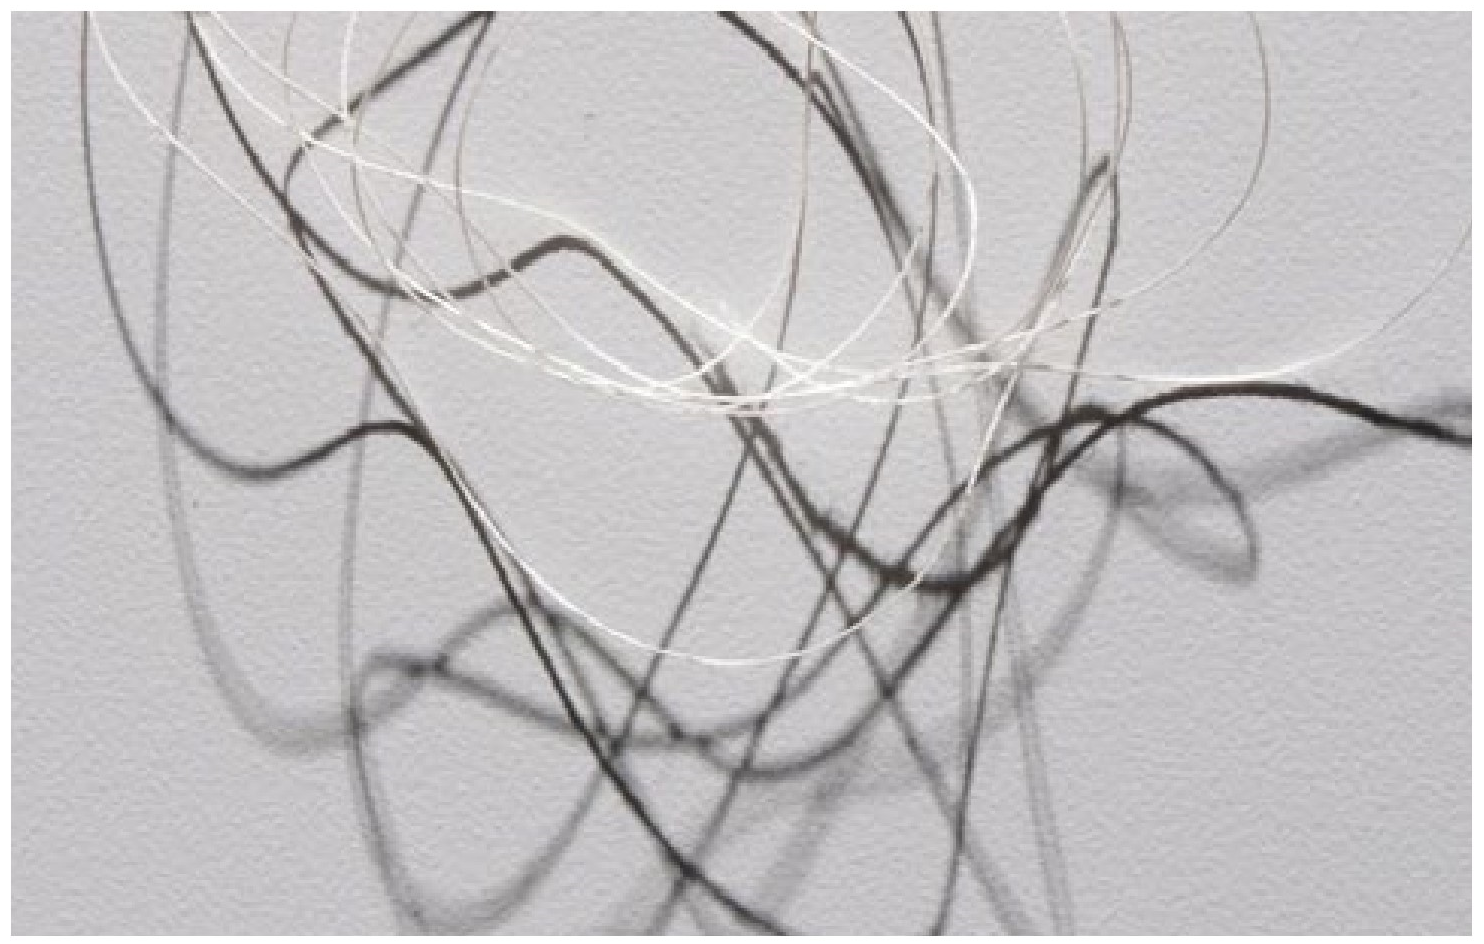
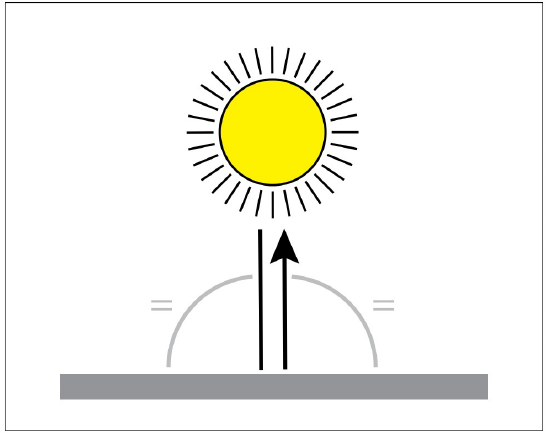
The effective size of a light source determines the sharpness of the shadow an object casts. A small light source will cast distinct shadows with hard edges. This is called hard light. The sun is a handy example of an (effectively) small light source. You have seen the shadow that you cast when the sun hits you. It is dark and the edges are distinct with sharp edges.
|
ABOVE White thread and its shadow from a small light source. BELOW The sun is effectively small, casting distinct shadows with sharp edges.
|
Another small light source is a flashlight, which is effectively about the same size as the sun (much smaller but much closer). This light will cast very similar shadows as the sun.
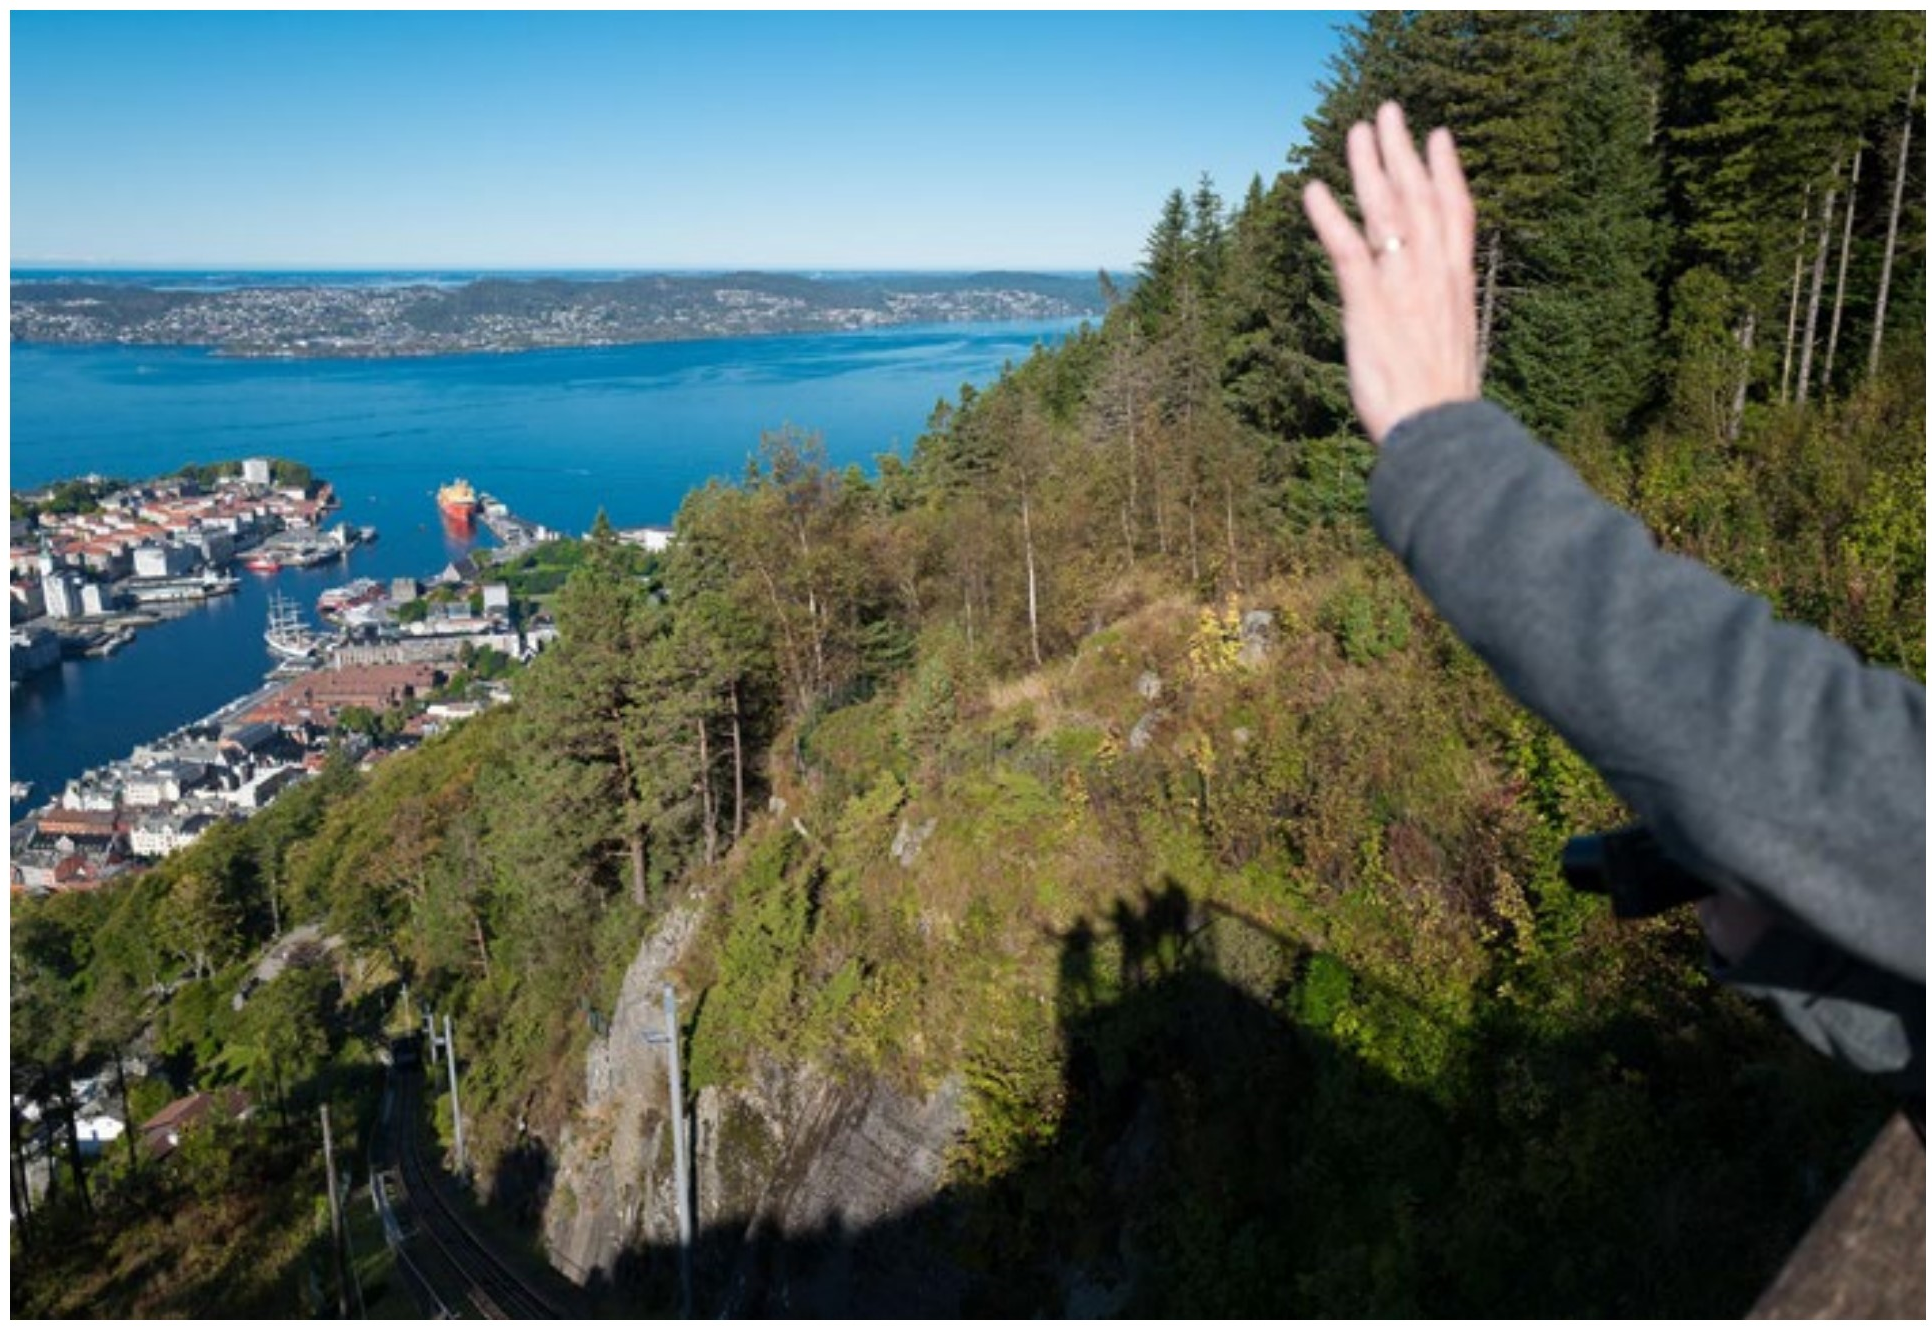
What if the sun goes behind a cloud, or it is an overcast day? The sun is no longer lighting the scene directly, and it is now the sky that is the effective light source since the sun itself is blocked. The sky is a very big light source, so the shadows are very soft and indistinct. This is called soft light.
|
The shadows here are very soft and indistinct. The effective lighting is the dome of the sky. |

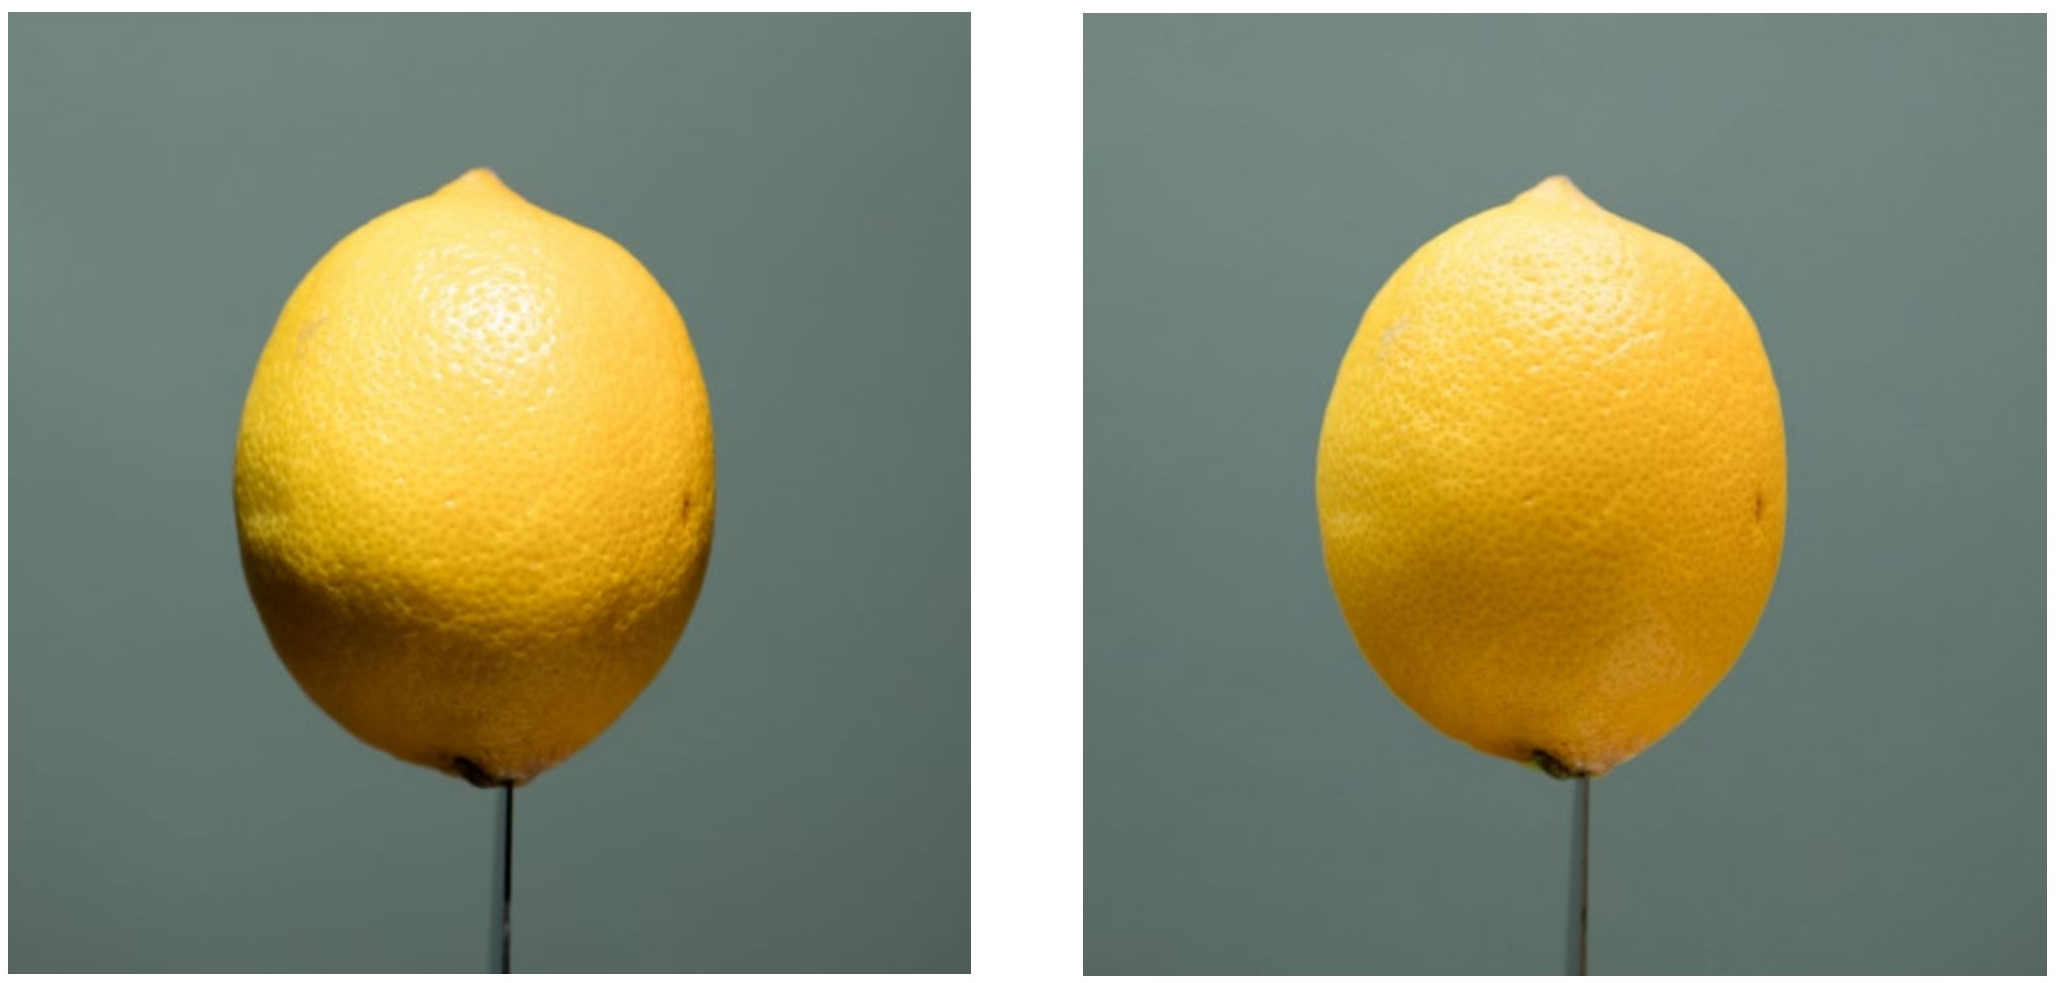
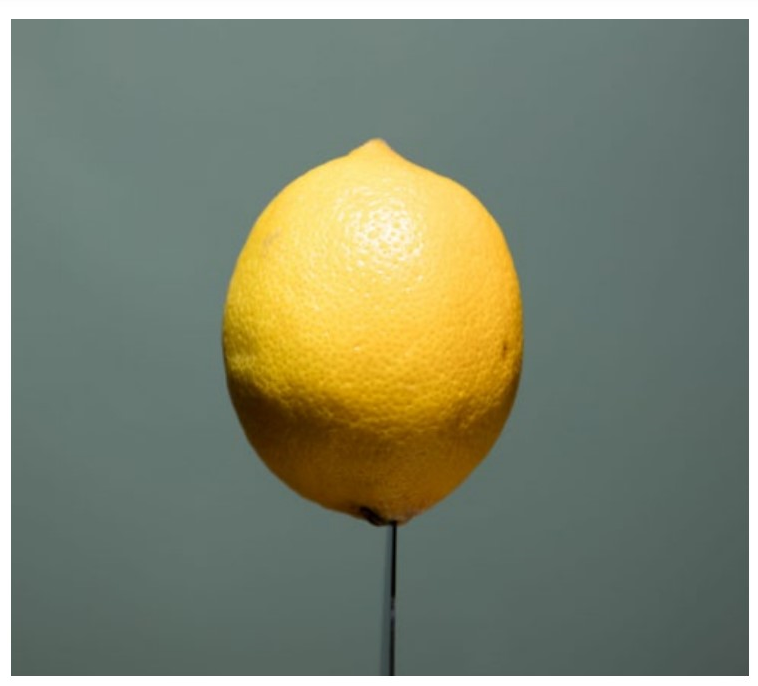
The quality of the shadow cast by a light source is very important and extends beyond just the shadow you see. The way texture is perceived largely depends on many small shadows on the surface of the subject. Since small light sources produce distinct shadows, they show texture much more readily (see illustration below).
|
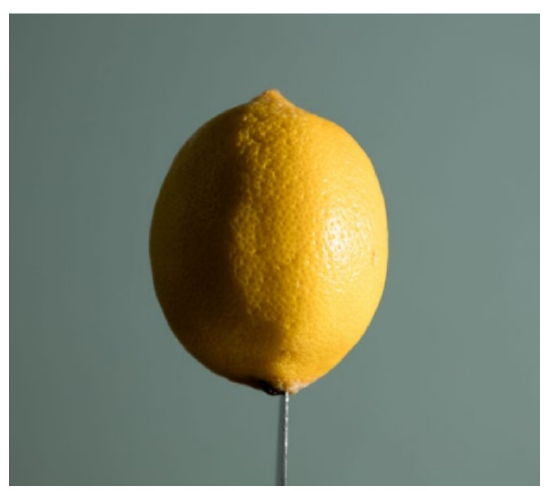
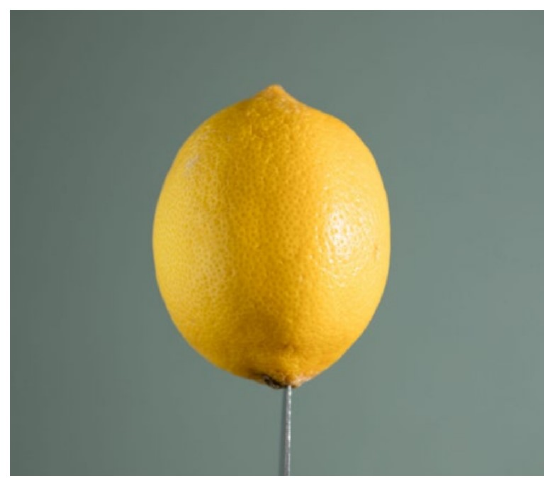
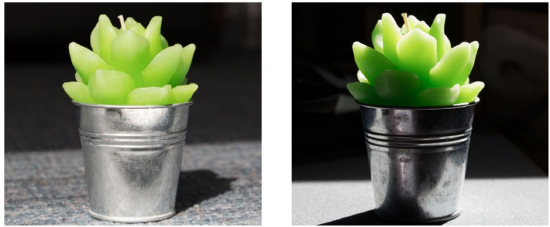
SIZE OF LIGHTLemon with small light source (left) and large light source. Notice not only the distinctness of the shadow, but also the interpretation of the texture and the reflections. |
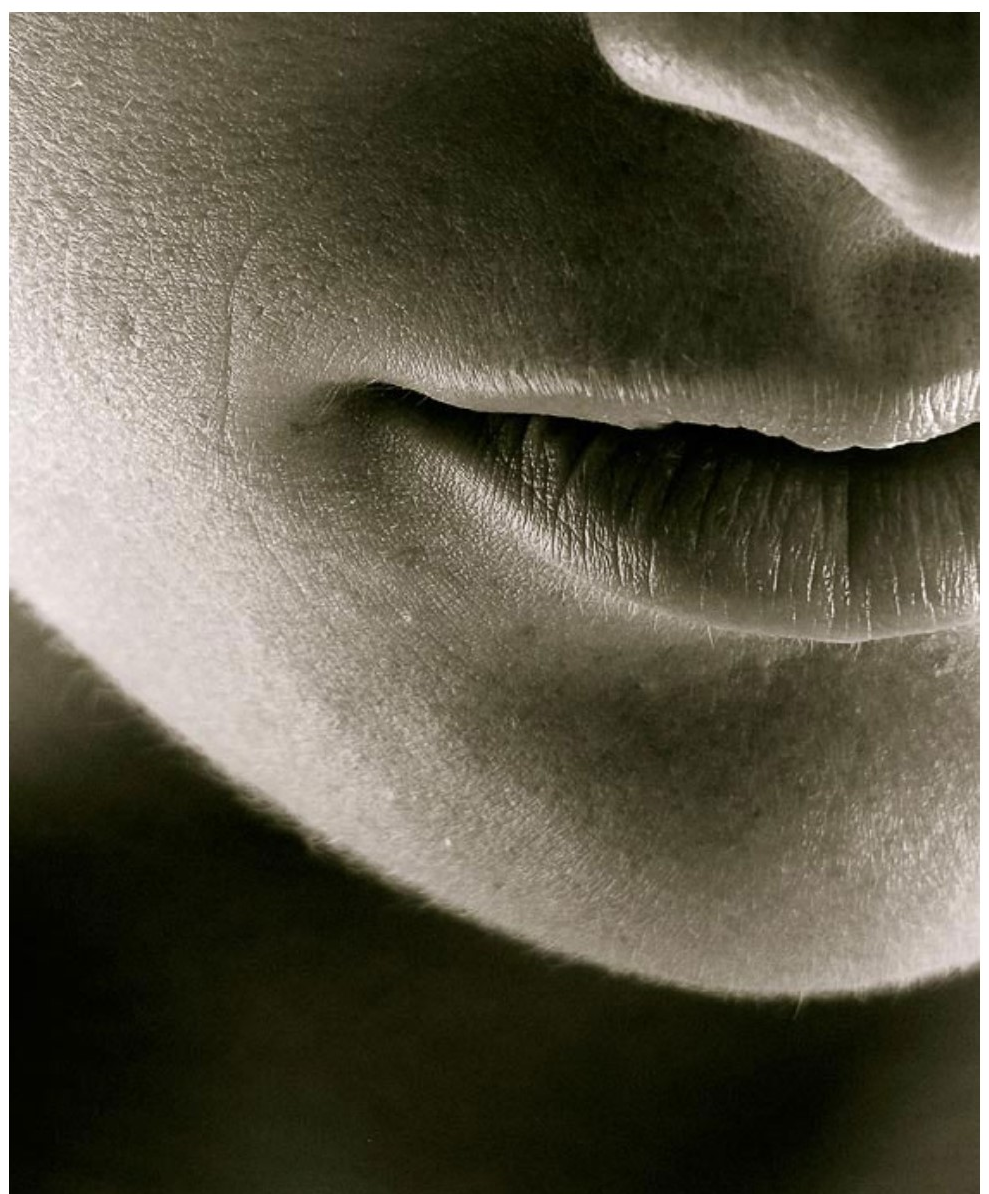
This is the reason portrait lights are always bounced off of umbrellas or filtered through material—these things make the effective light source larger and so reduces the texture of the skin, which is made up of not only big pimples but many smaller irregularities that would be exaggerated with the sharp shadows of a small light source.
Reflections are also more distinct with a small light source (look closely at the lemons on the previous page). Everything is reflective to some extent, and the reflections help to determine how something looks. This is the reason that actors and newscasters get their faces powdered before being on camera. The powder reduces reflections from various parts of their faces. You are accustomed to seeing these reflections when you speak to someone and so do not notice them. The camera is not so kind.
2) Direction of Light Source
Also influencing reflections and texture is the direction the light is coming from relative to the subject and the camera.
Hard light (from a small source) coming from near the camera will show less texture than light raking across a subject. Another way of thinking about this is that the shadows from the light near the camera are smaller, so less noticeable than the longer shadows of raking light extending across the subject.
|
DIRECTION OF LIGHTLight coming from above (top) and from the side. Light from the side is more interesting, although straight from the side like this is fairly unusual. |

Reflections from light coming from near the camera will be also be more noticeable since the light reflects back at the camera. You may have noticed this with flash pictures of friends, especially if their skin is not freshly washed (if it is oily). The flash is a small light close to the camera, so the reflections from that oily skin are exaggerated.
There are other things that change when the direction of the light changes. The following are some examples:
The classic way to scare the bejeebers out of little kids is to hold a flashlight so that it points up at a face. In natural settings light is rarely seen coming from below, so it scuttles expectations and causes anguish (well, at least to little kids).
Light coming directly from the direction of the camera (think flash, license photos, and mug shots) is rarely pleasant since shadows that define features and give faces volume are hidden.
When the light source is small, light from straight above a subject (like a noon-day summer sun) is also unpleasant. With people it causes a shadow covering both eyes and large shadow under the nose (like Hitler’s mustache!). With other things light from above is not as objectionable, but certainly not inspired lighting or particularly interesting.
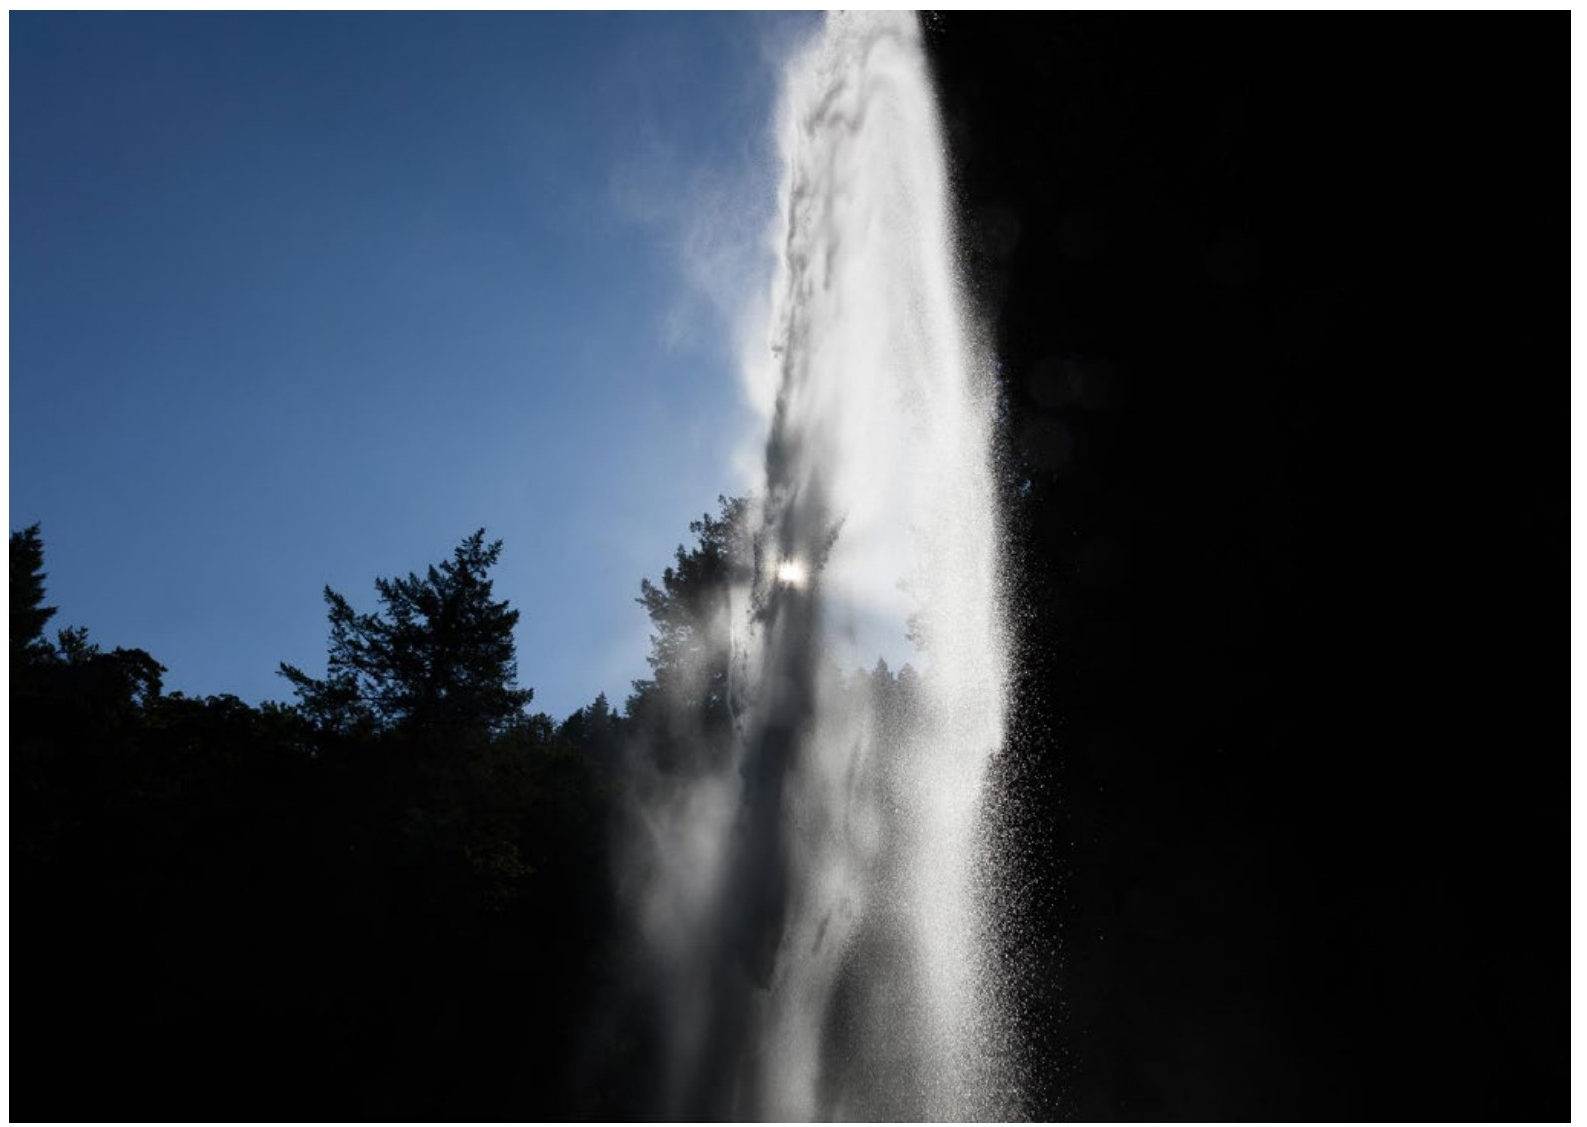
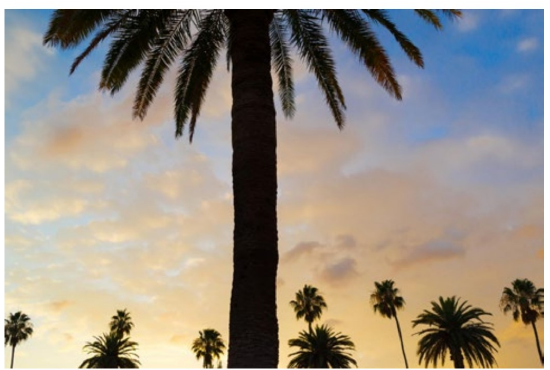
Light from behind the subject (called back-light) is great for some things, since it is unusual. But many times it is useless since it does not reveal the subject.
This discussion leaves only one light direction option left—light from the side. With a hard light (small source), this lighting can be very dramatic. With soft light (large source) it can be very pleasing.
Of course, light from any direction can be effective if it is used well, and light used by photographers often doesn’t come strictly from one of these directions—it may come from the side, but also up and toward the camera. Or a hard light from almost behind the subject, illuminating just a sliver of it. The dome of the sky lights from many directions at once.
Also, one light is often used in conjunction with other lights, although one light source can be very effective as you can see from the examples on the next page.
|
ABOVE Back-lit waterfall. Imagine if this didn’t have the water. Pretty boring in this instance. LEFT Silhouettes are about all you get with back-lit opaque objects.
|
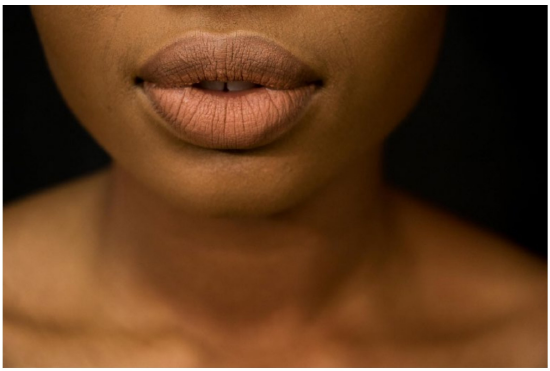
LIGHT DIRECTION WITH ONE LIGHT
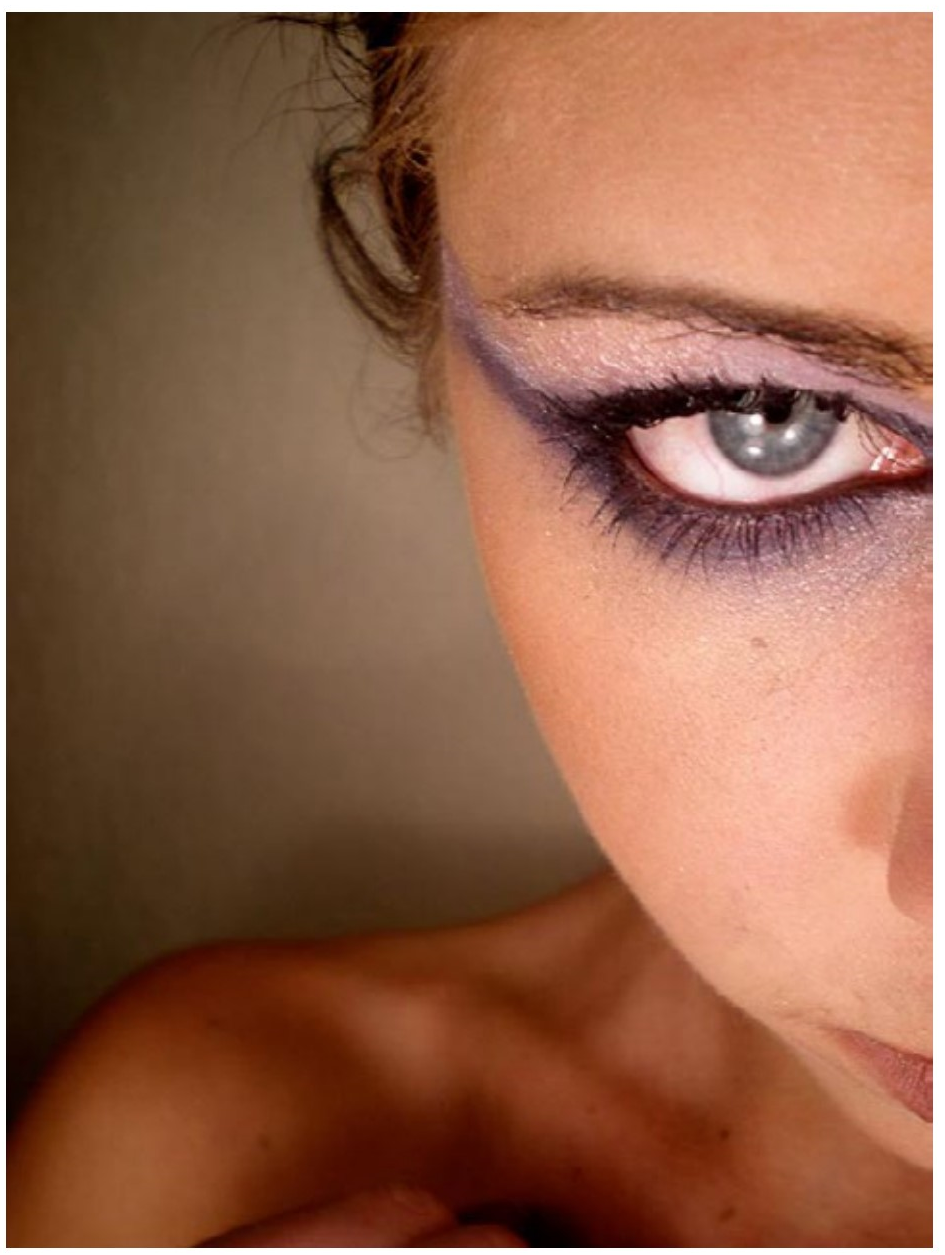
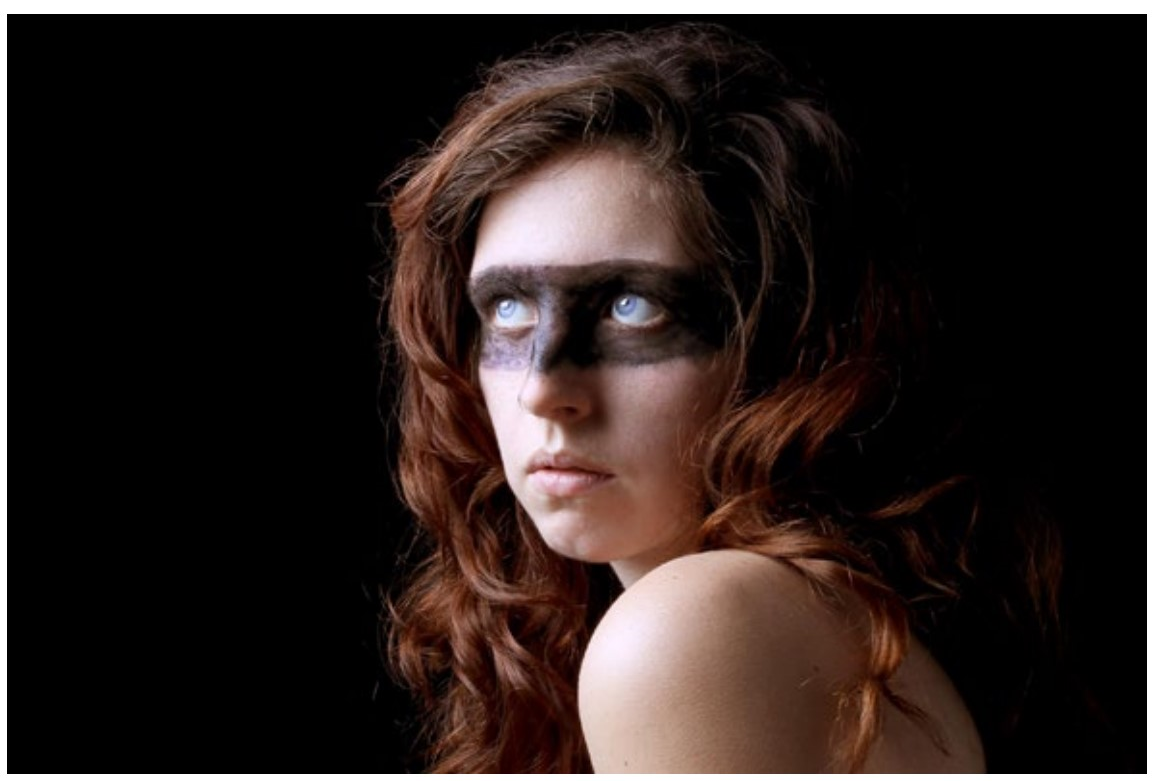
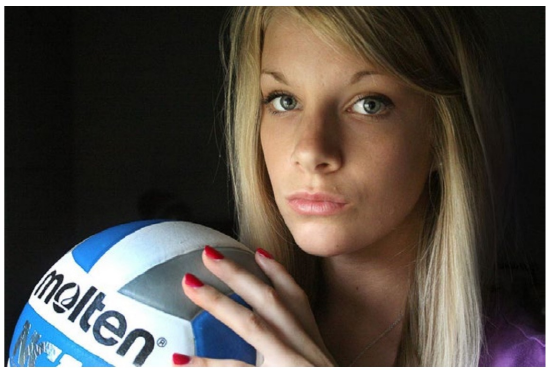
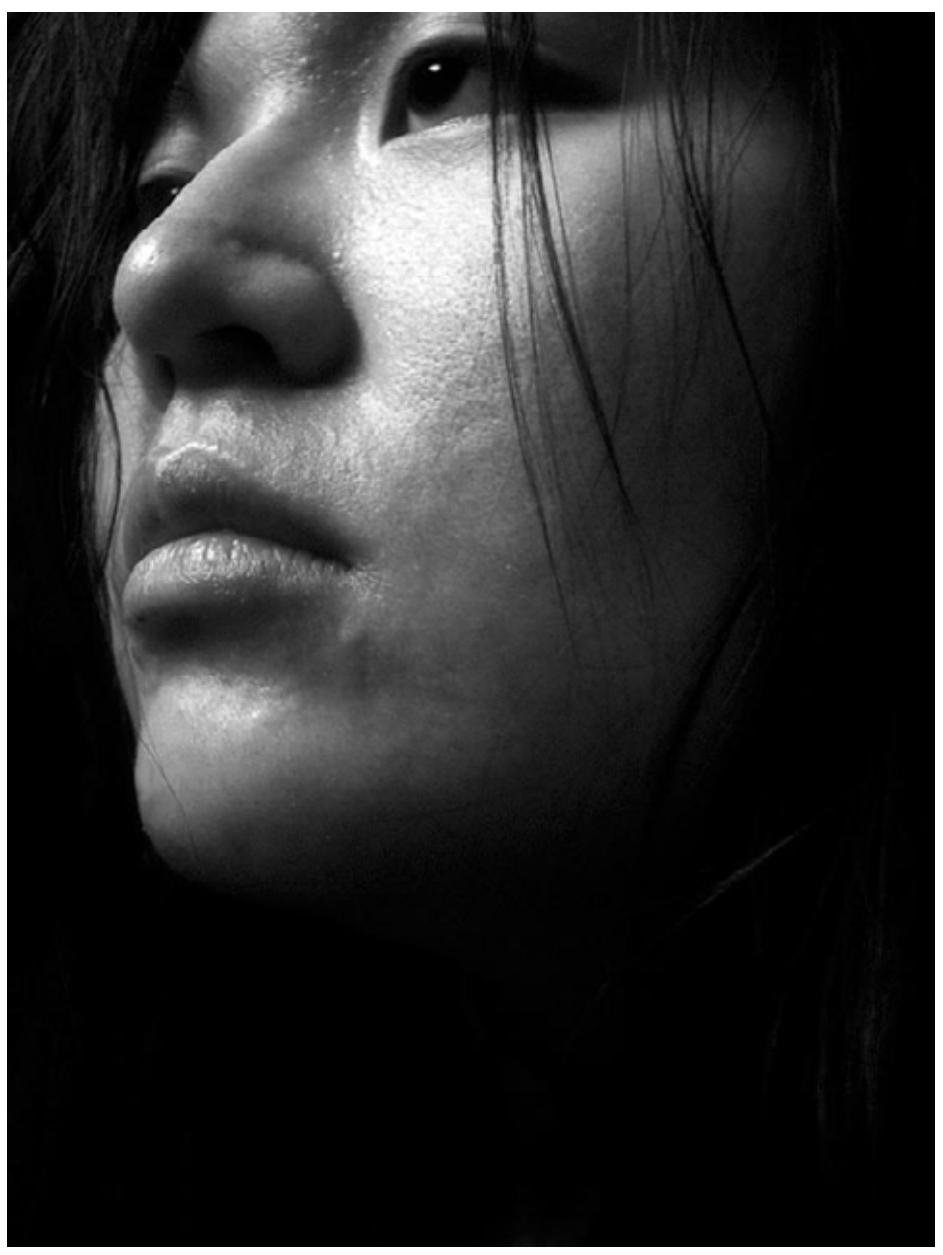
One soft (large) light can be very effective LEFT Somto Mogbogu, light from above LOWER LEFT Megan Howe, light from above and to the left RIGHT Becky Urlaub, light from below. When you see a photograph you like, try to figure out how it was lit.
|
3) Number of Light Sources
More than one light is almost always used with any photograph. Imagine a snapshot on a sunny day. There is the sun (a hard small light) hitting the subject, but there is also the dome of the sky (a soft big light) also hitting and illuminating the subject. What the photograph reveals is a combination of these two light sources.
The secondary light sources can be subtle. On a snowy overcast day, the light source is the sky, but the reflection of the light from the snow acts as a second large (soft) light source giving the subject almost 360 degrees of illumination.
Many times (either in nature or with lights indoors) two light sources are needed, if only to fill in the shadows to give them tonality and detail. These light sources can be reflectors reflecting the main source (the sky is actually a big reflector for the sun), or actual lights themselves.
Of course, this doesn’t mean you have to carry reflectors and lights around with you. Nor do you have to think about all of this as you photograph. Just be sensitive to the light. Really look at it.
|
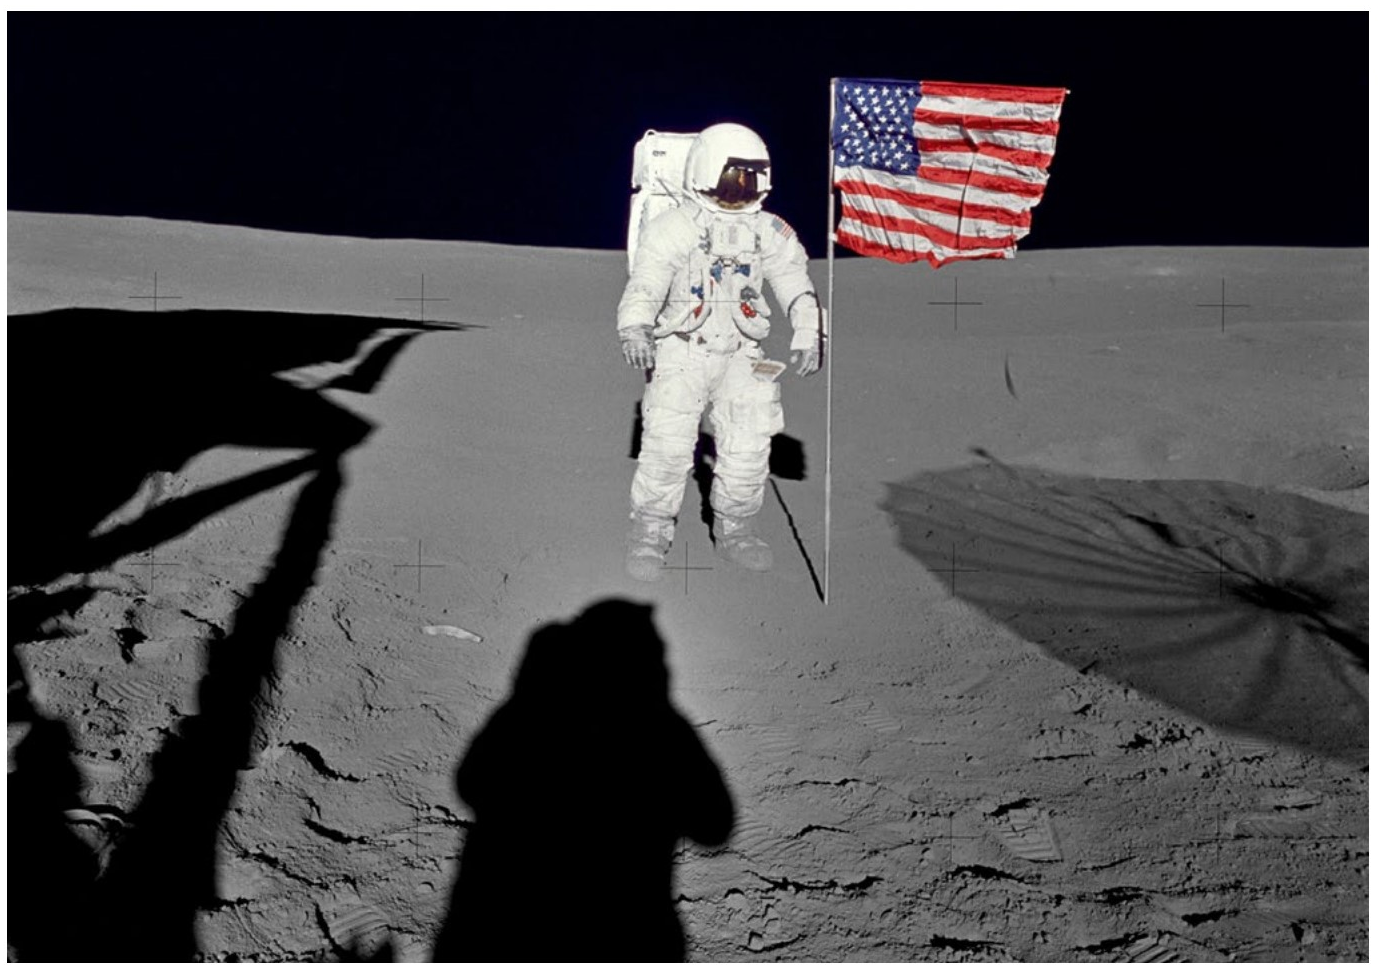
NASA image. Why are the shadows so dark? —There is little atmosphere (sky) to act as a light source to fill in the shadows with detail. This is also why the sky is black, not blue. In other words, only one effective light source (the sun) was used. The unnatural look of this lighting is more familiar from studios. Perhaps this is one reason for the conspiracy theories of faked moon landings. |
Size, direction, and number of lights are the three things that influence how light looks. It may seem pretty simple, and in its basic form, it is. But there are many permutations that can complicate things. What if you have a light reflector with a faceted surface? —Is it one large light or many small lights? Or a soft light coming from both the side and in front of the subject? Things get complicated pretty quickly because all of these variables of light are actually continuums that work together.
One could argue that there are other variables, such as how coherent the light is. This might describe how a matte reflector makes different kind of light than a polished reflector. But these are subtleties outside of the range of this text.
NUMBER OF LIGHTSTo the one light used on the top image a second light was added in the bottom image.
|
What follows are several issues with lighting. Although these things are not part of the variables of light, they do influence how you use light.
|
Here the main light is coming from a window on the left. A white wall on the right is acting as a second light source to fill in the shadows on the right side of the person. |
The Color of Light
The color of the light hitting a subject doesn’t really have much to do with how a photograph looks—as long as the light contains the colors necessary to reveal the subject’s colors. You can always balance out whatever color there is or add any color you want. This was covered in the Sensor chapter.
In the context of the current chapter, the color of light is important when you have multiple light sources of different colors, which is called mixed light. For instance, if there is a window illuminating half of a subject and an interior light illuminating the other half. The window side of the image will probably be blue compared to the interior incandescent lighting the other side of the subject.
This is not a problem if you want your photograph to be half blue tinted and half orange tinted. But if you want the color to look natural, you have problems. There is no real solution to this other than changing the light situation, although it can sometimes be improved in an image editing program that allows for local controls.
Also watch for light reflecting from color objects. If sunlight is reflecting off of green foliage to illuminate a side of a face, that side of the face will be greenish.
More about Reflections
Every surface of every thing reflects light. Some surfaces, such as a mirror, reflect this light directly and coherently enough to reconstruct an image of what it is reflecting.
Other surfaces, such as a shirt, reflect the light in a much more scattered fashion. This is why we admire ourselves in mirrors, not in shirts. The light reflected from a shirt is too scattered to reflect an image.
|
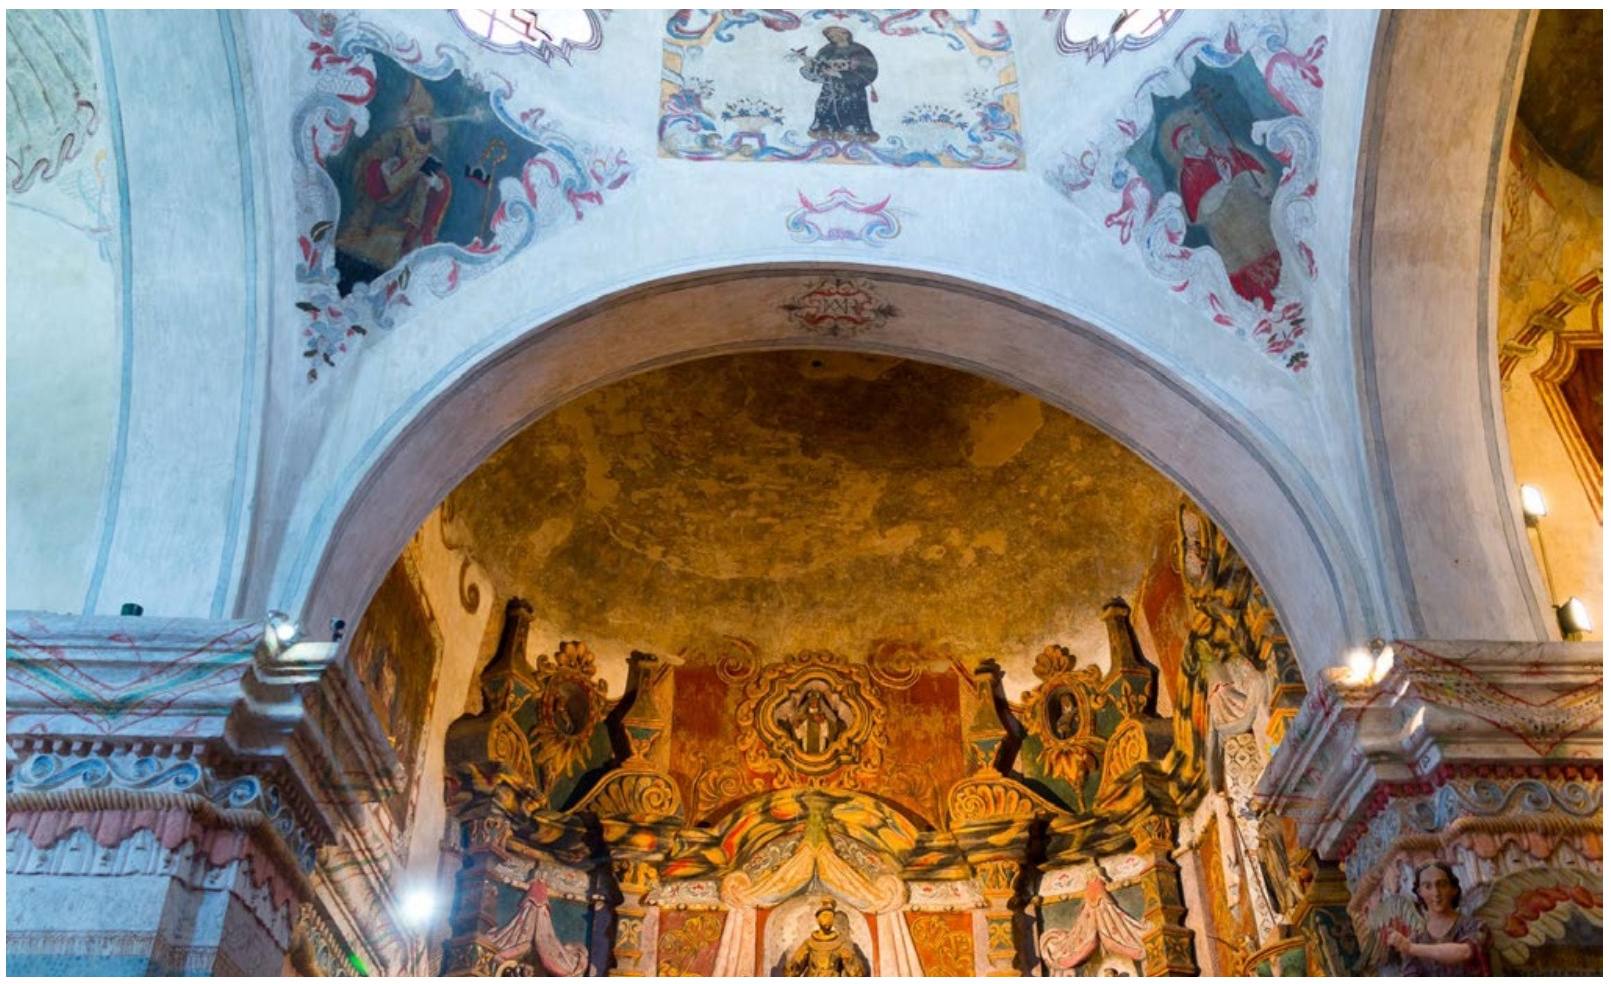
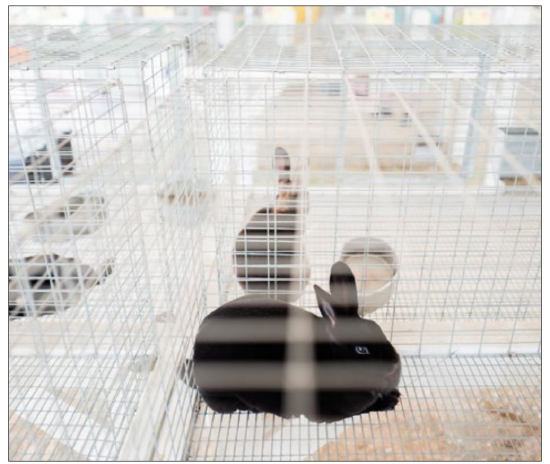
ABOVE The walls of this chapel are all the same color. The farther part of the chapel is lit by incandescent light, while the nearer parts are lit by daylight from windows. To avoid this mixed light one could photograph at night, lighting all of the chapel with the same type of lights. LEFT It was pointed out that light reflects off every surface, but this rabbit may be the black hole of bunnies
|
Dark objects reflect less light than light objects (of course). This is a good thing, because it is what photography relies on to make an image!
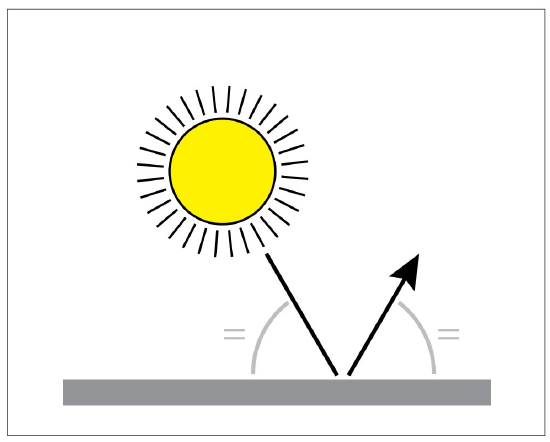
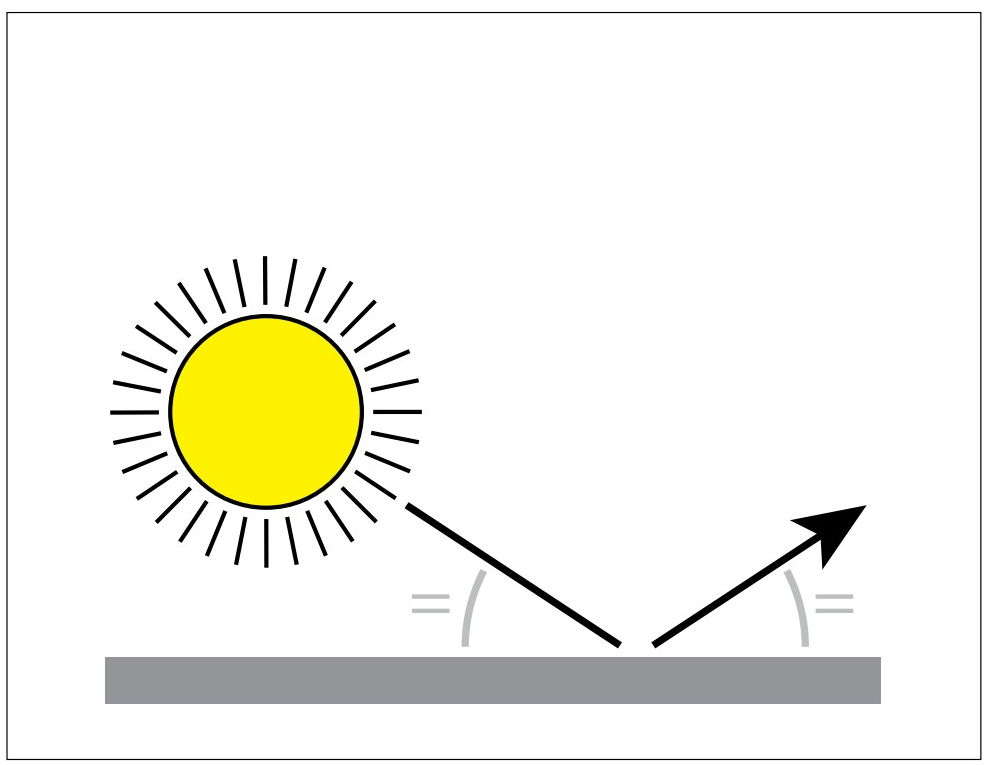
Whether it is a mirror or a shirt, light reflects off of a surface at the same angle from which it hits that surface. You can easily see this when you adjust the side mirrors in a car, but it is a little difficult when applied to objects which are less shiny.
|
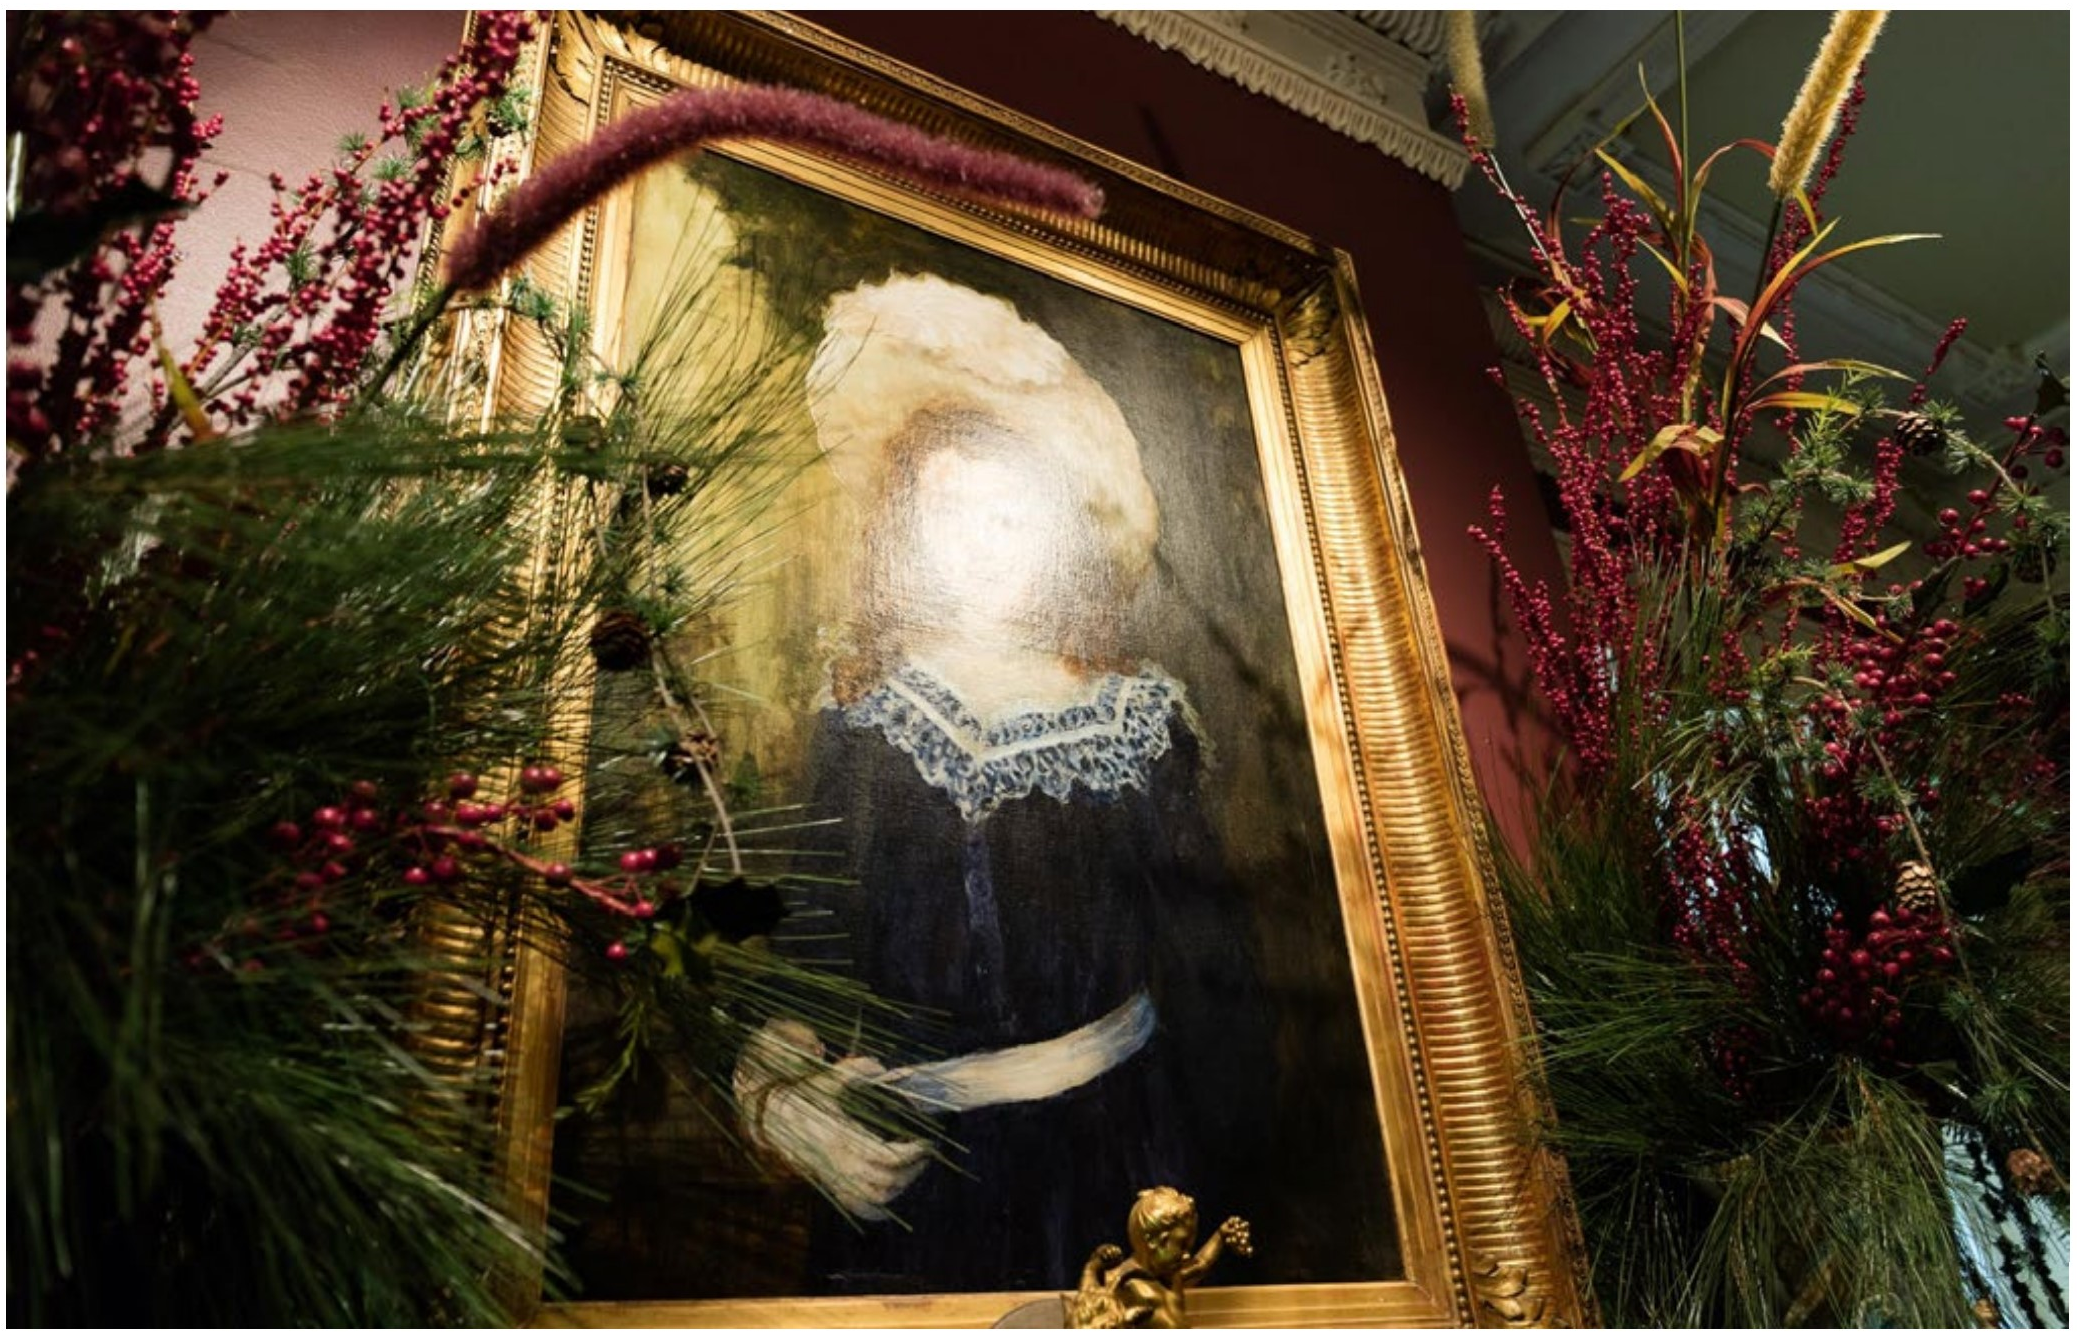
ABOVE Examples of how light reflects at the same angle from which it hits a surface. It is actually the opposite angle, but let’s not get confusing. LEFT The light and the camera are at the same angle from the painting. By slightly moving the camera this reflection could have been moved away from the face in the painting.
|
Objects that are not flat like the painting shown on the previous page also reflect light in the same way, although it is more difficult to readily see because of the curves of the object.
In practical terms, what this means is that you should watch for where the light is coming from and discern how the reflections are influencing the interpretation of the scene.
Reflections can help define an object or they can obscure it.
Light Falloff
Light gets dimmer the farther from the source it is. Of course you know this, but it is important to keep in mind. With a light source like the sun this is not an issue. You don’t have less light if you walk away from the sun—the distance you are moving is infinitesimal compared to the total distance from the sun. But if a window (or a candle) is lighting the scene, suddenly the distance at which the light gets dimmer is very important.
Portraits
Since you know something about photography, at some point you will be asked to take a portrait.
|
The coat of arms on this strange pew decoration is closer to the window than the background is. This makes the background dark, which in this case helps to highlight the main subject. Using light falloff is one of the easiest methods of darkening a background. |

Big LightsStill photographers use fairly small lights, since light falloff can be easily controlled. In movies, where people are walking around, big lights that are far away are needed. You don’t want the actors getting brighter or dimmer as they walk towards or away from the light. Percentage of the distance from the light is key here. Putting lights far away reduces the percentage of the distance changed when walking. |
There are many ways to light a portrait. From this chapter you already know that you are probably going to be looking for a soft (large) light sources.
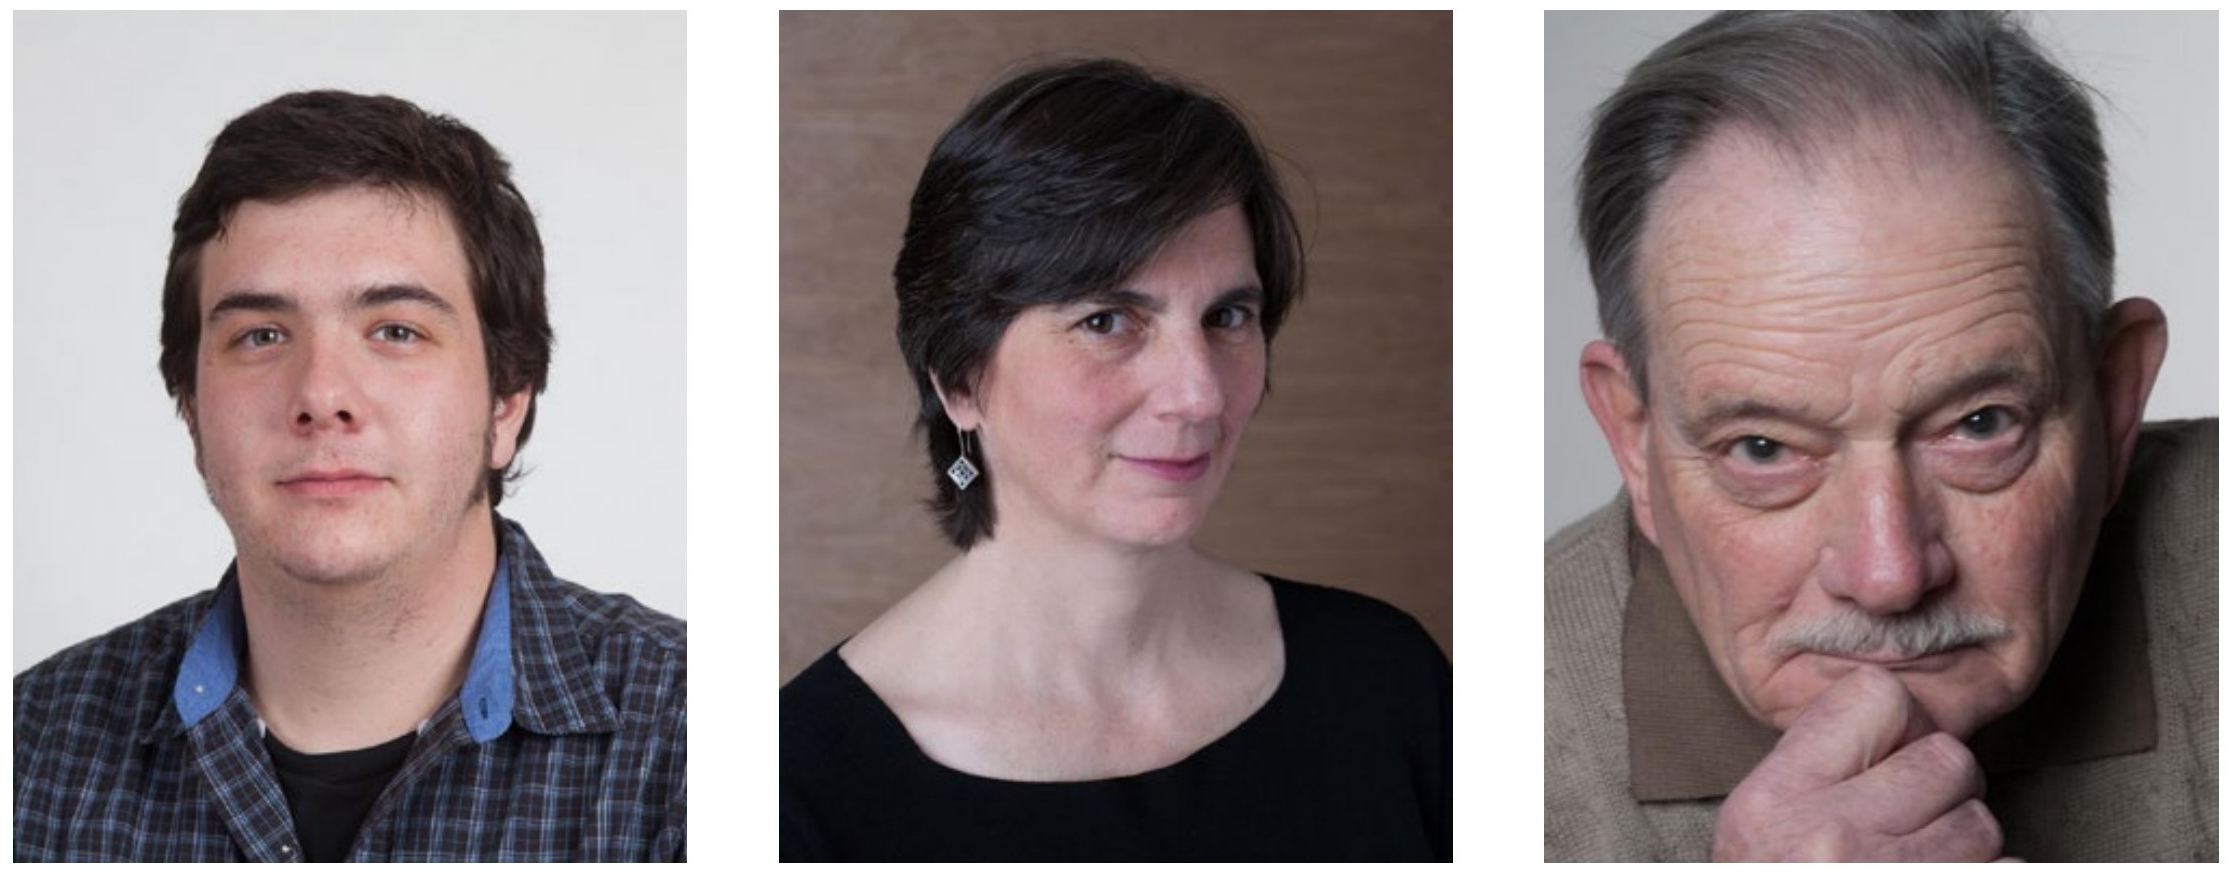
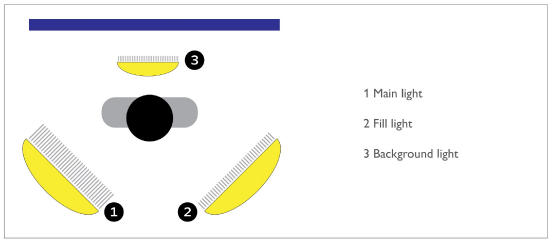
The question you need answered is how the portrait will be used. With the common portrait lighting set-up shown below there are two lights set above and to the right and left of the subject. One of these lights is called the main light, and does the primary job of illuminating the subject. The other of these lights is dimmed (or moved back) to provide about one stop less light than the other to illuminate the shadows. This is the fill light.
You can also add a third light for controlling the brightness of the background. This is called a background light (of course). Other lights can be added, such as hair lights pointing towards the camera to illuminate the side of the hair to give extra highlights and depth.
The standard portrait situation depicted in the illustration here is only important as a point of departure. It serves a purpose, but the most interesting portraits depart from it quite a bit. See the photographs on the next page for proof of this.
|
Three portraits all using two lights. The one on the left was for a passport, so the brightness of the lights was fairly even, with the light on the left being about half as bright (a stop) as the one on the right. The center image was for a business card, and the lighting ratio was increased. The third image was a publicity photograph for an artist, so the fill light was set very dim for more impact. |
|
Standard portrait light set-up as seen from above |
|
PORTRAIT LIGHTING
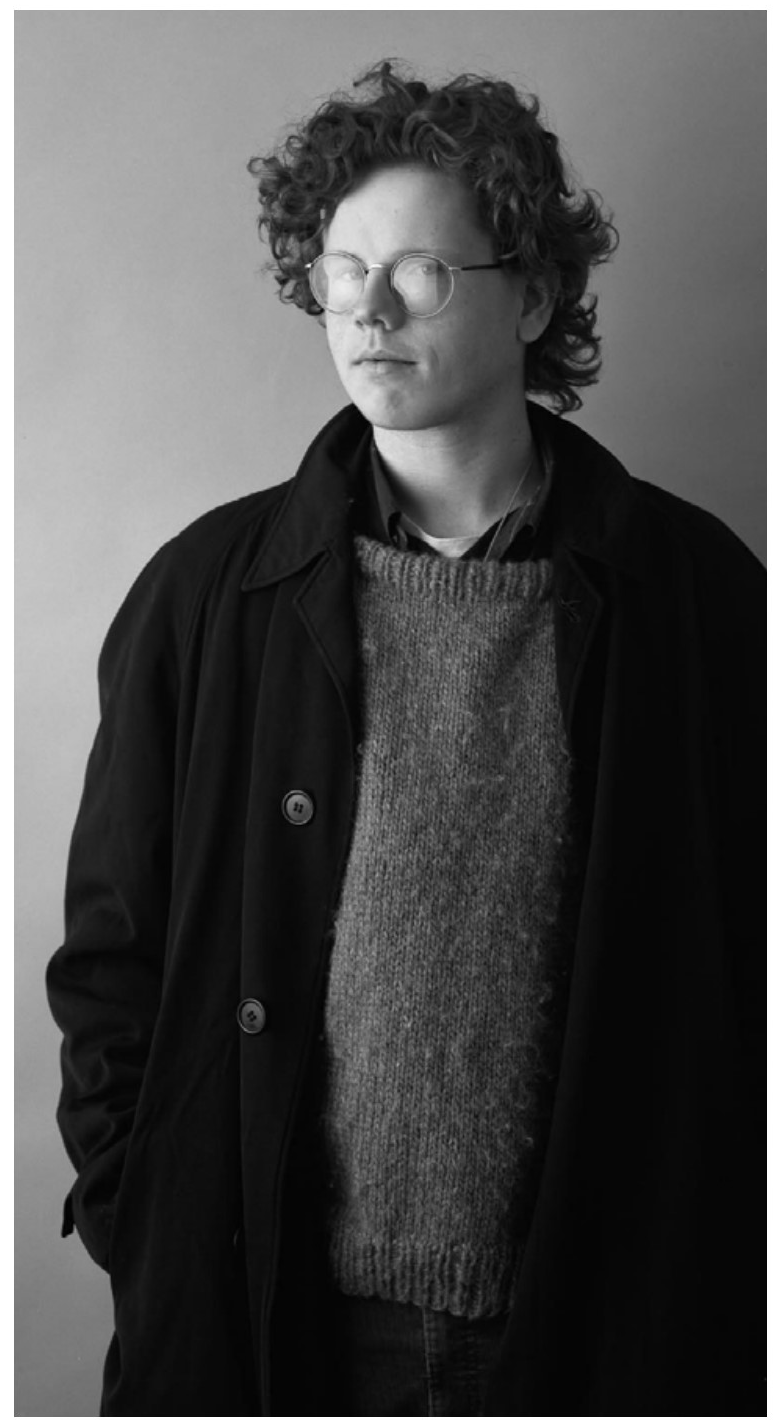
TOP LEFT Katy Hora, three desk lamps pointing from the area of the camera are used to illuminate this scene TOP RIGHT Beth Anderson, one monolight with a soft-box was used BOTTOM LEFT Kalyn Ertz, light from a window BOTTOM RIGHT Tessa Knosp, single desk lamp high on the left The point here is that successful portraits (and other things) can be taken with a wide variety of different lighting situations. By the way, often you can see an image of the light source reflected in the eyes of a portrait. However, in commercial images sometimes every reflection but one is retouched away.
|
Copying Flat Material
There may be situations where you need to photograph flat material, be it paintings you did in kindergarten or family photographs that need digitizing.
There are two directives related to this. First, the material needs to be as parallel as possible to the back of the camera. Second, the lighting needs to be as even as possible without reflections. If you just take a photograph with the flash on the camera, the light will bounce right back to the camera and the image will probably be washed out by reflections.
|
A copy stand ensures that the lights are in a position where reflections are directed away from the camera. |
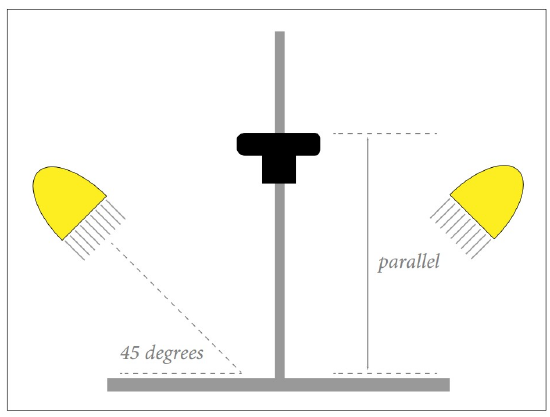
A copy stand is made for copying flat things, and ensures these requisites will be met. Without a copy stand you can improvise. Perhaps by copying the material on a porch where the light is coming from the side. Or by using a window that is to the side of what you are photographing.
There are further instructions contained in the appendix of this book.
Light Types
Light originating from the sun is called natural light. It is wonderful source, whether it is coming through a window, reflected off a wall, in the shady area next to a house, or even shining directly on the subject. Ambient light, or existing light, is light that happens to be around. Maybe a living room light, or the fixtures in a ceiling, or natural light.
Ambient light can be fine, but also can be awful. There are times when you need lights made for photography. What follows are the main types.
BUILT IN FLASH: Your camera’s built in flash is not a controllable light. It is small (hard), and it comes from only one direction (not an ideal one). It is also only good for illuminating things close to the camera. But it is convenient when you have to have a bit more light, and you can even turn it on outdoors when you need to lighten the shadows in a scene.
CAMERA FLASHES: These are bigger flashes which mount on your camera. They put out much more light for longer distances, and can be aimed to bounce the light off of a ceiling or wall. Often you will see these being used with various reflectors to split the light so that part of it can bounce and part be directed to the subject. These flashes often integrate into the camera’s automatic controls.
|
Camera flash |

Many flashes can also communicate wirelessly to additional flashes, which can be set around in an environment and bounced or aimed through translucent boxes (soft boxes) which increase the effective size of their light source. With multiple flashes, lighting options increase substantially. You can have a lot of control using multiple camera flashes.
MONOLIGHTS: More light can be had if that portable flash is made bigger than a camera flash. These larger flashes, called monolights, also have modeling lights, which are extra (incandescent) bulbs that contribute nothing to the exposure itself, but allow you to see the effect of the light before you take the picture.
Monolights are very simple and versatile. Although the size dictates that they be used on stands, most can be powered by a battery, so some portability remains.
Monolights have wireless connections to each other and to the camera so that they are all triggered when the shutter is open. You can buy monolights in kits that come with stands, reflectors, and a wire-less transmitter to mount on the camera.
STUDIO FLASH: These are more powerful than monolights, so the power source needs to be separate from the light itself. These lights have power packs to which multiple light heads can be connected. With digital cameras the extra power these lights have is rarely necessary considering the cost and weight of them.
HOT LIGHTS: These lights are like desk lamps, but they can be mounted on stands. They are brighter, smaller, and more predictable in their color. They are constant-source (don’t flash), so can also be used with video. The better ones all use halogen lamps, which do get very hot.
|
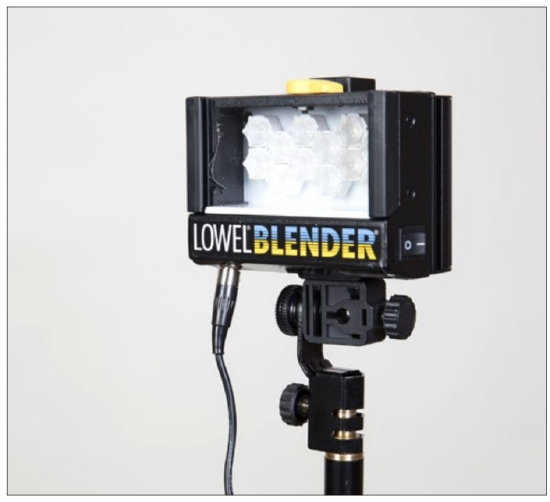
TOP LEFT Monolight TOP RIGHT Hot light LOWER RIGHT LED light. This particular LED light is quite small, enabling it to be easily held.
|
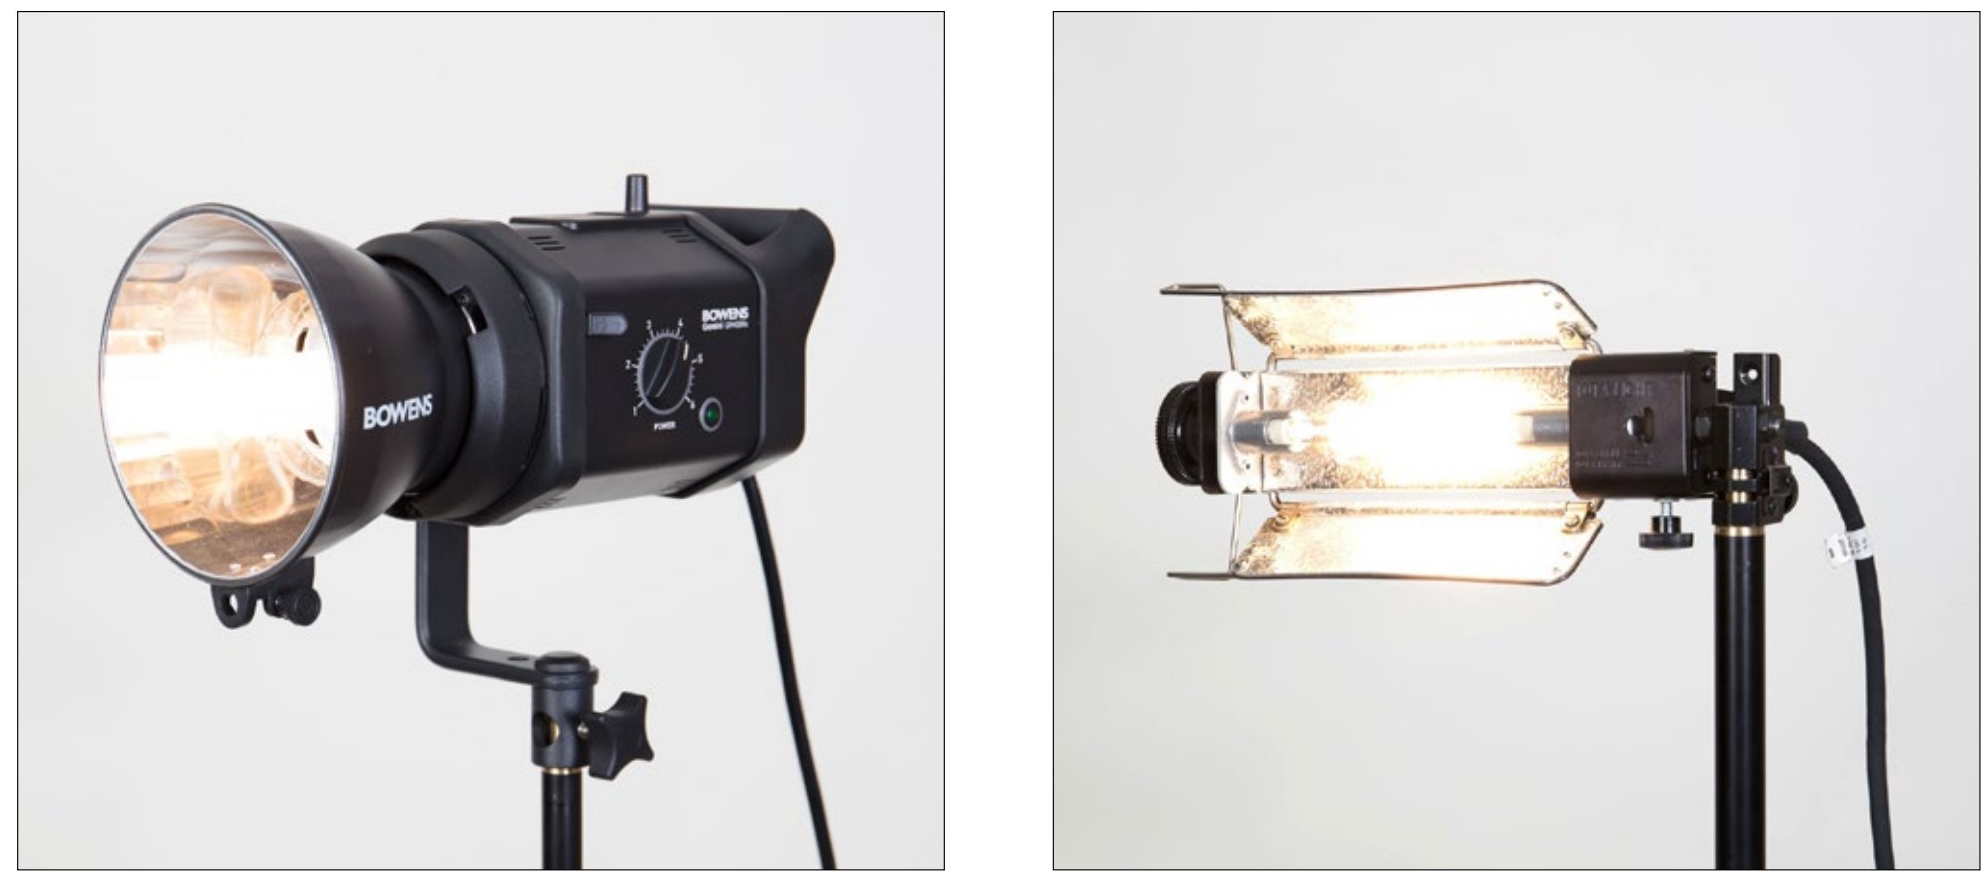
There are many types of hot lights, from spotlights to ones with built in large reflectors.
LED LIGHTS are basically the same as hot lights, but with less heat. Like hot lights, these are constant-source lights. LEDs have many advantages over hot lights. Not only do they stay cooler, they are extremely versatile and come in forms from panels to rings. They can easily be powered by small batteries, they have good color, and with some the color can be varied to match either daylight or incandescent. They can be made very small, and multiples of them can be put together to make large fixtures.
As LED technologies get better, these lights are largely replacing hot lights.
Light Modifiers
If you want to make a big light out of a small one, just bounce it off of a neutral colored wall or ceiling. If you want more versatility in modifying light, you could buy a sheet of white cardboard (or foam core) or cover a surface with aluminum foil. If you have enough duct tape you will be amazed at how easily you can modify light sources. And, if you can make it, you can surely buy it—there are any number of things sold to modify light sources. What follows are two which are widely used and very practical.
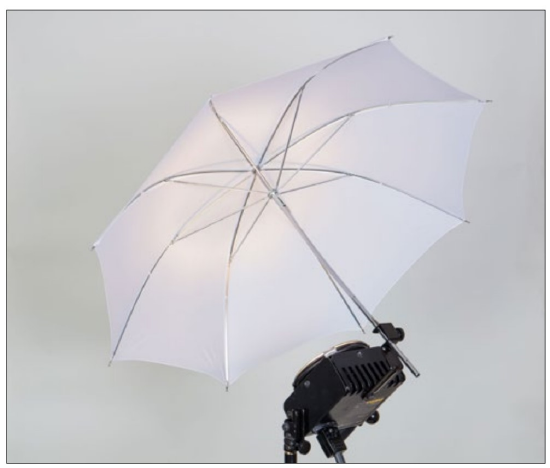
UMBRELLA: Photographic umbrellas look very much the same as the rain variety, but with white, silver, or translucent interiors. You simply mount your small-source light so that it points to the concave part, and the light is reflected out as a nice large-source light. These are very portable and retain much
of the brightness of the
original light.
|
ABOVE Umbrella. Most photographic lights have mounts for umbrellas. LEFT Soft Box. These are mounted to the reflector bracket.
|
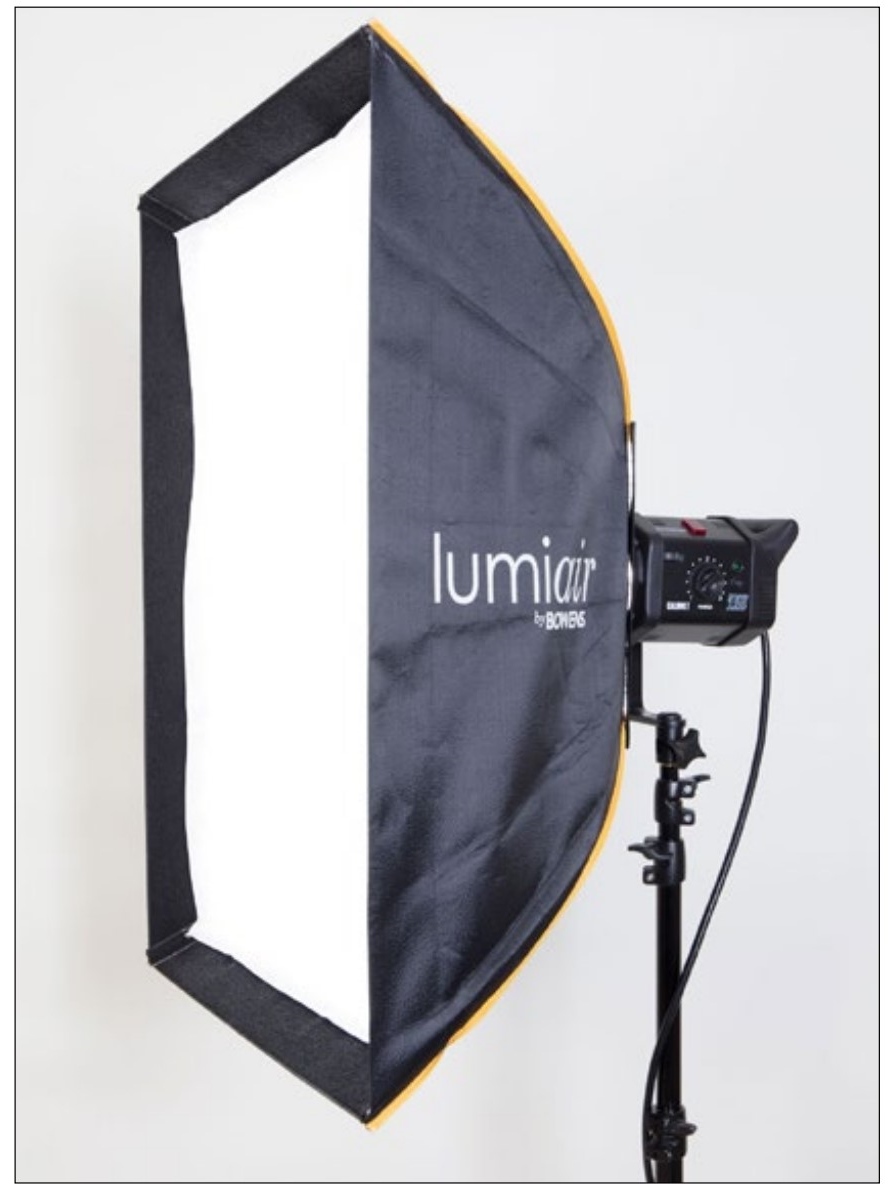
SOFT BOX: Put a box over a light and shine it through a translucent bottom. Soft boxes act much the same as umbrellas in making small light sources big ones. They have some disadvantages over umbrellas, such as the fact that they block more light, making the light dimmer. But they also have advantages, such as a making the light more controllable, especially when you take into account that they come in many sizes and can be used with accessories to tailor the light.
With most LEDs putting out comparatively little light to begin with, soft boxes work best with flash. You could try a hot light in one, but get the fire extinguisher ready before you do.
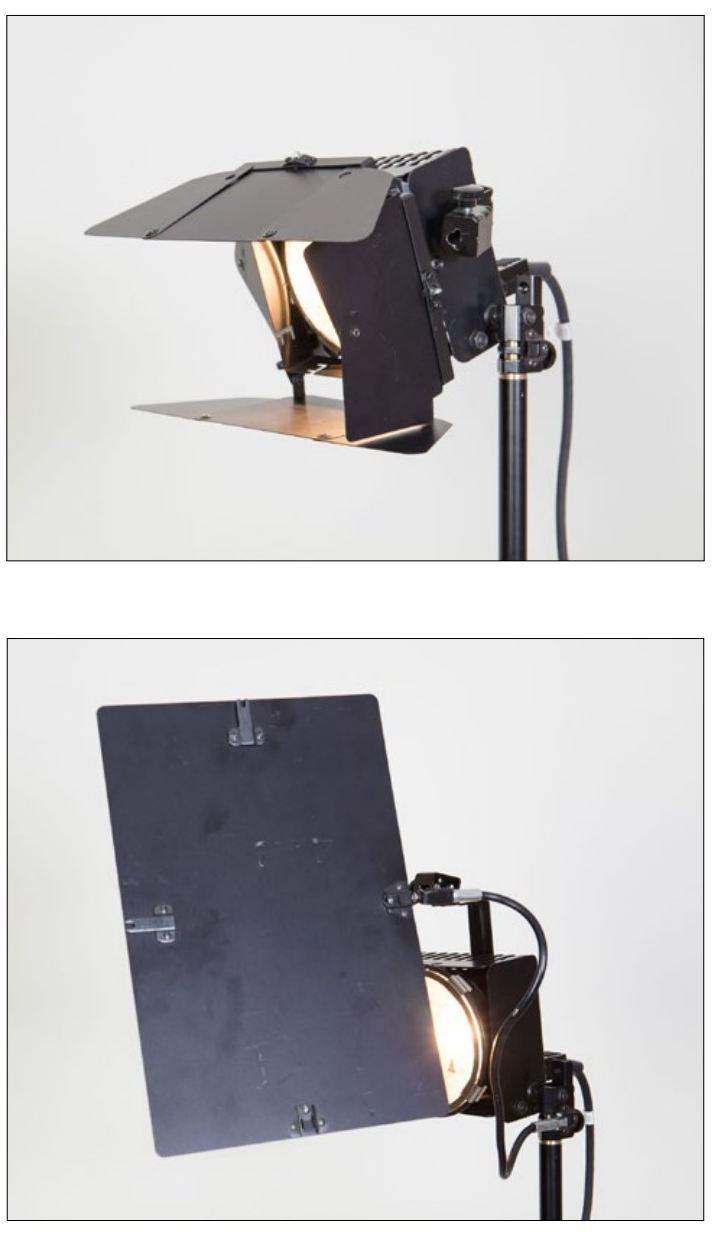
OTHER LIGHT MODIFIERS: There are a myriad of different accessories that can be made or bought to modify light. Reflectors with different textures can make the reflector act like multiple tiny lights. Adjustable doors, louvers, or flags (cards) limit the light spill and direct the light. Translucent tents can contain small subjects and soften the lights placed outside the tent to make a 180 or 360 degree light source.
|
TOP Barn doors are adjustable doors that limit the spread of the light. BOTTOM flags block or dim the light hitting areas. These can also be reflective for different effects. |
Often photographers use duct tape (or black gaffer tape) and various cards and reflectors to modify the light for specific instances. Lighting might seem very complicated, but often lights are only added as needed to do things such as lighten shadows or provide highlights.
Now Go Shoot
Evaluate the light source as you are taking photographs. Small or large? Is there more than one light source? Are reflections making additional light sources? What direction is the light coming from? Try different directions. How are these things interpreting the subject?
Turn your camera flash on and try a few comparisons with and without the flash. Try to use the flash when photographing closer things outside.
How good is a desk lamp for taking photographs? Turn off all the other lights in the room and try it. How about a window?
Take a sheet of paper and reflect some of the light from your small light source (sun or desk lamp) back to your subject to fill in the shadows with a smaller subject. How does this work with a large light source?
EXPERIMENT
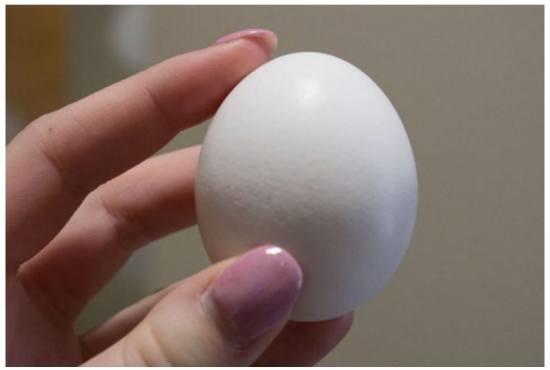
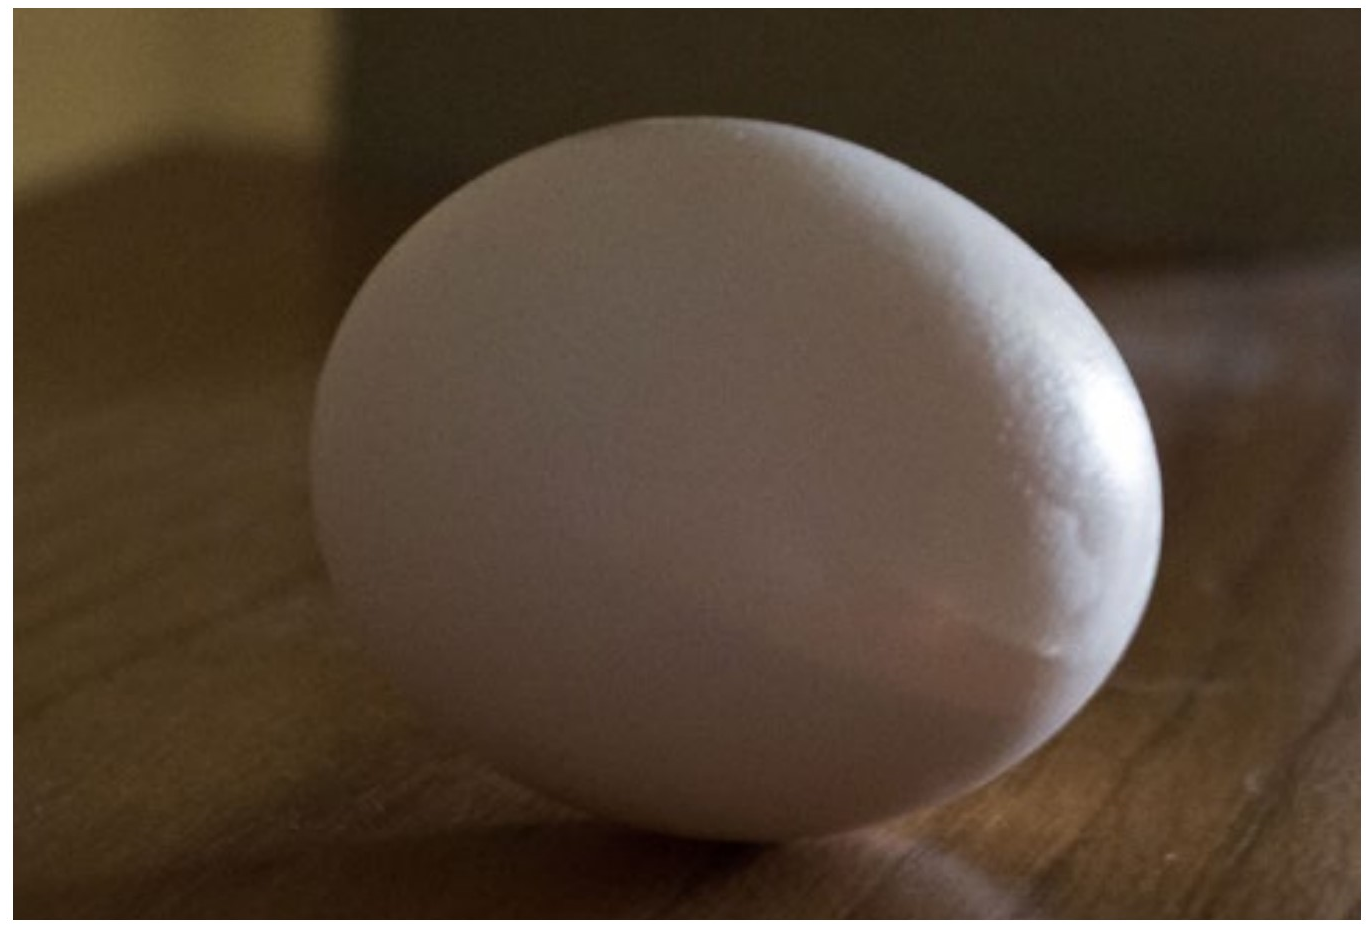
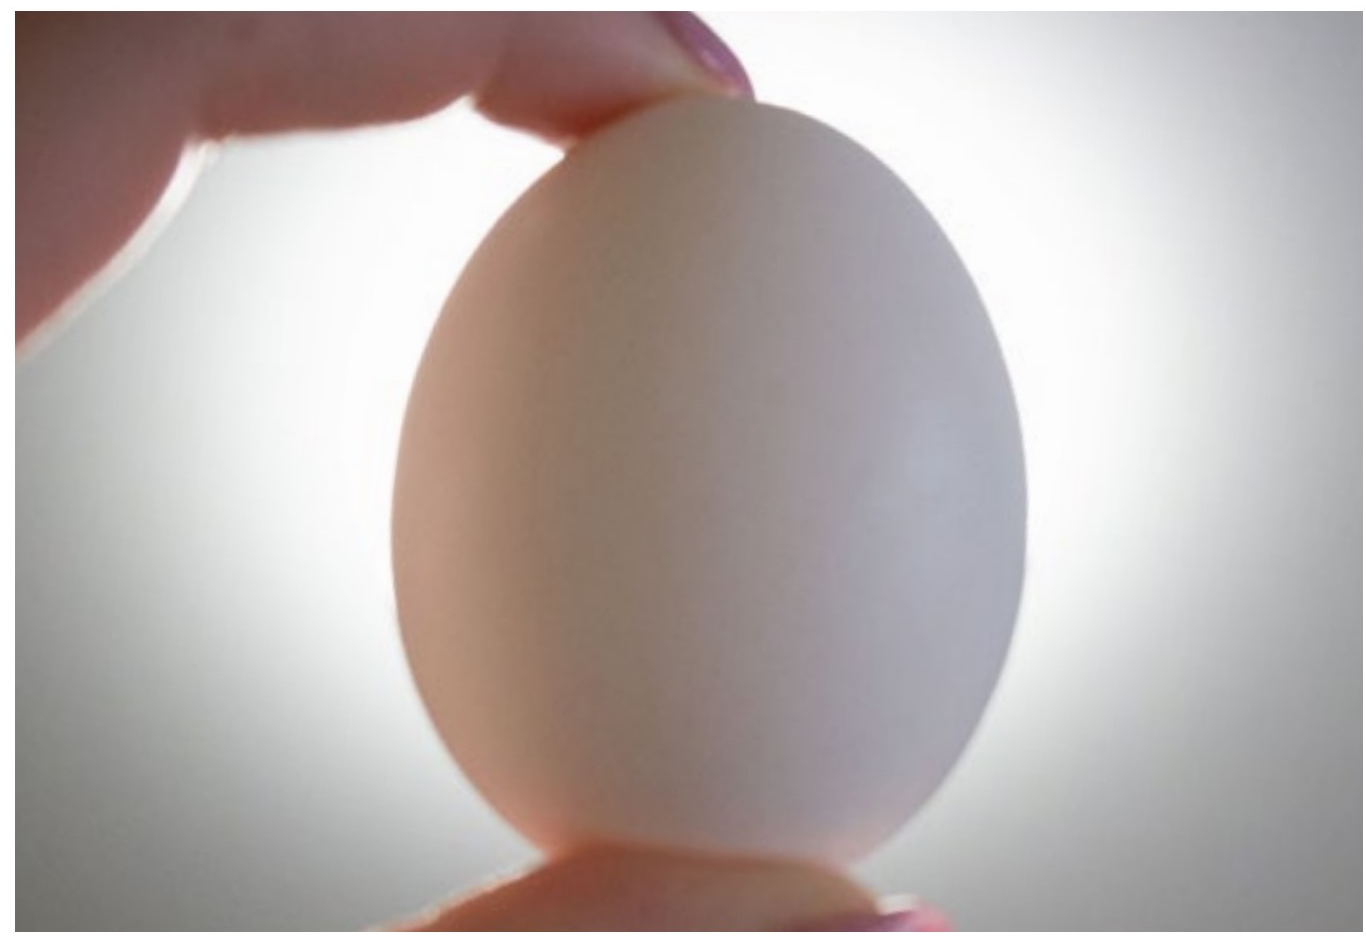
Find a simple object with a textured surface that you can carry around or that will go where you tell it to go. Place it in different lighting conditions with a fairly neutral background so the difference in lighting is the main change. Find at least eight different lighting situations (light size, direction, number of lights).
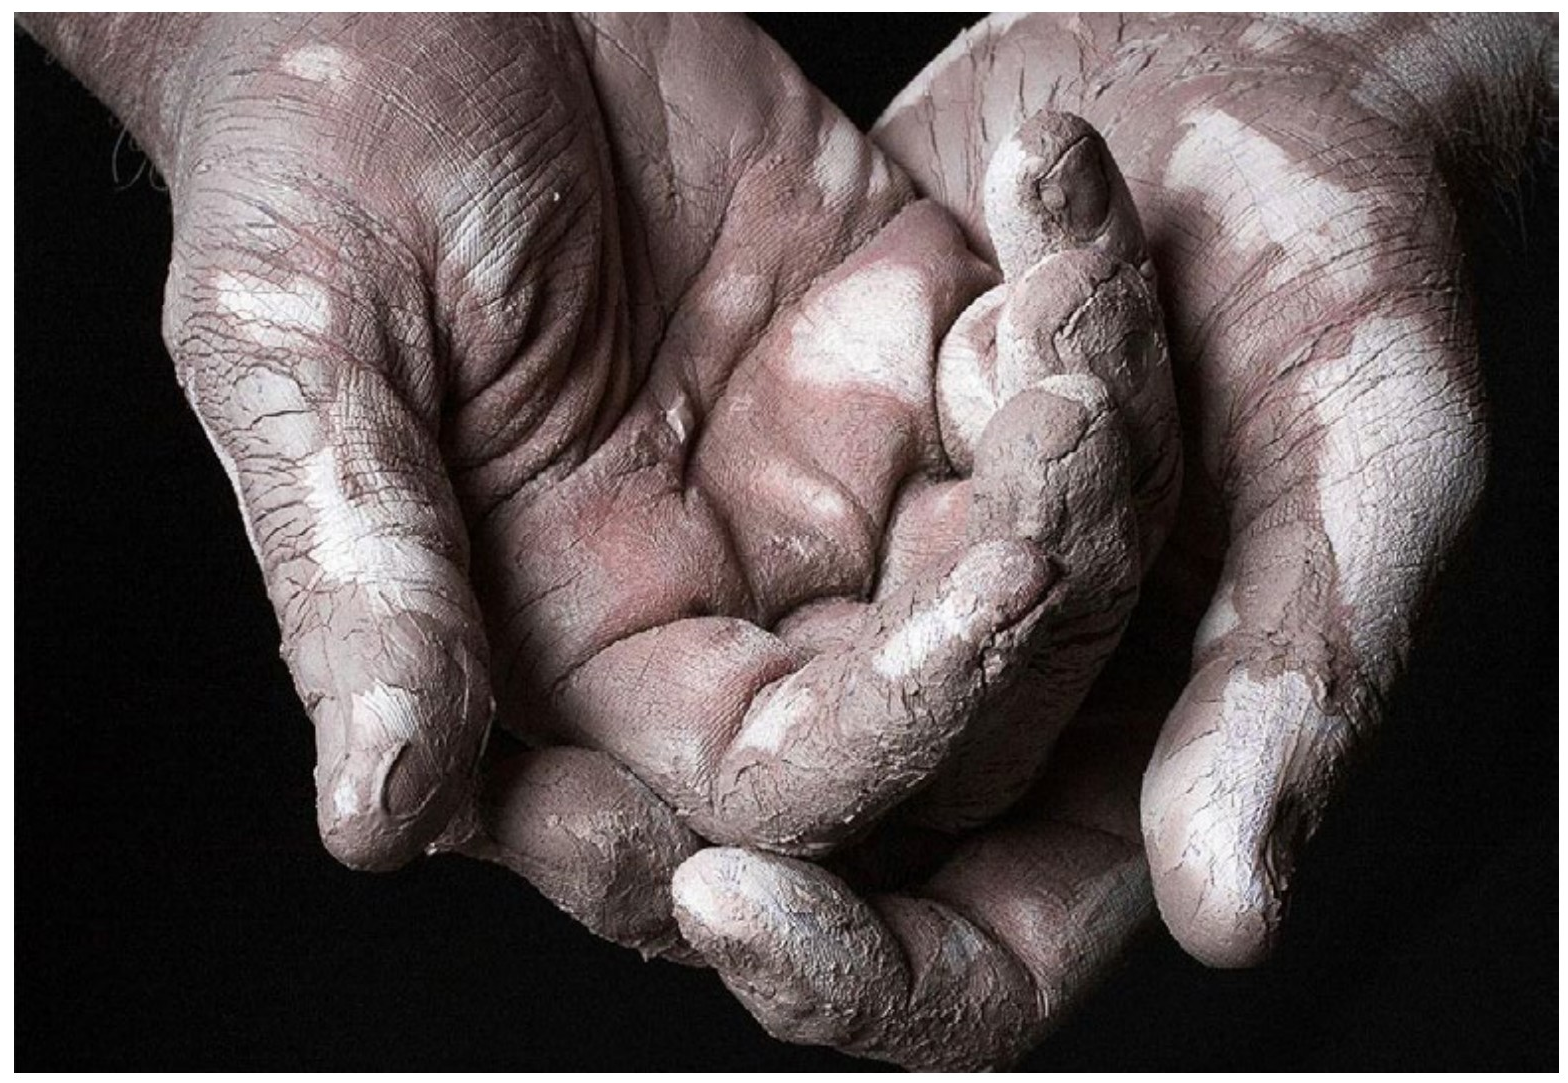
One common object for this experiment is an egg. While an egg does show quality of shadows and reflections very nicely, you do have to look closely to see texture changes. A vegetable or your hand might be better. Try to make this experiment somewhat practical and remember that this is just an experiment that will show you a bit more about light. High art can come later.
And if you are really interested, you can take this experiment and expand upon it, using multiple lights you might have handy and reflectors made of sheets of paper, boxes, and whatever else you can find.
|
ABOVE & RIGHT Miranda Buchholz BELOW Hanna Fox
|

One Last Note on Lighting
Lighting with photographic lights can get somewhat complicated and has a tendency to wait for that unbought light. Again, remember that the natural light that is around you all the time is an excellent light source. In other words...
Keep it Simple
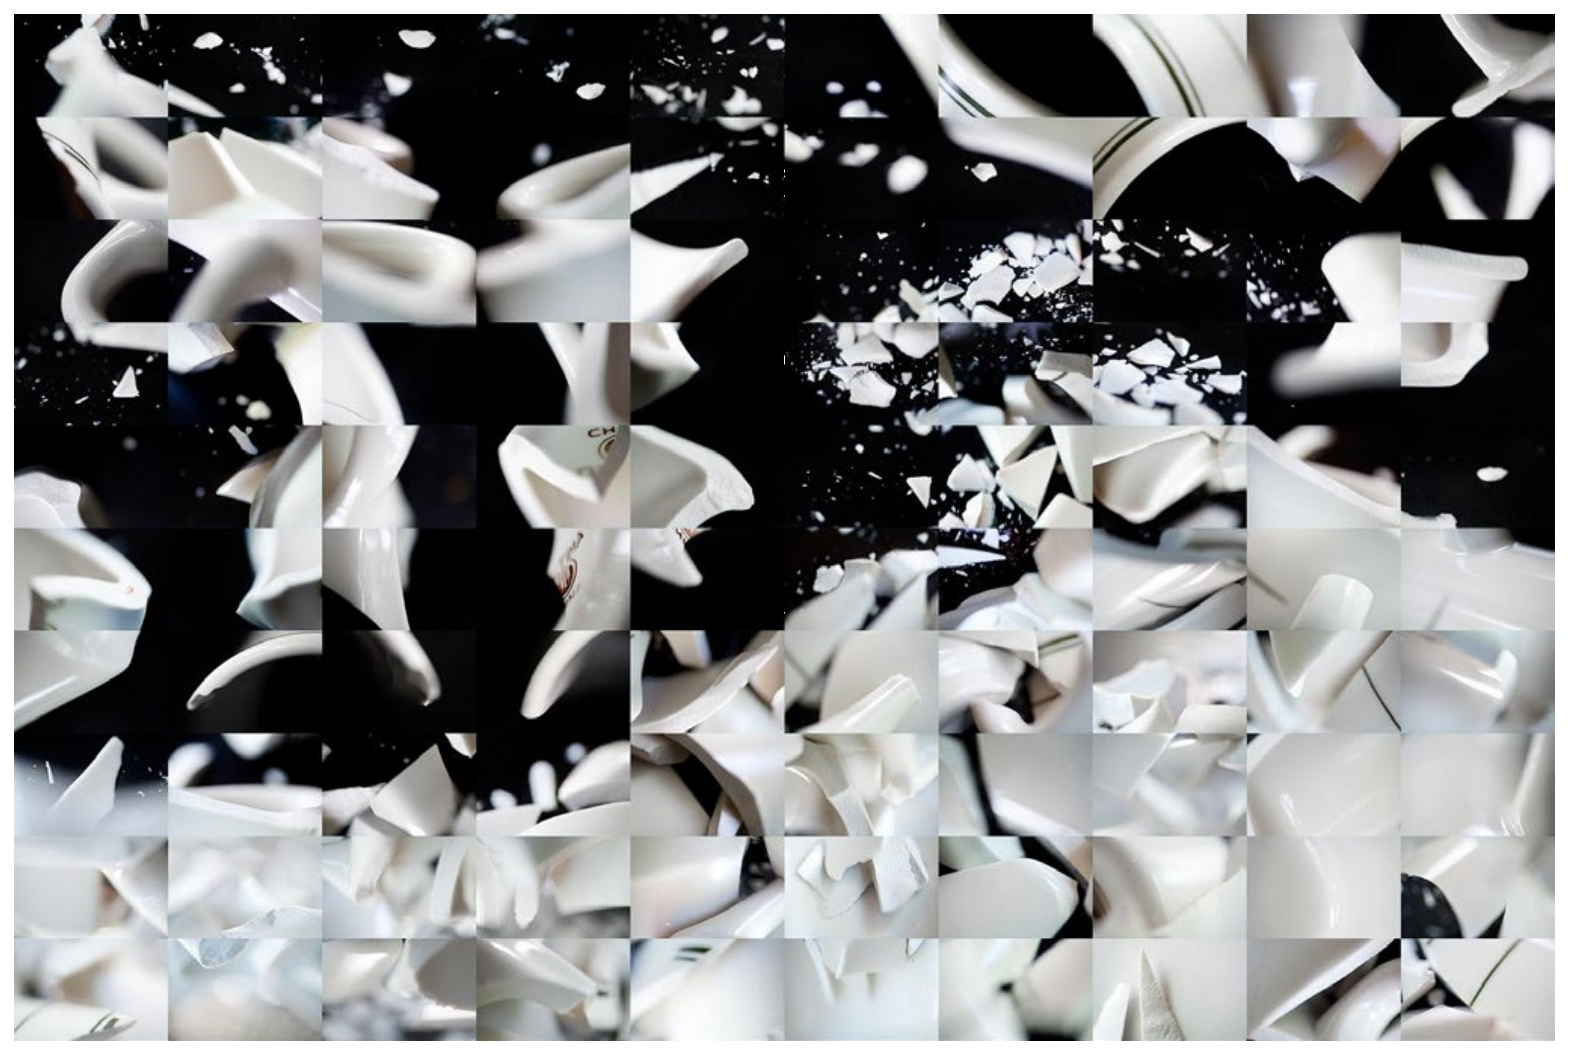
At right is a composite image of a broken cup. Several thousand photographs were taken for this on a porch with natural light, and as the shooting progressed clouds came and went and the sun moved across the sky.
Because of this, there were a range of different colors in the image. These had to be separately color balanced for many groups of the images.
That was a lot of work, and would have been unnecessary with a more controlled light source. But it was much more pleasant to take the photographs on a nice day outside rather than in a dark studio.
Also, since the shadows necessarily changed color relative to the highlights, a certain amount of randomness was introduced, making the image a little less formal, which in this case is a good thing.
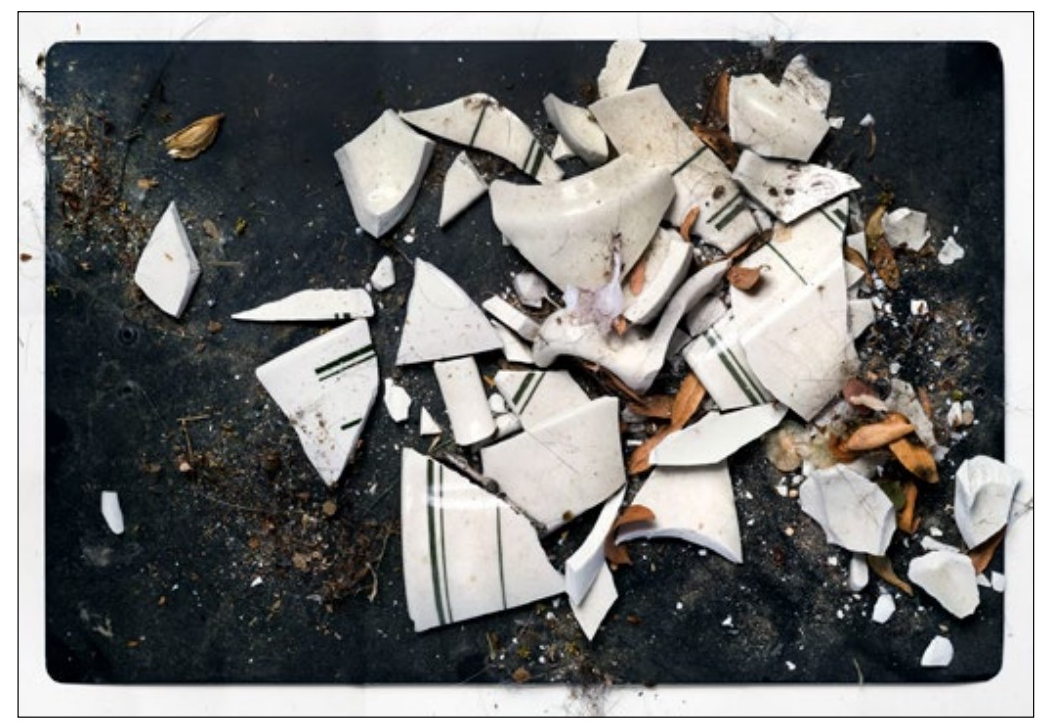
|
The same cup in one shot. The background for both images was the black steel photographic lighting flag you can see here.
|
Lighting Questions
What are the three main variables of light?
Hard-edged shadows would indicate what kind of light source? Soft-edged shadows?
What effective size of light source creates ‘soft light’. What size creates ‘hard light’?
Why does the sun behave like a small light source?
What type of light source makes reflections more distinct? Textures more distinct?
Mixed light refers to what quality of light?
What kind of objects reflect light? (trick question)
At what angle is light reflected from objects?
Why is the sun not giving you less light as you walk away from it?
How many lights are used for the common portrait situation given?
What is the main light in a portrait situation called? (this is pretty easy)
What device is made for copying flat material?
Light originating from the sun is called what?
What is the term for light existing in the environment in which you are photographing?
What is the type of flash is self-contained but must be used on stands?
What are two light types that have a constant light output (not flash)?
Photographic umbrellas are used to do what? Soft boxes?
