
14.1: Editing Workflow/Assembly
- Page ID
- 140335
Importing
Importing is a process of using editing software to input resource files for your post production process. Most software will support your merely dragging files into their timeline structures. But dragging is a poor way to get your files into a professional editing project, and deprives you of the myriad ways professional software can keep you organized and spot on towards your ultimate goals.
Earlier on, we talked about how important organization was for any successful endeavor, and film editing in particular, can really benefit from a well organized approach. Assuming you have already finished your planning process, and understand the basic interface and structure of the editing system you’ll be using, importing will be the next important step in preparation for the edit.
All software will have some basic interface window to use for importing files into your film. Below is a screenshot of Final Cut Pro’s Import Window.

The import interface will have entry fields for all the crucial information about your resource files, as well as how you’d like to handle them in the editing process. It will help you locate your files from many different sources such as cameras, and/or external drives. In the illustration of the Final Cut Pro import Window above, you can see that it will help you locate files from many devices, such as cameras, hard drives and archives. You can even designate Favorite sources, where much of your files are stored, so you don’t have to be jumping around among lots of different device sources, when editing.

You’ll often be able to plug all your Media organization, naming conventions, etc. into your clips in the actual importing process and be able to assign favorite locations and further organize your media. The software can also help with assigning different organizational elements that group clips into collections of similar items, such as shots, scenes, shooting dates, etc.


Currently, much of the software can find specific content, analyze resource clips for illegal audio/video levels, and even automatically correct these. They will allow viewing in either filmstrip or list (text) views, supply entry fields for notations, reminders, and a multitude of presets like starting/ending timecodes, date shot, codec/camera used, etc.

Importing from Different Sources:
All software will have a section/fields on various clip resources, such as Cameras, screen cameras, hard drives, archives, etc. You’ll choose the source, and then the software will have various ways to access its files, as well as where they are to reside in your media management scheme.

Importing from Cameras:
Most software will allow you to plug your camera directly into your computer software, but usually, you’ll be plugging your camera’s recording drive into a card reader, which then attaches to your computer input.
It is very important to understand that the camera records image information in more than one place for each file on its recording devices. These files are in mystifying numerical systems, making it impossible to know if you have all the information for each specific shot. So the only way NOT to lose information, is to immediately copy the entire card into a folder on your hard drive. Then, let the software do the organizing and the gathering of the different shots for you. If you mistakenly try and just copy a couple of shots from the camera card, rather than the whole card, you might end up missing some important parts necessary to displaying the video/audio, and think you’ve messed up on the recording side!
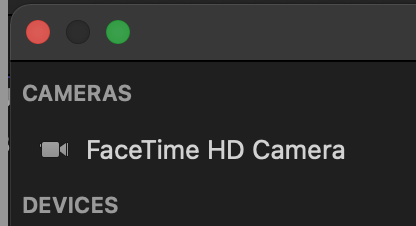
Your computer’s display camera will also be directly connected to your import device, so be prepared to ‘see yourself on TV’ if you accidently click on its source. In the image above, it shows up as a "FaceTime HD Camera."
Importing from External Drives
External drives show up as source devices in your import interface, and you can choose which drive, and find/play potential project clips from them. Most applications will also allow you to import clips directly into, and saved inside your project. Or, one can choose to "leave the files in place" and the software will create links to these external sources. This is a great way to save space in your editing computer’s storage, since often 10 to 20 times the amount of media is imported, than actually used in the final cut. That’s a lot of gigabytes!

Your importing software will contain various types of transport controls, different views (eg: filmstrip [thumbnails] vs list [text] views), allowing you to choose either the most convenient at the moment, or the one that suits your style best.
Transcoding/Analyzing during Import
Since so many different formats exist these days, most applications allow for transcoding your source clips. We previously talked about native, vs optimized, vs proxy files, and usually during import, one can choose to transcode their sources during import. Though this is convenient when it comes to editing in the timeline, transcoding can take time, and a lot of space is used for many files which might never get to be in the final cut. Editing apps like Final Cut Pro also let you choose to transcode within the editing software while editing, thus working around one of the storage problems (storing only the files actually used).
The same is true for analyzing and fixing problems during import. This can be convenient, but again, the same potential exists for wasting time and space for clips that never get into the final output/sharing of the project.

Creating an Archive:
All software will have a way of creating an "Archive,"which is a way of backing up your imported material for a long duration, even after the editing is complete. This archival source will contain all the information from the camera card and preserve it for future use. Professional editors, in their workflow, will upon receiving source files, immediately create an archive. Then they'll make a couple of copies, to be stored in different places, to prevent loss of crucial source materials, especially during the editing process. If files are lost for any reason, without this kind of backup, the only recourse is to go back and re-shoot the file. Sometimes even this is impossible. So, "backup, backup, backup" is the only way to go for a successful career in editing.
Media Navigation and Selection Operations:
Although there are transport controls all throughout the application interface, it’s usually easier to just use the Spacebar, to toggle playing off and on. This however, only plays your material back in Real Time. But when reviewing your available clips, you'll want to be able to quickly skim through them, as you would when skimming hard copy books, newspapers, etc. You will find some kind of skimming device in all professional editing software, which allows you to fast forward/backward through your source materials. Also you’ll find that there’s always more than one way to perform an operation. First, there’s the menu at the top of the interface, though this is the most time consuming way to perform any operation. Then there are buttons throughout the interface that can be clicked on, and lastly, there are keyboard shortcuts for most steps, which I recommend you learn ASAP. Using the shortcuts gives you the greatest speed and versatility in editing. And fluency in all the different ways to do a specific operation, gets the job done quicker, resulting in a quicker paycheck. Remember, if you are considering becoming a film editor, you are paid by the job, but what you put into the job is your TIME, so efficiency puts you ahead of the game.

Media Selection for your Project:
Once you’ve actually imported your source footage into your editing project, your next most important job is to REVIEW it, to find out precisely what you’ve got to work with, and become "intimately" acquainted with it. And I’m serious about the "intimate" part – knowing exactly what clips you have, and also what you don’t have (and still need to get if possible) is crucial to a successful edit. You can never tell when that ho-hum clip just might save your you know what, if you improvidently run into some crisis, when you can’t find a shot you desperately need.
In the old days, these reviews used to be called "logging." The review process is still referred to as such, but gone are the yesteryear pen and paper lists of timecodes, content, notes, etc. You can thank your digital gods that this has been greatly simplified by your editing application. All of them contain ways to rate clips as to their usefulness (or not), and group them into similar type collections for fast access. They also have convenient fields with presets, such as timecode, start/end, date shot, codecs used, date of shot, scene/take, etc. etc. etc. All this, plus the ability to group these categories according to your personal work style, makes logging a lot more tolerable.

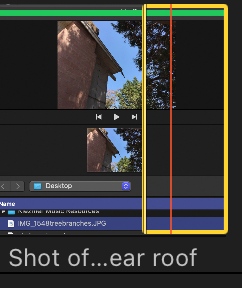
While reviewing your sources, part of this process also involves choosing what portion of the imported clip you wish to use in your edit. As you skim through your clips, you can mark In and Out points in the sections, designating the portions you wish to use. These will be less detailed, gross choices - not tweaked or frame-accurate edits, but just a little more than you want to use. This allow for more discreet, frame-accurate edits or changes later. Again, there is more than one way to do this, and the more ways you are fluent in, the more versatile and speedy your editing will be. Digital editing is of course, indestructible, so you’re able to use your clips and their portions as many times as you wish.
All software will have a way of searching for clips, adding notes/reminders to clips, ways of marking specific points in clips (markers) and ways of batching groups of clips for certain operations. The better you know your editing software, the more time you’ll have to spend on being creative, and less time on scratching your head trying to figure out how to do some procedure. And, just like learning to play the violin, the music will come after you know your way around the "violin bow and fingerboard."
Editing Workflow
Now that we’ve gotten our source clips imported into our project, let’s first talk a little about a Professional Workflow. Here are the basic steps:
- Copy the camera footage onto your hard drive and import your working clips
- Review or log your footage – get very familiar with it and organize it into categories for quick and easy access
- Make a "Rough Cut" with vide and audio – to get a good idea of how the whole movie can come together
- Make sure the audio sounds good and is corrected if necessary (though this can also come a little later)
- Tweak your edit to frame accuracy, and then add effects – like titling, color correcting, etc.
- Distribution or output – create a Master File for future use. You keep this in your editing Fort Knox, and then output to various codecs from its copy
It doesn’t matter if you’re editing as a hobby or for a client. If you’ve planned and organized, and follow the steps above, you will be on a direct path to your first Oscar!
Starting a Project and Editing clips into the Timeline:
In all platforms, once you’re ready to begin putting together the actual movie, you first have to set up or create a timeline in which your movie will reside. These can have different names (eg: Premiere calls it a Sequence, Final Cut Pro calls it a Project), but basically it’s a timed space in which you insert your clips in the order that best tells your story. You will have to make decisions as to this movie’s duration, what its starting timecode will be, and other video and audio properties. In some cases you must insert this custom information first - in others, like in Final Cut, the movie takes on the same specs as the first clip inserted into the timeline. You will also make choices for the way you’d like to view your timeline, such as clip height, how to view audio waveforms, etc.


Adding Media to Your Timeline
As with all the operations in these editing chapters, you’ll find there are also several ways to add media files to your story timeline. For instance, by clicking on specific buttons, using the main menu at the top of the interface, or by far the fastest, using keyboard shortcuts. Again, being handy with all these methods affords you the greatest fluency of operation.
Your basic workflow here will be to:
- View and/or listen to the imported clips in your media bin or browser,
- Decide which portion you wish to use,
- Mark the In and Out of that portion,
- Then add it to a particular place in your story timeline.

Depending on how your editing application works, there are several methods of adding the clips. Here is some standard nomenclature for this operation:
- Appending: adding clips to the end of your storyline (either singly or in batches), regardless of where your playhead is located
- Inserting: inserting clips between others already in the timeline, or even splitting a clip in the timeline (either singly or in batches), at the playhead site
- Replacing: replacing clips already in the storyline
- Overwriting: writing over clips already in the storyline
- Connecting or Adding Tracks: to have layers of clips appearing/sounding at the same time


Assembly
The first, really fun part of editing is the rough assembly, where, after you’ve finished the more tedious process of viewing and organizing your source clips, you can abandon yourself into throwing those clips into your story timeline, helter skelter, in all kinds of ways, moving them around using the software’s navigational rules, and just playing, to see how they look, sound and feel together, for the most impactful way to tell your story.
Many editing platforms will allow you to have several projects open at the same time, making it easier to compare and make decisions about what works best. This is also the time where you can freely experiment with all kinds of combinations. It’s a good idea to save some of the more promising initial versions, in case you decide the path you’ve chosen to start with, doesn’t really work. Having these available, will allow you to tune back in to that initial creative energy, and try a different approach.
In this frenzied tossing around of clips, notice, that you’ll be "butting" clips up against each other in the timeline.
When there is no special effects type of transition between the clips, (think eg: cross dissolves), you get a kind of "non transition" transition. This makes for an abrupt change, where one clip ends, and another begins, without any smoothing of the impact from the outgoing clip to the incoming one. This kind of abrupt transition is called a "cut," and the name comes from the old film, celluloid days, when editors had to literally "cut" pieces of filmstrips, to change scenes. The greatest number of transitions in most films are cuts, and you’ll find lots to read about when and where to cut, in order to be most effective.
The whole idea of the craft of editing is to be able to fit real hours- and minutes-time, into a shortened movie world, where years can fly by in seconds. You'll want to be able to keep your audience from being distracted, and totally believing this is really happening while watching. The good editor can keep her audience spellbound beyond our temporal world, by knowing when to change a scene, and at which precise frame to do this. The golden craft of editing is knowing how to do this effectively, without the audience realizing, and keeping them focused on the story.