
10: Painting
- Page ID
- 177926
Scenic painting often takes advantage of the filtered spectrum of the lighting designer’s palette in order to achieve its illusionary effects. Knowing that the lighting allows some colors to appear prominent and some to recede, the painter chooses hues that best support the illusion their paint is intended to create.
Scenic paint effects are largely achieved through the layering of colors over a surface. In order to achieve layering that allows the previously laid layers to show through, the painter must use a series of thinned paint washes to complete the effect.
Paint is made up of several elements. The color of paint is due to the pigment added to its mixture. Pigment is an often dry, colored particulate, which is suspended in a liquid to give the liquid hue. The liquid itself has two purposes: it allows the pigment to be spread over a surface and includes glue that permanently binds the pigment to the surface. The paint liquid is part vehicle, which allows the paint to spread and is eventually evaporated or absorbed, and part binder, which is the glue that adheres the particles of pigment. A fourth component that is common to house paints is filler, which is particulate matter that increases the opacity of the paint for better coverage and sometimes can be used to extend the paint to drop its price. chalk is a common filler.
When creating washes by thinning paints (adding more of the vehicle component), a scenic artist has to be careful not to thin so much that the binder can no longer effectively glue the pigment to the surface, or the paint will easily rub off onto costumes and actors.
Though it is common for modern theatres to work primarily with water-based latex paints, it is possible to encounter other types of paint and solvents in a scenic paint shop. Always read labels on the products you are working with. Shops are required to keep a binder of SDS (safety data sheets) for all chemical compounds they stock. These sheets serve as guides for safe use, personal protection requirements, and cleanup of chemical products.
Most commonly, scenic artists are asked to replicate the textures of materials such as woods or stone onto scenery, though creating visual depth through manipulation of highlight and shadow is also central to the art. As temporary constructions, sets are often built of relatively light and inexpensive materials, though often they represent rather ornate interiors. So scenic artists paint wood to look like more expensive wood or wood to look like stone or metal. Scenic artists are masters of these illusions and create most of them through the use of relatively few application techniques. The most common application techniques are wet-blend, scumbling, dry-brushing, spattering, stippling, and rag-rolling. The combination of these application methods produces some amazing painted illusions. Painted light and shadow can add very convincing detail and depth to these illusions, but must be carefully coordinated with the lighting design.

Brushes
There are many different kinds of brushes that are used to paint in a production.
- Priming: A wide thick brush for covering large areas quickly.
- Lay-in: A flat-tipped brush with a thick ferule of bristles to carry large amounts of paint.
- Graining: A brush cut to have void areas for creating random graining.
- Liner: A flat edged brush for outlining and details.
- Sash: A steeply angled brush for cutting in against window framing.
- Chip: A commonly available, inexpensive brush well-suited to dry-brushing technique.
- Roller: A round tube capable of rolling paint onto a surface. The nap of the roller indicates the thickness of its cover and will determine the texture the roller is best suited to cover or create.
The Parts of a Brush
While there are many types of brushes, each with its own purpose in an artists toolkit, all brushes have the same named parts.
- Tip: The very end of the bristles that make contact with the painting surface.
- Head: The main body of the brush that holds the bristles and connects to the ferrule.
- Bristles: The thin, flexible fibers on the end of the brush that are used for painting.
- Crimp: The metal or plastic band that attaches the bristles to the ferrule.
- Ferrule: The metal or plastic tube that connects the bristles to the handle and provides support for the brush head.
- Handle: The long, usually wooden part of the brush that is held while painting.
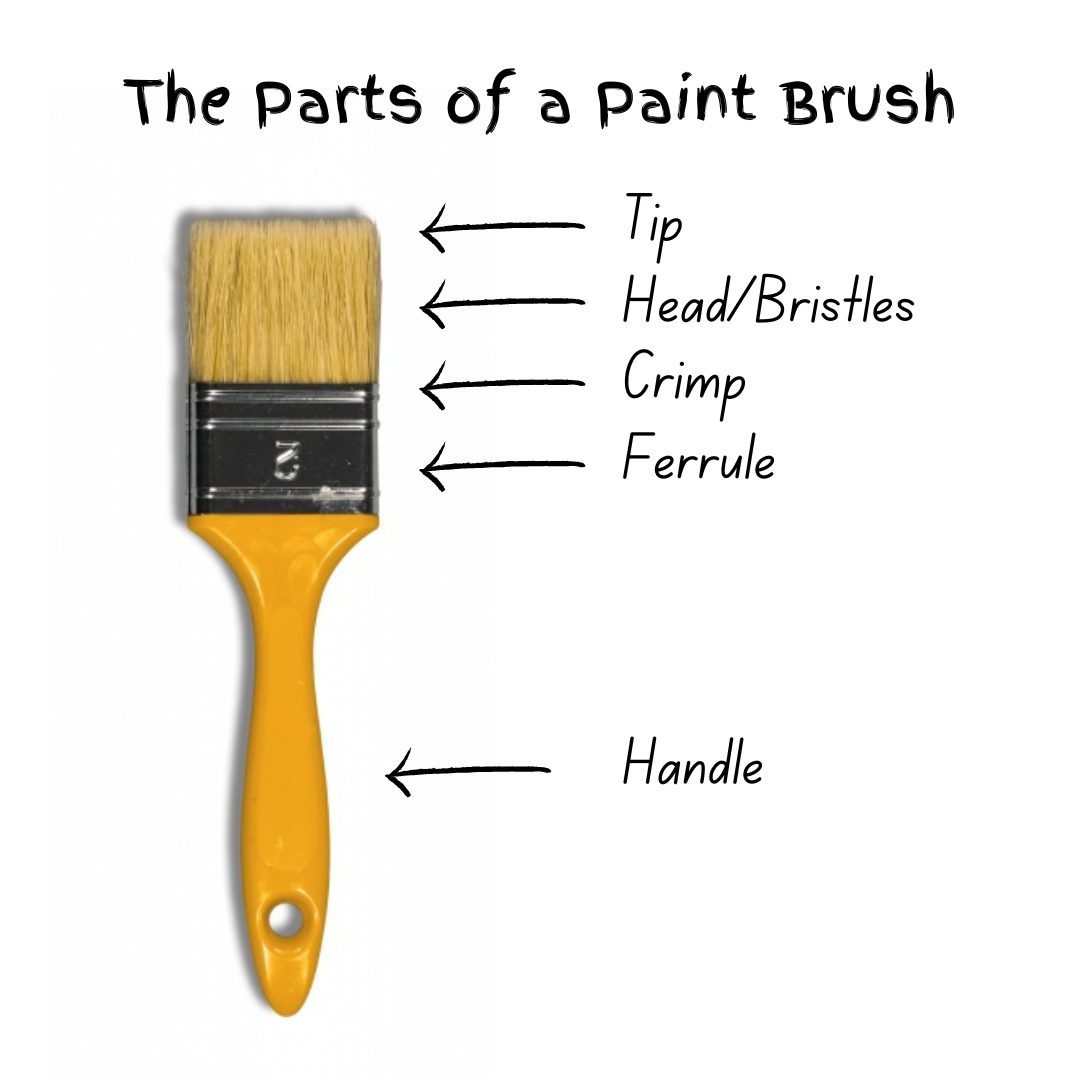 Figure \(\PageIndex{2}\): The parts of a paint brush
Paint application techniques
There are many different paint application techniques that can be used sets.
- Wet-blend: To blend two or more colors together often in a smooth gradient.
- Scumble: To wet-blend two or more colors together using multiple brushes in a randon camoflauge-like pattern..
- Spatter: To spray small dots of paint onto a surface by flicking the paint of the ends of the bristles.
- Dry brush: To drag a nearly dry brush across the surface of a base color in order to leave a series of streaks of paint along the surface.
- Stipple: Using the blunt ends of the bristles of a brush to stamp color onto a surface to provide visual texture.
- Rag roll: Using a length of cloth dipped into paint and wrung out to roll across a painted surface to apply a roving line. Especially useful for marble and stone effects.
- Paint layers (coats): Applying multiple layers of paint are applied to a surface
- Prime coat: A layer intended to seal the surface of the object and provide a uniform surface for the base coat.
- Base coat: The foundational coat for the intended technique, it should match the hue and value of the finished product.
- Texture coat: A thick coat of paint, plaster or other medium applied to add a three-dimensional texture to a surface.
- Top coat: A final coat, usually clear or lightly tinted, to add a sheen to the finished technique.
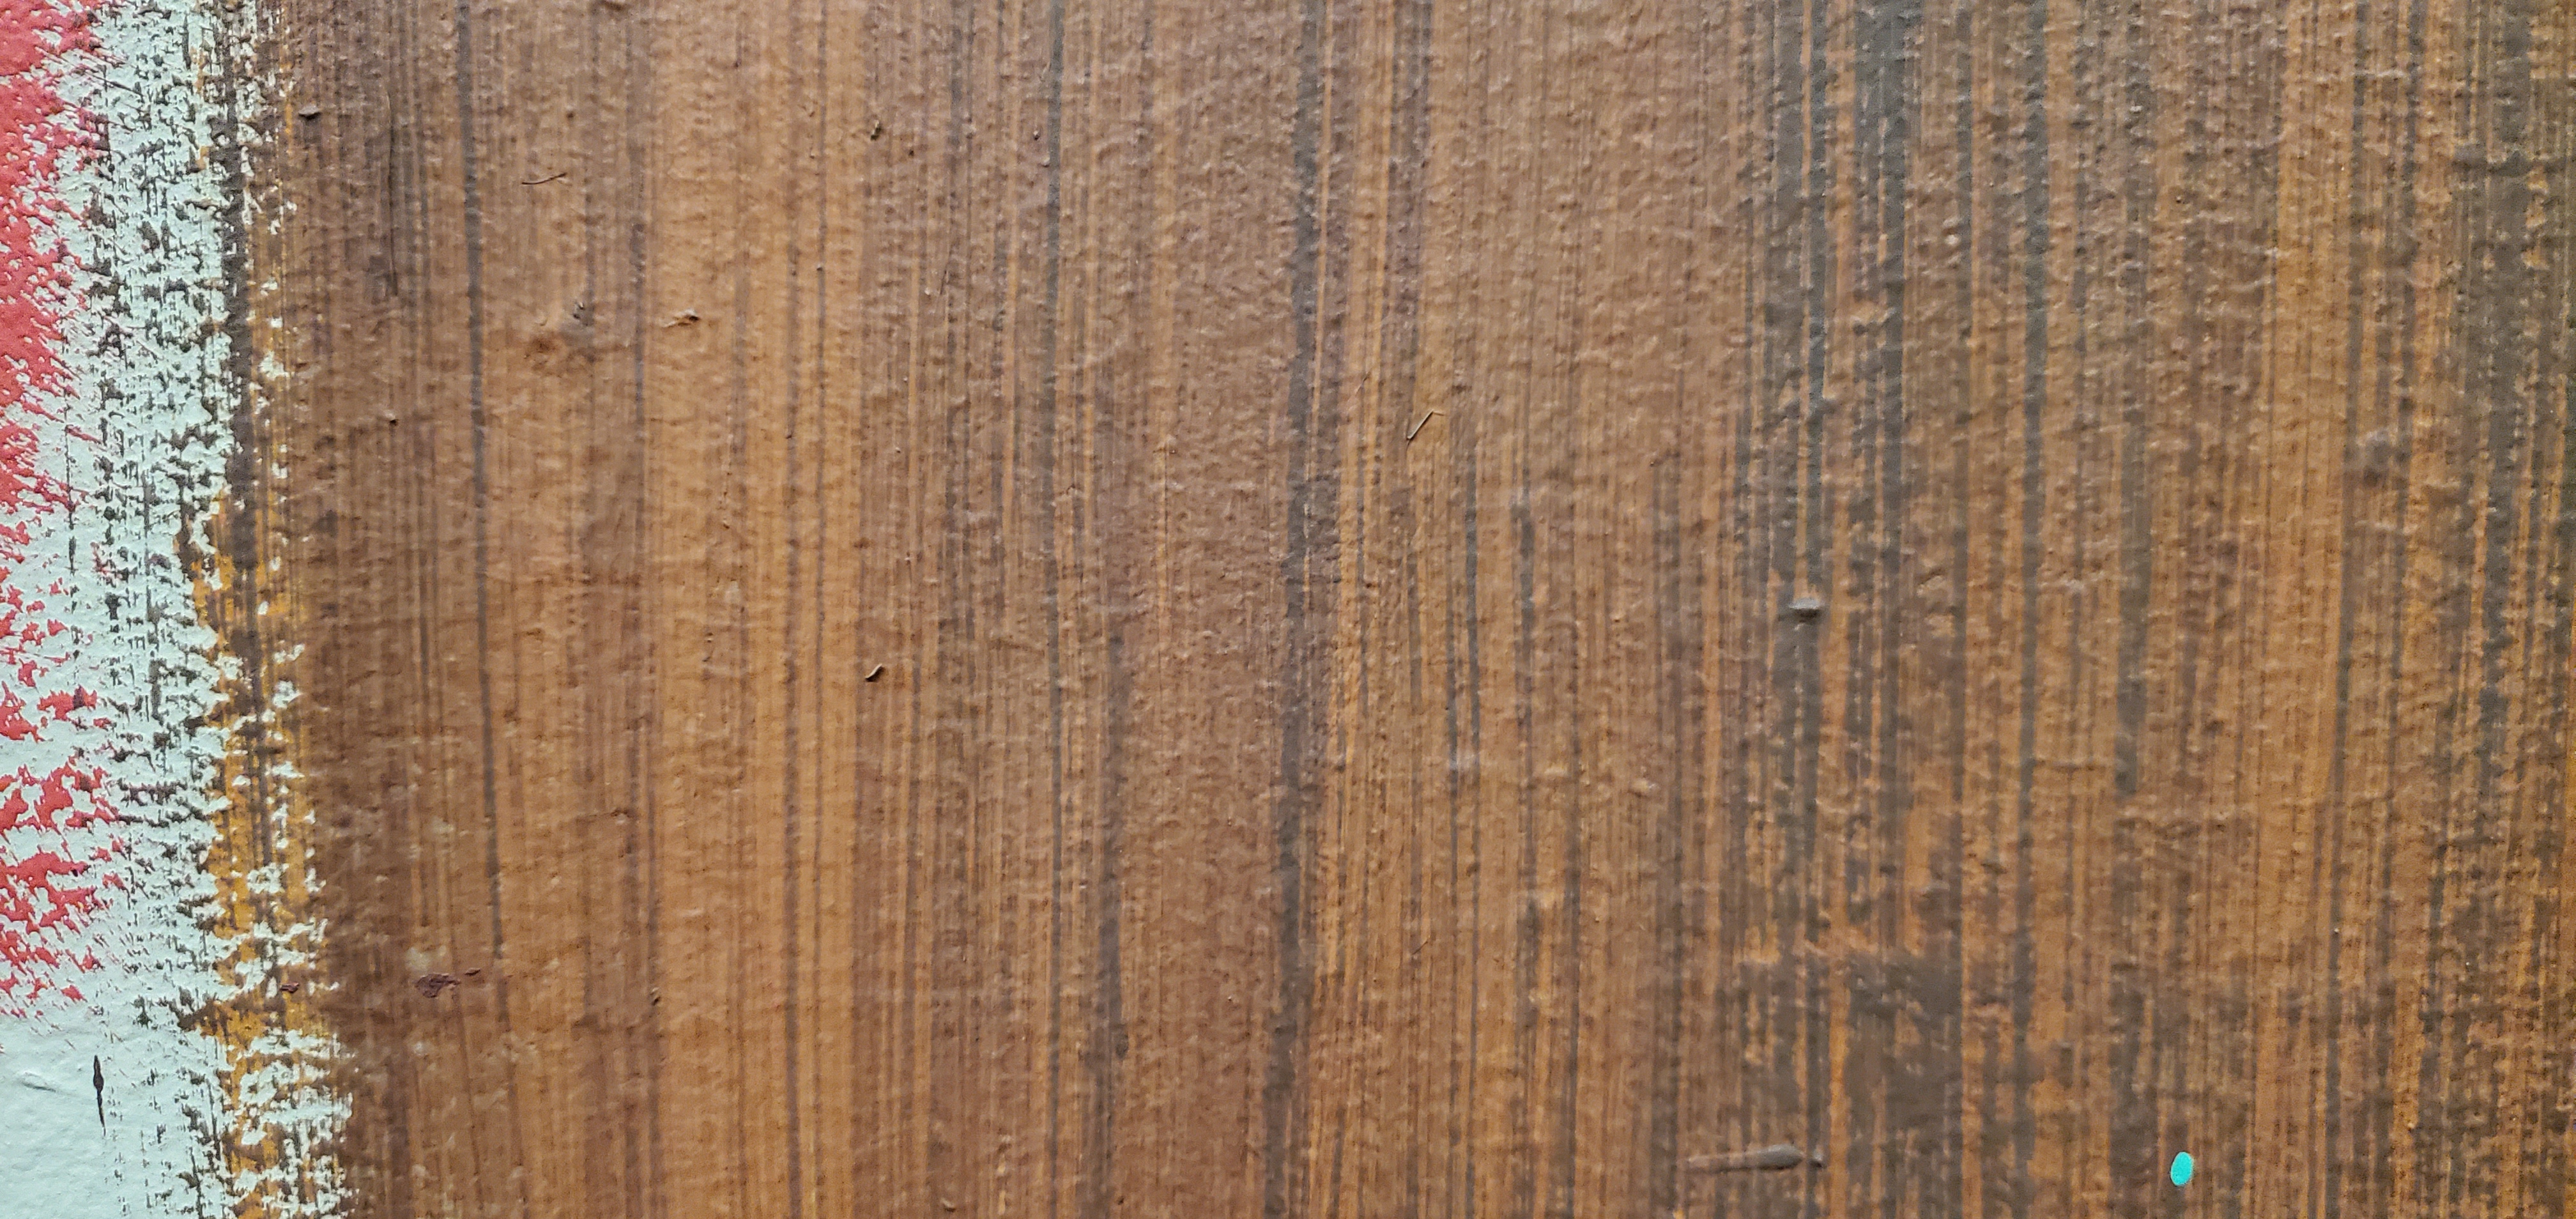
Creating a Faux Wood Grain
First observe a sample of the wood you are attempting to replicate. Look at the quality and colors of its grain and the tones of its base colors. Begin with a two-color base coat of the extreme light and dark tones of its base colors scumbled together applied in the direction of the grain. Wood grain can be created either in a wet-blend or a dry technique. To wet-blend colors, the grain colors are brushed into the still wet base scumble. This technique can produce subtle results with enough time and care. Dry techniques work well when covering larger areas and can also be very controlled with practice. To use the dry technique, allow the base scumble to dry completely, then dry brush thin grain colors over the base, letting each color dry between steps. In either method, waiting for the base and grain layers to dry before applying toning glaze and/or top coat for sheen will make for a convincing effect. The toning glaze is often a thinned version of the most prominent grain color sponged over the entire piece to help blend the colors together. It can be mixed into a glaze medium that will also add sheen to the finish or can be covered with a clear top coat for sheen once dry.
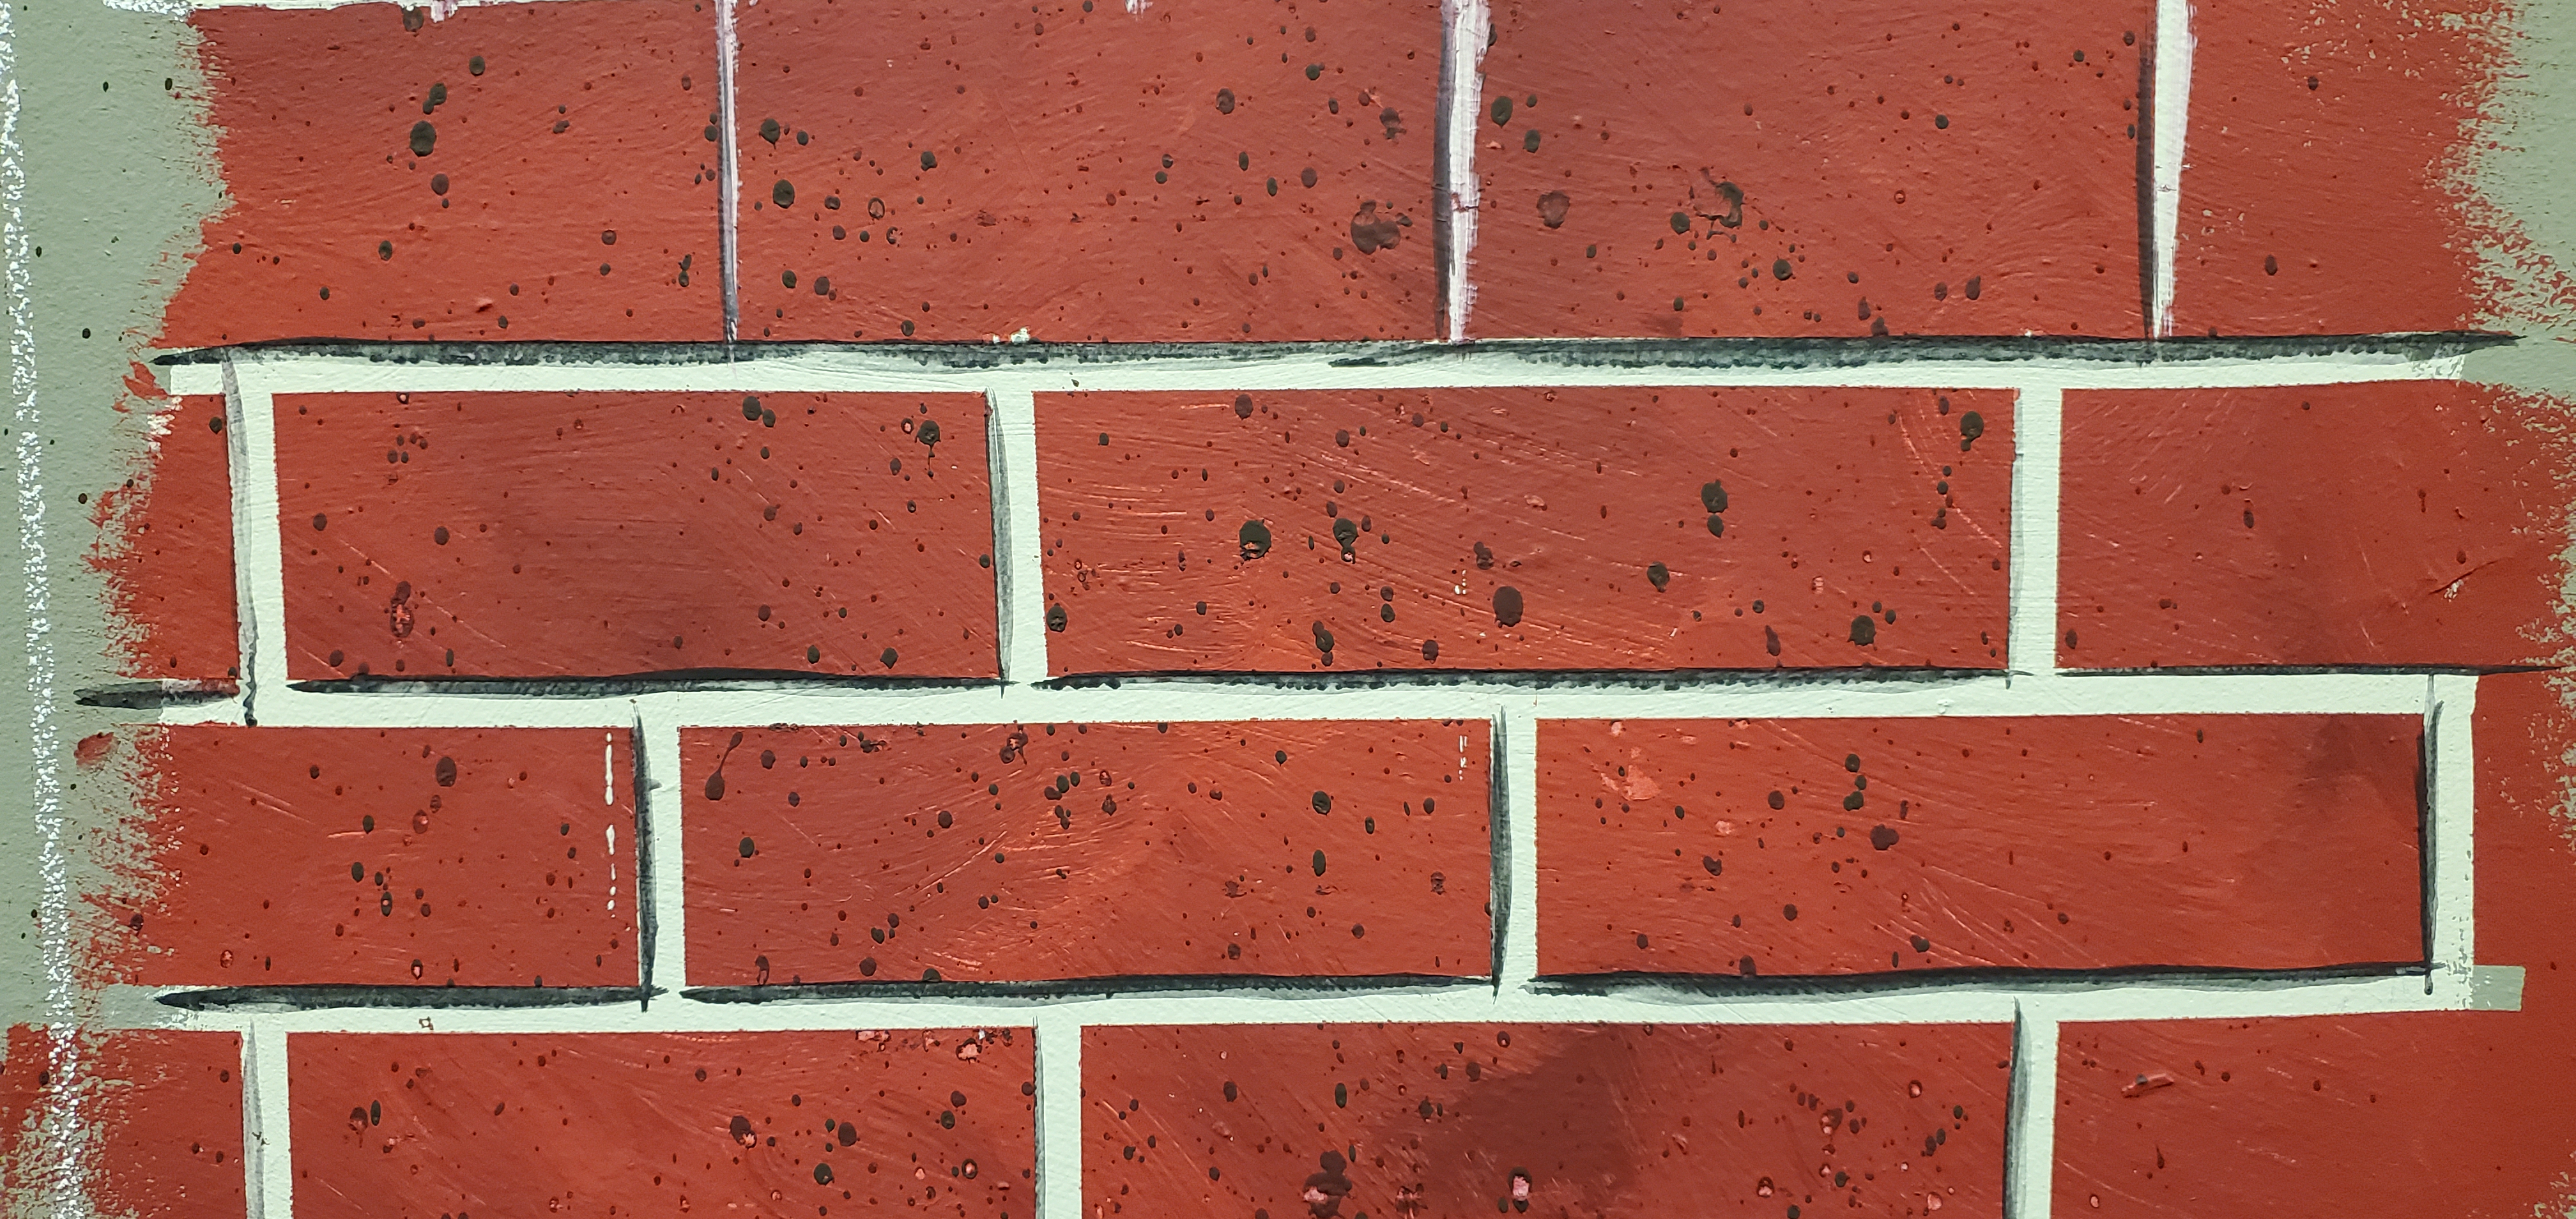
Creating a Faux Stone Surface
Scumble two or more colors together on the surface to supply variation to your base. Once dry, apply a series of spatter coats to add visual texture to the effect. A tint and a shade of the mid-tone from your base colors can be thinned to spatter consistencies appropriate to the size of spatter dot you are trying to achieve. Thinner paints produce larger spatter dots. If any areas look too bold after spatters are applied, applying a third layer of spatter made from the untinted mid-tone base color can break up the two previous spatters. If your final effect is that of a stone path, paint your mortar lines between stones prior to applying the shade spatter to help blend the surfaces together. Add highlights and shadows along edges of stones to add dimension.
To create a convincing sense of depth on a scenic surface, you must work in concert with the lighting designer so all shadows, both painted and those created by scenery and actors, work in the same direction. The direction of the shadows is established by the direction of key light sources of the light plot. Once the direction of the stage lighting has been established, the placement of highlights and shadows can be calculated for the scenic painting.

For Further Exploration M.A, Associate Professor William H. Pinnell B. A. 2008. Theatrical Scene Painting: A Lesson Guide. Carbondale: Southern Illinois University Press. Sherwin, Stephen G. 2006. Scene Painting Projects for Theatre. Boston: Focal Press. “Color Matters.” n.d. Accessed August 16, 2018. https://colormatters.com/.
This chapter was updated and remixed from content created by
