
B. VISUAL ORGANIZERS
- Page ID
- 14518

VISUAL ORGANIZERS
Chronological Order

Definition/Classification
Frayer Model, or Flashcards
Exemplification
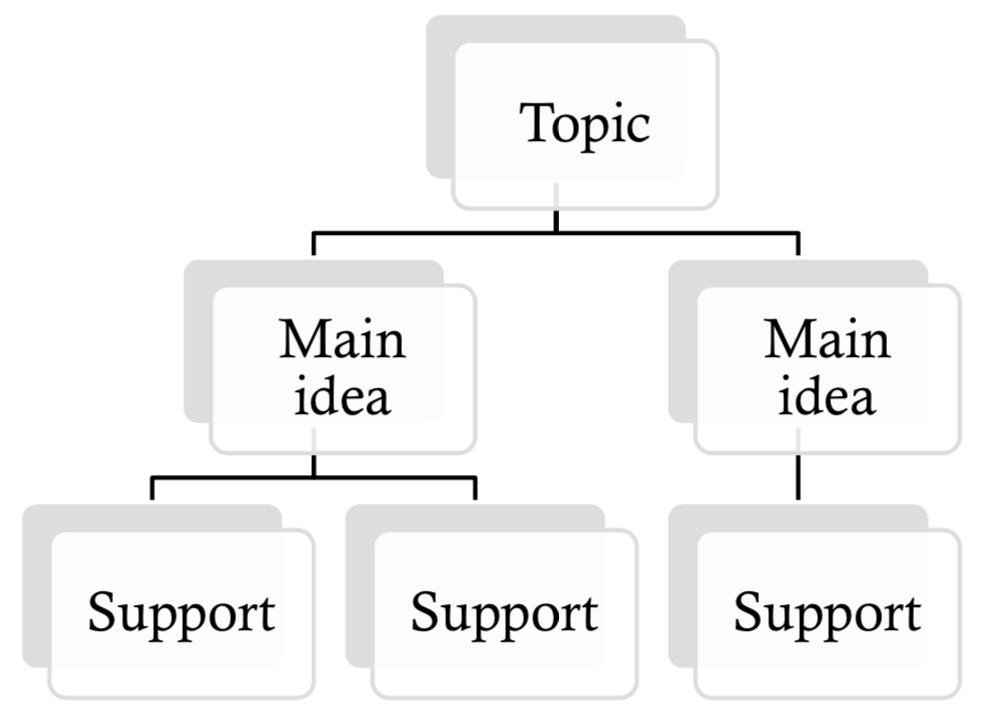
Outline
Topic or Chapter Title
-
Topic Sentence
-
Support
-
Support
-
Support
-
-
Topic Sentence
-
Support
-
Support
-
(etc.)
-
Mapping
One word of caution with mapping – it can be messy! Plan on making more than one draft of your map.
Cause/Effect or Problem/Solution
The same chart works for each of these. Simply replace the words “cause” and “effect” with the words “problem” and “solution.”

Comparison/Contrast

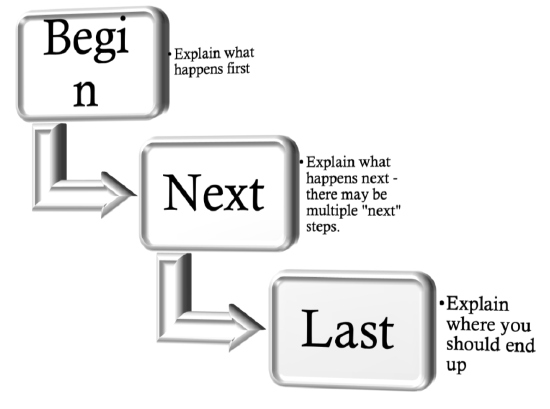
Process
Describe a process using a process diagram or flow chart. Flow charts use specific symbols, for example, in computer processes. These visuals may vary in their appearance, but they always involve arrows pointing you in the right direction.
Combinations
You can combine any of these to suit your needs.