
8.5: Video Composition
- Page ID
- 124334
Rules of Visual Composition
Learning the rules of video composition will allow you to frame your shots to make them look professional and dynamic. Also, by understanding the rules, you can become a better visual storyteller.
Rule of Thirds
The rule of thirds breaks the video image into three both vertically and horizontally. Essentially, it looks like Tic Tac Toe lines overlayed on the screen. Some cameras will allow you to put these grid lines over the image, but they will not show the lines in your recording.
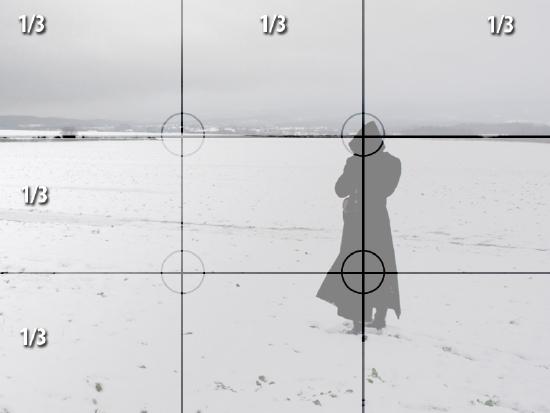
(Public domain; Chaky via Wikimedia Commons
Where the vertical and horizontal lines intersect are considered to be the most interesting areas to place a subject (See figure 8.5.1). If you are conducting an interview, placing the interviewee’s eyes on the top right or left line intersections will create a more interesting shot instead of simply placing them in the center of the frame.
Headroom


Headroom is the area from the top of the subject’s head to the top of the frame. Having too much headroom can make the subject appear too low in the frame and makes them appear not as important. Too little headroom can cut off the person’s head if they move or make the shot seem too cramped (See figure 8.5.2).
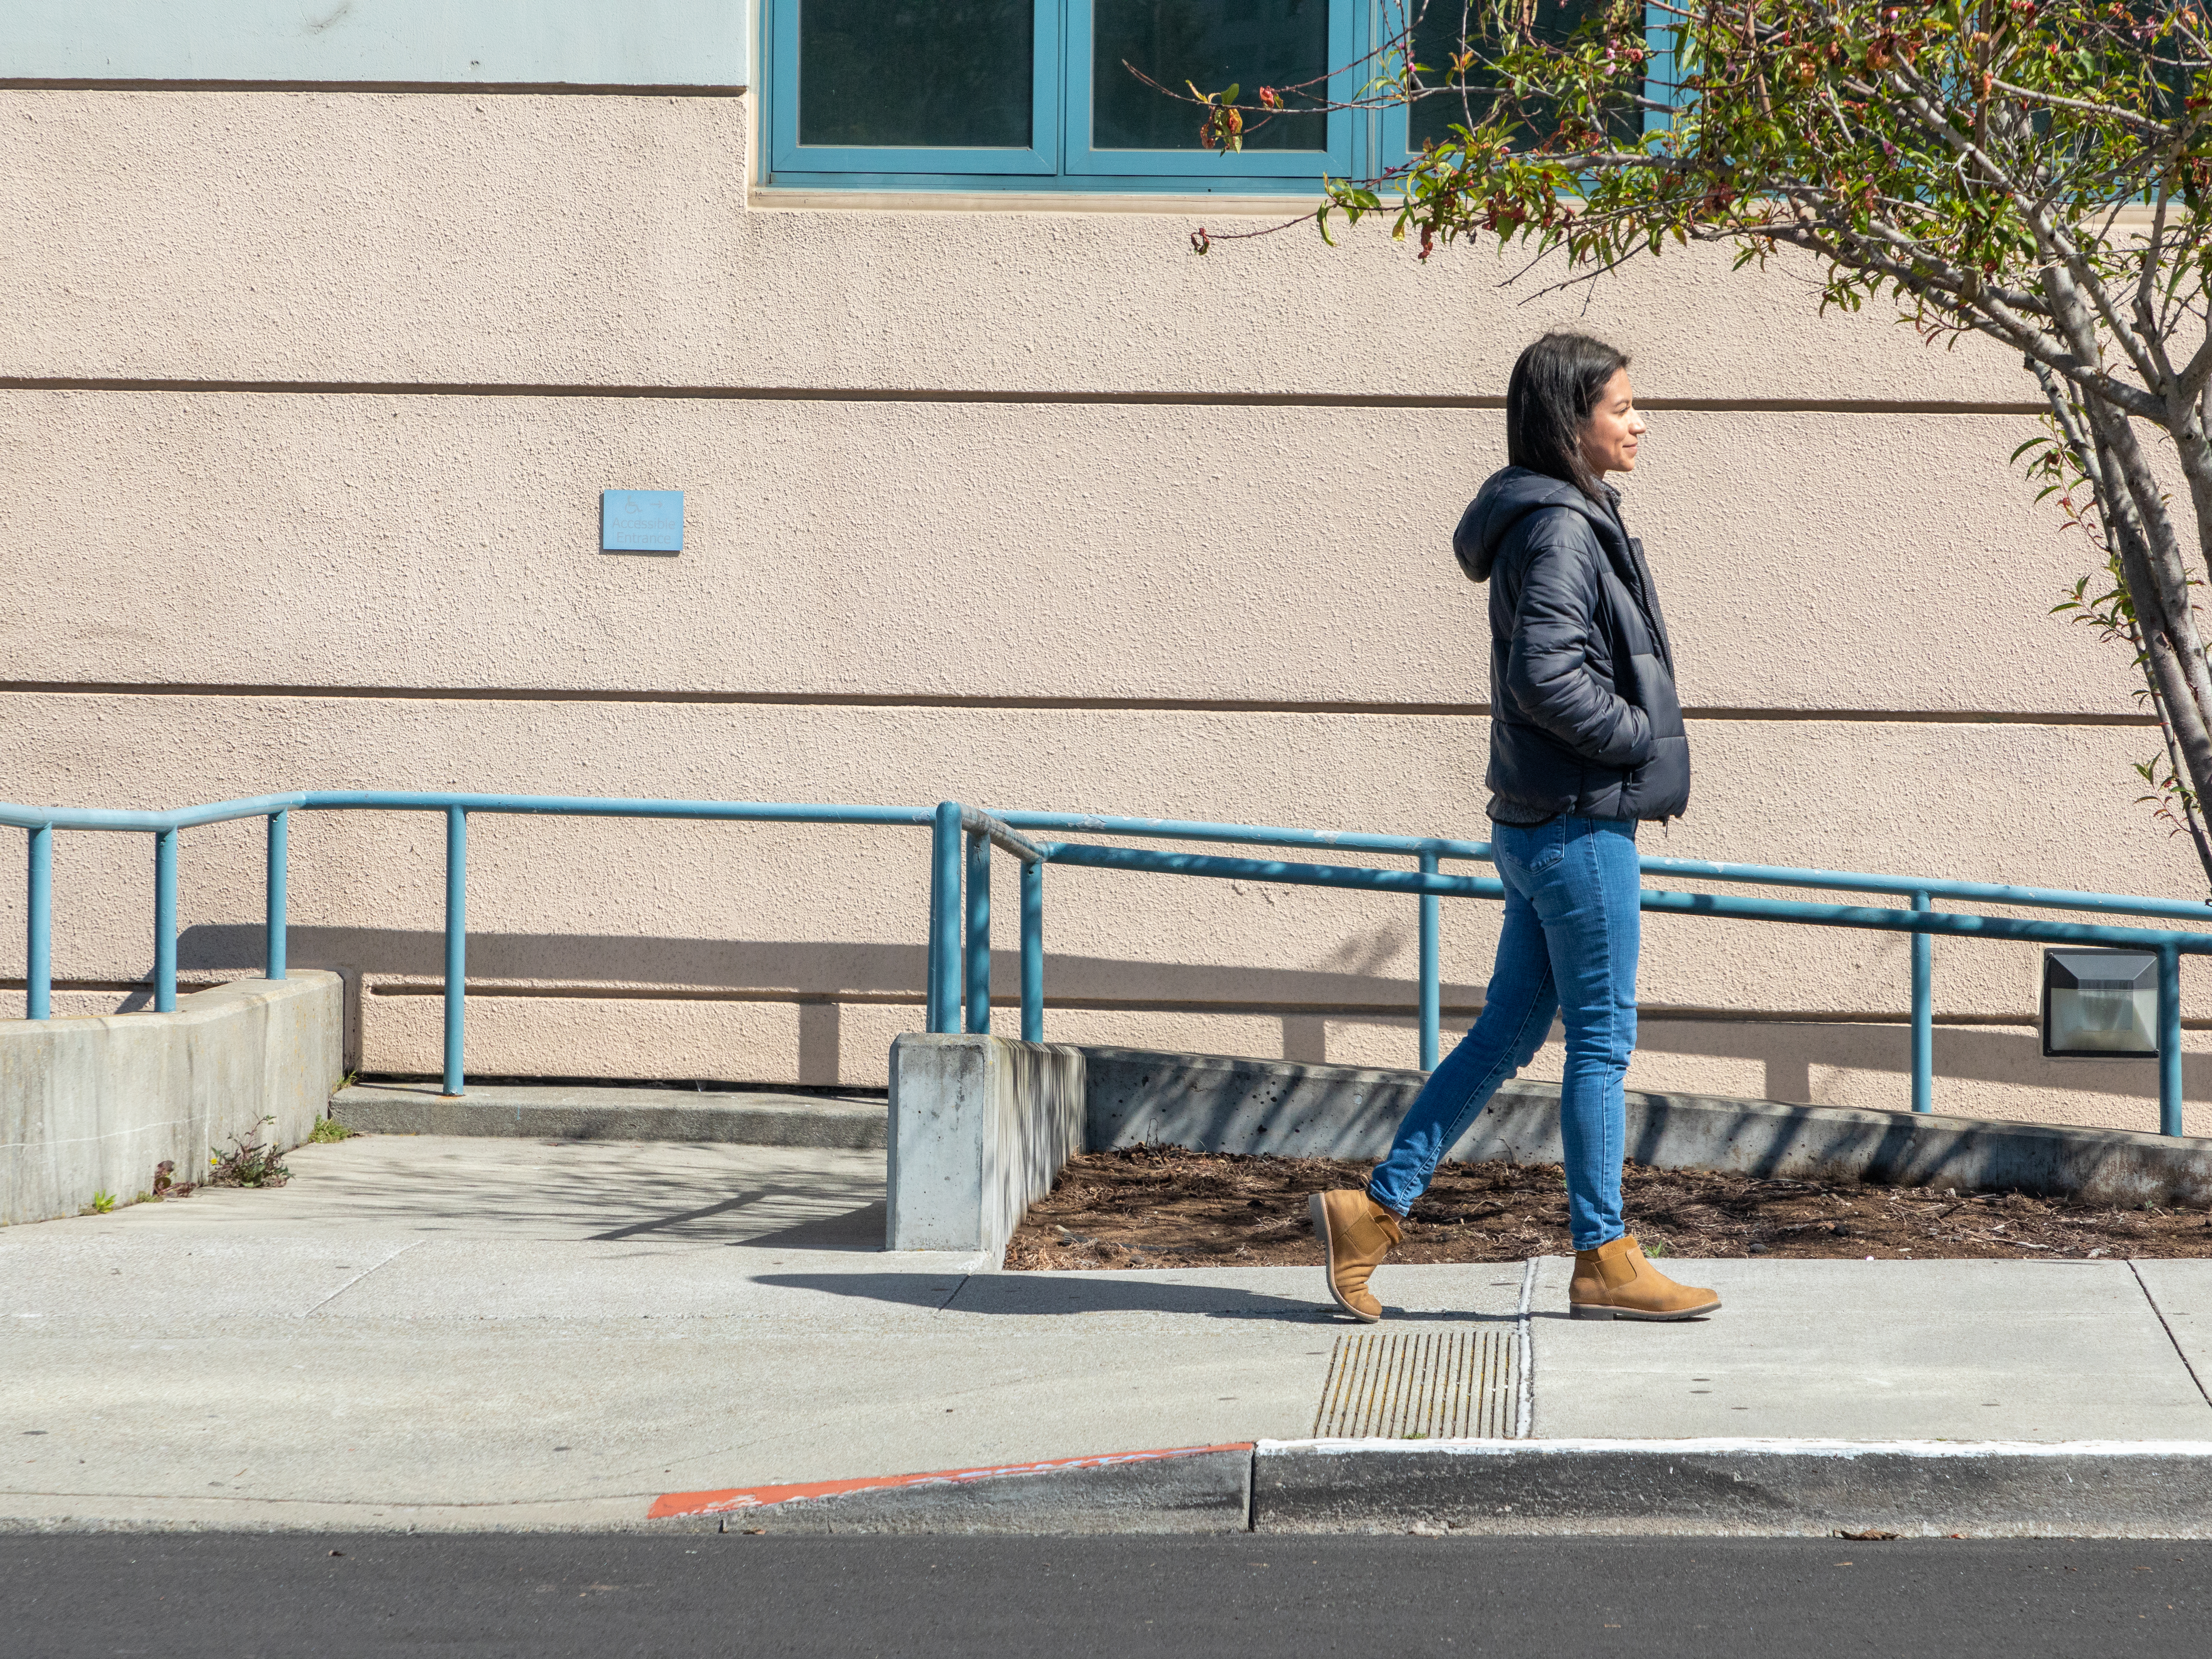
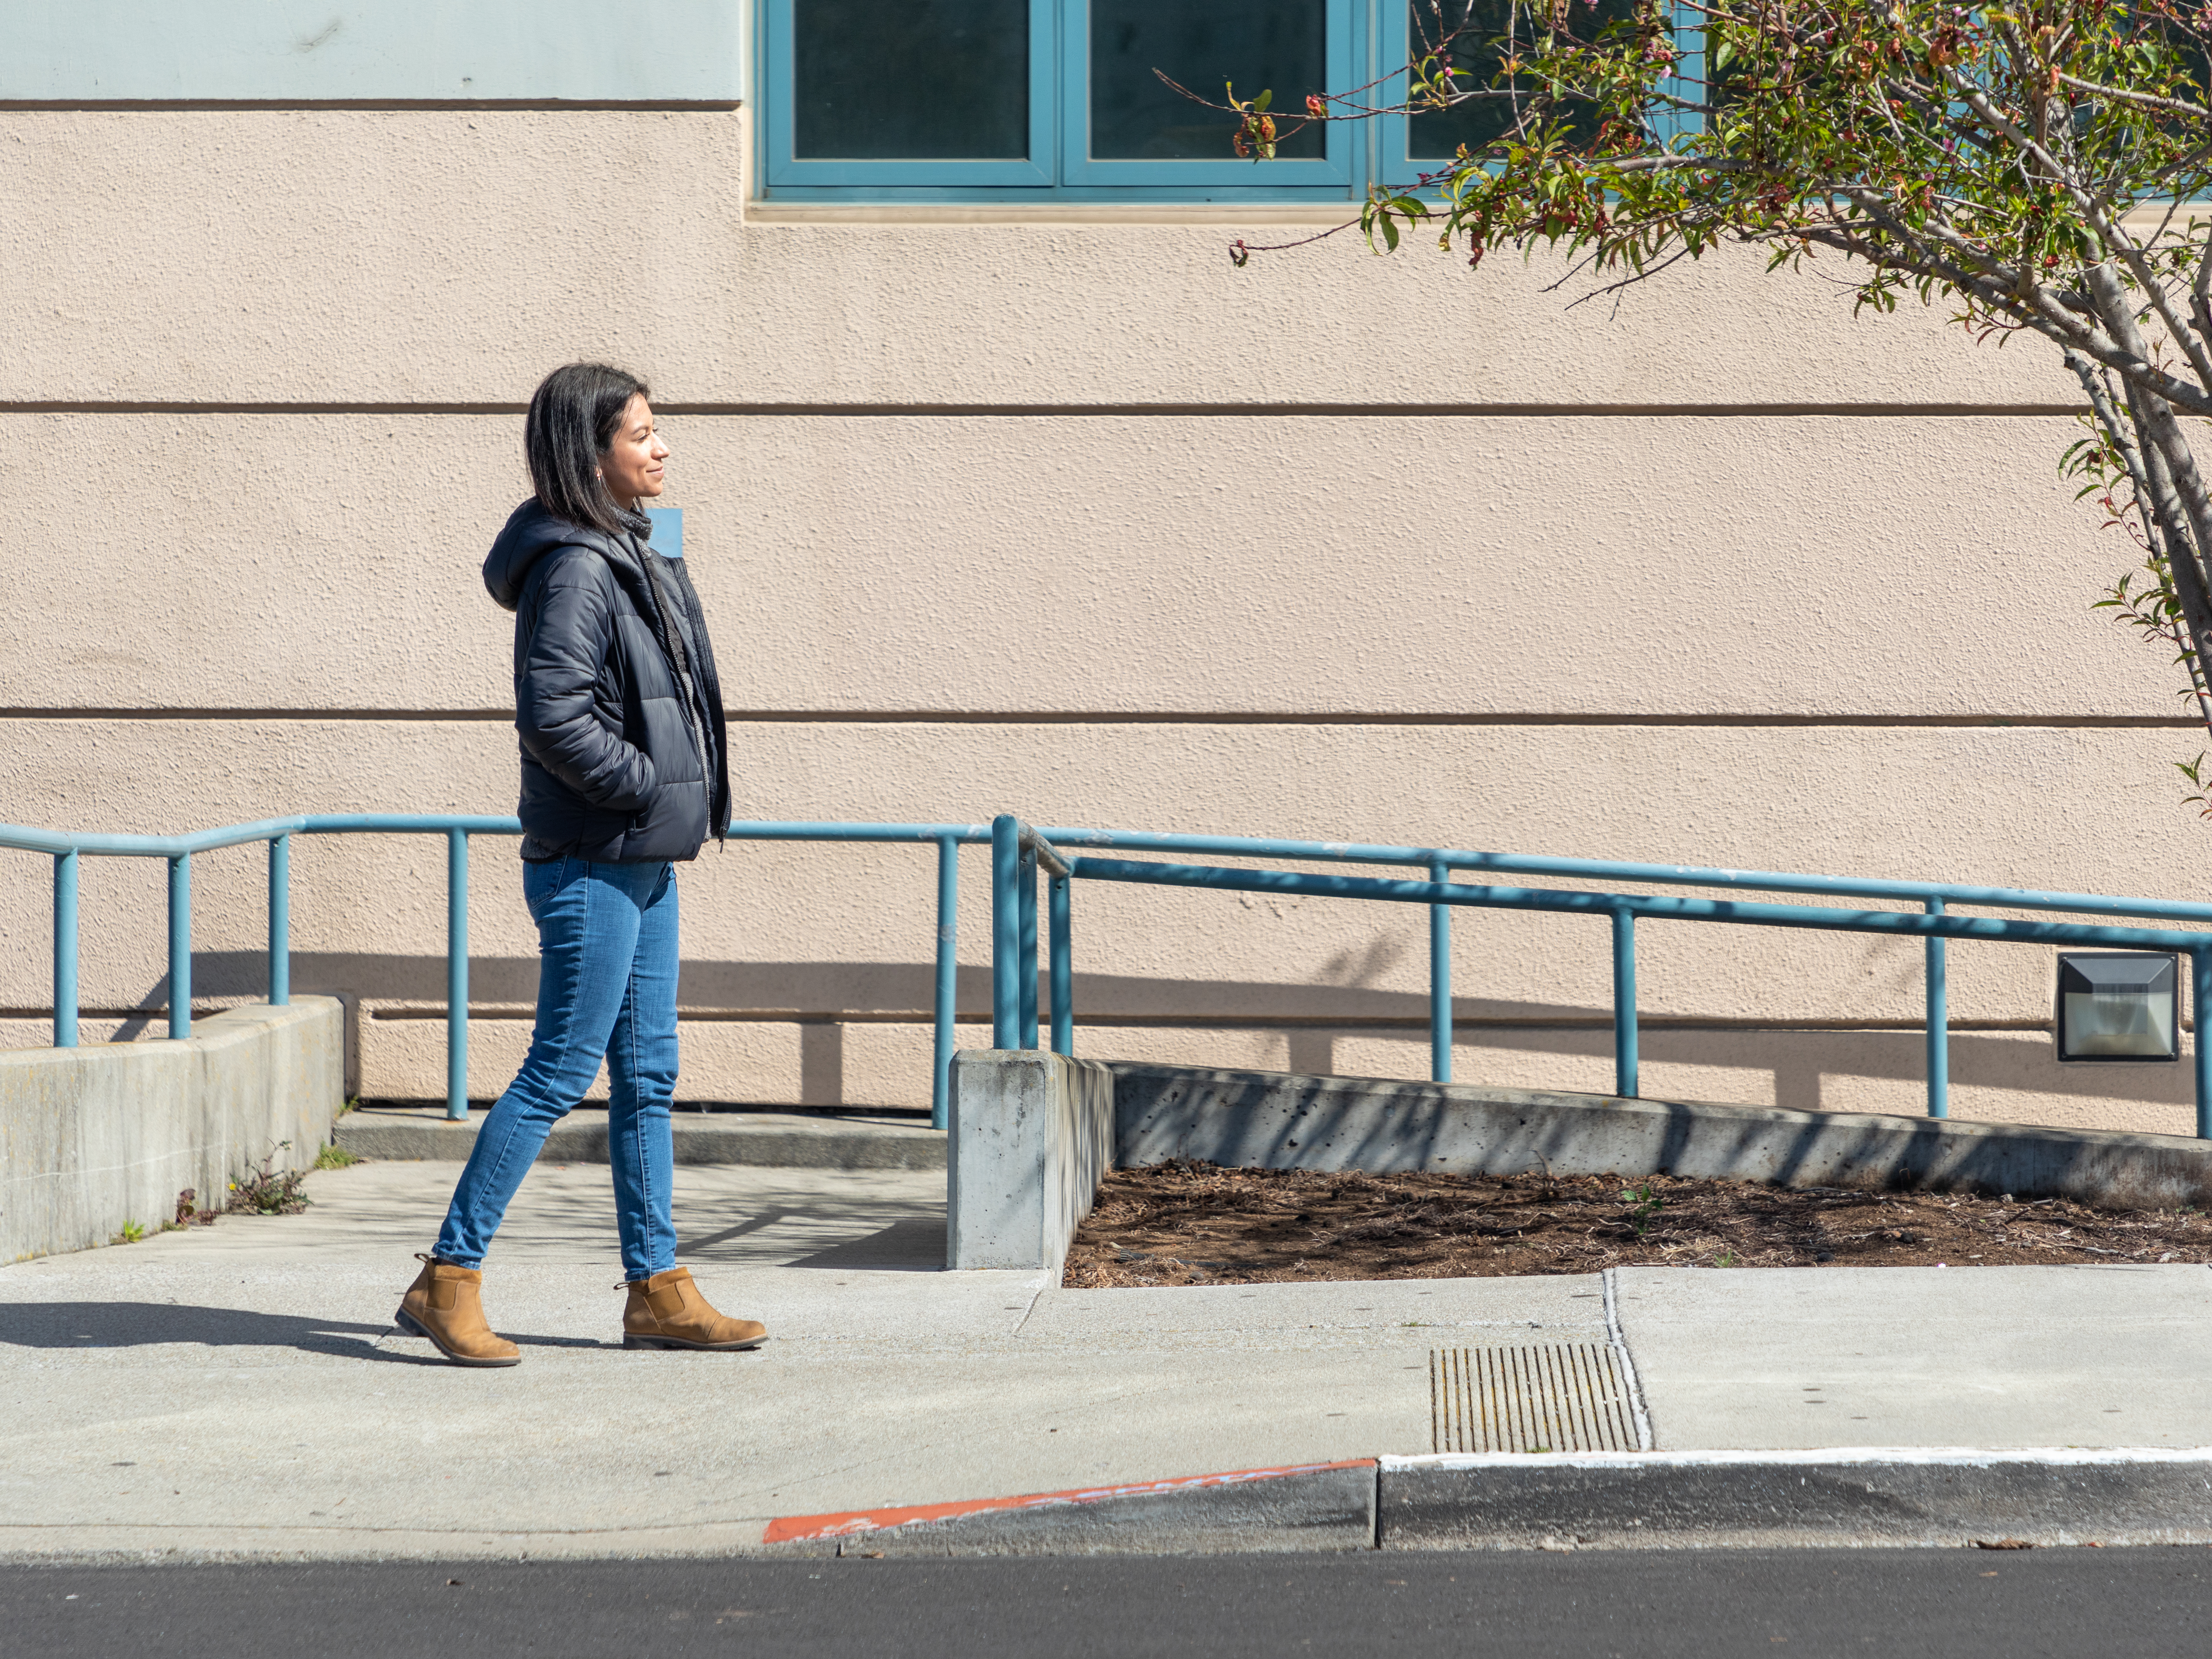
Nose Room


Figure \(\PageIndex{3}\): Not enough nose room (left), Correct nose room (right). (CC BY-NC 4.0; Shelley Ho via San Francisco State University)
Nose room is the area in front of the subject of the shot. If you are conducting an interview, you can place the subject’s eyes on the top right intersection of the horizontal and vertical lines following the rule of thirds. You will need to frame the shot so the subject’s nose is facing toward the left side of the frame to give them enough nose room. Having too little nose room makes the frame feel unbalanced because of the amount of room behind them (See figure 8.5.2).
Lead Room
Lead room is very similar to nose room but refers to a subject in motion. When a subject is in motion, the viewers want to see what is coming up in front of them, not what is behind them. Give the subject more room in front of their motion than behind them to give proper lead room (See figure 8.5.4).
180 Degree Rule
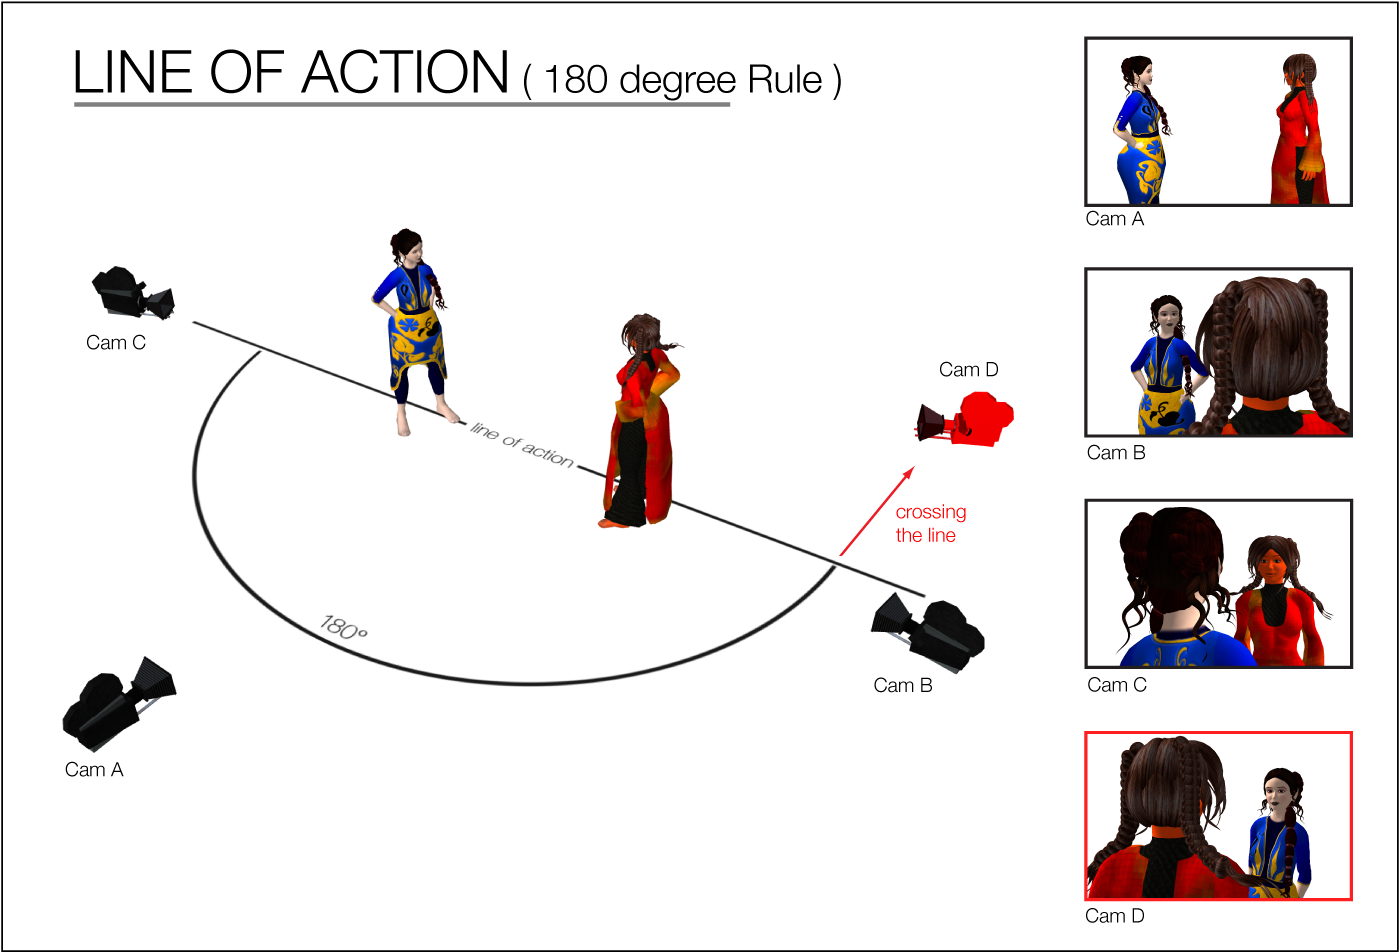
(CC BY-NC-SA 2.0; AngryBeth via flickr)
The 180-degree rule is a guideline for continuity. When you have two characters speaking in a scene and facing each other, there is an imaginary line of action that runs through both of them. When you choose which side of that line to shoot on, you cannot go over that line or you will break the continuity. It may look as if both actors are looking in the same direction. In Figure 8.5.5, Cam A and Cam C follow the 180-degree rule, but Cam D breaks the rule. Cam D looks as if the lady in red is facing the same direction as the lady in blue on Cam C. This could disorient the audience.
The same line of action guideline is true when characters or vehicles are in motion. When a character is running from left to right in shot one. In shot two the actor needs to either continue to run left to right, or the angle of shot two needs to be neutral. A neutral shot would be the character running toward or away from the audience. If we use the neutral for shot two, then in shot three the character can be moving in any direction.
The video below demonstrates the 180-degree rule with two people, three people, and when a person is walking. Knowing how the line of action changes is important to adhere to the 180-degree rule and not confuse the audience.
Watch this video with Closed Captions: https://amara.org/en/videos/2T3ARTZhelPT/info/breaking-down-the-180-degree-rule/?team=
Layering/Creating Depth
Video is a two-dimensional medium, meaning our screens have height and width, but no depth. Good video creates the illusion of depth by layering objects from front to back. There are three layers to depth, foreground, middle ground, and background. By placing objects on all three layers, your image will provide depth and a more immersive experience for the viewer.


The foreground is the area closest to the camera. In the foreground, everything can be seen unobstructed from other objects in the shot. The middle ground is behind the foreground and this area will be obstructed by objects in the foreground. Lastly, the background is the furthest area from the camera and is obstructed by objects in the foreground and the middle ground. The obstructed view of objects in the middle ground and background gives the illusion of depth within the frame (See figure 8.5.6).
Conclusion
There are many streaming shows that break these composition rules, but it is done with a clear intention. When you are starting out, follow the composition rules above. Once you have mastered the rules of composition, then you can begin to explore when they can be broken.