
7.2: Lesson 1- Parts of the Stage
- Page ID
- 74086
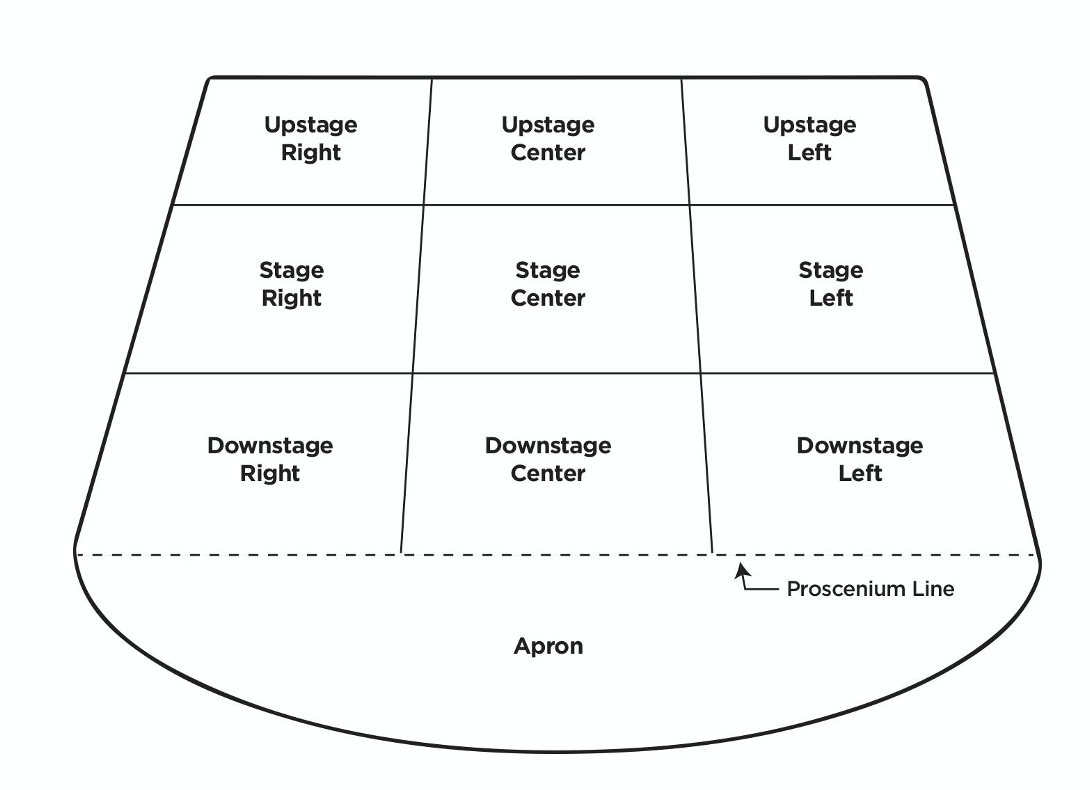
The director and the actors have a different perception regarding directions or orientation. Right and left have different meanings based on where you stand and since the director and actors are facing each other, and the perspectives are so different a language needed to be developed so that directors and actors could communicate efficiently while discussing blocking. The areas of the stage are from the actors perspective, while facing the audience. Upstage is the direction moving away from the audience and Downstage is moving closer towards the audience. A long time ago theaters had their seating on the largest area with a flat floor and the stage was raked so that all audience members could see. In those days as an actor moved away from the audience they would literally walk up the stage and when they moved towards the audience they would walk down the stage. When working with your actors and as you train remember to go over the areas of the stage so that everyone is able to communicate and understand your direction. Never assume people have the same shared knowledge (Figure \(\PageIndex{1}\)).
Hierarchy of Focus
Each area of the stage will draw the audience's attention and give one actor more significance just by where he or she is standing. By knowing each area’s power of focus you can highlight certain moments or characters visually.
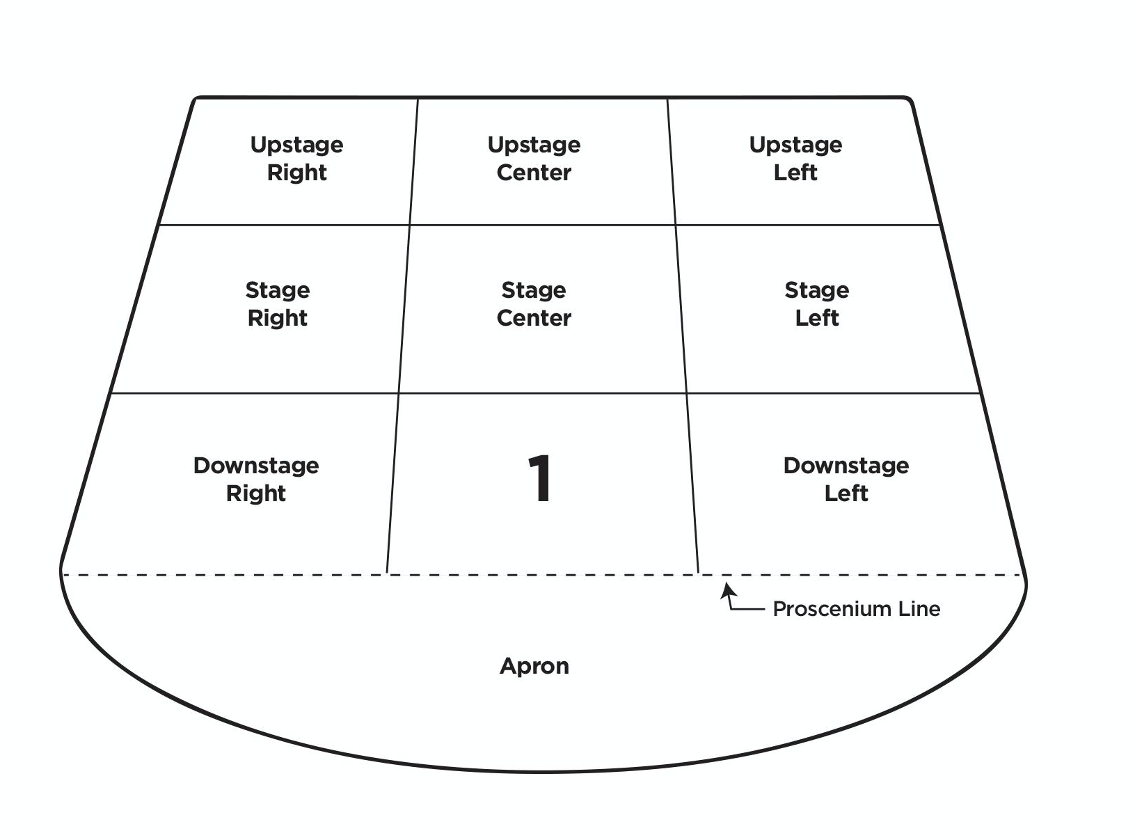
Downstage center (Figure \(\PageIndex{2}\)) will always draw the most focus because that position is centered visually on the stage and the actor is closest to the audience. All of the elements on the stage frame the actor and if someone or something is staged in that area it will always draw focus.
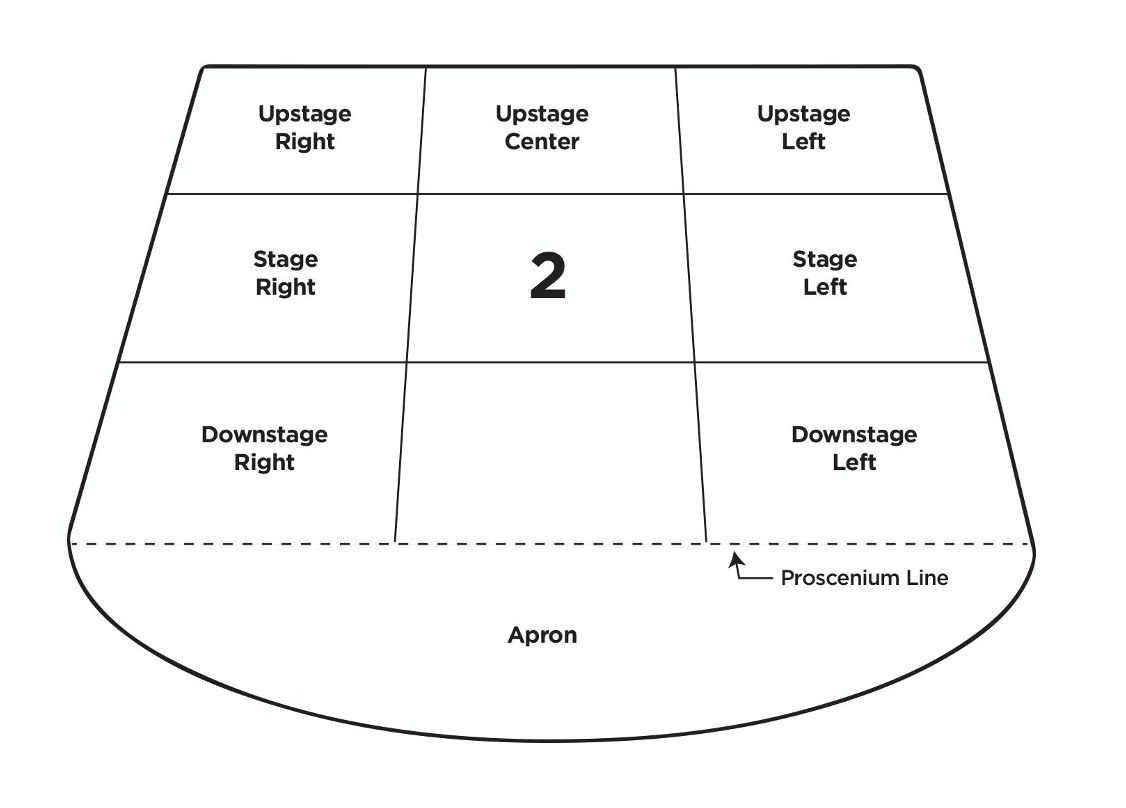
If you remove the actor or object from downstage center the next area the audience will look is Center Stage (Figure \(\PageIndex{3}\)). Not only is the actor center stage, the objects or people in the downstage locations create a visual triangle that draws the audience’s eye to its apex which is Center Stage.
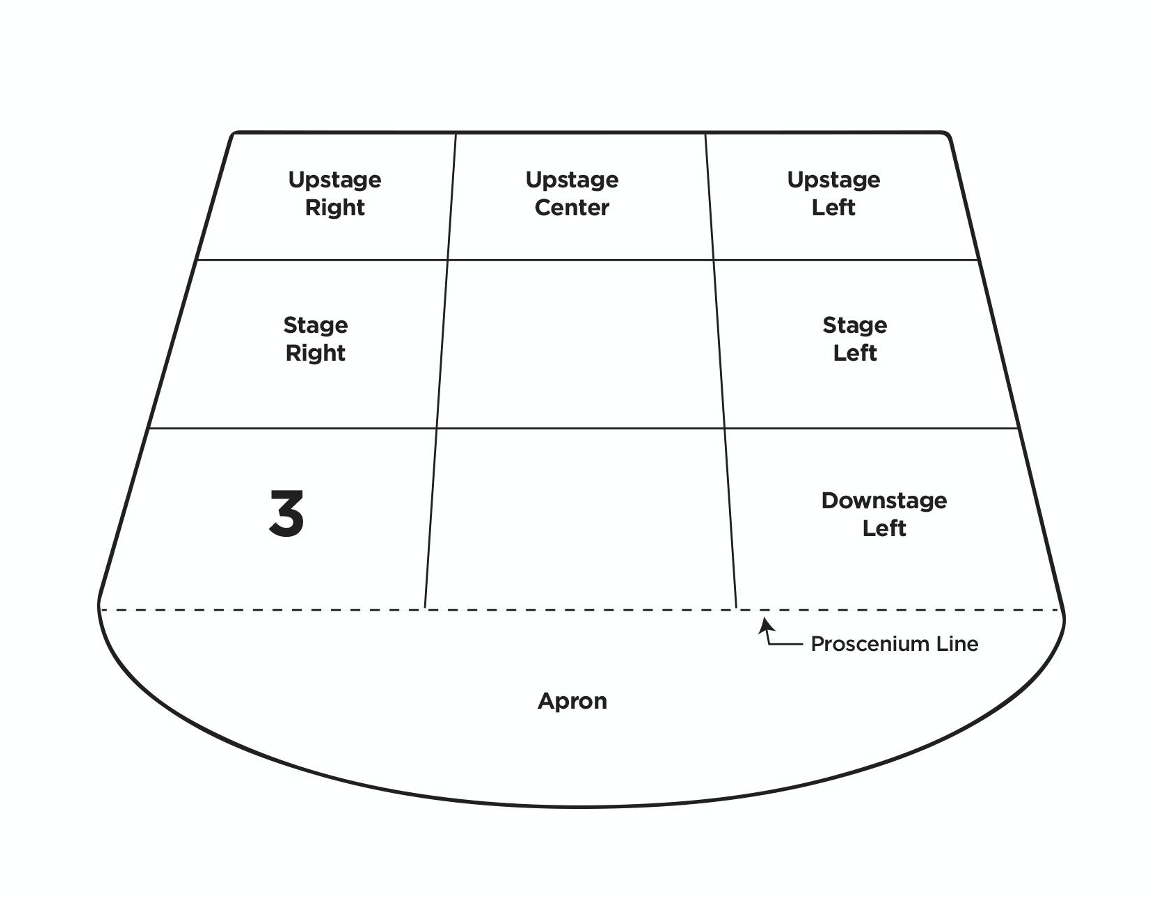
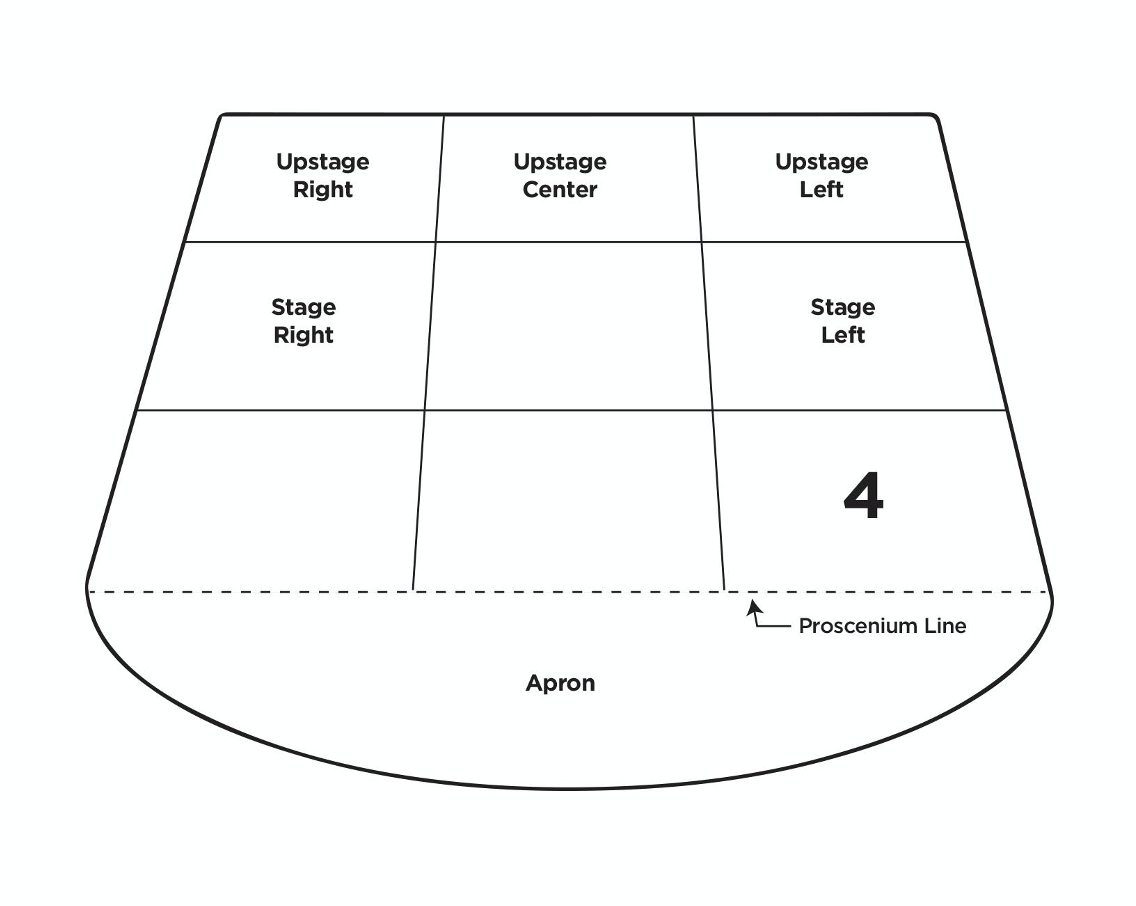
If you remove both Downstage Center and Center Stage positions, the focus is then awarded to Downstage Right. Upstage Center is so far removed from the audience that the audience will focus on the actors or objects closer to them in proximity. Downstage Right draws more focus for western audiences because those audiences are used to reading from left to right. Because we are used to absorbing information in this fashion the audience will naturally move to focus on information coming from their left, which is Downstage Right (Figure \(\PageIndex{4}\)).
Once you remove Downstage right your eyes will automatically move to Downstage Left. The entire stage is creating a triangle whose apex is Downstage Left (Figure \(\PageIndex{5}\)).
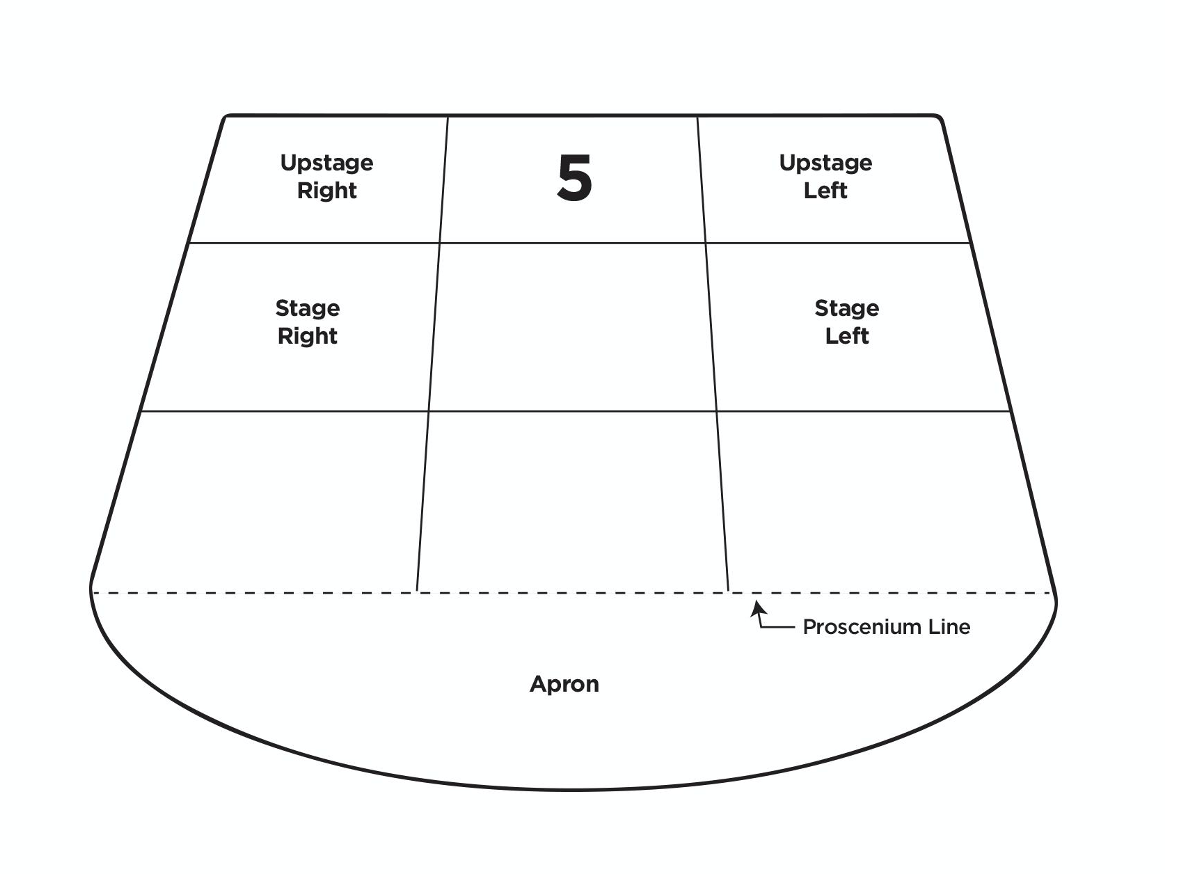
Once all of the downstage areas have been removed then your eyes return to Upstage Center (Figure \(\PageIndex{6}\)) which again becomes the apex of the triangle on stage.
After the removal of all downstage and center stage areas your focus will move from left to right and prioritize proximity (Figure \(\PageIndex{7}\)).
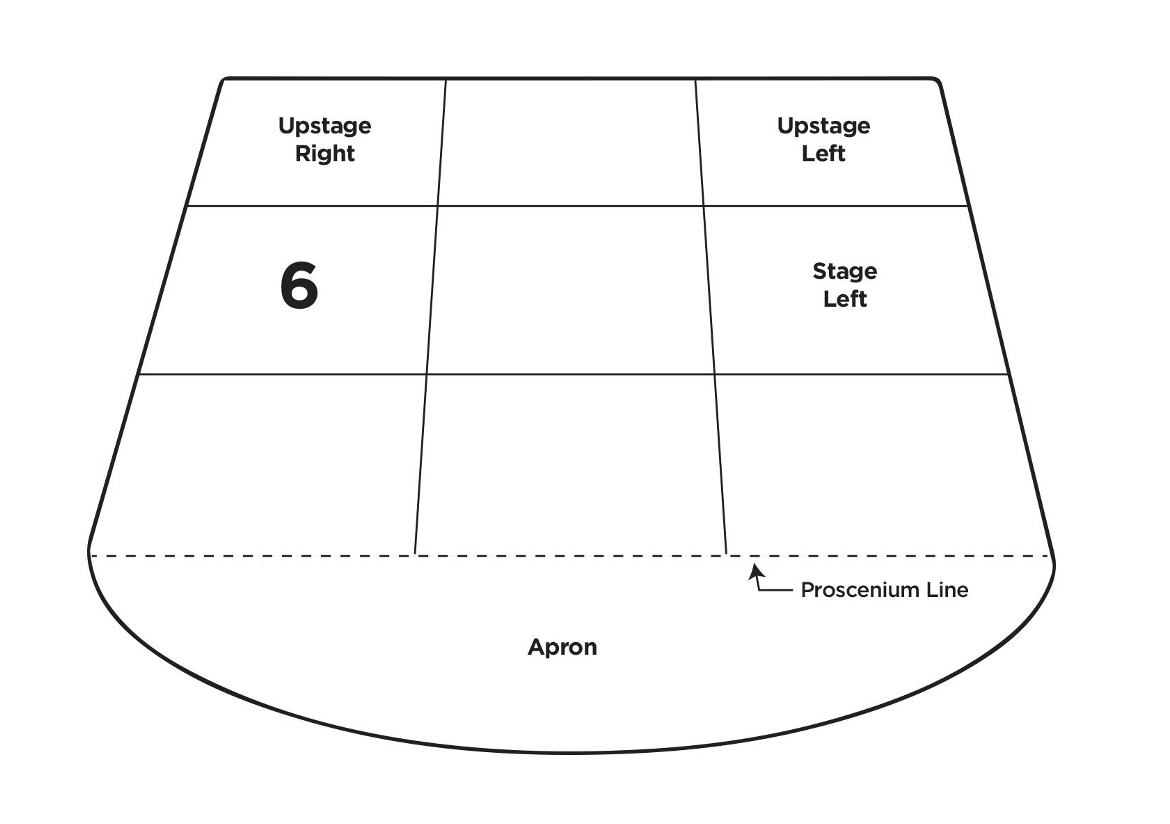
Stage left (Figure \(\PageIndex{8}\)) is the apex of the visual triangle on stage and draws your focus.
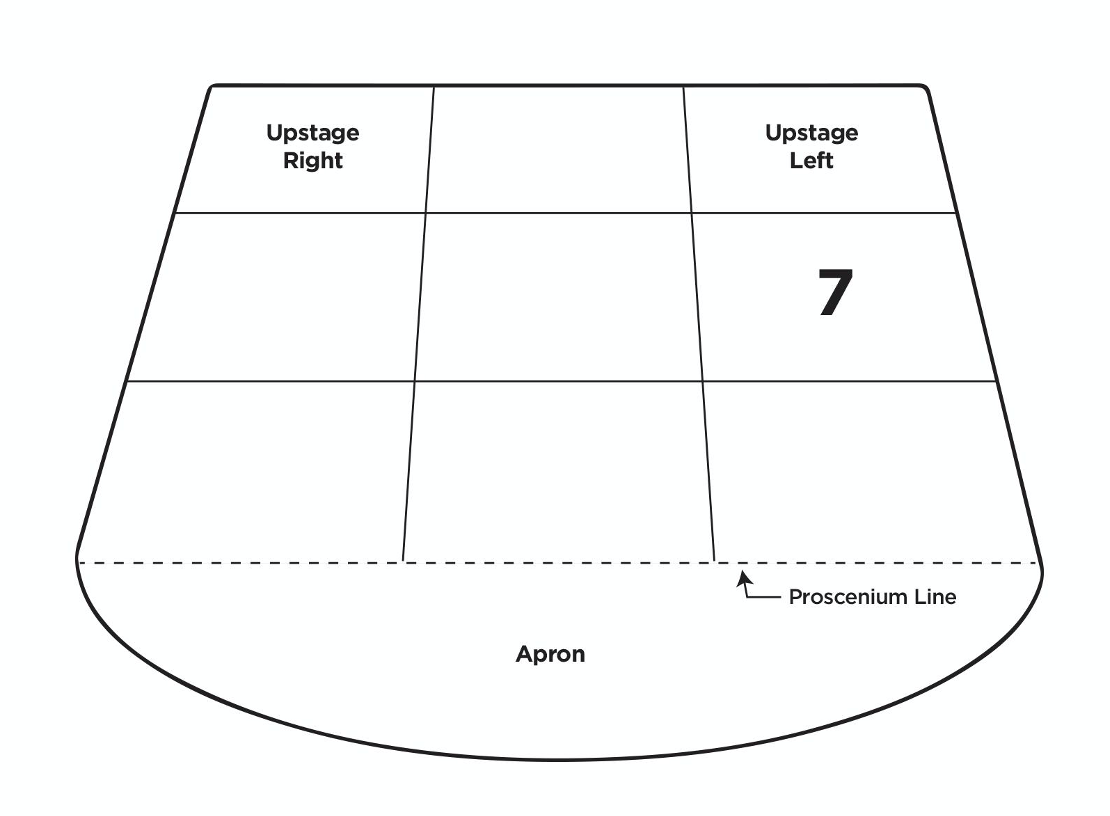
Upstage Right (Figure \(\PageIndex{9}\)) and Upstage Left are the two weakest positions on the stage. Both are highly removed from the audience, yet between the two Upstage Right will always draw focus for western audiences because we read from left to right.
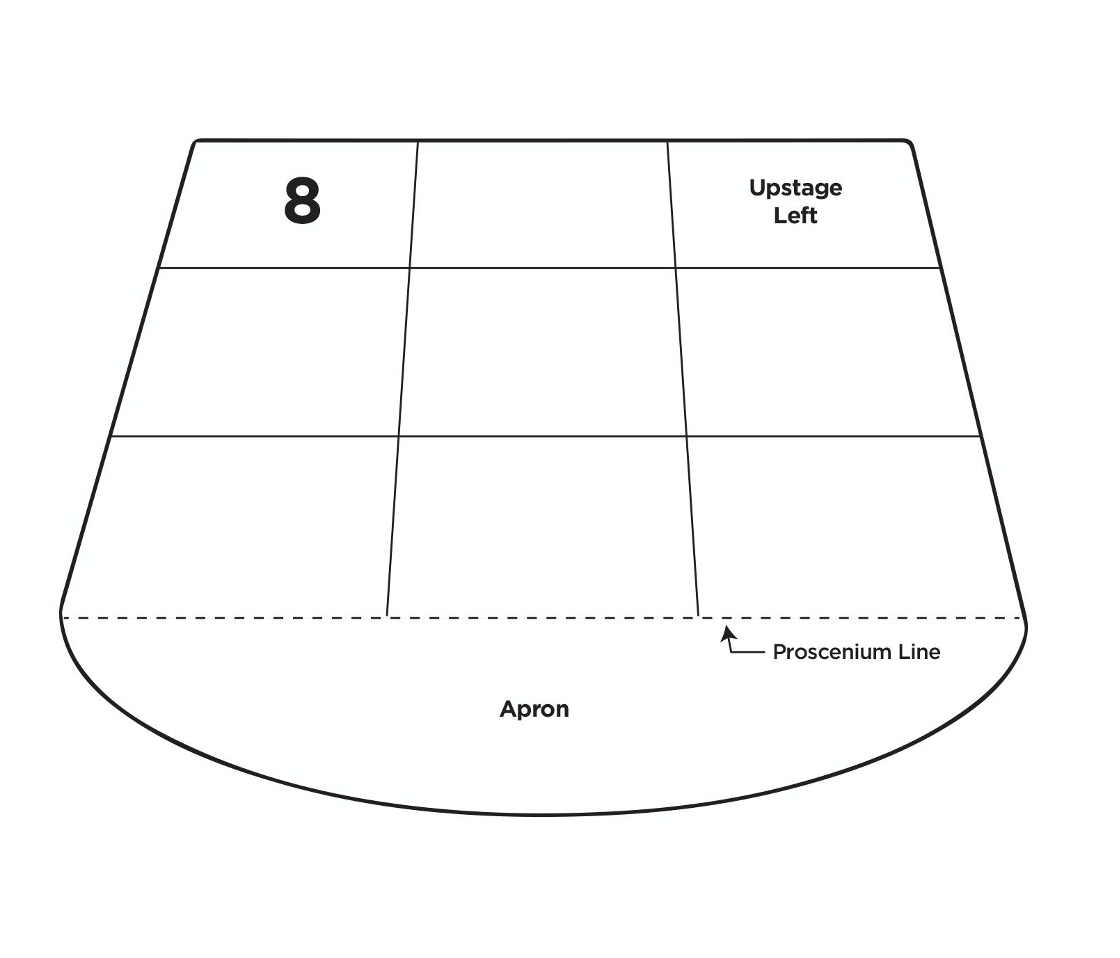
Upstage Left (Figure \(\PageIndex{10}\)) is the weakest position on the stage. If you wish to minimize a character or object’s significance place them this position. It is important to note that an actors stance and posture can sometimes override these positions.
Staging Exercise 1
- Create a silent scene with a beginning, middle, and end where a character either gains or loses status.
- Use the areas of focus on the stage and see if you can find instances where posture, stance, or action can draw focus and override the natural hierarchy of focus.
- Rehearse for 1 hour and then present
- Discuss and critique each scene
- Remember to always focus on successful elements first. People need to know what they are doing well more than they need to know what to improve. Encourage progress and try to give 5 positive comments to each suggestion for improvement.
- Rehearse for an additional 15 minutes in order to incorporate notes.
- Present scenes a final time without notes or critique.
Staging Exercise 2
- Create a scene where someone in the scene is upstage, downstage, or centerstage the entire scene. You have to justify each movement and as someone moves to a new position, another character must shift to keep the balance.
- Rehearse for 1 hour and then present
- Discuss and critique each scene
- Remember to always focus on successful elements first. People need to know what they are doing well more than they need to know what to improve. Encourage progress and try to give 5 positive comments to each suggestion for improvement.
- Rehearse for an additional 15 minutes in order to incorporate notes.
- Present scenes a final time without notes or critique.