
8.2: Developing Presentation Skills
- Page ID
- 131976

Like any kind of advanced communication skill, the art of giving effective presentations is not in-born; it requires deliberate practice — that is, systematic practice that requires focused attention on improving, and making use of feedback from others to help you do so. An excellent way to learn more about delivering effective presentations is to follow a systematic process:
- Observe others
- Study their strategies and reflect on their effectiveness
- Select and practice strategies that will work for you; reflect and get feedback from others.
Step 1: Observation
You can learn a lot simply by observing how successful public speakers “work the room” and engage their audience. Observe what they do. How do they use their voice as a tool of communication? How do they deploy tone, pausing, pacing, and projection? What do they do with their hands? How do they make use of the physical space around them? Take note of how speakers physically operate, either in person or on media: identify what they do, make note of what you think works well and what doesn’t, then put what you’ve learned into practice.
As a student, you might start by observing your professors. Aim to identify what makes one professor a great lecturer and another less engaging. Compare what they do with their voice, their hands, their gestures, their movements. Pay attention to how they pace their talk to draw you in and create emphasis. Reflect on what they do to convey a sense of enthusiasm for what they’re talking about—or fail to do so. You want to know what kinds of things to avoid—a dull monotonous tone, for example—as well as what kinds of things to adopt to ensure your voice comes across as a powerful tool for communicating your ideas clearly and emphatically.
Exercise \(\PageIndex{1}\): Observation in action
Whether observing your favourite professor give a lecture; watching your favourite podcaster, TV or YouTube presenter; or viewing the videos linked below, turn your observations into an active learning experience: create a list of what the speakers do well as speakers, and then use them as role models. The goal is to create a toolkit of practical tips, approaches, and ideas for building confidence, developing your own “spark” as public speaker, and engaging your audience. In short, watch, observe, and learn.
Here are some public speakers on film that you may enjoy watching and learning from:
- Really achieving your childhood dreams by Randy Pausch,[1] computer scientist (Carnegie Mellon). As you watch the video, make note not simply of what he says, but how he says it.
- “The Wisdom of a Third Grade Dropout” by Rick Rigsby[2]
- “The Joy of Stats” by Hans Rosling[3] offers an engaging and inspiring description of 250,000 data points from over 200 years for 200 countries—in 4 minutes flat!
Step 2: Study and Reflect
Learning from experts who lay out a set of simple techniques is a confidence builder because it shows that great speakers are made, not born. With deliberate practice, anyone can do this. There are no mysteries, just specific, applicable strategies that anyone can adopt to establish rapport with an audience and make a meaningful impact.
Here are some more great online resources to help you develop further:
- Advanced Public Speaking Institute (Tips)
- Toastmasters 5 tips for public speaking (YouTube)
- 10 Most Common Rookie Mistakes in Public Speaking – Terry Gault (Prezi Blog)
- The Power of your Hands – Allan Pease (TED)
- How to Sound Smart in your TED Talk − Will Stephen (TED)
- How I Overcame my Fear of Public Speaking − Danish Dhamani (TED)
Exercise \(\PageIndex{1}\):
Take notes from the sources while you study them. Making written notes about points you want to remember can be an effective way to promote deep learning. As you watch each of the videos, identify 2-3 key tips. If you are doing this activity in class, share your “top two” tips with classmates and make note of their “top two” tips in turn.
Then consider the value of the tips and strategies you’ve compiled. What makes them seem to work so well and, equally important, how could you feasibly incorporate them into your presentations to make them your own?
Step 3: Select, Practice and Assess your Progress
Now that you have identified strategies that you find effective and think might work for you, try putting them into practice. See if they add some extra “oomph” to your presentation style. Afterwards, either by engaging in self-reflection, or by asking for feedback, consider how well these strategies worked for you and whether you need to further hone, adapt, or change the way you used them.
Videos are helpful because they not only provide information, but visually demonstrate the ideas (both showing and telling); however, you can also learn from many books on the subject. Here are four classic books by public speaking experts designed to help you develop your own strong presentation skills. By focusing on aspects such as“voice,” or by getting you to create effective slideshows, they offer a range of practical, “tried and tested” approaches designed to help you build confidence, speak fluently, and hold an audience’s attention with relevant, well designed visuals.
- Lilyan Wilder, 7 Steps to Fearless Speaking offers a lively, straightforward “how to” approach to public speaking, paying special attention to what to do before you even get on stage to deliver your talk. In short, according to Lilyan Wilder, it’s all about preparation. Wilder’s seven steps have been used by many successful public figures, including George H.W. Bush, Oprah Winfrey, Fortune 500 CEO’s, as well as network anchors at CNN, CBS, and more!
- Lee LeFever, The Art of Explanation: Making your Ideas, Products, and Services Easier to Understand invites you to become an “explanation specialist” by using simple elements to motivate your audience and inspire them to say “yes!” to your designs and ideas.
- Garr Reynolds, PresentationZen: Simple Ideas on Presentation Design and Delivery provides a clear, easy-to-read set of tips for cutting through the noise and blather of modern life and reaching an audience through simple, pared-down slides and story-telling: two techniques that can help you connect with and inspire your audience in an authentic, genuine way.
- Nancy Duarte, Slide:ology: The Art and Science of Creating Great Presentations looks to the role of presentation software in the visualization of ideas and information. Its goal is to turn you into a “visual thinker” so you can design presentation graphics that enable your audience to easily and effectively process data—an especially valuable skill for technical presenters who often have to convey complex data in meaningful ways to non-technical audiences.
Exercise \(\PageIndex{1}\): Build your repertoire
Just as you did when watching your videos, make a list of key tips that you want adopt as a presenter. Select a “top three” strategies, reflect on those three, rehearse them and put them in practice when you get a chance. Going through these steps will get you primed and ready to put the tips into play when time comes to actually deliver your talk. Keep adding tips to your repertoire until you’ve got a good, well-rounded set of strategies designed to keep your audience alert, engaged, and wanting to hear more!
Visual Aids – PowerPoint Basics
Even the most dynamic speakers often make use of visual aids to accompany their presentation and help illustrate their ideas. Having well designed visuals as part of your presentation is one way for beginners and those honing their skills can add interest and audience engagement to their talks. PowerPoint is probably the most common form of visual aid used in presentations, so much discussion has been focused on the pros and cons of this medium. Indeed, a Google search of “death by PowerPoint” brings up over 90 million results!
While there are many other presentation tools out there that you should explore (and perhaps present to your classmates or colleagues in your own presentation!), PowerPoint is a standard workplace tool, so it would be wise to gain proficiency with it. The key concept to remember is that your visual aids should supplement and illustrate what you want to say to your audience. YOU are the presenter; your slides illustrate and amplify what you want to say.
PowerPoint Terminology
When designing a PowerPoint presentation, it is helpful to be familiar with key terminology used to discuss the various elements. Here are a few terms to get started:
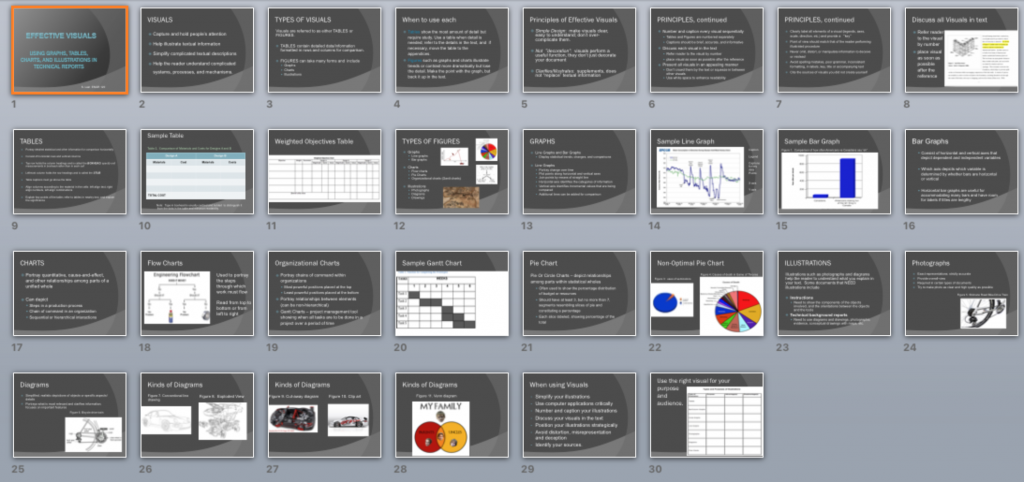
- Deck: the entire presentation (all the slides in the presentation; see Figure 8.2.1).
- Gloss: what the speaker says about each slide. The speaker should not simply read what is on the slide. Slides should have minimal text in the form of key words and short bullet points. They might include key quotations. Speakers should elaborate on what is written or shown on the slide in their gloss.
- Slide: one “page” of the presentation (Figure 8.2.2 shows one slide from the deck above) with the various elements identified.
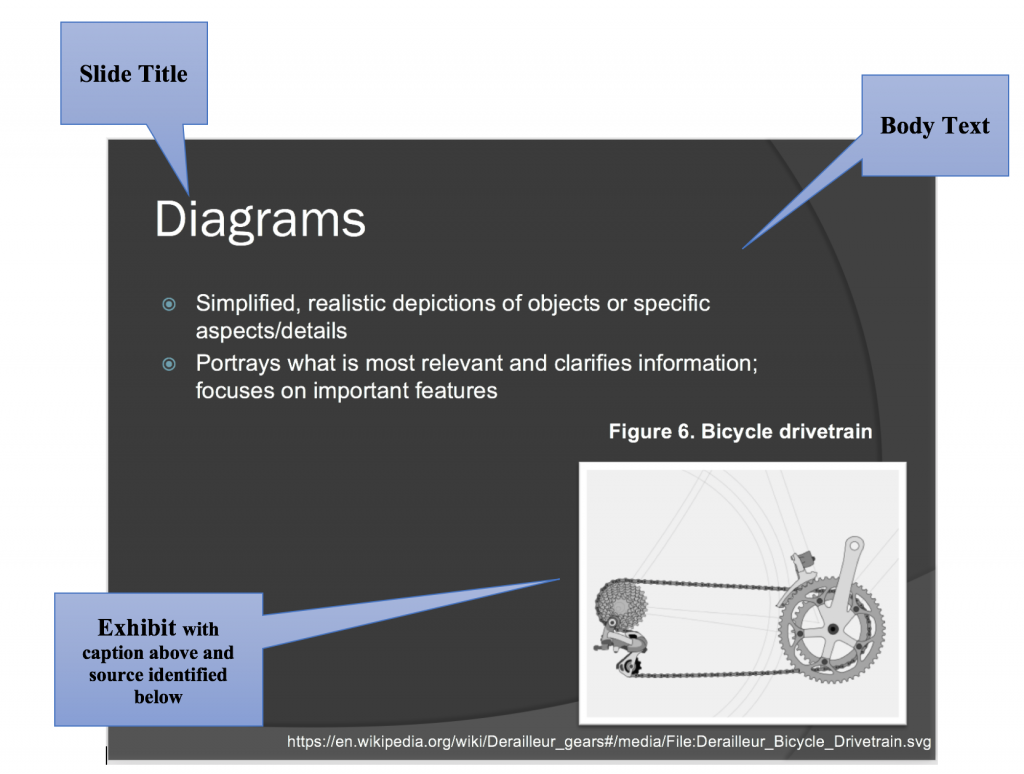
- Slide Titles: usually at the top of the slide, the title acts as a “heading” indicating the topic to be discussed in each slide.
- Body Text: written text on the slide, often in the form of bullet points or key terms. This text should be kept to a minimum (key words/phrases; quotations you want to read out loud). Don’t write your “script” in the slide’s body text.
- Exhibits: illustrative graphics on the slides that are glossed in the presentation. You should discuss graphics and explain what is important about them.
- Decorative Graphics: Slide motifs, themes, and other non-essential images that add visual appeal to the slides, but do not illustrate substantive ideas.
- Notes: The section underneath the slide where you can write notes you want to cover in your gloss. The audience will not see the “notes” portion.
Click on the Sample PowerPoint Presentations listed below to see detailed examples of PowerPoint decks.
PowerPoint Presentation on PRESENTATIONS (.ppt)
Tuckman’s Model of Team Formation – Sample student presentation (.ppt)
Definitions in Technical Writing – Sample student presentation (.pdf) (Created by Isaac Morton)
Visual Rhetoric
PowerPoint is not the only visual medium you might use. Pamphlets, posters, billboards, and other kinds of displays can also work to effectively convey your message if they are well designed. Considering how to present ideas visually can be as important as determining what to say. Here are some resources to help you design visual information in a rhetorically effective way:
Visual Rhetoric page from the Online Writing Lab (OWL) at Purdue University
Rule of Thirds (Wikipedia)
Color theory (Tiger Color)
Psychology of Font Choices (The Daily Egg)
- R. Pausch, “Really achieving your childhood dreams, Sept. 18, 2007 Youtube [Online]: Available: https://www.youtube.com/watch?v=ji5_MqicxSo↵
- R. Rigsby, “The wisdom of a third grade dropout will change your life,” Oct. 2017, Youtube [Online]. Available: https://www.youtube.com/watch?v=Bg_Q7KYWG1g↵
- H. Rosling, “The joy of stats,” Nov. 26, 2010, YouTube [Online]. Available: https://youtu.be/jbkSRLYSojo↵
- Keithonearth, [Bicycle image embedded in slide]. [Online]. Available: https://en.Wikipedia.org/wiki/Derailleur_gears#/media/File:Derailleur_Bicycle_Drivetrain.svg.CC BY-SA 3.0. ↵